Following the battle of Catlow Moor, (
link) both armies opted for a period of rest and re-organisation. Sir Victor was by the far the most active, he had the most to accomplish, his forces having had the worst of the encounter. Nevertheless, it was the Parliamentary forces which were ready for action first and true to form, Sir Victor was determined to seek the initiative. His scouts reported that Royalist forces had still not assembled and that the infantry element was isolated in the vicinity of the small town of West Dene. Orders were immediately issued for an advance on the town to seize this opportunity.
For his part Lord Melchett had ordered his forces to assemble at West Dene. The infantry had reached the town, to find their commander very comfortably ensconced in the main inn, the Angel. Lord Melchett chose the Angel not only because of it's reputation as an inn with good food and excellent beer. It's proprietor was one "Bonnie Bess Bentham" a wealthy widow with a warm welcome for favoured guests. That night he had a meeting with his officers in the inn's parlour and laid before them his plan for an advance, once the cavalry arrived on the morrow. They were dismissed with orders for defensive positions to be taken up around the town and for all officers to assemble at 9 the following morning for further orders.
 |
| View of West Dene from behind the Parliamentary position |
In the morning Royalist scouts reported that the Parliamentary forces were approaching. Having found his subordinates' dispositions satisfactory, they had made good use of the enclosures surrounding West Dene, Lord Melchett returned to the town.
 |
| Lord Melchett takes his leave of 'Bonnie Bess' |
The infantry were once again under the command of Sir James Fotheringay and Colonel William Saville, with Sir James on the right and Colonel Saville the left. Lord Melchett had retained two regiments in West Dene to act as a reserve. The Royalists were in for a nervous morning; Lord Melchett had just received news that his cavalry would not arrive before noon. Lord Melchett thanked Bess for her hospitality and prepared the defence of West Dene.
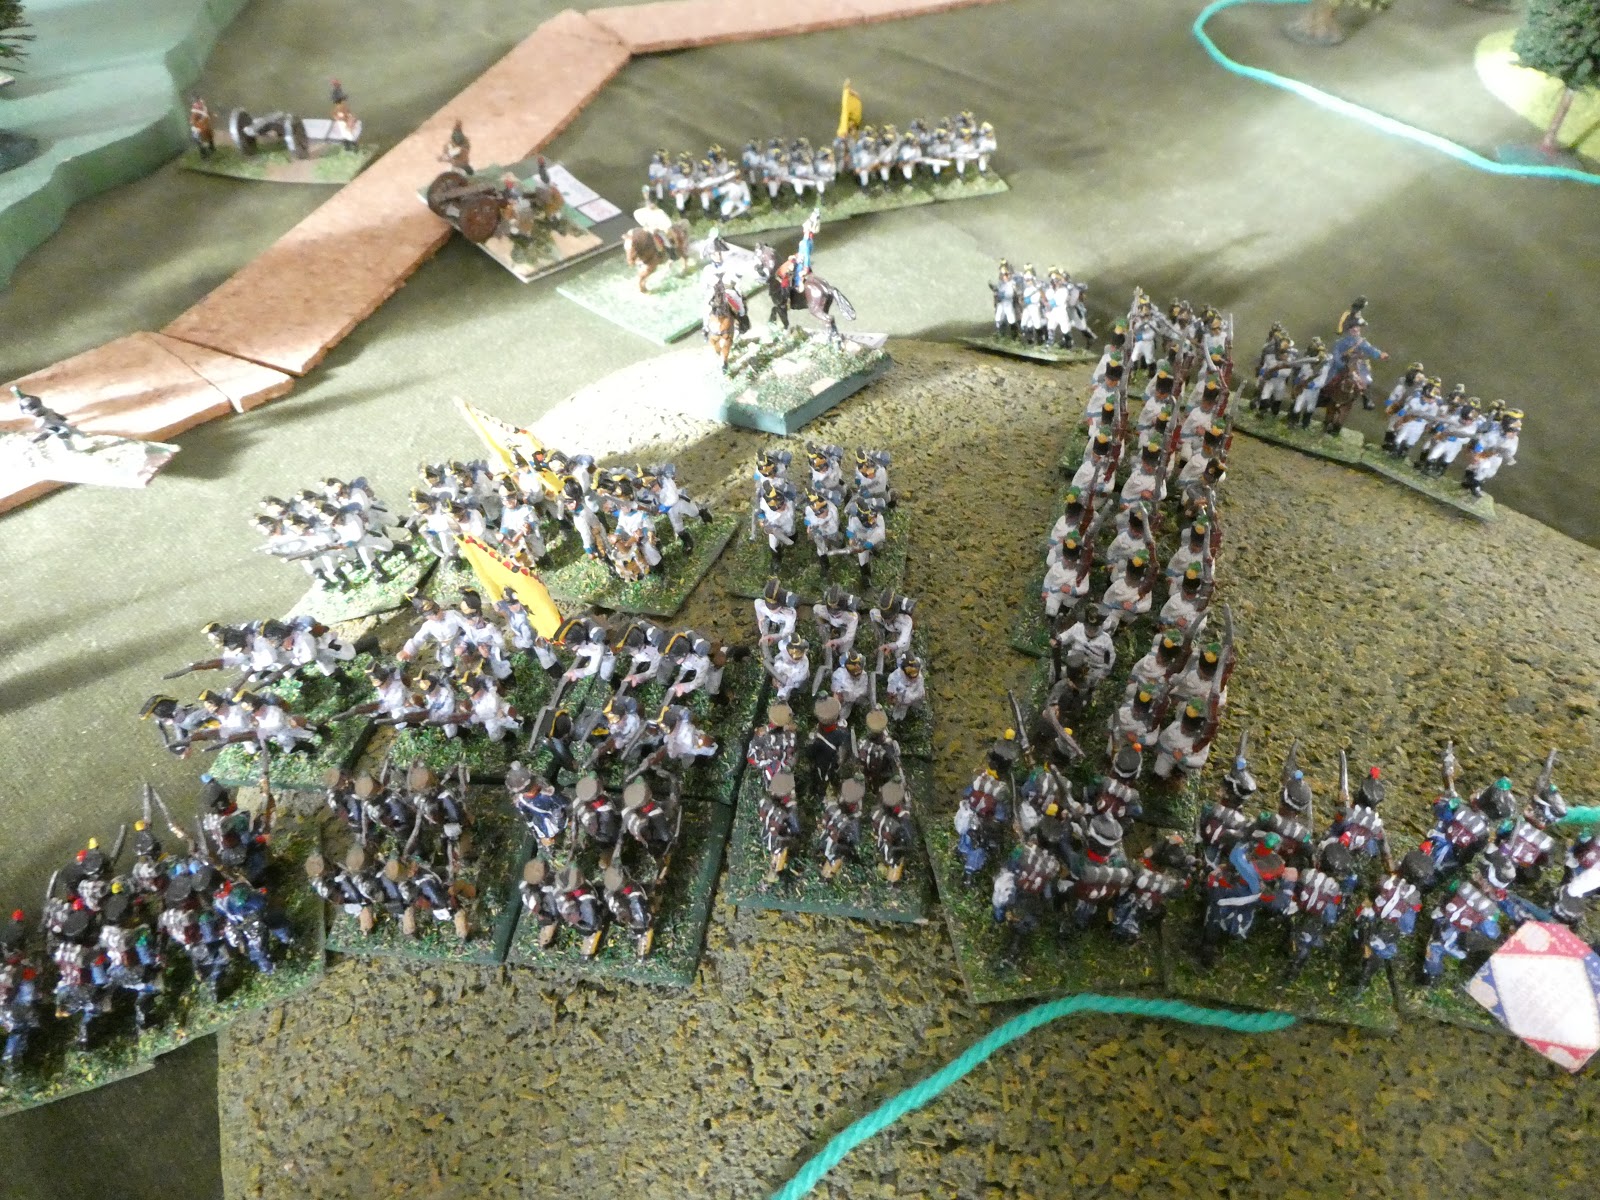
Sir Victor had deployed with his infantry, two brigades under Colonel Ezekial Cooper and Sir Richard Clayton, in the centre. On his flanks were the cavalry, Colonel James Livesey's brigade of on the left and on the right Sir Walter Foote's. Noticing the absence of enemy cavalry, Sir Victor decided to send Livesey and Foote on flanking movements to try and cut off any Royalist retreat. Cooper and Clayton were to push the enemy infantry back into the arms of the cavalry.
Having reached the battlefield, a kind of inertia seemed to settle on some of the Parliamentary commanders and their units. Livesey advanced slowly on his flank; nowhere near as quickly as Sir Victor would have liked, but at least he was moving. Sir Walter Foote's command however seemed rooted to the spot. Seeing no sign that his orders were being carried out, Sir Victor sent a rider with a reminder of the importance of a speedy manoeuvre before the arrival of any enemy cavalry. Foote's command still remained in position. Finally, losing patience, Sir Victor rode over himself and suggested to Foote that if he felt unable to carry out his orders, perhaps he should appoint someone else? Red-faced, Foote galloped over to the leading regiments and led them forward.
 |
| Cooper's men ready to advance |
 |
| Foote's cavalry on the Parliamentary right |
Meanwhile the Parliamentary infantry had begun their advance. Clayton's men were met by fierce fire from the enclosures in front of them but they plodded forward, paused, fired a volley of their own and then resumed the advance. As they charged home another volley swept their ranks, but, undeterred they closed and fought their opponents across the hedgerow.
 |
| Clayton's men close up to the Royalist defences |
On the opposite flank, Cooper also faced stiff resistance. The newly raised Riding's regiment faced a unit of commanded shot. Cooper had thought that the advancing pikes would 'encourage' the musketeers to fall back rather than stand their ground. He was proved wrong. As Riding's crested the ridge they received a volley which stopped them in their tracks. The officers struggled to establish order prior to advancing again, but a second volley from the commanded shot wounded several of those officers and raw recruits turned and ran back over the ridge. Cooper managed to stop them before they left the field but even he struggled to restore order. It was only the arrival of Sir Victor which steadied the men and allowed Cooper to return to oversee his brigade's attack.
 |
| Riding's raw recruits rout |
Clayton's attack had had some success. He had pushed back a unit of commanded shot and his leading unit was now over the first hedge line. Seeing the fugitives streaming towards West Dene, Lord Melchett sent one of his reserve regiments to steady the line. The other regiment had been moved to the right to oppose any attempt by Livesey's cavalry to enter West Dene.
 |
| Cooper leads his men against Fotheringay's flank |
Indeed, Livesey had met little resistance in his flank march. That didn't mean it was swift however and Lord Melchett was able to deploy not only an infantry regiment, but also a light gun to fire on the Parliamentary cavalry. Livesey's advance did mean that Cooper felt able to do a flanking manoeuvre of his own. After leaving Riding's regiment with Sir Victor, he galloped over to his own regiment and led them around the flank of the Royalist infantry holding up his brigade's advance. The Royalists had been having the better of the melee across the hedgerow, almost routing their opponents, but the flank attack by Cooper changed that. Assailed to front and flank and with their retreat route threatened, the Royalists broke, running back towards West Dene. Fotheringay managed to stop them, but it would take time for them to be ready to return to the fray.
 |
| The melee between Fleetwood and Livesey |
Foote meanwhile had advanced as required. To his left was enclosure with an infantry regiment in it and he decided to give this a wide berth and screen his flank with the dragoons which accompanied him. Unfortunately, one of his regiments strayed too far towards the enclosure and suffered heavy casualties from the ensuing volley. They fell back, disordering the dragoons and exposing them to a volley from the Royalists before they could deploy. The resulting casualties caused the dragoons to fall back as well. Foote's day was going from bad to worse and not helped by the appearance of Colonel Richard Foster's brigade of horse. Foote now found himself outnumbered and any hopes of getting to West Dene had evaporated. His only hope was to try and hold the Royalists back whilst Clayton's infantry continued to advance.
Sir Hesketh Fleetwood had by now arrived to oppose Livesey. He quickly sent his dragoons to West Dene, with orders to flank the Parliamentary cavalry. With his remaining units, he attacked Livesey's regiments. A fierce struggle took place with fortunes swaying back and forth. In the end, Livesey's superior numbers told, but by then Livesey did not have the strength to threaten the Royalist position in West Dene. Indeed, the fire from the town and its adjoining hedges was whittling away at his flank. His only option was to pull back ready to oppose any Royalist attack.
 |
| Cooper faces stiffening resistance |
Cooper's advance was slowing. Having cleared one hedge line he was now faced with another. The defensive line had been strengthened by Melchett being able to release his last reserve from the defence of West Dene following the repulse of Livesey. Clayton was also facing stiffening resistance. An attack by Newell's regiment had been stalled by volleys from the defenders. Taylor's regiment had also failed to make any headway and the site of Foote's cavalry falling back in the face of the advancing Royalist horse made him reluctant to advance further.
Sir Victor too had seen enough. He ordered a retreat and on his way back to Twiston mulled over some possible changes in senior commanders. Lord Melchett was happy to see the Parliamentary forces pull back. It had been a near run thing. The cavalry had arrived just in time to swing things his way. However, a great deal of powder had been expended and more supplies would be be needed before an advance could be contemplated. What could be contemplated however was a return to 'the Angel' for a well deserved supper.