Wednesday 29 April 2020

Rearguard action at Santa Corona: an Italian Wars scenario for Pike and Shotte

Another of our Skype games, hosted by Steve.  The Imperialist forces commanded by the Duke of Barbera are falling back after a failed attack on a French strong point.  They are being pursued by the Duc de Merlot and Barbera has chosen the Pandemia Pass as a place to set up a delaying action.  The pass has a handy strong point, the Convent della Santa Corona, named after the fragment of the crown of thorns which is held there.

The pass from behind Merlot's force
Merlot had 8 units of cavalry, spread equally between the Comte de Carignan (right flank) and the Marquis de Gamay (left flank), each commander having 2 units of gendarmes, one of men at arms and one of stradiots.  In the centre were the Swiss under Lord Landroter, two units of pike, two of arquebusiers, one of halberdiers and a light gun.

To hold the pass Barbera had the landskneckts commanded by Graf von Spatburgunder, with two units of arquebusiers, one of which was placed within the precincts of the convent, and a light gun.  On the Imperial right the Marquis of Tempranillo had two units of gendarmes, one of men at arms and a unit of mounted arquebusiers.  The Count of Trebbiano was stationed on the left with one unit of gendarmes, two of men at arms and a unit of mounted crossbowmen.

The Imperialist forces holding the pass
As the battle began, the French light cavalry advanced quickly, but the heavier units were rather more circumspect.  It was the same in the centre. The right hand unit of arquebusiers advanced to take on their opposite numbers, but the remainder of the Swiss seemed reluctant to move.  Merlot had had suspicions that this would happen, Lord Landroter had 'happened to mention' during the advance that the area beyond the pass was outside the theatre of operations for which he had originally been contracted and therefore perhaps some financial arrangement needed to be negotiated?   Merlot thought that the matter had been deferred, but Landroter now made the most of the situation.  Something needed to be done as the arquebusiers were isolated, apart from the single light cavalry unit from Carignan's command and the enemy cavalry were moving forward.  Fortunately, Carignan had now got the rest of his command moving and a general melee ensued as more units joined the fray.

The cavalry melee between Carignan and Trebbiano
On the opposite flank a small area of marsh funneled the advance of Gamay's men.  The leading  unit of gendarmes passed to the left of it whilst the men at arms moved to the right, covering the flank of the Swiss.  Gamay's stradiots had been driven back by the mounted arquebusiers, which left the gendarmes exposed to fire.  Not willing to stand for this, the gendarmes charged and drove back their tormentors.  They in turn were charged by Tempranillo's gendarmes and a slogging match ensued.

Merlot had at last persuaded Landroter to advance and capture the pass and the remaining Swiss began to lumber forward.  It was just in time as the arquebusiers had had the worst of the shooting exchanges with their Imperial opponents and were in need of rallying.  The second unit of Swiss arquebusiers moved towards the convent and engaged the Imperialist arquebusiers stationed there.  Making good speed along the road, the small unit of halberdiers swept by the arquebusiers who were attempting to rally and charged the Imperial arquebusiers.  These were driven back with heavy losses and to steady the defence, Spatburgunder sent forward one of his pike units.  The halberdiers had now come under fire from the Imperial light gun.  However, panicking as the halberdiers moved towards them, the gun crew bungled the loading procedure.  This produced a misfire which put the gun out of action.   The halberdiers now charged the advancing Imperialist pikes.  Against the odds, they  prevailed, but at considerable cost, needing to rally before they could advance again

The gallant halberdiers send the landsknechts packing
Things were not going well for Barbera on the wings either.  Tempranillo had managed to push Gamay's leading unit of gendarmes back, but at the cost of committing his second gendarmes unit.  When Gamay responded in kind Tempranillo's leading unit was routed and his second unit disordered by the rout.  Only the need for Gamay's men to rally saved Tempranillo's command because at the same time a melee had taken place between the two units of men at arms.  This had been a hard fought draw, with the result that both units were disordered and had to fall back to rally  On the opposite flank Trebbiano's men had fared even worse.  One unit of men at arms had been routed by Carignan's men at arms and the other had been driven from the field by one of the gendarmes units.  Trebbiano's gendarmes had tried to stem the flow, but had been forced to fall back, saved by their opponents having to pause to rally.

Trebbiano's gendarmes retreat
Merlot now joined Landroter and together they led the remaining Swiss pike block forward.  This large phalanx drove the last of infantry units defending the road through the pass back in disorder.  Barbera now had no option but to fall back, leaving the gallant defenders of the convent to shift for themselves.  They were fortunate that Merlot was in a mellow mood.  He allowed them to join the retreat as long as they left all their arms and equipment behind.  The convent had a renowned guest house for pilgrims and he was assured of a good meal tonight.  In addition, the convent's excellent wine cellar may smotth the negotiations with Lord Landroter.

The final position


Friday 24 April 2020

Raise the Siege: an eastern renaissance scenario for pike and shotte

This week's game is being dealt with out of sequence, I should be posting about last week's game set during the Italian Wars, that will follow shortly.  Once again Steve and I used skype to play the game, with me hosting for the first time.  After a few issues with audio volume were resolved, everything proceeded smoothly; at least until we began to roll dice.

The scenario was set in southern Poland, a mixed force of Muscovites and Tartars have besieged an isolated Polish garrison and a force of local Poles and Cossacks has been assembled to drive off the besiegers.  This was to be an all cavalry affair.


A view along the table, taken with the camera on the tablet.  In the foreground are the Polish forces. Five units of pancerni, (one lost in the bottom left corner), three of cossacks and a unit of light horse skirmishers.  In the distance are the Muscovite covering force.  Four units of feudal cavalry, four of tartars and a unit of skirmishers.  We played along the 6 foot length of the table; the Poles/Cossacks have to break through, the Muscovites/Tartars keep the Poles at bay.

The Muscovite skirmishers advance
In no time at all the opposing units of skirmishers were in bow shot range, though few casualties were inflicted.  Eager to press on the Polish skirmishers charged their opposite numbers and drove them back in confusion.  However, their supports were slow to advance, so the skirmishers held their position, shooting at the enemy skirmishers as they tried to rally and waiting for reinforcements.

What arrived first was a unit of Tartars and then a unit of Muscovite feudal cavalry, which burst through their own skirmishers and then charged home.  Perhaps surprised, the Polish skirmishers failed to 'fire and retire' and payed the penalty.  Completely over-matched they were driven from the field.

The feudal cavalry pick on a soft target
On the Polish left, two units of pancerni had been ordered to move over the hill to their front.  As they advanced, they found that some feudal cavalry had got their first and the resulting melee took place at the foot of the hill.

Forces gather on the Polish left
More general action now occurred in the centre and on the right.  The Cossacks had been ordered to 'deal with' the Tartars.  This was easier said than done. A combination of slow movement by the Cossacks and judicious use of 'fire and evade' by the Tartars, meant that the advancing Cossacks took a few casualties before they managed to finally catch a unit of Tartars.  In the ensuing melee the Tartars managed to hold their ground, until reinforcements arrived to support the Cossacks and then the leading Tartar unit was forced to retreat.  By this time the leading Cossack unit had to halt to rally and the pursuit was delayed until they recovered.

Cossacks v Tartars
By the pond, the feudal cavalry, having disposed of the Polish skirmishers now charged a unit of pancerni.  Although they offered stubborn resistance, weight of numbers prevailed and the pancerni routed, leaving only one unit of pancerni between the feudal cavalry and a breakthrough.  On the Polish left, the two units of pancerni managed to rout the feudal cavalry which had advanced over the hill, but needed to rally before they could follow up.  The Muscovite commander had sent a second unit of feudal cavalry to that flank and although the routing unit passed through the reinforcements, they were unaffected and charged the pancerni.  Caught at a disadvantage the leading unit routed.  At this point the Polish cause seemed lost, but Lady Luck now decided that she had done enough for the Muscovites, (they had rolled a lot of 6's) and she changed allegiance.

The feudal horse attack in the centre
In the centre, the feudal cavalry had advanced too far ahead of their supports and found themselves attacked to the front by pancerni and then a unit of Cossacks joined in from the flank.  At first the feudal cavalry held their ground, but as the melee continued, losses increased and then they routed.  On the Polish left, the last unit of pancerni held the feudal cavalry charge and then broke them.  As they routed back, they  passed through the first unit which had rallied.  This first disorganised them and  then they too routed.

The Muscovite commander's reserve, a fourth unit of feudal cavalry attempted to stem the Polish advance, but struggled to hold it's ground.  The Tartar resistance also was also weakening.  The leading unit broke and disorganised its support, which was unable to hold the pursuing Cossacks.  That in turn routed and disorganised the final Tartar unit.


The Muscovite commander saw that the day was lost and pulled his forces away, leaving the Poles free to relieve the garrison.

Definitely a game of two halves, with the action flowing back and forth.  The table was probably too small for the Tartars to be really effective, but until I win the lottery, it will have to do.  We formed up the feudal cavalry in three ranks, so although they were, in Pike and Shotte terms, large, they fought as standard, giving the pancerni more chance of victory.  we  also rated the pancerni as 'stubborn' allowing them to re-roll a failed morale dice.

Friday 10 April 2020

Long Furlough, an ECW scenario for Pike and Shotte

After a three week break, Steve and I managed to play a game this week.  Not, I hasten to add in person, but by the wonders(?) of technology, ie Skype.  Steve set up the game and moved all the troops whilst I viewed the table via a webcam and issued orders to my units and rolled dice when required.

A view of the table from behind the Royalist force.
The Royalist commander, Sir Edward Colville, had a mixed force of 3 units of cavalry, Ashton, Catlow, and Bracewell; Harrington's regiment of foot, a unit of commanded shot and Widdop's dragoons. His task was to drive off the Parliamentary troops billeted in the area of Long Furlough, (the edge of the village can be seen at the far end of the table).  Nearer to him was Locke Farm and beyond it Locke Down.  Facing the cavalry was Barren Fell, with Wayste Wood beyond.  The dawn attack is to disrupt and drive off any enemy forces and then withdraw before reinforcements arrive.  Colville has two subordinates, Colonel Alexander De Lisle to command the horse and Colonel William Bradshaw for Harrington's foot, the commanded shot and the Widdop's dragoons.

Steve commanded the defenders and these were activated by die roll.

My plan was to send the cavalry forward over Barren Fell towards Long Furlough, identifying any enemy forces in the area.  Bradshaw was to clear the enclosure and then take Locke Farm with the commanded shot and Widdop's dragoons, leaving Harrington's foot free to advance towards Long Furlough.  All began well.  Widdop's rode up to the enclosure and found it unoccupied and the commanded shot then moved up to the track junction near Locke Farm.  Bracewell's unit of horse galloped up onto Barren Fell, found it unoccupied and then set off at speed towards Long Furlough.  Unfortunately, Catlow's and Ashton's horse seemed reluctant to follow them and it took a personal intervention from Sir Edward to get them moving forward.  Harrington's were also reluctant to move forward and Colonel Bradshaw had to come back to almost shame them into advancing.

The first enemy resistance was met at Locke Farm.  Sir Nicholas Starkie, the local Parliamentary commander, had billeted a unit of dragoons at the farm and they had had a 'convivial' evening, having liberated the farmer's stock of ale.  They were rudely awakened by a volley from the commanded shot.  Bradshaw had instructed the commanded shot to fire volleys at the farm, but the lack of reply and Bradshaw's absence, encouraged the commander of the commanded shot to order a rapid advance toward the farm.  As they tried to enter the farm buildings they were met by the determined resistance of the Parliamentary dragoons, who had had just enough time to organise a defence.  A fierce melee ensued in which the commanded shot came off worst and they had to fall back to rally and recover.

The commanded shot approach Locke Farm
And are repelled
Near Long Furlough, Bracewell's horse had not found any enemy troops and De Lisle ordered them forward into the village to see if it was occupied.  As Bracewell's entered the village they came under fire from the houses and had to fall back.  As they fell back, Ireby's regiment of foot and the Parliamentary commanded shot emerged from the buildings and formed up.  What Colville needed was Harrington's regiment of foot, but that was blocked behind Ashton and Catlow's horse.  It required some manoeuvring, but eventually Harrington's were in a position to advance on Long Furlough.  However, by now Starkie  had Clayton's regiment of horse available and a light gun.  Sir Royston A'Dames had also arrived with Clayton's regiment and he was given command of them and also Bannister's horse which were approaching the field.  Sir Royston ordered Clayton's to advance and oppose Catlow's regiment, preventing them from attacking the commanded shot.

On Locke Down, De Lisle saw that Bracewell's were well placed to attack the commanded shot and ordered a charge.  The commanded shot managed to fire a volley, but the horse still charged home and almost broke through.  The gallant infantry fought like tigers and against the odds drove off the cavalry with heavy losses.

Bracewell's are driven off by the commanded shot
Bannister's horse were now arriving and Sir Royston sent them to the left of Long Furlough, ordering them to take up a position on the flank of any attack on the village.  He then led Clayton's regiment in a charge against Bannister's horse which were attempting to rally on the top of Locke Down.  Also on the top of Locke Down were Widdop's dragoons.  They had ridden there from the enclosure with the intention of dismounting and then firing on the defenders of Locke Farm.  Now they found themselves supporting Bannister's regiment.  Caught at a grave disadvantage, Bannister's had little chance of resisting the impetus of the charge and they were soon routing from the field.  In their flight they barged through Widdup's and they too were swept away.  Sir Royston ordered the cornet to sound the rally, but the troopers thought they heard the call to pursue and they galloped off, chasing the fleeing Royalists.

The removal of half the Parliamentary cavalry gave Sir Edward a chance to attack the village.  Harrington's regiment fired a volley at Ireby's regiment which decimated their ranks.  He followed this up with a charge.  As the Royalist's swept forward they came under fire from the gun to their right and the commanded shot to their left.  Undeterred they closed with Ireby's, which broke and routed.  Catlow's regiment of horse charged the Parliamentary commanded shot and swept them from the field. 

Ireby's rout
Catlow's rout the commanded shot
Sir Nicholas now had a single regiment of horse, Bannister's, a light gun and a unit of dragoons on the field and the latter was still exchanging fire with the Royalist commanded shot.  Against this, Colville could field two units of horse and a regiment of foot.  Sir Nicholas had little option but to cede the field and pull back towards the main force. 

After a few teething troubles with the technology this first 'skype' game worked very well.  Communication between Steve and I was straightforward and the picture quality enabled a good view of the battlefield.  The fixed view meant that it was perhaps a more realistic representation of what a commander on the spot could have seen, rather than the 'all seeing eye' of the gamer who can walk around the table.  We both enjoyed the experience and although it lacked the full level of interaction  of our usual games it is far better that no game at all. With the 'lock-down' due to continue in all likelihood for a few weeks yet at least there could be more games of this type.

Wednesday 1 April 2020

Whitehough Enclosures: an ECW scenario for Pike & Shotte

The government restrictions have meant our games are suspended for at least the next three weeks, but it does mean that I can attempt to catch up with the few games that Steve and I have played, but |I haven't got around to posting on the blog.

This report covers a recent ECW encounter in Kelhamshire.   Colonel William Saville had taken his brigade of foot on a raid to Overton, a small town just across the River Kelham.  It had a significant leather industry and the Royalist forces were in need of new belts and other leather equipment.  Unfortunately, Parliamentary scouts had spotted Saville's force and when they reached the river they found superior forces ready to oppose them.  Forced to fall back they were closely pursued and Sir William sent an messenger to Lord Melchett requesting assistance.  Gathering what forces were to hand Lord Melchett went to Sir William's aid.  The Whitehough Enclosures offered a temporary defensive position which could delay the pursuit long enough for Sir William to rally his dispirited foot and then hold off the advancing Parliamentarians.


Whitehough enclosures with the Parliamentarian foot nearest the camera
 The main route through the enclosures has been blocked by felling a few trees.  Lord Melchett has deployed a unit of dragoons and two units of commanded shot to hold the hedges nearest the pursuers and has the Stang Top Clubmen at the second barrier.  He has part of Sir William Molyneux's brigade of horse, but Sir William is still rounding up his remaining regiment and as the battle starts Lord Melchett is the only Royalist commander on the field.  Sir William Saville's brigade is off table and Sir William will need to rally all his regiments before they can advance and take an active part in the defence.  The final element of Lord Melchett's force is a light gun which he has placed to cover the route around the enclosures on the left of the Royalist position.

Commanded shot man the barricade
Sir Victor has taken command of the pursuit.  He has Colonel William Wanless with three regiments from brigade of foot and to his right Colonel James Livesey has three regiments from his brigade of horse.  Rushing to join Sir Victor is Colonel  Ezekial Malkin with his regiment of foot, a regiment of dragoons and the remaining regiment of Livesey's command.

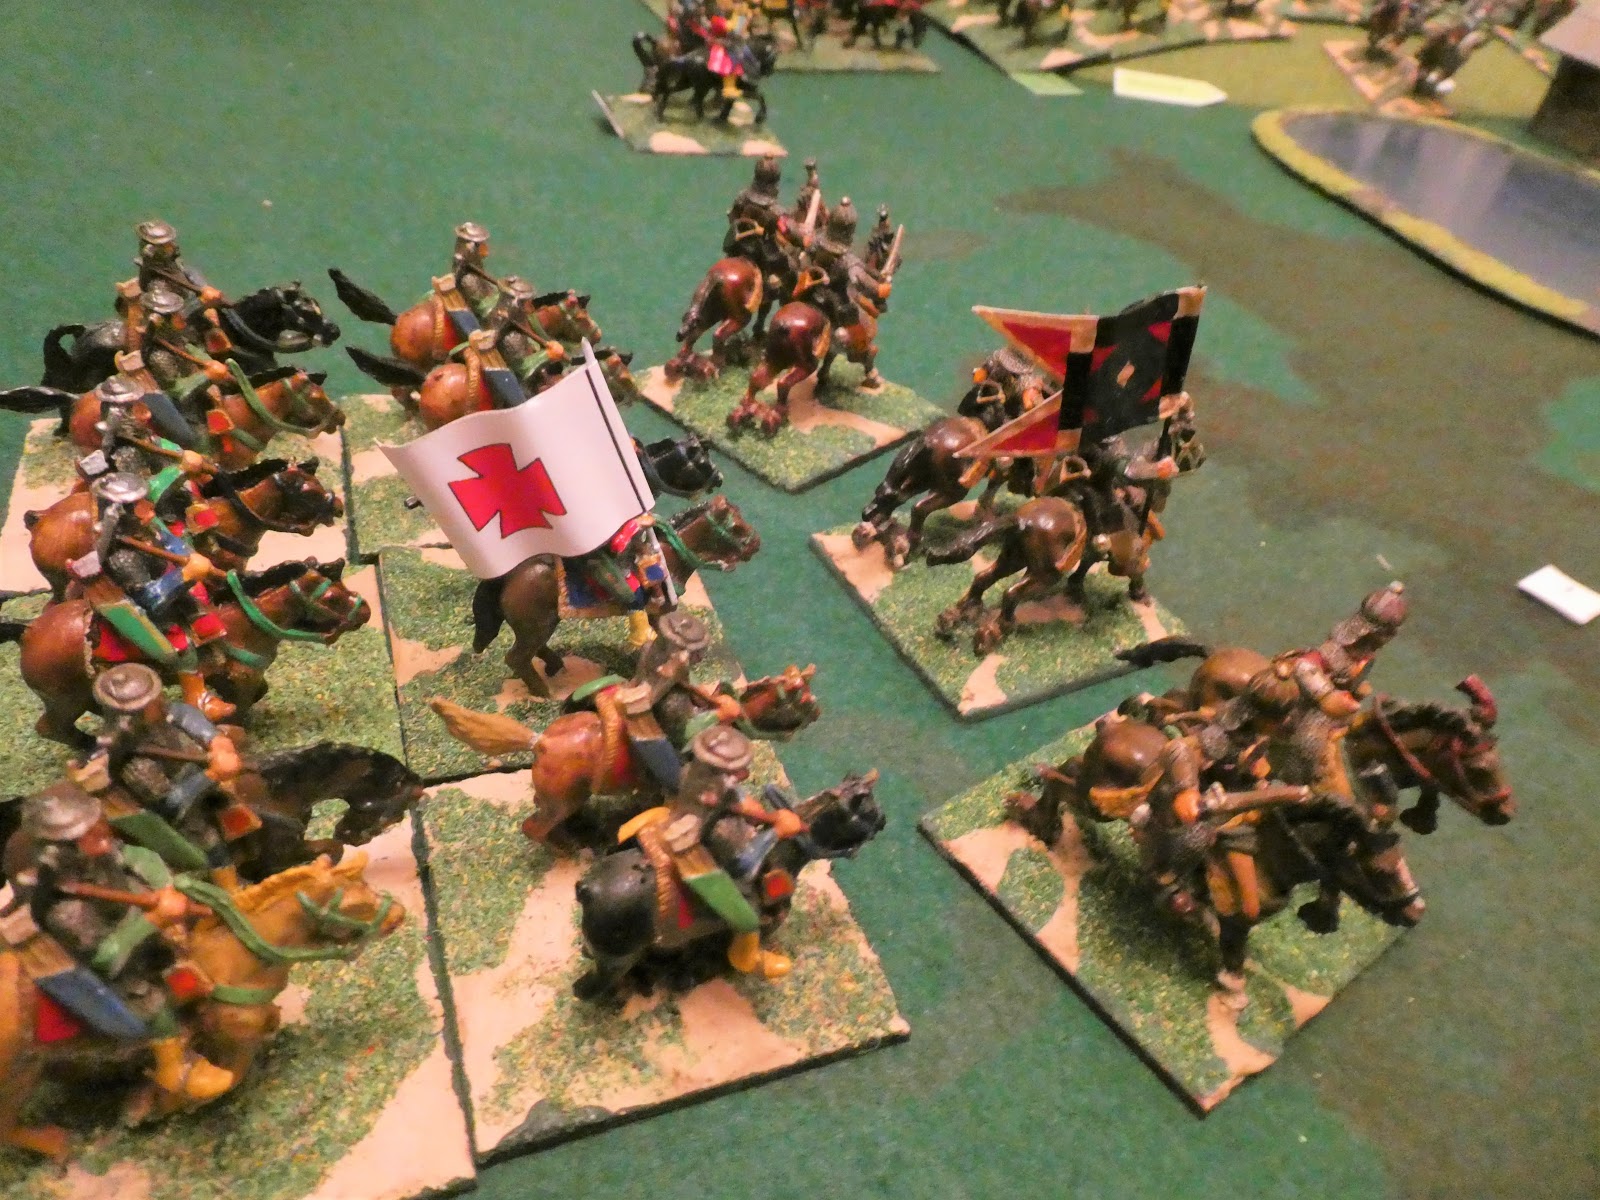
Sir Victor orders Livesey to advance
Wanless began by sending Chattox forward against the dragoons and Nowell against the commanded shot on the Royalist left.  Demdyke's regiment was to support Chattox but the order seemed to have gone astray as Demdyke's remained standing in reserve. Chattox suffered a steady toll of casualties as they moved forward.  As they attempted to charge home the dragoons gave a final volley and fell back towards the next line of hedges.  Disordered by the volley, Chattox did not cross the hedge but stood to reform.  Nowell had more success.  Fire from the commanded shot was sporadic and when the Parliamentarians charged the hedge they quickly drove back the defenders and then followed then followed them into the enclosure.

The dragoons fall back
Nowell's regiment advance
Livesey faced a tricky situation.  Sir Victor had ordered him to drive off the Royalist horse and then pursue Saville's foot.  However, he would have to advance on a narrow front, which negated his advantage in numbers and he would also have to contend with the light gun which Lord Melchett had deployed to cover the approach route.  He thought it may be prudent to wait for Nowell's regiment to push forward and force the gun from its position; a brief, terse. reiteration of the order from Sir Victor persuaded him that an advance was necessary, so, turning to his own regiment he gave the order to advance, sending Shuttleworth's forward in support.  Fortune favoured Livesey's regiment as the gun fired but the shot went well wide.  Rushing past, the Parliamentary horse charged Melchett's leading regiment, Molyneux's.  The Royalists were surprised by the rapid advance and failed to counter charge.  They were driven backwards by the momentum of the attack, but managed to flow round their supporting regiment, Tyldsley's who steadied themselves for the impact. In the ensuing melee it was the Royalists who prevailed and Livesey's had to fall back to rally, once again running the gauntlet of the gun.

Lord Melchett sends Molyneux's men forward
Lord Melchett was by now casting worried glances towards Saville's regiments which seemed to be taking an age to reform.  He was also anxious for Molyneux to arrive with his remaining regiment, Loughton's, so he could take command of his brigade and allow Melchett to oversee the battle.  It was with some relief that his lordship espied Strickland's regiment advancing to reinforce the Royalist right.  The dragoons had been driven back again by volleys from Chattox's.  Once they saw the dragoons retreat Chattox advanced.  Behind them, Demdyke's regiment, the recipient of another blistering message from Sir Victor, at last moved forward.  The dragoons withdrawal became a rout as they were blasted by another volley from Chattox and Lord Melchett had to gallop over to rally them.

Chattox continue their advance
 On the left, the commanded shot which had been pushed back by Nowell's regiment attempted to stand.  For their pains they were charged again by then Parliamentarian foot.  They managed to stand against the first push, but when the surge came on again they had to give ground.  However, they had managed to force Nowell's regiment to rally before they could advance again.  In the lane, the second unit of commanded shot had experienced little action themselves, but had seen their comrades on each flank pushed back.  Captain James Hartley, their commander thought he had a chance to intervene against Nowell's regiment.  He passed the order for the men to turn to their left and line the hedge facing the Parliamentarians.  Some of his NCO's questioned the wisdom of this, but he was adamant and reluctantly the men shuffled to their new position.  They were too late.  Nowell's had regrouped and charged again and routed the commanded shot facing them, clearing the way for an advance towards Savlle's still disordered units.  Not only that, but Lady Luck decreed that Malkin should now reach the field with his regiment of foot.  Sir Victor sent him forward immediately with orders to clear the way between the enclosures.  With a "Follow Me men", Malkin charged forward, catching Hartley's men as they tried to re-deploy to meet this new threat.  The issue was never in doubt and Hartley's men were soon routing back through the second barrier and the Stang Top Clubmen.  Fortunately the clubmen stood their ground and the sight of the barrier held against them caused Malkin's regiment to pause.

Hartley's gamble
Disaster seemed imminent for the Royalists, but the light gun re-aligned and fired hail shot into the flank of Nowell's regiment, forcing them to halt to rally.  Lord Melchett was delighted to see Clifton's regiment of foot arrive, meaning that Saville now had to rally only one more regiment, Bradshaw's.  Clifton's were sent immediately to the left to oppose Nowell's should they advance any further.  Having rallied the dragoons, Lord Melchett now galloped over to rally the units of commanded shot.  On the way he met Sir William Molyneux.  "You took your d*** time, Sir William", he growled.  "Look to your men, the enemy are attacking again".

Nowell's advance again
Having rallied his men Livesey moved forward again.  This time Shuttleworth's regiment was to the fore.  With no galling fire from the light gun they swept forward, charging Stanley's under-strength regiment.  The Royalists counter-charged but numbers told and they were forced to withdraw, exposing Molyneux's regiment to attack.  Weakened in their earlier combat they were unable to hold the Parliamentary troopers and they routed from the field.  However, Shuttleworth's had by now become isolated, far ahead of their supports.  Sir William directed Tyldsley's regiment to charge Shuttleworth's and the recently arrived Loughton's regiment was to support them.  In a dour struggle it was eventually the more numerous Royalists who prevailed, forcing back Shuttleworth's regiment.

Shuttleworth's driving forward
A regiment of dragoons had also arrived with Malkin and Sir Victor had ordered them to the right to support Livesey.  Livesey had sent them forward to drive off the light gun.  This they did, picking off the crew until the survivors took to their heels.  With the flanking fire removed Nowell's men advanced again, only to find Clifton's men ready to receive them.  A withering short range volley swept through the Parliamentary ranks, driving the survivors back to regroup.  On the Royalist right, Strickland's faced Chattox and the now nearing Demdyke's.  Two volleys forced Chattox to fall back and a fire fight now developed between Strickland's and Demdyke's.  The reformed dragoons joined in on Strickland's right flank and their fire whittled away at the Parliamentary foot's resolve to attack.

In the lane Malkin was having trouble getting his regiment to attack the clubmen.  For some reason they feared farm implements more than muskets, (the clubmen had no musketeers).  It took three attempts to get them to attack.  The delay was crucial because Saville had at last rallied Bradshaw's regiment and when it arrived on the field it was immediately sent to cover the centre behind the clubmen.  Before Bradshaw's were in position Malkin's men charged.  Against the odds the clubmen held.  It took a second push to drive them back and by then Bradshaw was in position and ready to fire.

The gallant stand by the clubmen
Sir Victor's men had almost breached the defences on each sector, but the Royalists had had the good fortune to receive reinforcements just as they needed them.  A most enjoyable game that was in the balance to the end.