Monday, 23 August 2021

A trip to Shropshire

For our first holiday since  COVID  struck we decided to stay within the UK and opted for the Church Stretton area of Shropshire.  With the restrictions being relaxed it was possible for the whole family to get together, so we hired a large 'cottage'.  We had a very busy week and I think everyone could say that their interests were catered for.  For the readers of this blog the items of interest were :

Stokesay Castle

Not actually a castle, but a medieval fortified manor house.  A fascinating place to visit.  The majority of the structure you see today dates from the late 13thC when it was constructed for a wealthy local wool merchant, Laurence of Ludlow.

The North Tower from the churchyard

The building was never intended to withstand a serious siege, but to deter any marauding bands of robbers.

The North Tower from the moat

The Great Hall, Solar and South Tower

In the mid 17thC the original gatehouse was replaced by a timber and plaster construction, similar to many 17thC houses in Ludlow.

The Gatehouse

Acton Burnell Castle

Contemporary to Stokesay, Acton Burnell was built by Robert Burnell, Chancellor of the Exchequer to Edward I.  The design is similar to that of the keeps of major castles, but the function of Acton Burnell was more to do with prestige and entertaining guests, than operating as a centre for projecting  military power.  On the ground floor were store rooms and in the north east corner, a porch and grand staircase led important guests up to the great hall.

Exterior view

In the early 15thC the castle passed to the Lovell family of Oxfordshire and into the hands of Henry VII after Bosworth.   It was acquired by the Duke of Norfolk in the early 16thC and by the mid 18thC had become merely a barn.

Interior view
So, two 13th C castles, neither fitting the usual mould of what a castle should look like, but both interesting in their own way.

Shropshire Regimental Museum

Housed in Shrewsbury Castle, the museum collection covers all the military units associated with the county, starting with the 53rd (Shropshire) Regiment and the 85th King's Light Infantry, both raised for the Seven Years War.  These were amalgamated in the 1881 Cardwell reforms into the King's Shropshire Light Infantry.  In addition there are uniforms and artifacts for the county's militia nd volunteer units.   Although fairly small, the museum is worth visiting.


Replicas of the uniform worn by the 53rd in the AWI, presented to the museum by a US re-enactment society.


The Elphinstone Colours, survivors from the AWI

As you can imagine, being part of the Welsh Marches, there are plenty of castles and other historical sites to visit in this part of the world.  If you get the chance, it is well worth a visit.


Sunday, 1 August 2021

Another desert encounter; a scenario using our version of the Black Powder and Battles for Empire rules

After two or three games set in the AWI we decided to have a change this week and headed for the Sudan.  OK, it could be argued it was another game set in the colonies, but it presented a totally different set of challenges.  Bob joined us again, so that released Steve to umpire and I took the chance to command the Dervish forces for a change.  Usually, it is necessary that I command the Imperial force as the Dervish begin the battle concealed. 

The battlefield, the Imperial force enters from the left

Bob's task as commander of the Imperial forces was to seize the arms and ammunition held in the village.  He opted to attack on the flanks with his cavalry and use the mounted infantry and artillery in the centre, to pin down the defenders.  I placed my Beja units around the compound on my right flank and held the village with the smaller of my two Ansar 'rubs'.  The larger Ansar 'rub' was placed on the left and the cavalry held back behind the village in reserve.

Lady Luck smiled on the cavalry on the Imperial left.  They made a rapid advance, but ended up close to the compound and my Beja troops, still in column.  Fortunately for the cavalry, my troops refrained from charging, (failing their command roll twice) and the cavalry had time to fall back and then deploy into line.
On the left, the Imperial cavalry make a rapid advance

But the Beja are waiting for them


The Ansar prepare to defend the village

On the opposite flank, the Imperial cavalry found themselves with enemy units on both flanks.  Suffering casualties from rifle fire they fell back , but the swift moving Ansar forced one into melee and the other to keep evading back towards their starting position.

The cavalry on the Imperial right find themselves in an ambush

And a unit of lancers are routed

The Lancers who were in melee with the Ansar eventually routed, which may have saved them, because two more units of Ansar were closing in to surround them.

By now the Imperial artillery and machine gun had taken up position on the ridge overlooking the village.  They were joined by one of the mounted infantry units and their fire caused increasing casualties on the leading Beja unit.  Provoked into attacking the ridge, the Beja charged, but the volume of fire increased as they attempted to close and in the end they fell back, their morale shaken by their losses.  Seeing the pressure increasing on my right, I ordered the cavalry over to the right to assist the Beja in driving off the Imperial cavalry. 

The Dervish cavalry arrive and move to support the Beja

With the Imperial cavalry on the Dervish left driven back, the Ansar now began to move to threaten the right flank of the Imperial centre.   


The Ansar on the Dervish left move to encircle the Imperial centre

Bob had been very unlucky with his command rolls for the mounted infantry units, indeed one of them were still sat on their camels as the game drew to a close!  However he did manage to get one deployed just in time to to face the first Ansar charge.  Once again rapid fire caused heavy casualties on the charging Ansar, but they charged home and a prolonged melee took place, eventually going in favour of the Imperial troops, but leaving them weakened and vulnerable to attack by fresh units. 

The Ansar try to break through the Imperial right flank

As the attack was going in against the Imperial right, the mounted infantry on the ridge were also attacked.  They had been 'softened up' by rifle fire from the village and the attentions of a field gun and they were unable to stop the charging Beja.  Even so, they stood their ground and eventually beat off the tribesmen.

The Beja attack the Imperial infantry on the hill

Hand to hand fighting had also been taking place around the compound.  The Beja had charged one of the Imperial cavalry units and although they had eventually been routed, they had given time for the Dervish cavalry to move up ready to charge the now disordered cavalry.


At this point we ran out time.  Although battered the Dervish forces had held the Imperial attack and under cover of darkness would be able to spirit the arms and ammunition away to a new hiding place.  The Imperial troops had also suffered heavy losses and perhaps would be not quite so 'gung-ho' in their next attack.

This was Bob's first encounter with these rules and he caused me problems all game.  He was particularly unfortunate with his command rolls for his mounted infantry and their tardiness did prove very helpful in me retaining command of the village.  He was also unfortunate with his right wing cavalry.  Their first move took them very close to the building holding the cache of ammunition (though they did not know this), a little luck at this point would have secured him one of his objectives.


Saturday, 17 July 2021

Prospect House: a Patriots and Loyalists scenario

For our most recent game, a larger AWI encounter, Steve reverted to our usual Patriots and Loyalists rules.  The background story was that General Greene's Revolutionary forces had been forced to withdraw following a bruising encounter with General Brooke's Crown forces.  After marching all night and most of the following day, Greene felt that he had put sufficient distance between himself and Brooke to allow his forces to rest.  He had made his headquarters in Prospect House and his three brigades had set up camp behind Mann's Ridge, (Archer's Brigade), Prospect Hill, (Brown's Brigade) and Mackay's Ridge, (Church's Brigade).  The vital supply train was also drawn up in the grounds of Prospect House.  Picquets had been placed on the hills to watch for any sign that the Crown forces were approaching.  The Revolutionary forces' task was to hold off any enemy attack and enable the safe passage of the supply wagons down the road leading through Brown's camp and then along the river valley.

Looking from Church's camp towards Prospect House

Archer's camp around Prospect House
No sign of Crown forces had been seen by dusk, so Greene felt confident enough to give his men a full night's rest before resuming the march on the morrow.  His confidence was also reflected in his hosting of a dinner for his brigadiers and senior staff at Prospect House, where full use was made of some excellent wine and spirits.

Dawn broke on a misty countryside and Greene's picquets had eyes peeled and ears pricked for any sign of an approaching enemy.  From the road beyond Mann's Ridge came indistinct muffled sounds and dark patches in the mist coalesced into a skirmish line of jaeger heading up the slope.  Archer's riflemen fired into the advancing enemy and fell back a little towards their supports.   Hearing the shots the men of Archer's Brigade began to rouse themselves and form up for action.  As more firing took place on Mann's Ridge, the men of Brown's Brigade also began to form up.  Conspicuous by their absence at this point were the senior officers who were rather tardy in arising.  When Greene was ready for action his first thought was for the supply wagons.  "Get them on the road back to base now" he ordered, "they must be saved".  

The fighting on Mann's Ridge was hotting up.  The whole of Von Stalheim's Hessian brigade was heading towards Prospect House.  Behind the jaeger were a unit of fusiliers and a unit of grenadiers.  A unit of musketeers was attempting to outflank the ridge by continuing to march along the road, directly towards Prospect House.  Archer's riflemen were driven off the ridge by the Hessian jaeger.  They suffered heavy casualties from the jaeger's bayonets, but they had bought enough time for two battalions to be ready to contest the ridge with the Hessians.  Archer himself had now appeared and was frantically trying to get the defence of Prospect House organised while the wagons were equally determined to move through the grounds towards the road. 

The vital bridge at Lawson's Farm

From Prospect Hill, Brown could see the fighting on Mann's Ridge, but no enemy were visible to his front.  He therefore directed his riflemen to harass the flank of the Hessians attacking Archer's brigade and, as his two continental battalions arrived, moved one of them to support the rifles and kept the second in reserve.  Further to the left, Church's brigade was also unchallenged.  The riflemen on Mackay's Ridge saw no enemy approaching and were buoyed by the arrival of the artillery and continental infantry battalions.   Church's confidence took a severe knock when he saw not one, but two brigades of British infantry heading towards him.  Brooke, the Loyalist commander had planned for a strong 'right hook',  moving over Mackay's Ridge and then along the turnpike to the bridge at Lawson's Farm.  If the brigades of Cary and Boyd could get over the bridge before the wagons from Prospect House passed there, the victory would be complete.

Cary's Brigade

Boyd's Brigade


As yet, General Greene was unaware of the threat to his left, his attention was fully occupied by the slow progress of the wagons as they crawled out of Prospect House and began their journey along the road.  Archer had launched his battalions against the jaeger.  The continental battalion drove back the jaeger, but were then charged by a supporting Hessian fusilier battalion.  This quickly overcame the continentals and the supporting militia, though it did take considerable casualties in the process.  

The leading elements of Brown's brigade on Prospect Hill were now engaging the enemy.  When Von Stalheim ordered a Hessian musketeer battalion to outflank Mann's Ridge on the right and cover the flank of the attack on Prospect House, they paid a heavy price.  One of Brown's continental battalions shredded the Hessian battalion with a succession of telling volleys and the Germans beat a disorderly retreat.  In addition, Brown's riflemen were now sniping away at the Hessian artillery, driving back the gunners.  On the other flank of Prospect Hill, the Delaware Regiment was firing at the leading elements of Boyd's Brigade as they advanced on Mackay's Ridge.  Brown's artillery also joined in, though made little impact.

The Hessian Musketeers sent packing

On Mackay's Ridge, Church was happy for any assistance; his riflemen had been driven back by the skirmishers from Cary's and Boyd's brigades and the Crown skirmishers were now sniping away at his Continental battalions.  On the left of Church's line the  artillery crew were driven back by a volley from the 50th foot.  They recovered. but by the time they returned to their gun they found the position being attacked by the 50th, who had crossed the fences along the turnpike and moved quickly up the ridge.  With his position on the ridge now compromised, Church had to order his line to wheel backwards to prevent them being outflanked.  The remainder of Cary's brigade was now pouring around Church's left.  A militia regiment which was trying to hold the line of the turnpike was driven back by a bayonet charge and the way to the vital bridge was open.

Church's artillerymen are driven back

 
The Militia are forced to retreat

Back at Prospect House, Archer was trying to cobble together another line of defence while his retreating units rallied.  He was not helped by the fleeing units blocking the advance of his artillery.  At least the wagons were now on their way which enabled him to deploy his remaining continental battalion to cover the house.  A large militia battalion was firing at the Hessian fusiliers, but the Germans stood their ground, fired a volley and then charged.  The militia broke under the impact and fled to the rear.  The seemingly invincible fusiliers were now joined by the Hessian grenadiers and they pushed forward towards Prospect House.  A volley drove back Archer's final unit of continentals and only an artillery gun and a reformed militia regiment stood in their way.  Finally, the militia fired a decisive volley and the grenadiers were driven back, leaving the fusiliers on their own.  With the wagons now beyond their reach, they let the battered remains of Archer's brigade fall back and contented themselves with occupying Prospect House. 

The Hessians reach Prospect House

The militia drive off the grenadiers

Seeing the situation to his right, Brown thought it may well be time to pull back from Prospect Hill.  He was probably influenced also by the increasing pressure he was coming under from Boyd's brigade.  Boyd had deployed his artillery to fire at the Delaware regiment and they had been joined by his light companies.  The increasing volume of fire had taken its toll on the Delaware regiment and they broke, having to be rallied in the lee of the hill.  Brown's artillery was also driven back by the fire of the light companies and when he saw Crown troops flowing over Mackay's Ridge he began to fear his command may not get away.

Church's position was desperate; One continental regiment was still on the ridge, but the other was facing the flank and was opposed by two Crown battalions, one of them grenadiers. One Crown battalion was on the turnpike ready to march to the bridge and cut him off from the rest of the army, only the remnants of his riflemen stood between that battalion and the bridge.  Fortunately, the militia regiment which had been driven back from the turnpike had managed to rally and as the Crown battalion began to march along the turnpike, the militia fired into its flank.  The casualties from this volley proved too much and the redcoats fled back towards their own lines.

The militia stop the march on the bridge

However, nothing could save the remains of Church's brigade near Mackay's Ridge.  The red-coated line continued its inexorable advance, firing volleys and driving the continental units back into bend in the river, even the riflemen were caught up in this net.

The net closes

An enjoyable scenario which we played over approximately six hours.  The Crown didn't achieve the goal of capturing the wagons, but they severely damaged the Revolutionary force.  Church's brigade had been shattered and Archer's wasn't much better.  All the continental battalions had suffered heavy casualties, but the wagons and most of the artillery had managed to get away.  The Hessians had paid a heavy price for their attack on Prospect House, but they had drawn away units from Brown's brigade, which may have made life more difficult for Boyd.  Thanks to Steve for the scenario and to Bob who although playing his first game using these rules, proved a formidable opponent. 
 

Thursday, 17 June 2021

Rebels and Patriots rules post correction

 In my original post I said that the scenario Steve and I played came from the Rebels and Patriots rule book published by Osprey.  This was an error, the source is Jonathan Freitag's blog Palouse Wargaming Journal link.  My apologies to Jonathan and to the people who had accessed the post since yesterday.  The original post had now been corrected.

Wednesday, 16 June 2021

A first outing for the "Rebels and Patriots" rules

Steve purchased a set of these rules by Dan Mersey and Michael Leck and published by Osprey Games.  As we like the Lion Rampant set from the same author, he thought that they may be suitable for a smaller, skirmish type game that we could play over a couple of hours, rather than our usual larger Patriots and Loyalists games (link) which may need to be carried over to the following week.

The scenario, comes from Jonathan Freitag's blog, and is set in the early days of the war and features a British/Loyalist force moving out from Boston intending to seize a cache of arms stockpiled by the local Revolutionary forces.  The arms are spread through a number of caches, each of which needs to be searched by the British/Loyalist force.  Each cache searched is worth 1 Victory Point, except for the one cache which contains artillery, which is worth 3 Victory Points.  The caches are allocated randomly.  News of the British/Loyalist advance soon spreads and Revolutionary units begin to march towards the cache.


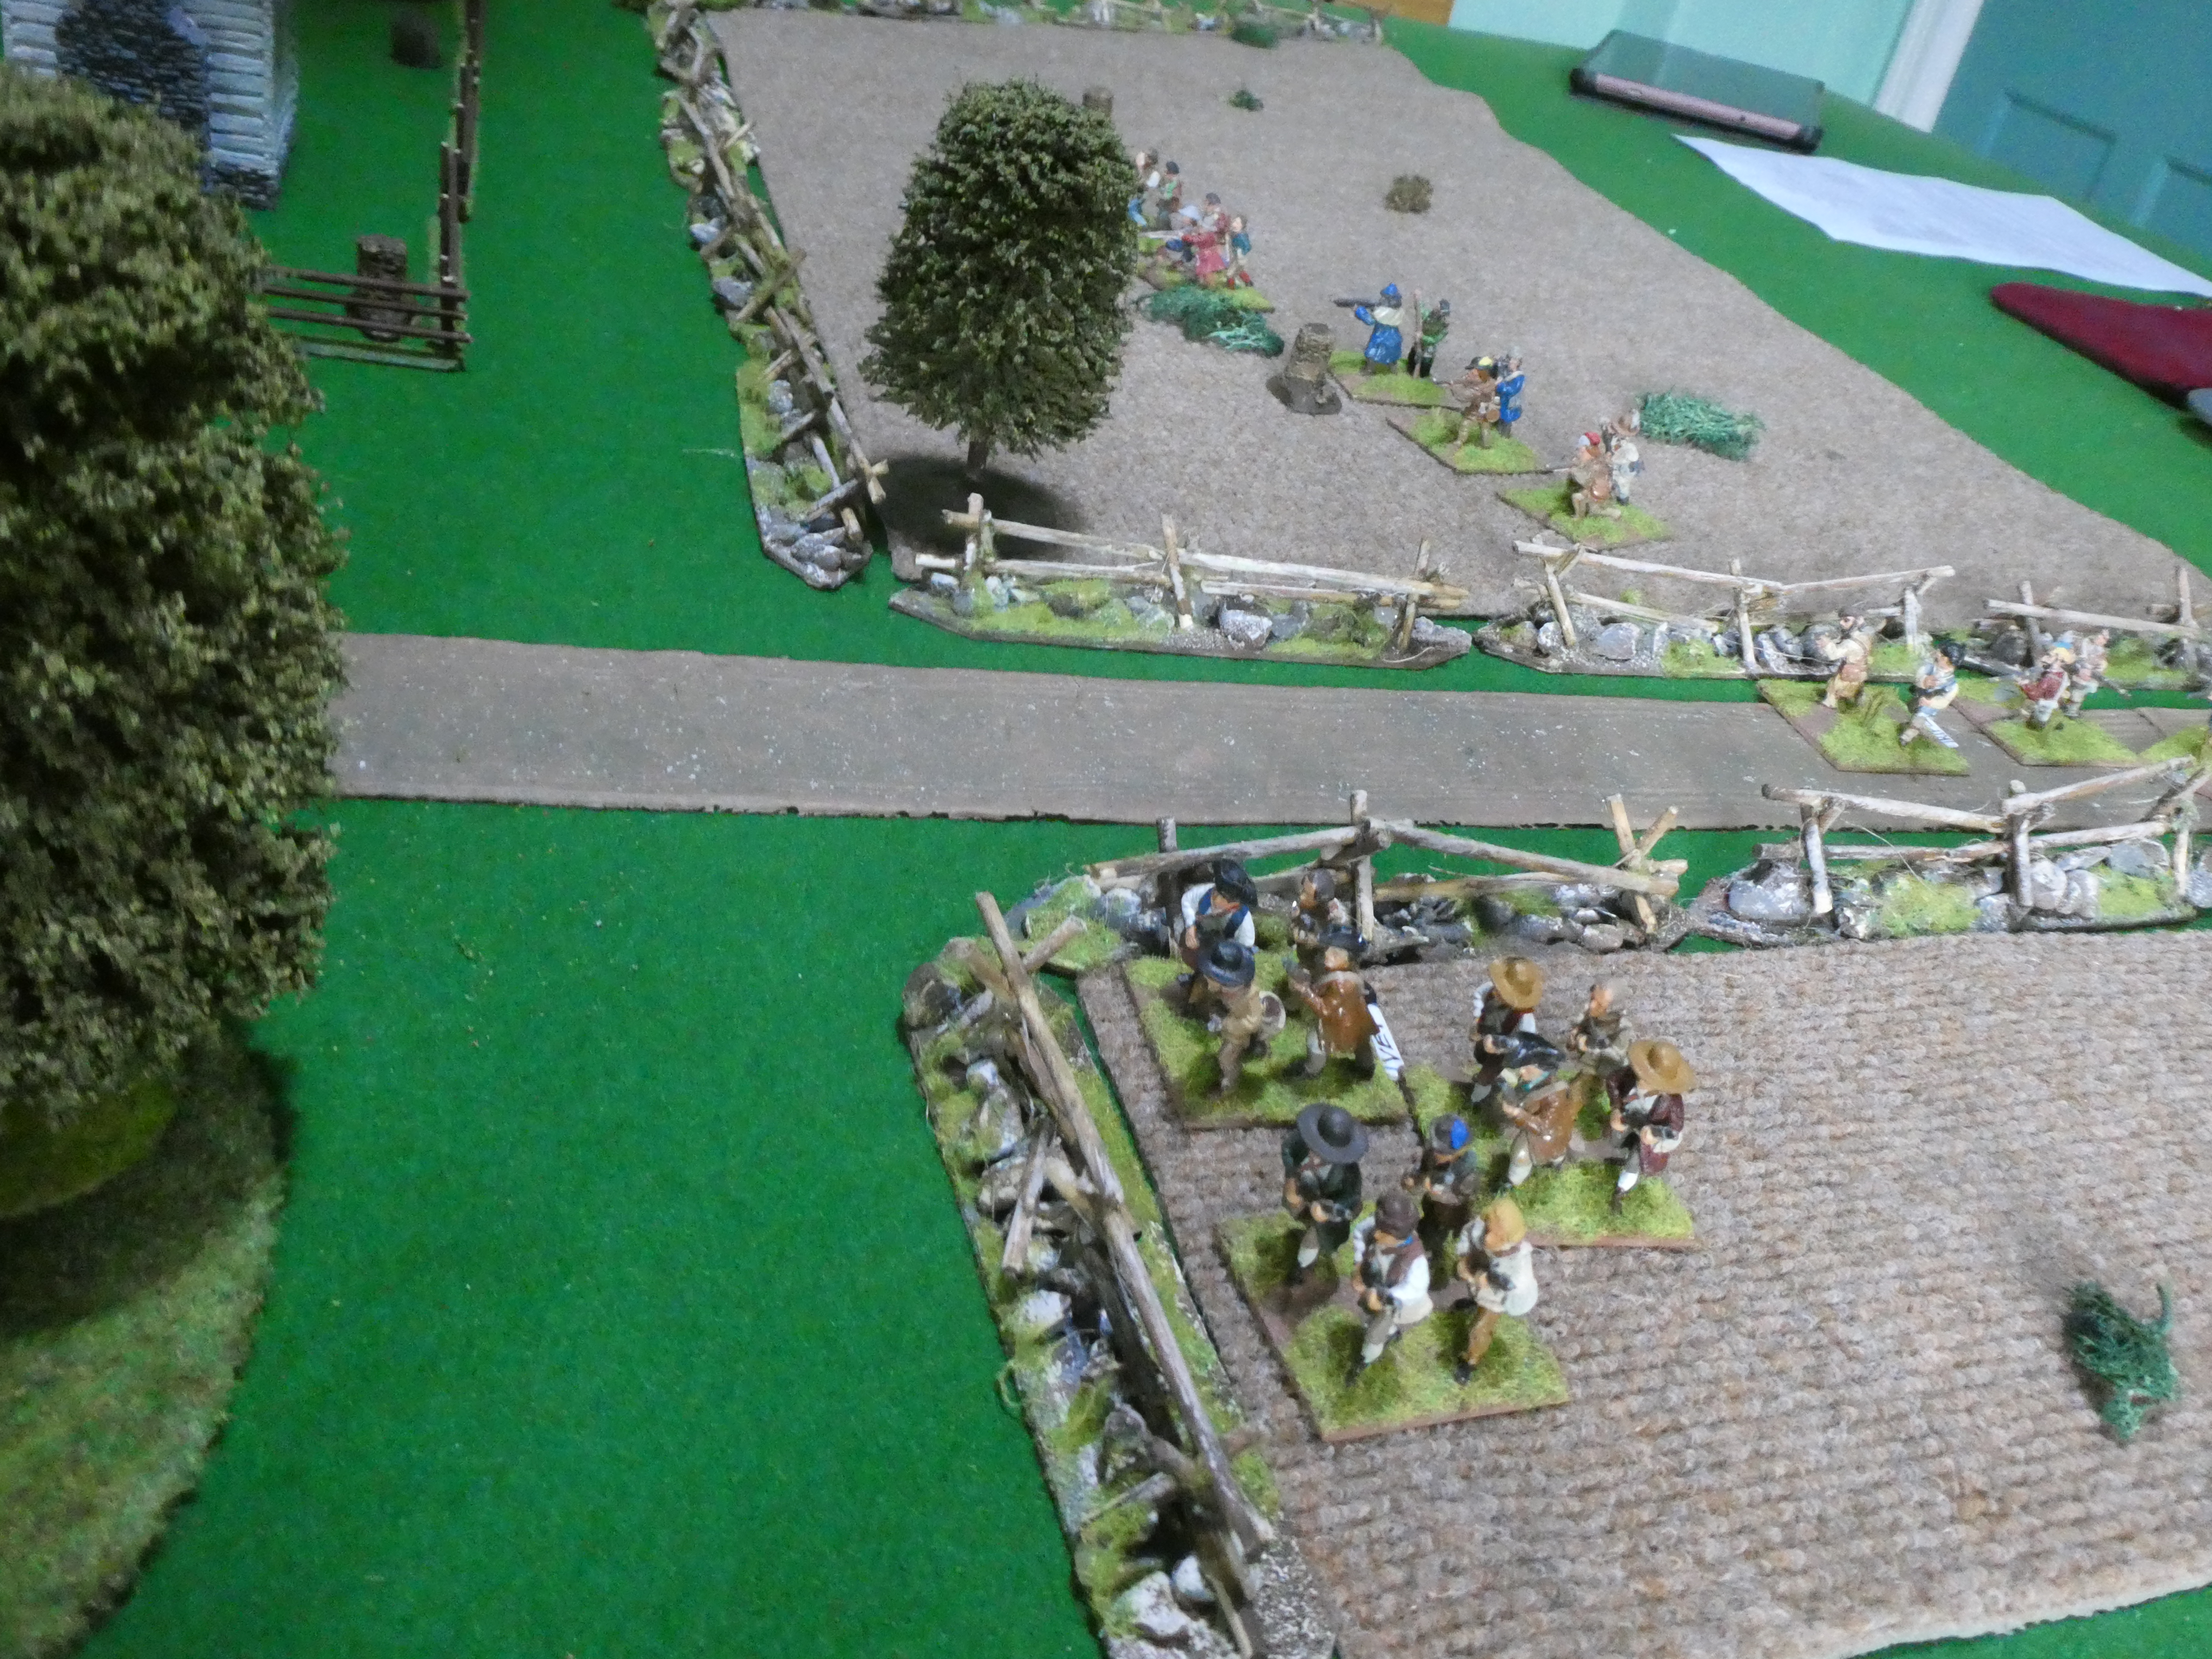
The terrain for the game.  Revolutionary units arrive around the table edge, (allocated randomly), to support the unit already at the farm.  British/Loyalist units arrive along the road from the left.  They must arrive on the road, but may deploy left or right subsequently.  The various rule mechanisms are familiar to anyone who has played 'Lion Rampant' or other Osprey rule sets by Dan Mersey.  A set score is needed to activate a unit (enabling it to move, attack or fire).  If meleeing or firing, units have 12 d6, (halved if disordered); a standard score on the d6 is required to register a hit.  The number of hits required to inflict a casualty varies with range/cover for firing and defensive terrain/unit type for melee.  Morale tests are required for units taking casualties or seeing units wiped out.  As Steve has no individually based figures we used three 4 figure bases for each unit, a method which we also used in our Lion Rampant show games.

The British skirmishers lead the advance

 I had command of the British/Loyalist force and led with my British and Loyalist skirmishers.  The British/Loyalist force made slow progress along the road, but a worrying number of local militia units began to move forward.

Revolutionary forces begin to converge on the farm

Fire from the militia, minutemen and skirmishers began to whittle away at the Crown units, but when given the chance, the Crown forces were able to retaliate.

A unit of rifles attempt to outflank the Crown forces but are caught in the open by the light infantry

The Grenadiers attempt to drive off the unit defending the farm with a volley

I found that engaging in a fire fight just played to my opponent's strengths; my weaker units in particular being vulnerable to enemy fire.

The local militia inflict heavy casualties on a unit of Loyalist skirmishers

So, with time running out (game length was c10 turns), I took a chance and launched a charge by my grenadiers.
The Grenadiers resort to cold steel and charge a unit of minutemen

This proved surprisingly effective and after driving off the minutemen, the grenadiers followed up and also sent a unit of militia reeling back.

Even then, the Crown forces only won the game because, very fortunately, the one cache they managed to search contained the artillery, which gave them 3 Victory Points.  After lunch we ran the game again and this time it was a narrow revolutionary victory, suggesting that this scenario is nicely balanced.  Another report can be found on Matt Crump's blog link

So, what were our thoughts on this set of rules.  Well, they are pretty quick to learn, though perhaps our familiarity with 'Lion Rampant' helped.  You can use troops you have already based up, rather than have them on individual bases, which is useful.  In keeping with many new sets of rules actions can easily be fought on a  4 foot by 4 foot table and it is possible to complete a game in 2 hours.  This makes them suitable for club games where you may wish to play a series of linked scenarios, or even to set up a mini competition.  An enjoyable game can be played with 50-60 figures a side, so if you want to try out a new period the expense is not too great.

However, for some gamers the rules may seem a little too simplistic (this is a comment that we have had when putting on a 'Lion Rampant' game at a show), or lack the sense of scale they prefer.  They may also include a little too much 'chance' for some.

All that being said, on balance Steve and I thought that in certain settings, eg. show participation games to introduce a new period to visitors, or a quick game that will not take too much setting up, they fit the bill; providing an enjoyable game.


Friday, 28 May 2021

Ober Bruchberg; a Napoleonic scenario using the Shako rules

 The last time my Napoleonic troops were on the table was nearly 18 months ago, a long gap and mainly attributable to the COVID restrictions.  When Steve and I got around to organising 'skype' games it became clear that with the avaliable cameras 15mm figures were too small to use and we therefore concentrated on our 25mm collections.  However, this week, with restrictions relaxed we were able to meet up indoors again and so I dusted off the figures and set up this scenario.  

It is set in the Isar valley during the 1809 Danube campaign.  Rosenburg's Corps is attempting to hold the line of the Isar and cover the flank of the main Austrian army in the Danube valley to the north.  Mouton's corps is marching towards Ober Bruchberg, hoping to seize the bridge and then move north.  Rosenberg has chosen to use the hills on the western bank for his defensive position.


The Isar can only be crossed at the bridge or the ford, the stream flowing into the Isar can be crossed by infantry and cavalry, but artillery must use the ford.  To the north and west of Klein Sandling are woods which reduce formed infantry to half speed and are impassable to cavalry.  The swampy ground from which the stream flows is impassable to all troops.

Rosenberg deployed Bartenstein's infantry division on the hill to the south of Ober Bruchberg with one battalion, 1st battalion Deutschmeister, in the town itself.  Mohr's infantry division was on the hill to the north of Ober Bruchberg and Frimont's infantry division was in the area beyond the stream of the Isar.  Nostitz's light cavalry division was placed in reserve on the eastern bank of the Isar, able to move north or south as required.  Rosenberg's plan was for Mohr to hold the hill to the north of Ober Bruchberg, Frimont to advance onto the high ground and then swing south-west to the line of the stream and threaten the flank of any enemy attack from the direction of Klein Sandling..  Nostitz was to move onto Frimont's left flank and pose a similar threat.  If circumstances permitted, Bartenstein was to swing his left flank north-west to threaten the flank of any direct attack on Ober Bruchberg.

Mouton had the infantry divisions of Franquement (Wurttemburg) and Deroy (Bavaria and Baden) deployed on the line of the road south from Klein Sandling.  Franquement, on the right, was to attack and seize Ober Bruchberg.  Deroy was to attack Mohr's position and pin him in place.  Sevdevitz's light cavalry division, which was deployed behind Franquement and Deroy, was to move south to support Franquement's right wing and threaten any infantry advancing from the hill to the south of the town.  On the 'French' left, Fontanelli's Italian division was only just arriving.  It was to pass to the north of Klein Sandling and attack Mohr's flank with one brigade and use the other to hold the line of the stream.

Preceded by artillery fire, the French attack moved forward.  Initially good progress was made, but Mouton's divisional commanders soon began to face problems.  Franquement had to move one brigade to his right as Bartenstein's  leading battalions moved off the hill towards him.  Sevdevitz's light cavalry took their time moving onto his flank and meanwhile a lively battle had erupted between the rival skirmisher screens.

The French left: Deroy ready to advance and Fontanelli just arriving

The French right: the skirmisher screens come in range

In the centre, Deroi's advance began to break up.  The Bavarian brigade continued towards Mohr, but the Baden brigade halted.  If they advanced further they would be threatened by Nostitz's light cavalry which was massing just beyond the stream.  The plan had called for Deroy's flank to be covered by Fontanelli, but he had run into problems.  

The Klein Sandling bottleneck

The gap between Klein Sandling and the woods  was narrow so Fontanelli continued to advance in column.  However, Frimont had rushed forward his artillery and the columns were in effective range and suffered severe casulaties as they moved forward.  The Austrian skirmishers also made a nuisance of themselves and the Italians deployed into line, slowing their advance.  Encouraged, Frimont now advanced his line battalions onto the hill and then down towards the stream, flanking the Italians.  The leading brigade moved left to meet this threat, slowing the advance of the second brigade which was supposed to be helping the Badeners. 

Nostitz's cavalry preparing to move across the stream


Deroy's advance

Franquement advances with cavalry support

Frimont launched the Stipcisz Hussars against the Baden brigade anticipating that this would force them to form square and provide juicy targets for the Austrian artillery.  In the nick of time a column of Italian infantry moved up on the flank of the Baden Gross Herzog regiment and enabled them to remain in line and deliver a closing volley into the charging hussars.  This emptied a good number of saddles, but not enough to stop the horsemen charging home.  The infantry managed to hold their ground and repel the light cavalry, but this would not be the only charge the Badeners would face.
The Stipcisz Hussars charge home


and are driven off
On the French right Franquement's attack on the hill was not making much progress.  The Austrian Zach infantry regiment had formed square when Sevdevitz's cavalry had moved forward, but the Wurttemburg horse artillery had been unable to disorder the square sufficiently for the cavalry to charge forward and finish the job.  Realising time was slipping away, Franquement ordered the 2nd battalion Prinz Paul regiment to charge the Austrian square supported by the Italian light horse.  The result was a bloody shambles.  The joint attack was driven off with heavy loss, the Italian cavalry lost half their strength and the infantry were so weakened they played no further part in the battle.

Zach stand firm
Deroy's Bavarians were now in position to assault Mohr's position on the hill.  Their skirmishers had been picking off the artillerymen manning the Austrian guns and although Deroy's artillery had had to re-deploy to face the threat from Nostitz's cavalry the Austrian infantry battalions in the front line had been weakened in the earlier bombardment.  To try and disrupt the attack Nostitz advance the Schwarzenberg Uhlan across the stream.  Here they came under fire from Deroy's artillery, suffering quite heavy casualties and instead of continuing against the Bavarians they swung right and charged the Baden brigade.  Once again it was the Gross Herzog regiment which came under attack and once again they drove off the cavalry.

Along the stream Fontanelli was coming under increasing pressure.  Perhaps sensing that the Italians were on the back foot, Frimont ordered his infantry to attack.  The 4 battalions on the 4th and 5th line regiments suffered particularly badly, two being driven from the field and a third suffering heavy casualties
Frimont moves forward

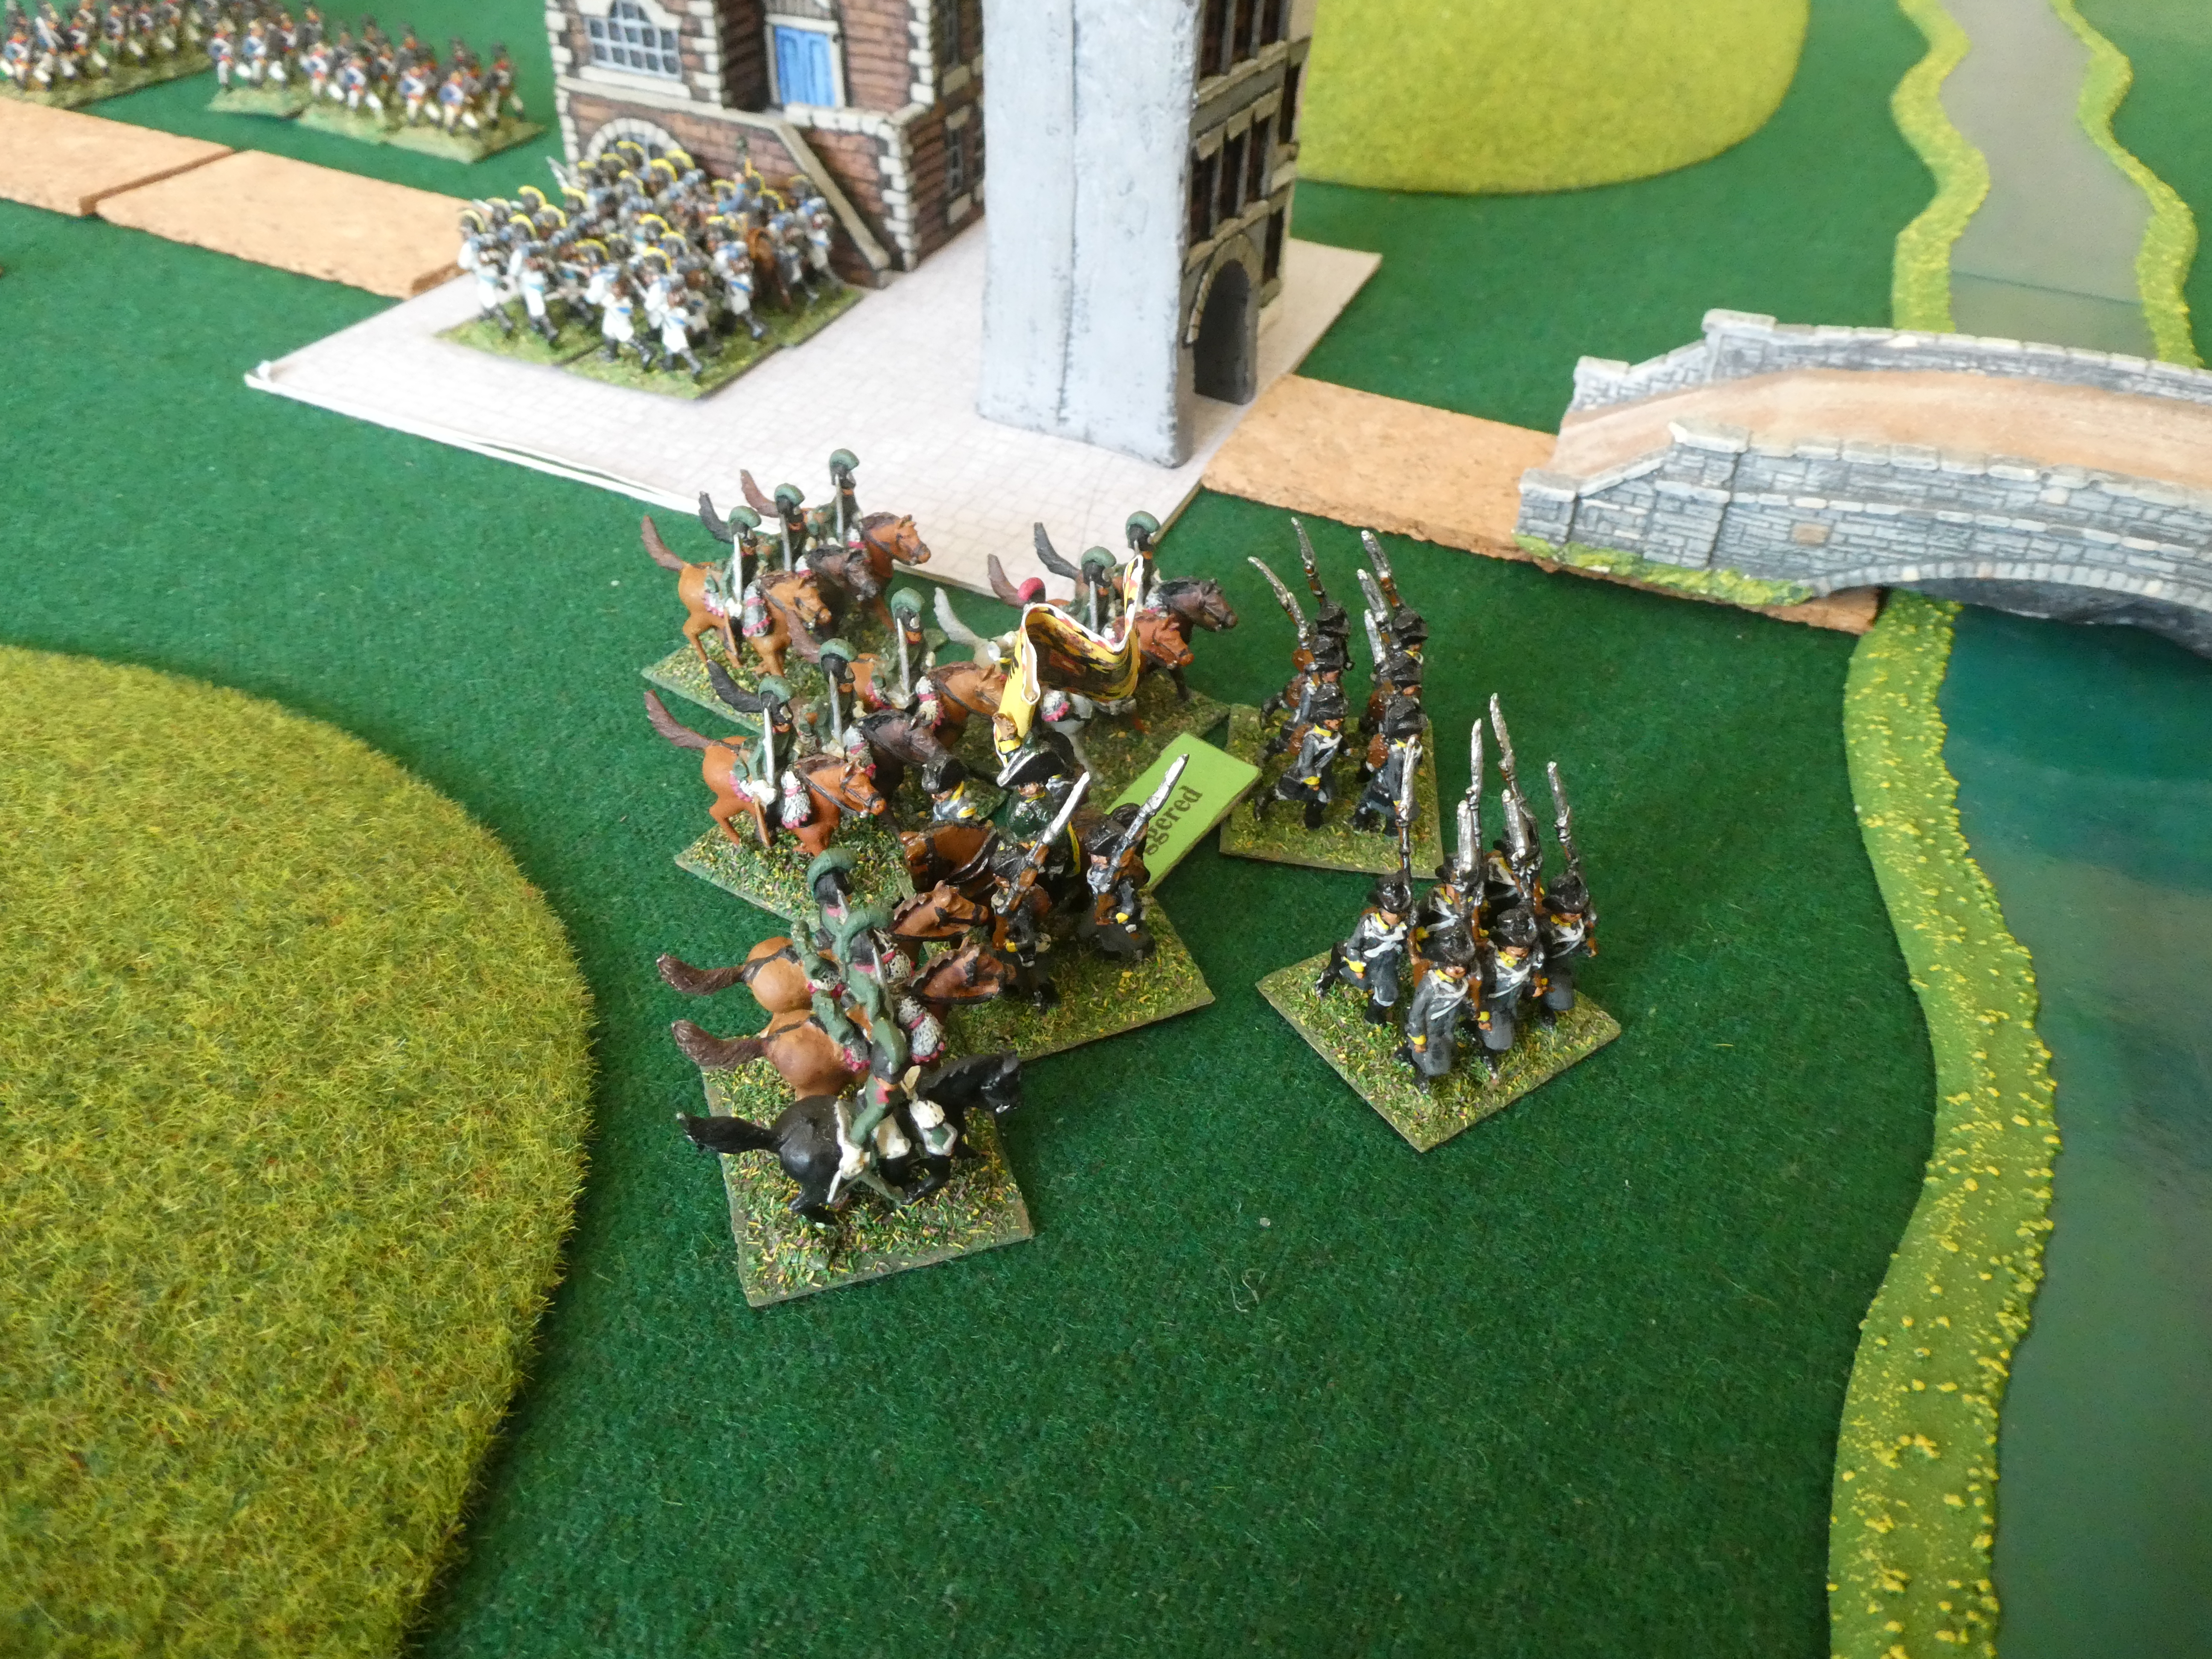
Glancing to his right, Mouton saw that Franquement was closing in on Ober Bruchberg.  After an artillery bombardment the 1st battalion of the von Neubronn Fusiliers charged the village.  The defenders, 1st battalion Deutschmeister repelled this attack and also one by the 2nd battalion von Neubronn.  As the Wurttemburger infantry formed up to attack again, Sevdevitz took matters into his own hands.  To the south of Ober Bruchberg, between the village and the hill, 3rd battalion Deutschmeister had stood firm under artillery fire and also an attack by the 2nd battalion Kronprinz regiment.  Behind them, the battalion of landwehr from the Salzburg district had also suffered losses from the artillery.  Both battalions looked as if they were wavering.  Sevdevitz ordered the Cheveauleger Prinz Adam to charge.  As the cavalry surged forward Deutschmeister began to form square.  Perhaps due to officer casualties this was not carried out as efficiently as usual and before the ranks were formed the cavalry were among them.  In no time the square was swept away and the survivors sought sanctuary in the village.  
3rd battalion Deutschmeister disintegrate

Nearer the river, the Landwehr looked on in horror as the regular line infantry scattered and the Wurttemburg cavalry followed up in their direction.  All cohesion seemed to evaporate and they were swept away by the cavalry.

The Landwehr suffer the same fate

This success was in vain.  Deroy's attack had stalled.  The Bavarians, faced with resolute Austrian infantry to their front and cavalry on their flank, were forced back.  Deroy's other brigade was unable to help and the Italians were fully occupied trying to prevent Frimont breaking through their lines and seizing Klein Sandling.

Mouton had little option but to recall Sevdevitz and Franquement and order them to help Fontanelli hold Klein Sandling and the lines of communication back to the Danube.  Deroy's orders were now to hold the centre as long as he could.  There would be no crossing of the Isar today.

A satisfying game, with both commanders able to take positives from the action.  I was happy that even after such a long break we managed to re-acquaint ourselves with the rules quickly and the game flowed well.  Congratulations to Steve for his stout defence.