Sunday, 22 March 2020

"Just one more push.." a Sudan Black Powder scenario

As an experiment Steve set up a Sudan scenario with the idea of using the "Blood on the Nile" supplement to Black Powder rather than our usual "in house" version of "Battles for Empire".  The scenario starts with a Dervish force, led by Emir Khat, holding a low ridge.  They have been withdrawing for the last few days after an unsuccessful attack on an Imperial garrison.  In pursuit is an Imperial force and it's commander, Brigadier Walter "lets get this over with" Glennister, having surveyed the Dervish position has offered his opinion that "just one more push and that rabble will disperse to the four winds"   To accomplish this task he had 4 units of British infantry and 4 units of cavalry, a machine gun and a field gun.

An overview of the Dervish position
The Dervish left seemed to be held in strength, so Glennister ordered Finch (right wing cavalry) and Chambers (right hand brigade of infantry) to pin them in position.  Meanwhile Armstrong (left wing cavalry) was to attack the Dervish right and Gregory (remaining infantry brigade) with the support of the field gun was to seize the central ridge.

Finch, knowing the aggressive nature of his commander adopted a rather energetic form of pinning; he led his cavalry straight towards the mass of Dervish cavalry, leaving Chambers and the machine gun to protect the British left.  Fortune favours the brave and the leading unit of lancers was unscathed by the ineffectual rifle fire from the Dervish infantry.  Adding to Emir Khat's woes one of his field guns suffered a misfire, jamming the breech and putting the gun permanently out of action.  The Dervish cavalry were unsure of how to respond to the British advance, only one unit moved forward and that was quickly overwhelmed.  Spurred on by this success the lancers swept on and struck another unit of Dervish cavalry.  This proved rather more resilient and held its ground and the fight continued.  Finch called up his second unit and as the first unit of lancers fell back the second charged into their  Dervish opponents.  This fresh assault was too much for them to take and they routed, carrying away their supports.

Finch's command move forward
Chambers meanwhile had his hands full.  Three units of Dervish infantry were heading towards him and they were aided by a unit of riflemen sniping at the British line from some rough ground.  Gregory and the field gun were making slow progress towards the ridge, but once again the Dervish rifle fire was ineffective and the second Dervish field gun suffered the same fate as the first, becoming inoperable after three rounds; (all of which missed).

Emir Khat had seen the British cavalry moving towards his right wing and sent an order for the infantry there to take cover in the broken ground.  Unfortunately, the messenger did not get through and the Dervish infantry in the open were driven back in total disarray.  Sensing victory, the cavalry raced forward in pursuit, hacking and slashing at any unfortunate Dervish infantry they caught.  Meanwhile , on the ridge, Armstrong's other unit was struggling to overcome the Dervishes opposing them in rather broken terrain.  To make matters worse, another Dervish unit joined the fray; but, rather than helping, they seemed to hinder the defence and in the end, both sides fell back to reorganise.

Armstrong's Hussars attack the Dervish infantry

Gregory's leading infantry battalion had by now reached the central ridge.  The rifle fire from the Dervish infantry continued to be ineffective and proved unable to stop the British advance.  The commander decided to revert to cold steel and ordered an immediate charge.  This was the opportunity Gregory had hoped for.  His infantry stopped and then delivered a withering close range volley which decimated the Dervish ranks.  Halting, the Dervish were subjected to another volley and they fell back in disorder. 

Gregory ordered the advance to continue and the 83rd (Kelhamshire) proudly took the ridge.  Behind them the Highlanders felt cheated that they had been denied the chance to prove their mettle, but their time would come. 

On the British right, Chambers had managed to drive off one unit of Dervishes with sustained volleys, but his other unit was being sniped at by some riflemen from an area of broken ground.  Determined to eliminate this nuisance he ordered this unit to advance although this opened up a gap in his lines.  Advancing rapidly the British infantry drove off their assailants, scattering them to the four winds.  The major's cry of  "well done the 61st !" was drowned by frantic shouts of "'ware cavalry" from the left, as a mass of horsemen broke cover.  A square began to form, but was not complete before the horsemen were on them.  A frantic fight ensued, with knots of soldiers fending off the lances, spears and swords with their bayonets.  Against the odds, the infantry prevailed, the horsemen falling back to reform.  The cost had been high, a third of the battalion lay dead or dying.  A ragged line formed and with the help of the machine gun they managed to keep the enemy horsemen at bay as the survivors fell back .

The Lancers attacked in the flank
Finch's cavalry had little time to rest on their laurels, fresh units of enemy cavalry were gathering to their front.  From their right flank Dervish infantry suddenly appeared and charged.  Turning to meet this new threat they managed to stand their ground against the first push, but groups of Dervish worked in among them, breaking their formation. Finch ordered the bugler to sound the retreat and the cavalry fell back towards their brother unit.  All the British cavalry now needed time to recover before they could fully support the infantry.  This was an opportunity Emir Khat was determined to exploit.

The lancers driven off
An attack went in against the 83rd on the central ridge.  The British volley was ineffectual and in the ensuing melee the 83rd were driven back, straight through the ranks of the Highlanders.  They managed to shrug this off, but it meant the Dervish assault struck home without suffering a closing volley.  Even so, the Highlanders held their ground and were even beginning to gain the advantage, until a second Dervish unit crashed into their flank.  Gregory was fully occupied trying to rally the 83rd and sent off an aide to request support from Finch.  However, Finch had problems of his own, as his still shaken units were attacked by fresh Dervish cavalry.  The issue was never in doubt and the lancers streamed from the field in total disorder.

On the British left, Armstrong had lost all contact with his leading unit.  He was fully occupied rallying the unit driven off the ridge.  The Hussars, which had pursued the routing Dervish were now milling about with officers struggling to restore some semblance of order to the ranks.  There were plenty of opportunities to charge disordered Dervish infantry, but a ragged fire from several directions hampered attempts to form up.

Glenister at last realised that a retreat was necessary if anything was to be salvaged from the day.  He ordered Chambers to form a rearguard and Armstrong to assist Gregory.  Armstrong did what he could, but Gregory's fate was sealed when the Dervish cavalry swooped down on his command.  Only a fraction of the 83rd and the Highlanders managed to escape to join the artillery and Chambers.  Armstrong's men managed to hold off the Dervish pursuit long enough for Glenister to make good his escape.

An enjoyable scenario.  The revised factors gave the British troops a better chance of survival, as long as they had the time.  Unfortunately, the Dervish troops did not give them the time.  With a superior number of units they were able to wear down the British troops.

Tuesday, 10 March 2020

WMMS 2020

At the weekend Steve and I visited this show.  We missed last year due to various reasons, but this time the stars were aligned and we had a good journey south.  The venue is spacious, (perhaps more so than the car park) and although there seemed to be a good number of people there, there was no trouble getting around and taking pictures of the games. 

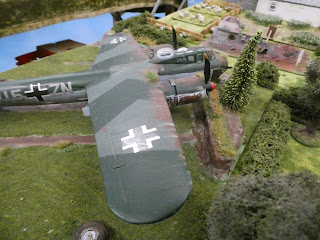
Will and Andy were representing the SOTCW at the show and put on a fictional Andrevia scenario set in 1943.  It involved a German raid on a Russian occupied port.


More photos can be found on Will's blog

Nearby was another WWII game, this time set in the Ardennes


The burning vehicles were effective with lights flickering within them


There was a participation game on the defence of Hougoumont.  Chatting too one of the organisers he expressed a certain disappointment that the first run through the game had resulted in an overwhelming French victory, with the garrison wiped out, whilst the British Guards stood by and watched.  I suppose that is the problem with scenario construction; it is all but impossible to account for the odd extreme result !

Nearby was a well-modelled Warmington on Sea, with the Home Guard coping with a German paratroop landing.


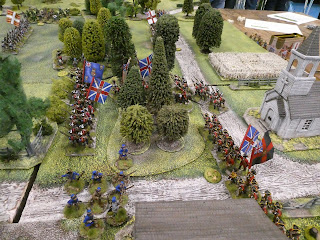
Alumwell Wargames Society had a large Peninsular display/game.  Lots of 28mm figures on good terrain.  It was nice to see the Spanish army present in large numbers and also some Swiss troops on the French side.


The French and Indian Wars were represented by two games; this was by the Wyrley Retinue
(I think)


On the next table a French force was advancing on a British held fort, (possibly Telford?)


One ECW game which caught my eye used The Kingdom is Ours rules


With small scale figures and excellent terrain, this modern period game (I use modern to cover conflicts within my lifetime) represented the attack on Jerusalem during the 1967 Arab-Israeli War.


This is only a selection of the games on offer, all presented to a high standard.  My only caveat would be that information explaining the game and indeed the group/club running it was in short supply. 

Congratulations to Alumwell for organising this event, it is an excellent mix of games and traders.