Showing posts with label SYW. Show all posts

Sunday, 30 December 2018

Wilhelmstadt, a SYW scenario using Konig Krieg

The usual gaming routine tends to go out of the window at this time of year and that is before the vagaries of the UK weather begin to make themselves a nuisance.  Management determined that seasonal preparations were of more importance than posting on the blog so I am only now catching up on a game Steve and I played earlier in December.  This provided an opportunity for rare outing, (almost 2 years since the last one), for my small 15mm SYW collection.  The scenario sees a force of Anglo/Brunswick|Prussian troops attempting to protect a supply base (Wilhelmstadt) from an advancing French force.  There are three brigades of French infantry (2 of 4 battalions and battery, 1 of 3 battalions and a battery), plus one brigade of cavalry(4 small regiments) on the table.  A fourth brigade (of 3 battalions) will arrive after on the French right after 3 turns.  For the Allies there are 3 brigades of infantry.  The British and Brunswick brigades have 4 battalions and a battery, the Prussians only 2 battalions, a battery and a detachment of jaegers.

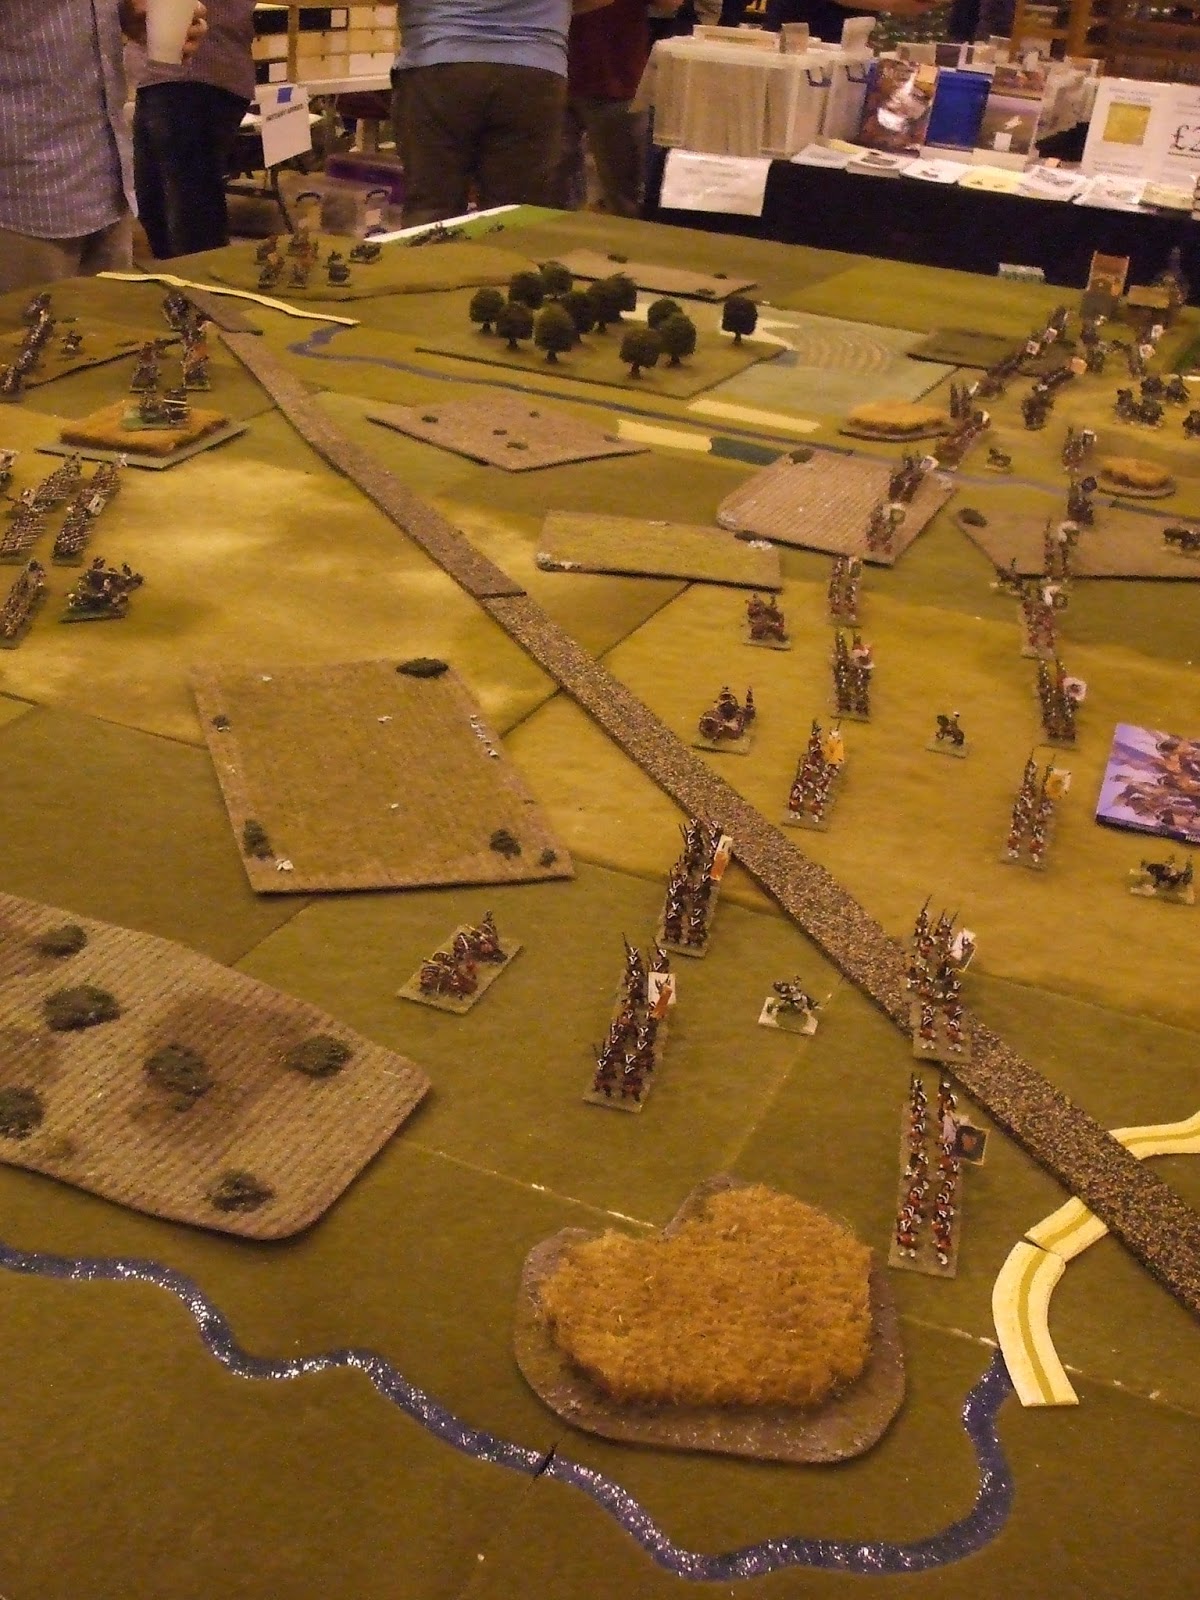
The starting positions can be seen below


The Allies, under General, the Lord Montague, are deployed with Brigadier Howard's 4 British battalions on the Wolfsburg to the right of Wilhelmstadt, Von Helsing's Brunswickers covering the town and Von Stalheim's Prussians on the Waldburg to the left.  Grenville's cavalry are held in reserve.  Wilhelmstadt itself has a garrison of a grenadier battalion.

Marshal Corbiere has his three infantry brigades (left to right, Sully, Montmorency, Givenchy) in the front line with Haut-Provence's cavalry in reserve.  Pozieres' fourth infantry brigade will enter via the road leading from the bottom of the photograph.

A roll of the dice allocated command of the Allies to Steve.  As Marshal Corbiere, I decided to advance Sully and Montmorency, supported by Haut-Provence,  to pin the Allied right and centre.  This would leave the six battalions of Givenchy and Pozieres to try and drive off the Prussians and then advance on Wilhelmstadt.

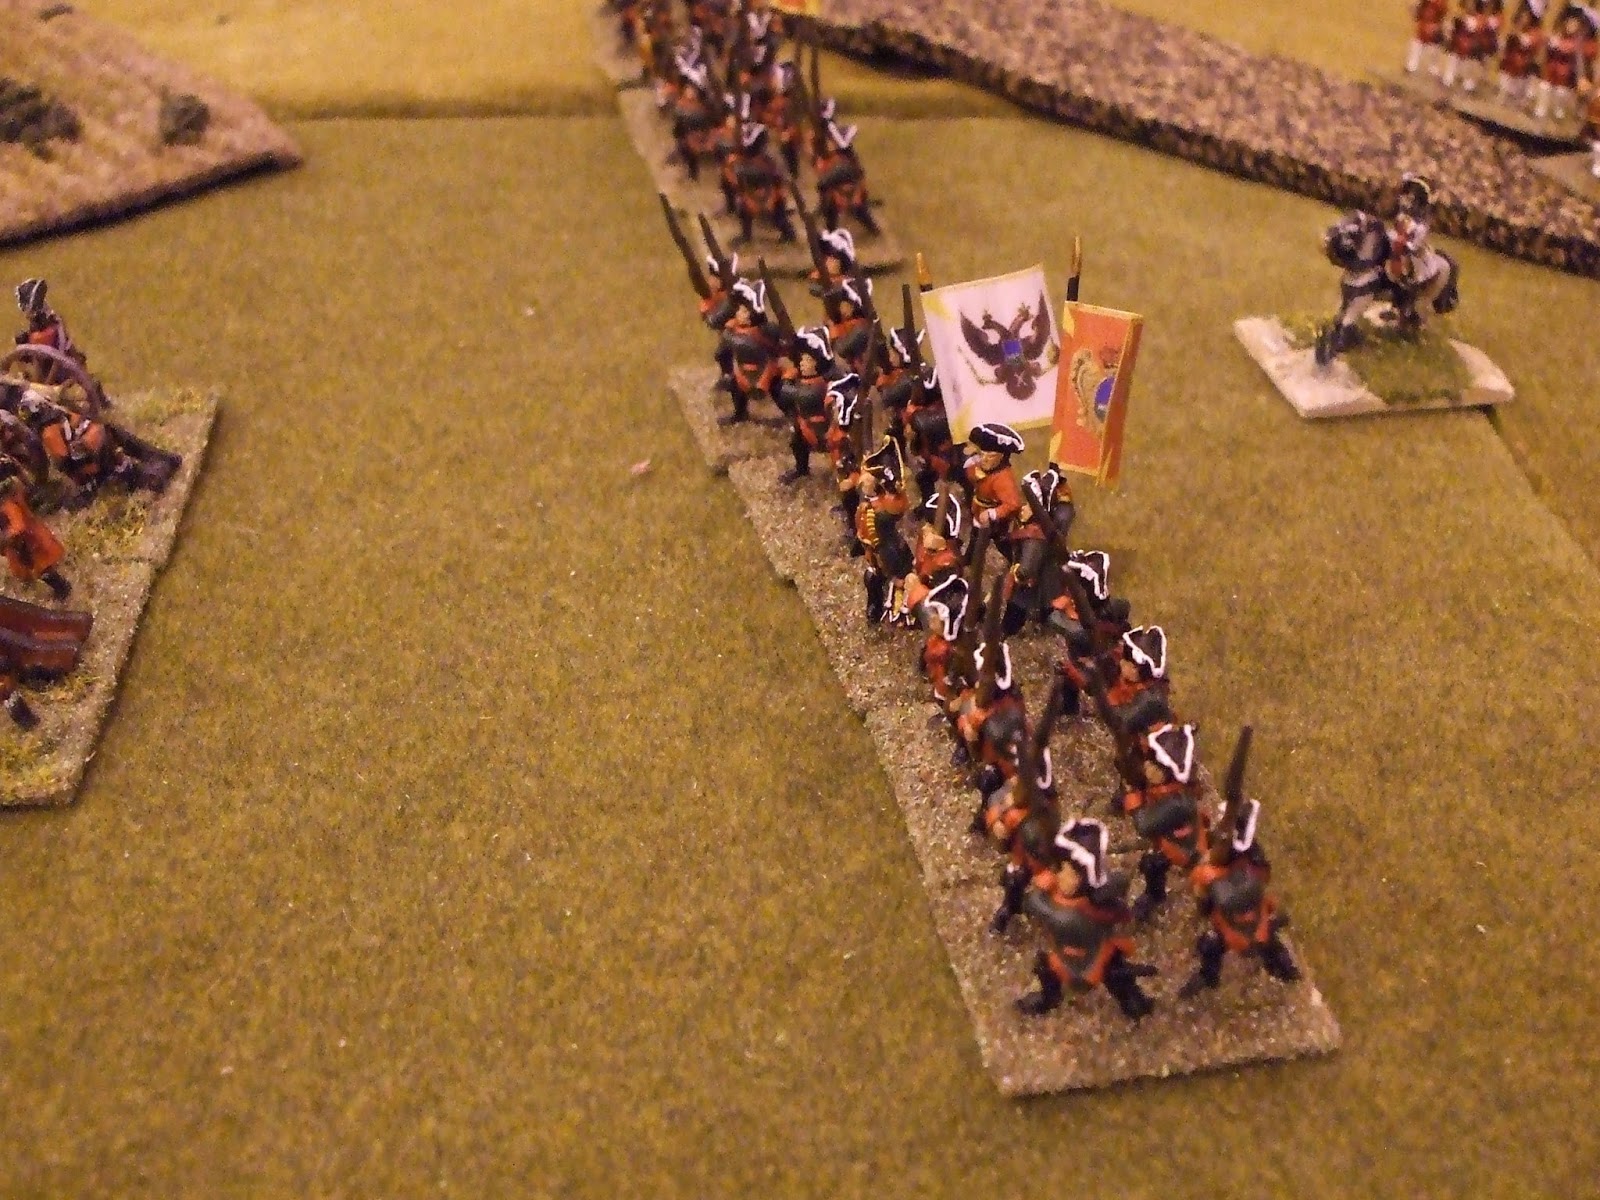
As the French infantry advanced the Allies threw their first spanner into the works of the carefully crafted plan.  Von Stalheim ordered his jaegers toward the woods to fire into the flank of Givenchy's advance.  Their fire, irritating at first, soon caused the regiment at the right of the line to waver.  As the head of Pozieres' column came into view they were greeted by the sight of some of their comrades from Givenchy's brigade retreating.  Pozierers quickly ordered his leading battalion to form line and advance on the jaegers and force them to fall back.  The jaegers obliged, falling back through the woods and inflicting heavy casualties on their pursuers as they struggled through the trees.

The Prussian jaeger advance
On the right, Montague made another unexpected move, ordering forward Grenville's cavalry.  This stalled the advance of Sully and Montmorency and Haut-Provence struggled to get his troopers into a position to charge the allied cavalry.   Although the French artillery did inflict some casualties, the British cavalry continued their advance and then charged the 1st battalion la Couronne.  The French infantry stood their ground and fired a volley as the British closed.  This emptied quite a few saddles but did not deter the survivors from striking home.


In the short melee which followed the infantry held firm and it was the cavalry who fell back, having suffered the loss of almost half their strength.  Sensing that further attacks would incur needless casualties, Grenville ordered his men to fall back.  He would bide his time and seek further opportunities to attack.

Corbiere now ordered his artillery to concentrate their fire on the allied guns as a prelude to a further advance.  This proved surprisingly effective, (due to some rather fortuitous dice rolls) and soon the allied guns were silenced.  As Sully and Montmorency continued their advance they diverged and opened up a gap through which Haut-Provence could advance his cavalry.  Attempting to bring Grenville's battered command to battle they found themselves denied as the allied cavalry fell back behind Von Helsing's Brunswick infantry.

On the French left Givenchy and Pozieres were struggling to bring the Prussians to battle.  Von Stalheim kept his line battalions on the Waldburg, forcing the French to attack him uphill.  Meanwhile his jaegers were tormenting Pozieres' infantry , evading contact and sniping away as they fell back.  Corbiere's 'right hook' looked to be failing.

In the centre, there was some progress.  Montmorency was grinding down the Brunswick battalions defending Wilhelmstadt.  Close range artillery fire, supported by volleys from the infantry had reduced two battalions to tatters.  Orders were sent to Haut-Provence to complete the job and attack with the cavalry.  Inexplicably, nothing happened.  The cavalry remained motionless, the Brunswick infantry, perhaps not wishing to antagonise their foe, inflicted only minor casualties with their desultory volleys.  A second set of orders were sent, but to no effect.

Meanwhile, Sully had begun his attack on the Wolfsburg.  As the French infantry climbed the slopes they were met by devastating volleys from the well-drilled British battalions.  Whole companies were swept away and the battered remains of once proud battalions fell back to reform.  The disjointed volleys from the French infantry did inflict some losses on the red-coated line, but very little in comparison to the losses they had suffered.  In a belated attempt to salvage some French pride, the Commisary General regiment from Haut-Provence's brigade charged in support of the battered infantry.  They broke through the 4th Foot and reached the crest of the Wolfsburg, but isolated and unsupported they had to fall back.

Grenville's cavalry had not been idle.  Montague had seen the growing strength of the forces attacking the Waldburg and ordered the cavalry to intervene.   With the Royal Dragoons in the lead, the Allied cavalry attacked.  The French infantry were caught unaware.  Their supporting artillery was ridden down and then an infantry battalion suffered the same fate.

The Royal Dragoons attack the French infantry on the Waldburg
With three of his brigades having suffered losses of at least 50%, Corbieres decided to fall back.  The attack on Wilhelstadt had failed, but once he had received some reinforcements he would try again.

An enjoyable game, but at times a bit of a struggle as Steve and I tried to remember the rules.  We had used them frequently when we gamed with Alasdair several years ago, and when you have thirty or more battalions, (as we often did in those days),  losing 3 or 4 is not that significant.  With only half that number these rules are quite unforgiving if you have a bit of bad luck with the dice.  I will have to try and paint some more 15mm figures or perhaps look for a different set of rules (one that doesn't entail re-basing the figures I already have).

Wednesday, 22 March 2017

Mittelstadt - a SYW scenario for Konig Krieg

Mittelstadt is a small town on the Braunwasser a minor tributary of the Main.  The French command have begun to establish a magazine there to support their planned advance eastwards.  The Allied command have heard news of this development and sent a force under General James Marlborough Blackadder (last in action over 2 years ago ( post ) to capture the town and destroy (or carry off) the magazine.  For this action he has 4 brigades of line infantry (4 battalions Hessians, 4 battalions British, a mixed brigade of Brunswick and Prussians,  and 3 battalions of highlanders).  In addition he has 1 converged grenadier battalion and a battalion of jaegers.   The cavalry arm is represented by 3 regiments of dragoons and there are two light guns.

The French defenders of Mittelstadt

The French cavalry


The Braunwasser flows across the battlefield,with Mittelstadt on the western bank close to the bridge. On Blackadder's right is a wood and a ford of the river.  His left is fairly open terrain and he therefore stationed his cavalry there.  The jaeger are on the right and the infantry make up the centre. Blackadder aims to pin the French in the centre and then force the ford using his highlanders, rolling up the enemy line.

Royal Allemand drive off the British dragoons


As the allied forces deploy, the French commander, the Marquis d'Ecoles deployed to defend his position.  His 15 infantry battalions (in 4 brigades) were deployed along his front from the bridge to the ford.  On his right the cavalry, 2 units of French cavalry supported by a regiment of Reichsarmee cuirassiers, faced up to the British dragoons.  The two light guns were supporting the infantry line. Expecting his cavalry to be stronger than their opponents, the Marquis intended to attack with his right, drive off the enemy cavalry and then roll up the infantry as they attacked.

The firefight develops along the river bank
The battle opened with a general Allied advance.  Once the two forces came within artillery range, the French cavalry moved forward.  Their charge proved too much for the dragoons who were driven back in disorder and then attacked again by the exultant French.  The issue was not in doubt. In a trice, all Blackadder's cavalry had fled the field and his left flank was 'in the air' .  This required one of his brigades, the mixed Brunswick/Prussian, to abandon its advance and turn to meet this new threat.   Quickly forming a line towards the enemy cavalry, the infantry awaited the onslaught.

The Frei Korps rout

On the opposite flank the jaeger had made good progress through the wood and soon began a nagging fire on the French infantry across the Braunwasser.  By the time the highlanders approached the ford one of the enemy battalions had been forced to retire due to its high casualties.  Supported by one of the light guns, the highlanders prepared to force their way across the river.


In the centre the British and Hessian brigades were having a tough time.  Under fire from the French artillery and lashed by volleys from the French infantry, their ranks were thinning.  However, true to their traditions they stood their ground and replied in kind, tearing gaps in the French ranks with their volleys.

On the Allied left the crisis of the battle approached.  The reformed French cavalry charged the infantry opposing them.  A Brunswick battalion remained in line and stopped the cavalry with a devastating volley.  To their left, a unit of Prussian Frei Korps had formed square, but their nerve broke as the horsemen closed and they broke and ran.  Fortunately for the allied cause, Blackadder had formed up his grenadiers behind the Frei Korps and the sight of the steady ranks of mitre capped infantry was enough to halt the onrushing French.    Withdrawing the French cavalry attacked again, but once again were beaten back.  A final charge by the Reichsarmee cuirassiers ended in dismal failure as the leading squadrons were shredded by canister as they closed on the Brunswick infantry.

Artillery supports the Brunswickers

The second French cavalry attack
The Marquis ordered forward infantry to support his cavalry and they threatened to swing the balance in favour of the French, but Blackadder re-deployed a hessian battalion and this supported by the second light gun drove back the French.

The French infantry attack the Hessians

The highlanders attack across the ford

Following up a salvo of canister shot, the highlanders rushed across the ford.  The battalion facing them, already shaken, was unable to stand against the charge and retreated.  A second highland battalion now crossed and drove back another French battalion with musketry.  Reacting to this threat, the Marquis ordered one of his light guns to the endangered sector.  The fire from this gun halted the allied attack just long enough for the Marquis to rally his fleeing infantry and form a new defence line.  Blackadder for his part could see that his British line battalions were at the end of their tether, all had suffered heavy casualties and their retreat opened a gap in his line.  The highlanders advance although successful was leading them into a salient and further advance risked their destruction.  He therefore decided that withdrawal was the best option.  Although Mittelstadt had not been captured the French forces had suffered heavy casualties and it would be some time before they could contemplate an advance.


Saturday, 18 June 2016

Phalanx 2016

It has been a bit fraught the last couple of weeks with family commitments and preparations for the  Phalanx show,  so table activity has been rather sparse.  There has been even less time to post on the two battles which Steve and I managed to stage, perhaps over the next few weeks I will be able to catch up.

For the moment, here is a brief post on the show.

Another very enjoyable day at the Phalanx Show, the Spartans do organise a very welcoming show. The B & B seemed to be doing a brisk trade, as did the traders.  A good attendance, with a  fair sprinkling of 'family' parties.    Perhaps not as many demo games as in previous years, but a good range of periods were covered.  Next to the Lance & Longbow was a 15mm game of Zorndorf from the Mailed Fist group


Manchester Wargames had a Black Powder Peninsular game, "3rd day at Fuentes D'Orono"


There was also a colonial game


We ran a 'Lion Rampant' game based on the Battle of Chesterfield, 1266.  During the day we ran our game three times, with each side winning once.  The final game was a draw, with both armies fought to a standstill.  We did get some willing 'volunteers' to participate and the rules worked well with the newcomers picking up the game quickly.

Hansard leads his Sergeants towards D'Eyville's archers

Ferrers leads out his knights

D'Eyville's men are spotted by Henry of Almain's contingent
Many thanks to Dave, Bob, Will, Nick, John, Gary and Steve for all their help with the game.

Monday, 1 December 2014

Minden

With no game this week, I thought I would take a closer look at one of those battles which tends to capture the imagination, Minden.  One particular incident, the charge of the French cavalry against the British infantry was of interest. This is because, in the Konig Kreig rules, which Steve and I use, the French cavalry units only field 6 figures and so are vulnerable to failing morale tests when they start to take casualties. In addition, the rules make the British musketry fire more effective (a 50% chance of inflicting a casualty with each die rolled).  So,to see if the charge could work using these rules I carried out a paper exercise, running through the charge procedure 20 times.  All dice were d6.

I began by checking the morale of the participants. The French (rated 6) could not fail, the British rated 5,could fail on a 6.  On 4 occasions the British failed the test and retreated.  When the British stood, they fired a volley.  Six dice were rolled, requiring 4 - 6 to hit.  On average you would expect to inflict three casualties on the French cavalry with each volley.  In the event a total of 41 hits were obtained for 16 volleys, a rate of c2.5.  The casualties on their own would not stop the charge as you only check morale once per phase, but they could effect the melee value of the cavalry, as increments are gained for ranks and numbers of figures.


However, before the melee takes place the cavalry have to 'break the bayonets' and close on the infantry.  Again this is a 50% chance if the infantry are in line; so you would expect a melee in 8 of the remaining 16 charges.  In the event only 6 melees took place and of these 3 were won by the cavalry and 3 by the infantry.

In total, of the 20 charges only 7, ( 4 in which the infantry failed their morale check and 3 victorious  melees) could be counted as a success.  Bearing in mind that I discounted the effect of the supporting British artillery it would seem that the commander of the French cavalry would be well advised not to charge full strength British infantry units as the chances of success are not good.


I ran the exercise again using Brunswick infantry, they inflicted fewer musketry casualties, but the French cavalry only managed to 'break the bayonets' 7 times out of 17 attempts. However, they won 4 of the resulting melees, meaning that the overall result was the same as for the British infantry; 7 French successes out of 20 attempts.


For my third attempt I charged the infantry with a larger unit of Reichs Armee cuirassiers, (12 figures strong). They had  more luck with the dice; breaking the bayonets on 9 out of 17 attempts and they won all of the resulting melees. Even allowing for the vagaries of my dice rolling it seems to support the dictum about 'big battalions'.  The solution could be to combine two French cavalry units together to make them less vulnerable; but this would then have a negative impact on British cavalry units which are of 8 figures and are generally classed as medium rather than heavy.  In a melee therefore, the British (melee value 7) would face French cavalry with a melee value of 10, rather a large handicap.

Wednesday, 12 November 2014

The Seven Years War returns

In the early days of this blog I posted several accounts of scenarios we had fought from the SYW.  These were devised by Alasdair and used his impressive collection of 25mm figures; these of course ceased when Alasdair moved away.  A good number of years ago I had been fortunate to receive a substantial number of unpainted 15mm SYW figures from the collection of the late David Barnes.  I had promised myself that I would get round to painting enough of them to put on a game, but the inherent 'butterfly effect' to which all wargamers seem susceptible meant that this particular project kept getting pushed down the 'to do' list. However, at long last, (with a bit of help from Steve's AWI collection), I was able to raise 8 brigades of infantry and  2 of cavalry  and devise a scenario from the campaigns involving the French and a mixed force of Anglo-Hanoverian/Prussian and Brunswick troops in the Rhineland.


Here is a general view of the terrain. The Allied forces (on the right) are defending their local supply base. General James Marlborough Blackadder has positioned his British troops on the hill covering the town.  In reserve is the brigade of Brunswick infantry and to the left of the Highlanders a brigade of Hessians (Steve arrived with these troops after the photo was taken).  On the far left were the British cavalry, comprising 3 regiments of dragoons.  In the wood on the far right was a unit of Brunswick jaeger.  The centre was supported by two batteries of artillery

The French, commanded by the  Marquis d'Ecoles, a descendant of the Comte de Salle Forde, the notable French commander of the wars of Louis XIV, comprised 15 battalions of infantry and four of cavalry, with the cavalry on the right.  He also had two batteries of artillery.  The Marquis' plan was to pin the Allied infantry with a frontal attack and then use his cavalry to defeat the Allied horse and then roll up the rest of their line.

The French infantry


The action opened with Steve making a general advance with the French infantry which was met by fire from the Allied artillery.  This had little effect at long range,particularly as the soft ground reduced the 'bounce through' effect of the ball shot, (ie I rolled a lot of 1's).  The jaeger 'ambush' on the Allied right failed totally; the first shots had no effect and all surprise was lost.  However, it did draw one French battalion into the woods and they spent the rest of the battle floundering around taking no part in the action.

Although struggling to find room to deploy, the French cavalry advanced and this challenge was met by the Allied cavalry which charged forward.  The resulting melees were victories for the French as the King's Dragoons and the 11th Dragoons were both driven back in confusion. For a time the 3rd Dragoon Guards restored the balance but they were attacked by Royal Pologne and the Mestre de Camp General and driven from the field.  All that saved the Allied left was that the French cavalry commander, who led the charge, as killed in the melee and it took some time for the Marquis to gallop over to reorganise the regiments.


In the centre, the two armies were now in musketry range and the French struggled to make headway against the British line, especially as it was bolstered by artillery.  The Alsace regiment found itself right in front of the guns and although suffering heavy losses from canister, they managed to drive off the gunners with volleys. Their victory was short lived as a volley from Loyals drove them from the field.

Blackadder was concerned at the advance of French troops into the wood on his right, fearing that it threatened his supply base.  He therefore ordered his reserve brigade to drive the enemy from the wood. The Brunswick troops attacked with elan, but it took some time to push their way through the trees and by the time they emerged on the far side, task accomplished, events had moved on in other parts of the field.

The Marquis had managed to get his guns forward to support his attack on the British line on the hill and Allied losses began to mount. To regain the initiative, Blackadder ordered his Highland brigade to attack. The first wave was driven off by musketry volleys, but the second crashed into the French line driving back their opponents and then carrying on to attack the second line.  These too retreated,and the Marquis hastily cobbled together a third line of battered units to resist the highlanders. However, the losses suffered in the melees now began to take effect.  Isolated and outnumbered the Highlanders found themselves swept by French musketry fire and destroyed as a fighting force.

The Hessians found themselves attacked frontally by infantry, but with cavalry menacing their flanks.  If they deployed to take on the infantry, they risked being cut down by the cavalry.  In square, they would be decimated by musketry volleys.  One battalion risked being in line and was destroyed by a charge from the Royal Allemand regiment.  Another was driven from the field by fire from the French artillery.

Blackadder found that his left and centre were destroyed.  He had no cavalry to counter the French advance and the one area of success, the Brunswick brigade's advance would not bring victory.  On the hill the remnants of his British battalions struggled to hold their position against a renewed French advance.  It was time to withdraw and lead the field to the French.

An interesting scenario that allowed Steve and I to reacquaint ourselves with the Konig Kreig rules after a break of a couple of years.  Hopefully I will paint up a few more units over the coming months and set up some more scenarios.

Sunday, 4 November 2012

Lobositz part 2

A couple of weeks ago I began a report on our recent Lobositz game and the first evenings gaming came to an end with the Prussian infantry massing before Lobositz and their cavalry threatening the Austrian centre.  The Austrians were desperately trying to redeploy their infantry to shore up their centre following the destruction of two thirds of their heavy cavalry.  Meanwhile on the Lobosch the Austrian light troops were being driven back by the Prussian grenadiers.


Bevern was watching the progress of his grenadiers with some satisfaction.  The front units had almost reached the summit of the Lobosch and although they had suffered some casualties, the Austrian musketry seemed to be slackening.  As the grenadiers approached the wall manned by the Grenzers they fired a volley and prepared to charge.  The Grenzers' reply was supplemented by canister from a light gun which temporarily stalled the grenadiers.  Before they could fully recover they were fired on from their right flank.  Some Grenzers had moved down the slopes to assist the defenders of the wall.   With casualties amongst the officers mounting, command began to falter and having suffered 50% losses the first line of grenadiers reluctantly retraced their steps back to the open ground at the foot of the Lobosch.  The first attack had been held and to Bevern's dismay he could see that the reinforcements sent by Lacy had now arrived strengthening the defence even more.

Lacy's attention was by now fully focused on the defence of Lobositz.  One of his flanking batteries had been lost to the Guards attack and the infantry holding the line between Lobositz and the Lobosch were coming under increasing pressure as they became targets for the Prussian howitzers.  Behind the howitzers a brigade of Prussian infantry was moving up in support and Lacy moved quickly to rally battalions which had fallen back out of the line.


Lobositz itself seemed secure as the original garrison of two battalions had been augmented by two more of grenadiers.

Browne's main concern was his centre.  His grenadiers would hold to the end, but they were faced by heavy cavalry, jaegers and artillery.  The former were waiting for the latter to whittle down his strength before charging.  All he had to cover the vital bridge over which his reserve infantry were marching was a unit of converged elite companies from his mounted dragoon regiments.  This was the unit which the Buddenbrock Cuirassier, victors over the Austrian cuirassiers now attacked.  Buddenbrock had to run the gauntlet of fire from the village of Sullowitz which had a garrison of Austrian light troops and also the fire of batteries on the far bank of the Model Bach.  They suffered losses, but charged home.  The crucial melee swung back and forth, but eventually the Austrians prevailed and the Prussians were driven back.

Frederick now directed Winterfeldt to capture Sullowitz and four battalions of line infantry advanced on the village.  Marching through artillery fire and the musketry from the village the first line stopped to fire a volley, and the attack stalled.  Reinforced by the second line the attack went in and the light troops were driven back across the Model Bach.  Having removed this irritant attention now returned to Lobostiz.


The second Austrian battery defending the village had been inflicting heavy casualties on the  Prussian infantry even as they were forming up.  As the infantry approached, their losses increased.  However, by broadening the attack the battery was outflanked and a vigorous charge drove off the gunners.  This increased pressure on the Austrian grenadiers as the Prussian jaeger could advance closer and inflict more casualties.  Lobositz would now have to rely on the volleys of its garrison to keep out the Prussian infantry, which continued to advance.


This is where affairs ended on the second evening of gaming.  The Prussians had made progress, but had concerns about their left flank.  For their part, the Austrians had managed to reinforce their centre but had had most of their guns over run.  Unfortunately it also where we had to end the game as Alasdair, our host is moving house shortly and his armies need to be carefully packed away pending the arrival of the removal men.  So this will be the last appearance  of his magnificent SYW collection along with the Schleswig-Holstein collection and many others.  Alasdair will be beginning his own blog once he settles into his new home and I will provide a link at that time.  Over the next few weeks I will add a page to the Gallery with photos from the SYW battles we have had over the years.

Here is a photo of the three of us prior to that final nights gaming.

Monday, 22 October 2012

Lobositz

Our group played this scenario a couple of years ago  and it produced a really good game.  As Alasdair had done some more research, including visiting the area, it came to the table a second time.  The first time I had taken the part of the Prussians, this time, Steve drew the short straw as Fritz and I took the part of Lacy, with Alasdair taking the part of Von Browne, the Austrian commander.

The Prussian attack on the Lobosch now included four battalions of grenadiers, with a Frei korps battalion in support, plus a light gun.  The Austrian defenders were three units of Grenzer with a light gun.  I had ten battalions of line infantry to hold the position between the Lobosch and Lobositz with a light gun.  Lobositz itself had a garrison of three battalions and it was flanked by artillery.  To the rear of Lobositz was my sole cavalry unit.


Between Lobositz and the Model Bach Alasdair had four battalions of grenadiers and three units of heavy cavalry, supported by two units of dragoons and a unit of converged dragoon grenadiers. Further to the left were a further 12 battalions of infantry with a light gun and howitzer.  The village of Sullowitz had a garrison of light troops.

Most of the Prussian infantry were arriving opposite Lobositz, 16 battalions of line infantry plus, leading the way, three guards battalions.  The cavalry arrived to the right of the Homolka Hill which had the main Prussian battery on it.


The battle began with the Austrian heavy cavalry advancing to threaten the flank of Prussian infantry marching on Lobositz.  In doing so they came under fire from the guns on the Homolka.  Steve also advanced the infantry brigade supporting the guns and with their double action (courtesy of Koenig Kreig) the infantry fired a volley into the cavalry.  This diverted the Austrians attention from the Guards battalions and they charged the line infantry.  The right hand regiment of cavalry (Portugal) ignored the casualties inflicted by the volley as they closed on the infantry (2nd battalion Von Pannwitz) and drove them back with heavy loss.  However, their colleagues suffered more heavily from the infantry fire and stalled before the unbroken rank of bayonets presented by the 1st battalion of Von Pannwitz.  The supporting regiment was unable to move forward to exploit the gap opened by Portugal because the Buddenbrock Cuirassier regiment had by now appeared to their left. The Austrian cavalry had no choice but to fall back and they helped on their way by further volleys from the Prussian infantry.  This further disorganised them and they were destroyed as a fighting force by a devastating charge by Buddenbrock.


Meanwhile, Bevern's attack on the Lobosch was making progress.  Although his lead battalions had suffered casualties, the grenzers had been pushed back up the slopes and the Frei Korps troops were also moving forward, occupying the attention of one of the grenzer units.  Seeing the Prussian progress I had ordered two battalions from the reserve to support the grenzers on the Lobosch.  However my main preoccupation was the seemingly unstoppable progress of the Prussian guards.  Ignoring casualties from my artillery they were advancing on the battalions closest to Lobositz, seemingly with the intention of breaking the line and covering the flank of the main attack on the town.  They had a howitzer battery in support and its fire caused one battalion to fall back and then a second was forced back as it failed to stand when charged by a guard battalion.  This exposed the flank of my artillery and the crews ran just before the guns were overun.


My cavalry reserve, the Wurttemburg Guard Cavalry, came forward to challenge the Prussians, who had by now lost almost half their men.  Undaunted,  the Prussians fired a volley as my cavalry moved forward and this must have knocked the fight out of them, because they failed the morale test to charge home.  A second volley by the Guards caused my cavalry to rout.  However, this debacle had given time for me to get a Hungarian infantry battalion into position to oppose any further progress by the Prussian guard infantry.

Meanwhile on the Austrian left, Von Browne had been busy moving as many troops as he dared towards the centre to counter the the threat of the Prussian cavalry.  Opposite Lobositz, the main Prussian attack was forming up..

to be continued      

Friday, 2 March 2012

The Empire Strikes Back?

Our scenario this week was set in the Seven Years War, in the period following the battle of Kunersdorf. Frederick had rushed to try and make good the losses he had sustained in that battle and one source was the various 'satellite' armies in the west. The army of Prince Heinrich in Saxony had therefore been stripped of most of its regular troops. Seeing this, General Stahlberg, commanding the Reichs Armee decided the time was ripe for an invasion of Saxony, with the aim of capturing Dresden.

Alerted to the advance of the Reichs Armee, Prince Heinrich moved his troops to a position where he could contest the crossing of the Blau Wasser and block a move on Dresden. He had two brigades of fusiliers (8 battalions,) one battalion of Frei Korps jaegers, one battalion of grenadiers, two light guns and a brigade of cavalry consisting of a regiment of dragoons and one of Hussars.

The Reichs Armee had 14 battalions of line infantry, two battalions of grenadiers, a regiment of cuirassier and one of dragoons and one heavy and one light gun. As he neared the Blau Wasser the only Prussian unit Stahlberg could see was a light gun which covered the only bridge over the river. What he could not see was a brigade of fusiliers behind the Church hill to his left flank and the cavalry and remaining fusiliers behind the woods behind the light gun. The Prussian grenadiers were in the village of Brunhof which lay just beyond the woods. Prince Heinrich's jaegers were in the broken ground to the Prussian right of the bridge.


Uncertain of the fordability of the river Stahlberg advanced his cavalry on his right together with a brigade of infantry and one battalion of grenadiers. The artillery advanced up the road with a view to taking up position either side of the bridge to support any crossing. To the Reichs Armee left a brigade of foot plus the second grenadier battalion moved forward, hoping to cross the river and then secure the church. The remaining six battalions would march straight up the road.


Reacting to the Stahlberg's manoeuvres, Prince Heinrich ordered his cavalry forward to oppose the enemy horse should they cross the Blau Wasser. He also sent a courier to the infantry on his right with orders to contain any forces which crossed in the vicinity of the church hill. Orders were also sent to the colonel of grenadiers to bring his battalion forward to support the light gun covering the bridge. Meanwhile, the lead elements of the Reichs Armee reported back to Stahlberg that the Blau Wasser was fordable and he gave the order for the advance to continue. The river was fordable, but with more difficulty than expected and as the Reichs Armee heavy cavalry formed up on the Prussian side they were charged by the Prussian dragoons. Caught at a disadvantage, they were quickly bundled back across the river. The Prussian cavalry reined in, reformed and waited for further enemy pushes.

Over on the Reichs Armee right the infantry were crossing unopposed, the Prussian fusiliers only now moving into position. However, the Reichs Armee infantry were placing themselves in a loop of the river with insufficient room to deploy. By now Stahlberg was supervising the deployment of his artillery, the heavy gun to the left and light gun to the right of the bridge. The light gun was in range of the rifle armed Frei Korps jaeger ensconced in the broken ground. The bullets were soon zipping round the ears of the crew and not a few were becoming casualties. The first Reichs Armee battalions were now crossing the bridge, straight into canister range from the Prussian light gun. The front ranks of the column dissolved into chaos under the artillery fire and the green troops broke and ran back over the bridge. Undeterred, a second battalion advanced only to receive the same treatment. However, they were made of sterner stuff and continued on up the road. Ignoring a second round of canister they charged the gun, if they captured this, the road to Dresden was open. The Prussian grenadiers were only just getting into position to support the gun and could not intervene. Prince Heinrich was saved by the alertness of the Hussar colonel who moved his men forward to attack the flank of the Imperial infantry. Caught unawares the infantry had no chance and were driven back in short order.


On his right, desperate to establish a bridgehead on the far bank of the river, Stahlberg pushed forward a battalion of grenadiers. As they struggled to reform,they were charged by the dragoons. A volley emptied a few saddles, but could not stop the Prussian horsemen. Although they fought bravely, the grenadiers were pushed back, again the dragoons reined in and reformed. However, they were now in range of the Imperial artillery and the guns soon began to inflict casualties.
Aware of the limited cavalry resources available, the dragoon colonel pulled his men back from the river. Once out of range he reformed his ranks, but his retreat had given time for a brigade of Imperial infantry to cross and also the reformed regiment of cuirassier. Once again the dragoons charged and once again the cuirassier were defeated. The colonel was a casualty in the melee and as the remaining officers tried to restore order the Imperial infantry exacted some revenge for the defeat of the grenadiers by firing a telling volley. With the increasing casualties (over 60%) the dragoons fell back and took no further part in the action.

The crisis of the action was now approaching. The Prussian centre was struggling to 'keep the cork in the bottle' and push back any Imperial attacks across the bridge. The left flank infantry brigade, although undamaged now faced attacks by up to 6 battalions of infantry with cavalry support. Only on the Prussian right were matters secure. The brigade there was holding its ground and had driven two battalions back with c30% casualties.

Prince Heinrich ordered the Hussars to charge the flank of the Imperial infantry moving against the central light battery. This they did with valour, but a steady volley halted them in their tracks and a second drove them back. To restore the line, the grenadiers moved forward. To their left, the Imperial cavalry commander saw an opportunity to attack the grenadiers flank and ordered his men forward.


Fortunately for the grenadiers the Hussar colonel had reformed his men and although outnumbered by the heavy cavalry moved to support the grenadiers. Their attention focused on the grenadiers the dragoons were surprised by the hussar charge. The right flank slowed, uncertain which unit to attack and indecision changed to consternation as the Prussians closed. Unwilling to stand and fight, the Imperial cavalry broke and ran.

Stahlberg recognised that the day had gone against him. He ordered his units to fall back and make camp for the night. Prince Heinrich, although the victor realised that he would have to fall back towards Dresden. He was still outnumbered and now short of ammunition. However, his fusiliers, often derided as second class had stood their ground and won a victory. Morale was high.

The scenario was fought using the Koenig Kreig rules and Prince Heinrich had a +2 for initiative. This gave him a big advantage in either taking advantage of firing first, or requesting Stahlberg to move and then reacting to the Imperial moves. Stahlberg was not helped by having a truly dreadful run of dice. Both sides had 2nd rate line units, but the requirement for the Imperial troops to attack always ceded the first volley to the Prussians.

Sunday, 29 January 2012

Paltzig

Well, this week we managed to finish off the battle of Paltzig and a bloody affair it was too. The background can be found on the Kronoskaf site.
Wedel had taken over command of the Prussian army from Dohna, who was considered too passive by Frederick. The King's instructions to Wedel were simple, attack, attack, attack! Unfortunately, neither appreciated the fact that the Russian army, commanded by Saltykov was at least twice the size of their own and had an even bigger advantage in artillery.


An attack on the Prussian centre was impractical. A marshy stream barred the advance and was crossed by a single bridge. This bridge was covered by artillery in a redoubt and three brigades of infantry. Wedel decided to move to his left and attack the Russian flank. Saltykov had anticipated such a move and had concentrated his artillery and grenadiers to block the Prussian attack. A further handicap for Wedel was that his artillery were not well placed to support his attack, being
positioned in the centre. Nevertheless, with his king's orders in his pocket Wedel ordered the attack and the brigades of Manteuffel and Hulsen moved forward flanked by grenadier battalions. Behind them the cavalry formed up to cover the infantry's flank and the infantry reserve under Flemming took up position in the rear.
The Prussian infantry soon came under artillery fire, but pushed on in spite of the losses. As they neared the low ridge on which the Russian artillery were placed the fire slackened, but only because the Russian grenadiers were in the way. Now it was musketry volleys which plagued the determined Prussian infantry. However, the accuracy of the grenadiers' fire was not to the liking of their generals; the Prussians halted dressed their ranks and returned the compliment, causing heavy casualties amongst their opponents.


In the centre the Prussian artillery had had some success against the Russian infantry, causing battalions to retreat because of casualties. Saltykov saw that the Prussians were bringing forward their howitzer battery to assist the infantry attack and decided to counter this threat with one of his Pandour units. The central Russian artillery battery gave assistance by targeting the weak brigade supporting the Prussian guns. This comprised garrison and Frei Korps troops and they quickly demonstrated that they had no appetite for standing under artillery fire and fell back to the lee of the ridge in the Prussian centre. This left the howitzer battery vulnerable to sniping fire from the Pandours, but fortunately the gunners spotted the threat and managed to drive off the Russians with a salvo of grape. After this events in the centre were limited to exchanges of artillery fire.

Seeing the Prussian attack develop, Saltykov began to move troops to his right, particularly his cavalry as the Cossacks and Hussars originally stationed on that flank were over-matched by the Prussian dragoons and cuirassiers now advancing towards them. In the van were the von Schorlemmer (or Porcelain) Dragoons. The Russian light cavalry did an excellent job slowing the Prussian advance and just in time the lead regiment of Russian horse grenadiers moved into the line covering the flank of the grenadier brigade. This marked the 'high water mark' of the Prussian advance. Against the odds the Prussian infantry were gaining the upper hand over the Russian grenadiers, though at fearful cost. One of the Russian Observation Corps regiments had been driven off by the right flanking Prussian grenadier battalion and a battered battalion of the Itzenplitz regiment was taking on the artillery fusiliers who were the last line of defence for the Russian batteries.


The Horse Grenadiers and Dragoons smashed into each other and the Prussians lived up to their nickname, being broken and fleeing to the rear. A second regiment of dragoons tried their luck, but they too were trampled underfoot by the Russians. The cuirassiers fared no better, they were also defeated and had to retire to reform. Von Schmettau and Von Normann struggled to cobble together forces to oppose the seemingly invincible Horse Grenadiers; it was vital to try and hold the ground in order to protect the infantry. Eventually, perhaps more by good luck than management, the Von Buddenbrock Cuirassier managed to attack the flank of the Horse Grenadiers and drive them off. However, there was not time to celebrate, as Buddenbrock were in their turn hit in flank by a supporting Russian Dragoon regiment.

Wedel could see the remnants of his infantry attack falling back off the ridge; he sent an aide requesting Von Flemming to advance to support the attack. It was too late, Manteuffel and Hulsen between them had only four battered battalions in the line and these were under strength. The final Prussian cavalry units were driven from the field by the Russian reserve cavalry and a fresh unit of Horse Grenadiers charged Von Flemming's line. One of his battalions broke and the cavalry surged through. Ahead lay the broken Prussian infantry units heading for the pontoon bridge across the marshy stream, all was lost for the Prussian army. Those units which could closed ranks and slowly moved off the field. For Alt Dohna, still fighting the grenadiers there was no escape, the cossacks saw to that.


The Prussians also lost their general. Wedel, waiting for the supports saw some infantry moving towards him from the ridge. He moved to rally them and was taken prisoner by the Pandours he had mistaken for Prussians.
At supper that evening with his victorious opponent he confided that "war is a horrid business, but murder is a good deal worse and that is what my orders today amounted to".