Sunday 26 July 2020

Clifton Moor reprise

This week Steve and I made our first foray into gaming in person since the lockdown was implemented back in March.   Naturally we aimed to abide by the social distancing requirements; the table was set up in Steve's garage and the choice of Clifton Moor, (one of our show participation games) was so we could each use our own figures.  In addition, I brought my own dice, ruler and refreshments and we kept at least 2 metres apart at all times.

Our lockdown compliant set up
   
The original plan had been to have the game out in the garden, but true to form, the British weather intervened and the garage had to be used.  That being said, with both doors open there was plenty of fresh air.

As usual we used our in-house version of"Lion Rampant" for the game and before long the nice straight lines of the initial deployment began to disintegrate.  The scenariio was a fictional dispute between the Lowther and Strickland families; I was in command of the Lowther force and my left wing was particularly slow in getting forward.  The Strickland centre battle was making good progress and I committed my unit of mounted sergeants in a mistaken belief that it would make short work of the enemy spearmen.

Lowther attacks

Sadly, I was to be disappointed.  The spearmen prevailed, reducing my segeants to half strength and then continued to force them to retreat for the next 4 moves.  The left made good progress, but the men at arms I had sent to reinforce them performed badly.  They were soundly defeated by a unit of billmen and only survived because the billmen failed to follow up.  My men at arms were saved by the levy archers who whittled down the billmen's strength sufficiently for them to fail their courage test and flee.

By now Strickland's right was struggling and my left wing units which had been reluctant to move,  decided to act.  The wing commander, plus a unit of spears turned their flank and moved towards the centre.

Lowther's flank attack closes in on the enemy centre

Their intervention was needed because my centre was in a parlous state.  It's strongest unit had been reduced to half strength and two more, even more battered, were edging back towards the base line, on the brink of fleeing.

Pressure increases on the Lowther right

However,Strickland's losses had been heavy, over half his units had fled and the remainder of his force was in danger of being surrounded.  Lowther was declared the victor, but it had been very close, only some very lucky dice rolls had kept my much reduced units on the field.

As an experiment, this 'distanced' game worked well.  It was definitely an improvement on our Skype games. Being able to see the game in front of you, rather than via a camera enabled you to see distances and angles far better.  Also, the communication between Steve and myself was much better, with no delay due to the whims of the internet connection.  I appreciate that this sort of set up will not be possible for everyone and increasing the participants would also increase problems with distancing, figures, dice etc.  


Sunday 19 July 2020

An encounter battle for the Grand Alliance, using Pike and Shotte

For our Skype game this week I thought I would try something a little different.   A couple of days before the game I allocated Steve and myself the following forces, 2 brigades of infantry (8 battalions), 1 brigade of cavalry (4 regiments) and a medium gun.  Prior to the game we each set out our order of march and rolled one dice for each brigade of infantry.

1 or 2 lose a battalion

3 or 4 stay the same

5 or 6 gain a unit

For the cavalry, roll a dice for each unit within the brigade

1 or 2  Unit is small size

3 - 6    Unit is standard size

For the placement of the terrain I turned to the late Stuart Asquith's book on Solo Wargaming.  On the afternoon before the game I rolled dice to see where the terrain would be and then sent a photo to Steve.  Each of us therefore only had a few hours to think of a plan before the action started.  Of course that plan would go out of the window once we began to roll dice!


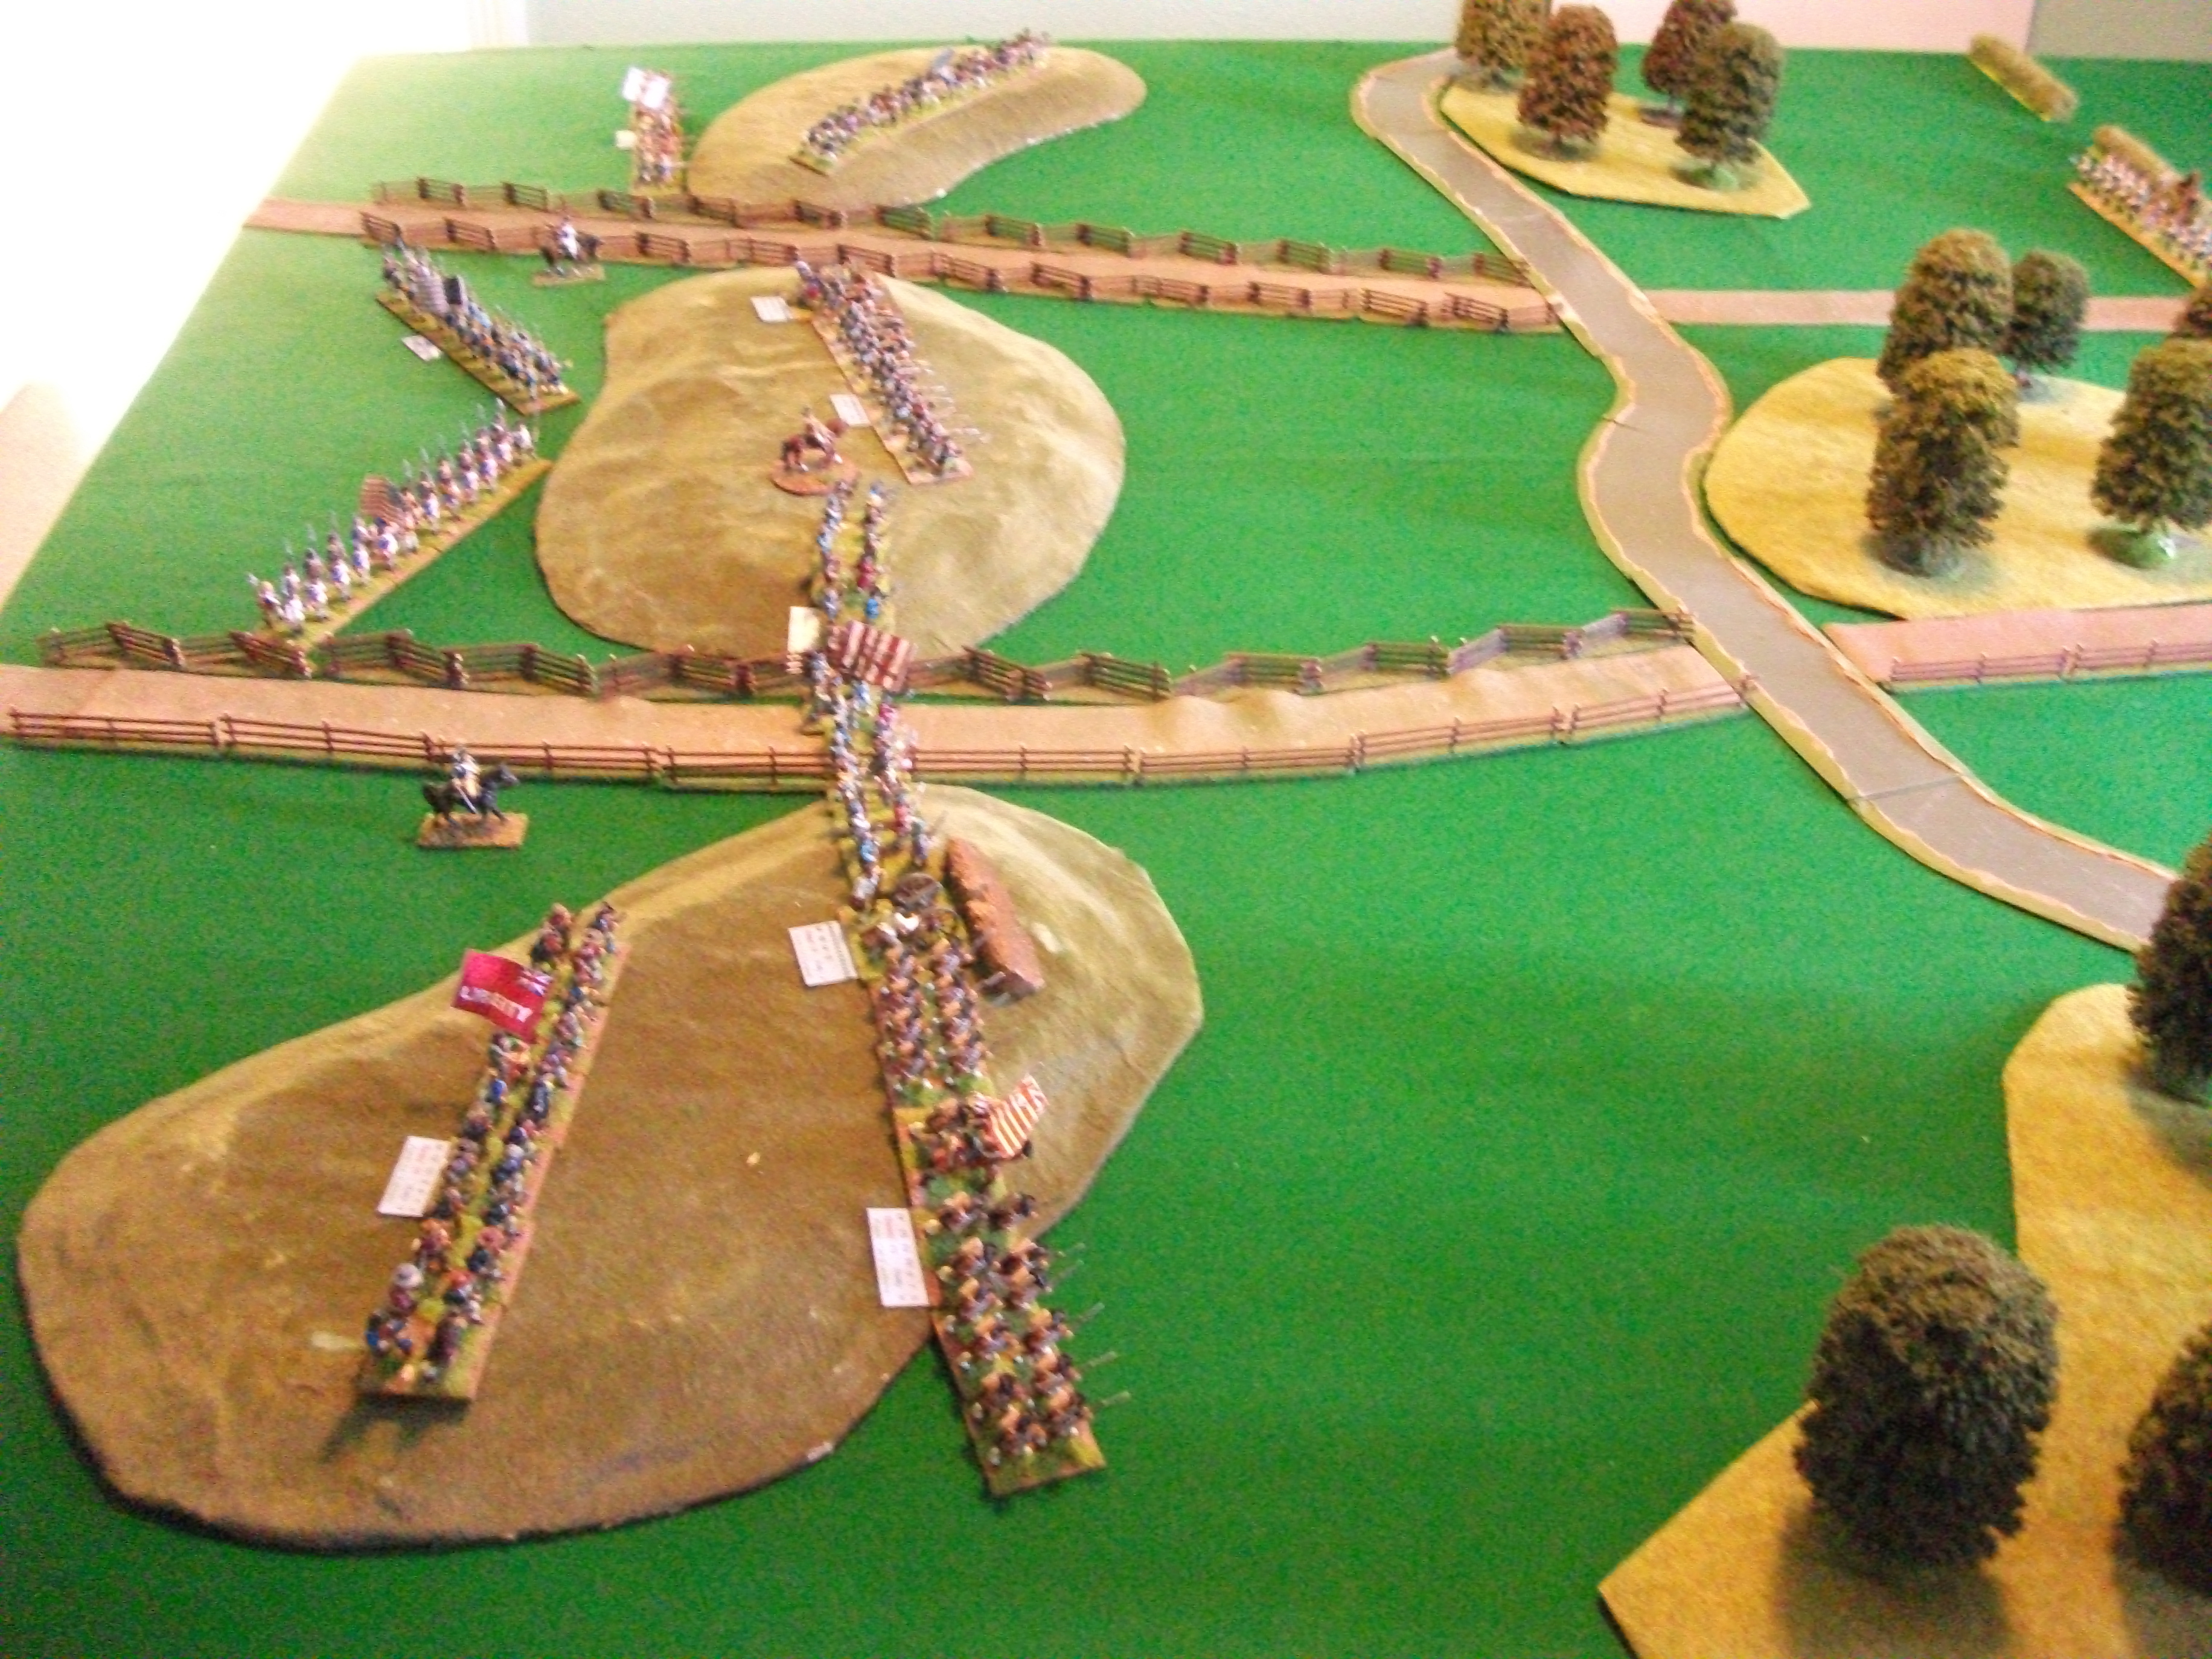
 The terrain over which the battle would be fought, viewed from the French side.  The Comte de Salle Forde would attempt to march off the far end of the table along the road to the right.  Graf von Grommit would attempt to do the opposite.  The stream (other than at the road) is fordable for all except artillery.

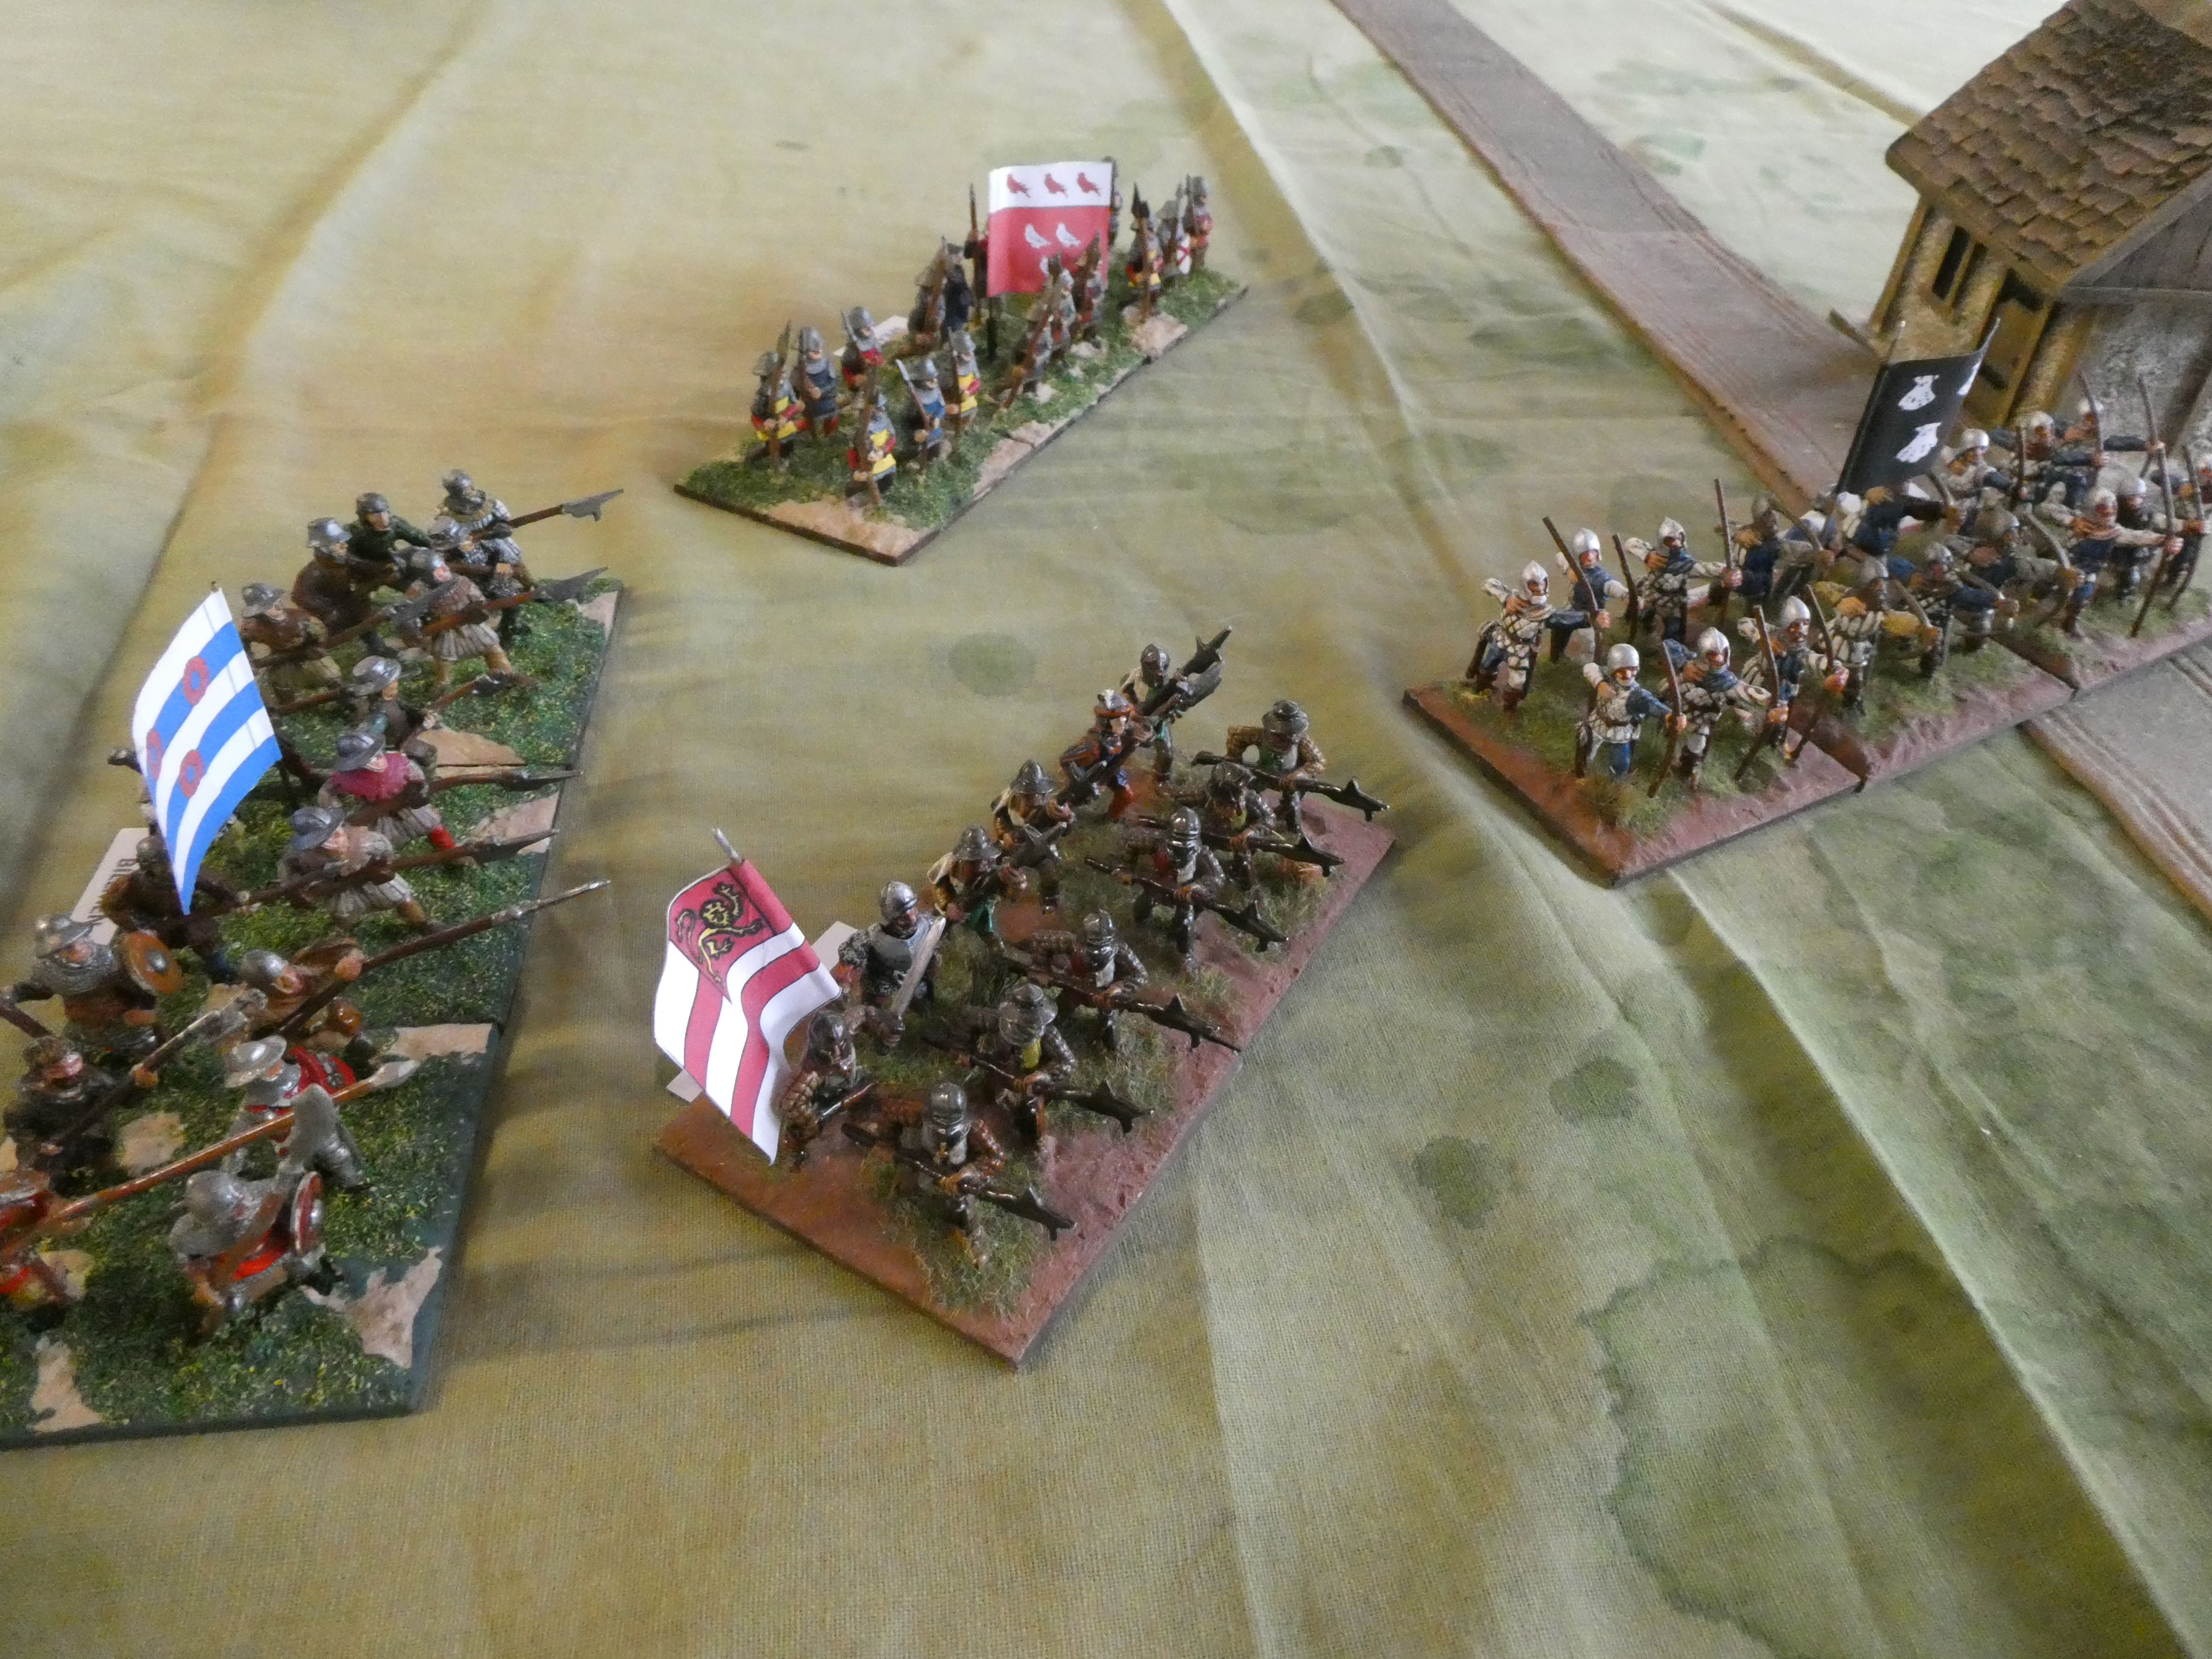
Both commanders opted to lead their columns with cavalry, (2 units for the Allies and 3 for the French), intent on attempting to prevent any interference with the advance of the infantry.

The two cavalry vanguards advance
The Comte marched with the infantry, leaving the cavalry brigade commander to take charge of the vanguard.  Meanwhile, von Grommit decided today would be the day he would accompany the vanguard, leaving the cavalry brigade commander to take care of the rearguard.  At first, von Grommit kept to the road, but he then saw the French cavalry making for the low hill to his right.  Momentarily forgetting he was commanding cavalry, he gave the order "prepare to receive horse" which somewhat confused the allied troops.  Fortunately, the regiments of Fugger and Erbach were able to form line before the French cavalry charged home.

The Ciurassier du Roi charge Fugger

Fugger were unable to stand against the French charge and had to fall back, the Cuirassier followed up and a second melee took place.  This exchange was very one-sided.  The Allied cavalry, already weakened, were broken and driven from the field 


Erbach were tussling with regiment Aubusson.  Their cause was not helped by the disorder inflicted by a volley from the Languedoc infantry regiment which the Chevalier d'Ecoles had brought forward. 


They too were bested and fell back to try and re-organise.  Unfortunately for them, Aubusson swept forward and caught them before they could rally.  Another brief clash and the second Allied cavalry regiment fled from the field.

The position just before the destruction of the Allied cavalry vanguard

Somewhat bemused by this rapid change of fortune, von Grommit looked for the supporting Hessian  infantry brigade of von Stalheim.  The advance of the Hessian infantry had been somewhat disjointed. No clear orders had been received, only a general instruction to advance along the road.  Slow progress by the lead unit had meant slow progress for all and eventually von Stalheim had decided to speed progress by taking some units off the road and across country.  However, the decision had taken too long.  By the time the infantry tried to advance they found the cavalry melee on top of them and once their cavalry had routed they could only stand to face the enemy horse.

A rough line was established on the hill, but the right flank was open and the Palatinate regiment had to turn to face the Cuirassier.  d'Ecoles' infantry was now pressing forward.  In the lead were Languedoc and to it's right, Rouergue, with Toulouse and d'Humieres following. Rouergue came under fire from both Erbprinz and Lowenstein and due to heavy casualties its ranks began to waver.  Sensing an opportunity, the commander of Erbprinz  ordered a charge.  In spite of its casualties the French unit fired a good volley at their attackers, inflicting significant loss.  Perhaps disheartened by this, the attack was not pressed home with vigour and the French infantry prevailed.

As Erbprinz routed back they were charged by  Aubusson and driven from the field, pushing through their support unit, Wartensleben in the process.

Rouergue rout Erbprinz

Aubusson complete the destruction


To the right of Erbprinz, Lowenstein were in a desperate struggle of their own.  They had been charged by the cavalry regiment Talmont and were struggling to hold their ground.  Slowly the cavalry began to break up the infantry formation and then the dam burst and the Hessians routed.

Lowenstein rout

On the crest of the hill von Grommit and von Stalheim surveyed the scene.  Wartensleben and Palatinate were desperately trying to hold back the French cavalry.  The only reserve available at the moment was the combined grenadier battalion.  The remainder of the infantry and cavalry plus the artillery were snarled up on the road, struggling against troops routed from the field.  There was only one option, von Stalheim would have to buy what time he could, while von Grommit took charge of the retreat of the remainder of the allied force.  Truly a day to forget.

This was just one of those games that occur from time to time when the dice dictate lady luck deserts one side totally.  Von Grommit rolled high dice when he wanted to move and low dice when he was in combat; the exact opposite of what was required.  Nevertheless, Steve and I had a good laugh about it and no doubt, if we played the game again, events would pan out differently.  The random terrain and adjustments to troop numbers seemed to work well and could feature in future games.


Wednesday 15 July 2020

Jabat Urrq - a Sudan scenario

This week we return to the Sudan.  The background to the scenario is that the Egyptian command have sent out a sizeable force to try and capture the rebel leader Makkan Ali.  This individual has been responsible for several hit and run raids on border posts and supply columns over recent months and become a thorough nuisance.  On the basis of supposedly reliable intelligence a force under Mehmet Bey had been sent to capture Makkan Ali.  For the last two weeks the Egyptians had followed one lead after another, never even seeing the rebel force, let alone capturing Ali.  Their trail has led them to the isolated village of Jabat Urrq, where once again they have come up empty-handed.  With supplies dwindling, Mehmet Bey has decided that they will now head back to base in the morning

As dawn broke a message came to the village from the scout posted on a nearby hill, a large cloud of dust was approaching from the south.   A second report came in from another scout that a large force of infantry were approaching from the south east. Orders were issued to rouse the men and prepare to defend the village.

A general view of the table, with the Dervish attack developing
.  
It quickly became apparent that the force approaching from the south was a mass of cavalry.  The scout determined that there were at least 4 units heading his way and turned to get back to the village as fast as his rather weary mount could manage.  This wasn't quickly enough.  The Dervish cavalry commander was determined to retain the initiative and attack the village before the defence was set.  Sweeping forward, the leading unit of cavalry flowed over the hill and towards Jabat Urrq, catching the unlucky scout just as he reached the outskirts of the village. 

The scout is caught
With the speed of attack there was no fire from the Egyptian infantry as they were still getting into position.  Sensing a quick victory, the Dervish cavalry swept into the square.  Here they found a unit of Egyptian cavalry ready to oppose them.  In no time, the centre of the village became a mass cavalry melee.

The Egyptians drive off the Dervish cavalry

The speed of the leading unit had left the remainder of the Dervish cavalry a long way behind.  Makkan Ali decided not to send further units straight forward as Egyptian infantry could now be seen manning the village walls.  Instead he directed them to move west, behind the hills and approach Jabat Urrq from the west.  The Ansar, which were approaching from the south east had also disposed of a scout and now the leading unit surged towards the walls of the village.  They came under rifle and artillery fire, but still got to the walls; but once again they had outrun their supports and on their own they were too weak to break into the village.  As the Ansar retreated the Egyptian infantry manning that section of the defences sent desperate pleas for more ammunition as supplies were dwindling rapidly.  In addition the artillery had also expended almost all their available ammunition and required re-supply.  Fortunately for the defenders, the remaining Ansar units would take some time to come forward and so fighting on this front died away.

The first Ansar attack thrown back


Dervish cavalry moving to the left, while the first Ansar attack on the south east goes in

In the village the cavalry melee continued.  Mehmet Ali saw that his first unit of cavalry was wavering and sent in a second unit to reinforce it.  These fresh troopers arrived in the nick of time, as the first unit broke and routed.  The Dervish cavalry had suffered heavy losses themselves and the charge by the fresh Egyptian cavalry proved too much.  They too routed, fleeing back over the hill, where Makkan Ali rallied them.  Mehmet Ali had sent his third cavalry unit, of Bashi Bazouks, to the east to counter the advance of the Ansar.  A report then came in from a third scout, who had seen the remaining Dervish cavalry heading west towards him and had returned to the village.  With the infantry now holding the perimeter of the village, Mehmet Ali now sent the second cavalry unit over to the west to cover access from that direction.

The Ansar riflemen on the central hill

Makkan Ali was also experiencing some problems.  He had wanted the Ansar riflemen to take up a position on the central hill, from where they could fire at the defenders of the southern face of the village.  Orders had been confused and the riflemen had strayed into broken terrain, slowing their advance.  As their leaders shouted at them to get going quickly, the men surged forward, but advanced too far.  They left the hill and charged the village.  Fire from the defenders stopped them in their tracks and they retreated back to the hill to rally.

The cavalry 'right hook' was also hitting problems.  Once again a coordinated advance proved beyond the Dervish cavalry.  Instead of keeping behind the hills one unit strayed onto the summit of one and immediately came under fire from the Egyptian machine gun.  Reeling from its losses it swerved left and blocked the advance of another unit, leaving the leading unit on its own.  Undeterred,  they continued and were met by the Egyptian cavalry.  The ensuing  melee was an even fight, with both sides losing heavily, but it was the Dervish who cracked first and had to retreat.

The decisive attack on the south east corner of the village

Mehmet Ali was feeling quite positive.  He had repelled two infantry attacks and the regular cavalry had also performed well.  The Bashi Bazouks had been forced back by the Ansar, but at least all the infantry and artillery were now well supplied with ammunition.   Then news came from the eastern wall, more Dervish infantry were approaching.  With the Ansar preparing to advance against the south east corner of the village once again, the defences were really stretched. He couldn't pull infantry from other sectors because there were several units of Dervish cavalry just waiting for gaps to appear.  Indeed the machine gun was busy firing at one unit trying to keep it at a distance.

A wave of Beja infantry surged towards the walls of Jabat Urrq.  Another Ansar attack had already gone forward.  The Egyptian artillery and infantry did their best but could not stop the attacks.  First to break were the artillery crew, the few survivors heading towards the centre of the village.  To their right the Egyptian infantry wavered and then broke, a wave of Ansar flowing over the defences into the village.  With his left crumbling, Mehmet Ali had to order the remainder of his force to retreat.  The remains of his cavalry were to try and hold back the Dervishes long enough for the Egyptians to escape.

The final attack

An enjoyable scenario, where I played the Dervish for a change.  It certainly presented a challenge after becoming used to the more predictable behaviour  of the Imperial troops.

Sunday 12 July 2020

Boldon Hill; an ECW scenario

This week's game is based on the Battle of Boldon Hill scenario available for the In Deo Veritas rules written by Philip Garton and sold by Helion (link).   Set in 1644, the action represents the attempts by the Marquis of Newcastle to disrupt the siege of Sunderland by the Scottish Covenanter army.  He pushed forward a small force to threaten the supply lines for the besiegers and the Scots sent troops to counter this.  The action at Boldon was a result.

The scenario gives two options one with a fairly open terrain, a second where the Royalist forces have the benefit of a couple of enclosures near the village of Boldon.  I chose the second option, but in either case the objective is control of the road passing through Boldon.  In the scenario the Scots have more infantry, the Royalists an advantage in cavalry, giving the Scots the decision of how much infantry to devote to cavalry support whilst maintaining sufficient force to carry the enclosures and village and thus secure the supply lines.

Both commanders deployed their cavalry on the more open terrain, leaving the infantry to contest for control of the enclosures.

The battle started with a Royalist cavalry advance, not as rapid or co-ordinated as would have been wished, but at least taking the fight to the Scots.  Indeed one unit advanced further than was prudent and suffered quite heavy casualties from musketry fire.

The Scots infantry support their cavalry

Therefore, when charged by the Scottish cavalry the Royalists were defeated, but managed to inflict sufficient casualties on their opponents to prevent them following up their victory.  As more cavalry units entered the fray the action swayed back and forth, both sides gaining an advantage only to be driven back by counterattacks.

The Scots infantry were now nearing the enclosures.  The defenders fired one volley which caused some losses and disorder but did not prevent the Scots charging home.  A closing volley caused more casualties among the attackers and they were unable to make any progress in the ensuing melee; both being driven back in considerable disorder. 


The first attack on the enclosures

The first attack repelled

However, there was no time for the Royalists to celebrate, before they could recover from their efforts the second line of Scottish infantry charged home and the battle for the enclosures resumed.  This attack proved more successful for the Scots and one of the defending units was routed, eventually rallying in Boldon village.

The Royalists rout

Unwilling to advance further until support arrived the Scottish infantry halted, contenting itself by firing volleys into the rallying Royalists.

The cavalry battle seemed to be moving in favour of the Scots.  One unit of Royalists had been routed and almost driven from the field, another was being driven back by the remorseless advance of a unit of infantry supported by the light gun.

One of the Royalist cavalry units rout
Just in time, the Royalist reserve infantry unit came into action.  It had originally been positioned in the village, but the developing crisis on the Royalist right had resulted in it being moved there.  Once in position it began to fire at the Scots infantry unit supporting the cavalry and forced it to the new threat.  As the Scots manoeuvred the Royalists were given the order to charge.  Somehow the order was not received.  It was issued a second time, but once again nothing happened.  By this time the opportunity had been lost and a devastating volley from the Scots infantry was enough to disorder the Royalists.  A second volley, supported by fire from the light gun drove the remains of the unit from the field. 

An overview of the cavalry wing

Deprived of their infantry support, the Scottish cavalry had struggled.  One by one their units had been routed.  As the remnants attempted to rally in the rear of the field they could see their opponents advancing to deliver the coup de grace.  


One of the Scots units routs
 In the enclosures the balance seemed to be edging in favour of the Royalists.  The unit in Boldon had rallied and was getting the better of the musketry exchanges with their Scottish opponents.  In the other enclosure the Royalists had held another Scottish attack, but with the reserve unit routed their flank was now unsupported.

With his cavalry all but destroyed, the Scottish commander ordered his infantry to fall back to prevent them being enveloped by the Royalist cavalry.  For his part, the Royalist commander, although satisfied with his troops showing, realised he could not hold Boldon much longer.  When a messenger arrived with orders for him to pull back he was only too happy to comply.

A nice little scenario which played out well under the rather limited conditions imposed by having to game over Skype.  I upgraded the Scots cavalry from the values given in the "To Kill a King" supplement to Pike and Shotte, giving them the same factors as the Royalists.

Sunday 5 July 2020

A day to forget: the Highlanders at Rumport River

Another AWI action, appropriately enough the report is written up over the Independence Day weekend.  Steve devised this scenario based on the action on the Brandywine, but much reduced to cope with the limitations of the Skype games we are playing at the moment. Below is an overview of the battlefield.  Nearest the camera are the units of the Hessian brigade; on the left, under the command of Von Stalheim, the jaegers and the Musketeer regiment von Mirbach with a light gun.  On the other road, commanded by general Arbuthnot, are the Fusilier regiment von Lossberg and the Grenadier regiment von Rall.  Arbuthnot has sent the British brigade under Brigadier Collingwood on a flank march, which should arrive on the rebel/revolutionary left flank in 10 moves.  The Hessians are to fix the attention of the two enemy brigades facing them, preventing them from manoeuvring to meet the flank attack. 


To buy a little time, von Stalheim took great care over the precise positioning of his units, but eventually the Hessian advance began.  The rebel/revolutionary commander, Brigadier James Walter, had deployed his two brigades, Baker on his right and Adams to the left.  Both brigade commanders had opted to place their riflemen well forward, occupying the flanking woods, their militia units on the ridge and their continental regiments in reserve. 

The Hessian left prepares to advance


The rebel/revolutionary force await the Hessians

As the Hessains advanced their leading units came under fire from the riflemen.  Both the jager and von Lossberg suffered casualties and their return fire seemed to have little effect.  Von Stalheim ordered the Musketeers von Mirbach to move to the left and bring their fire onto the riflemen, hoping that this additional firepower would prove decisive.  On the Hessian right the Fusiliers von Lossberg opted to close the range, increasing the pressure on their tormentors.  This proved to be an effective tactic, a couple of close range volleys tore through the ranks of the riflemen and the survivors turned and ran back towards their own lines.

Adams' riflemen rout

With the riflemen out of the way, von Lossberg advanced towards the river with the grenadiers in support.  Once they reached the river they came under fire from the enemy artillery and the militia unit on the ridge facing them.  On the opposite flank, the riflemen were proving stubborn, it took several volleys and an advance by the Musketeer regiment von Mirbach to force them to flee.

von Mirbach force the riflemen to flee

This minor success was offset by the Hessian artillery taking a pounding from the rebel/revolutionary artillery on the ridge.  The guns had been advanced too far before being deployed and took quite a bit of damage before this error could be rectified.  However, once deployed the guns quickly found the range of the militia unit holding the road in front of them and inflicted some serious casualties.

General Arbuthnot noticed that the units on the ridge on the enemy left seemed to be deploying to face a flank attack, was this Collingwood?  If so, the British advance was aided by von Lossberg, whose volley caused the militia unit facing them to rout, leaving a solitary militia unit facing the oncoming British brigade.

The militia rout

With the light infantry leading the way, the British brigade entered the fray.  The gallant militia facing them were reluctant to give ground.  They traded volleys with the British light infantry and only fell back when Fraser's Highlanders began to move round their flank.  Collingwood had deployed the combined grenadier regiment to the right of the light infantry and they, with the field gun moved towards the road.  Walker had seen the extent of the British advance and resolved to move what troops he could to meet it.  Two continental regiments hastened to the left, leaving only militia to face von Stalheim.

Collingwood's advance

Any notion Arbuthnot had entertained of leading his Hessians forward to aid Collingwood evaporated when von Lossberg were crippled by a devastating volley from the enemy infantry on the central ridge.  The battered remnants fled, leaving only the grenadier regiment to maintain the Hessian position on the Royal right..


Von Stalheim was also experiencing problems.  Once the riflemen had been sent packing he ordered the jaeger and von Mirbach to advance across the river.  The jaeger, being in the open, came under fire from the entire rebel/revolutionary right.  Already weakened by losses incurred trying to drive back the riflemen, the jaeger routed.  At the same time, the enemy artillery fired again on the Hessian artillery, destroying it with a direct hit.


Walter moves his reserves to the left

The Hessian artillery is destroyed

Collingwood continued with his advance.  The light infantry had eventually forced the militia back to the fence lining the road.  Behind them, across the road two continental infantry regiments were deployed in support.  Spoiling for a fight, Fraser's charged the militia, ignoring a closing volley they charged home.  To the surprise of almost everyone present, the militia, lacking bayonets, stood their ground and managed to beat off the attack.  With the catcalls of the militia ringing in their ears the highlanders fell back.  

Fraser's are defeated and driven back by the militia

For their part, the grenadiers were suffering also.  Facing a continental infantry unit they fired a volley and advanced; only to be stopped in their tracks by the returning volley.   Collingwood's resolve was further weakened when an aide from Arbuthnot reached him, informing him that he could expect no assistance from the Hessians as the the brigade had suffered over 50% losses.  Preferring to keep his command intact, Collingwood ordered a withdrawal, covered by the light infantry.

For his part, Walter was content to hold his ground, the morale of his troops boosted by their victory.