Saturday 30 May 2020

Action during the Livonian campaign

Following on from the AWI last week, our more recent skype game features another collection which has been overlooked for some time, the 40mm semi flat GNW armies.

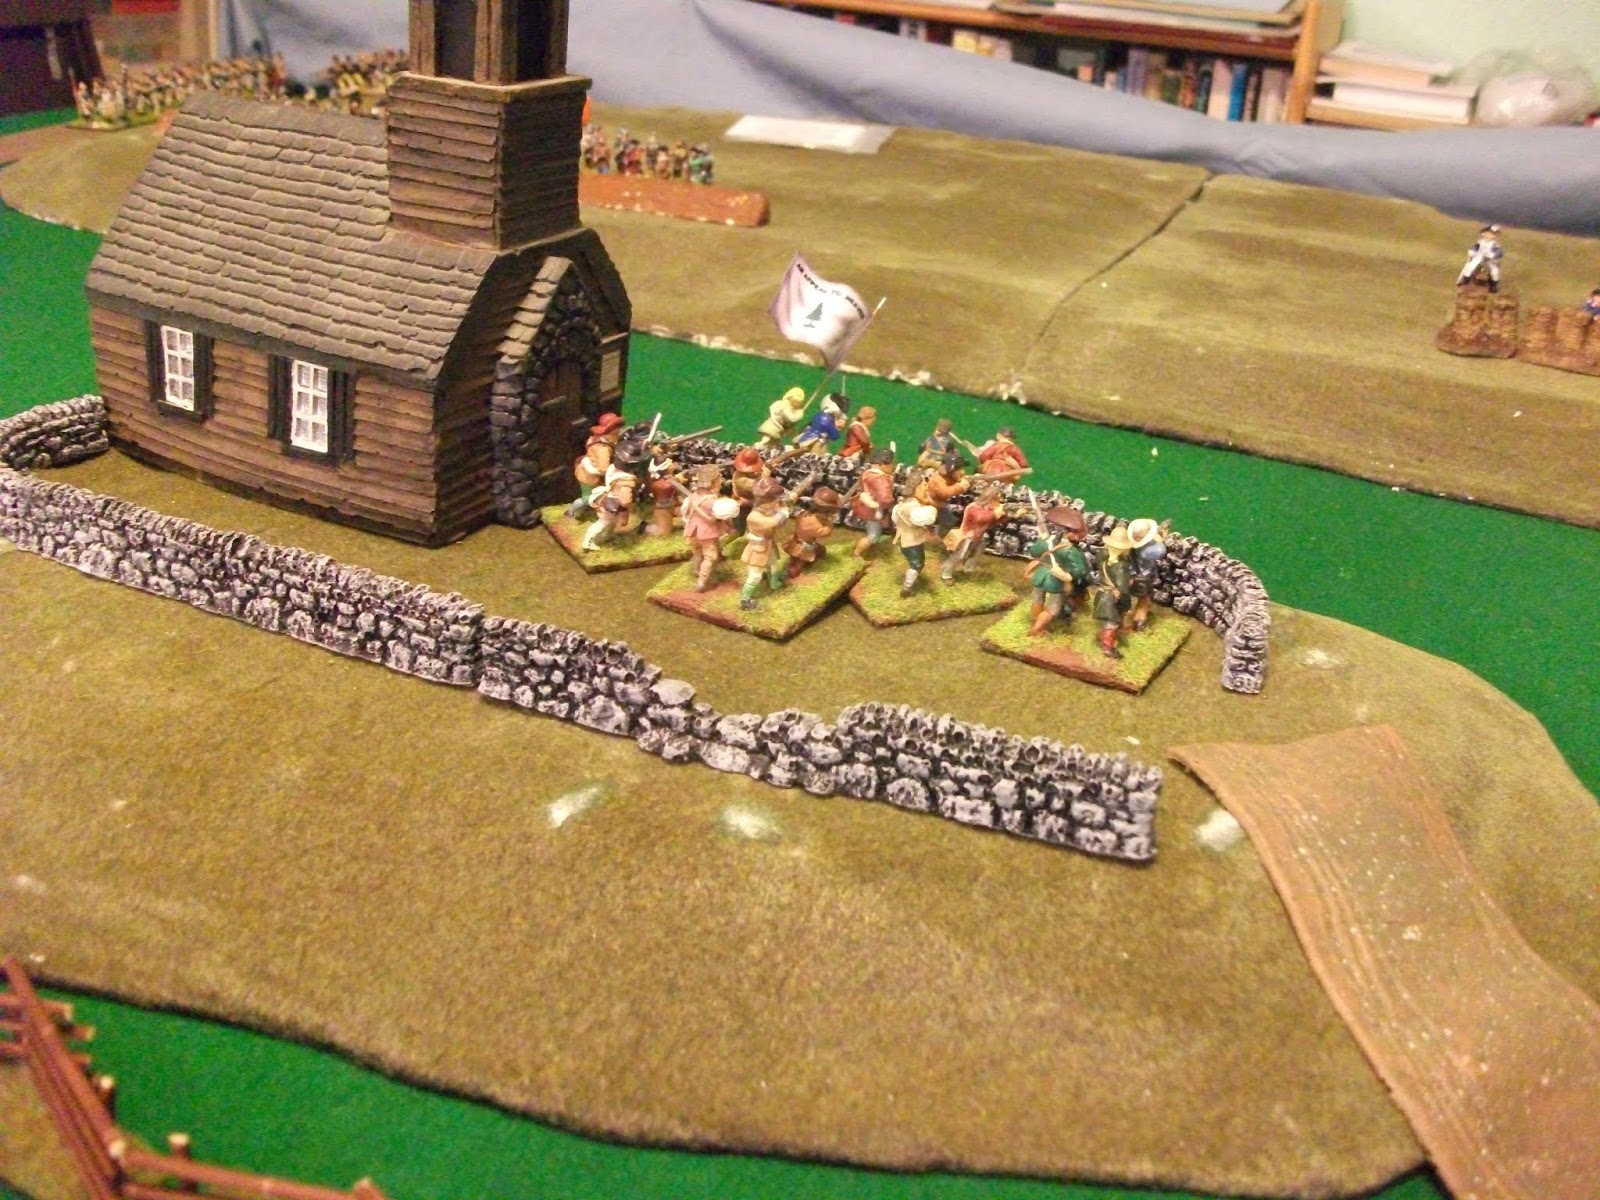
I set the scenario in the early years of the Great Northern War, meaning the Russians had some raw troops, (approximately 60% of the infantry and 50% of the cavalry), but made 25% of the Swedish infantry raw to balance things out a little.  A Swedish force commanded by General Axel Lindstrom has been carrying out operations to the east  of Riga and is now returning.  Russian forces are gathering to surround it and blocking the route west is General Shapishnikov's corps.  The Swedes need to break through the Russian force to avoid encirclement.

The initial deployment
I laid out the troops as shown in the photo above.  What cannot be seen are the two woods on the flanks, which narrowed the field.  Prior to the game I gave Steve the opportunity to redeploy his forces (the Swedes) if he wished.  He therefore massed all his cavalry on the right wing.


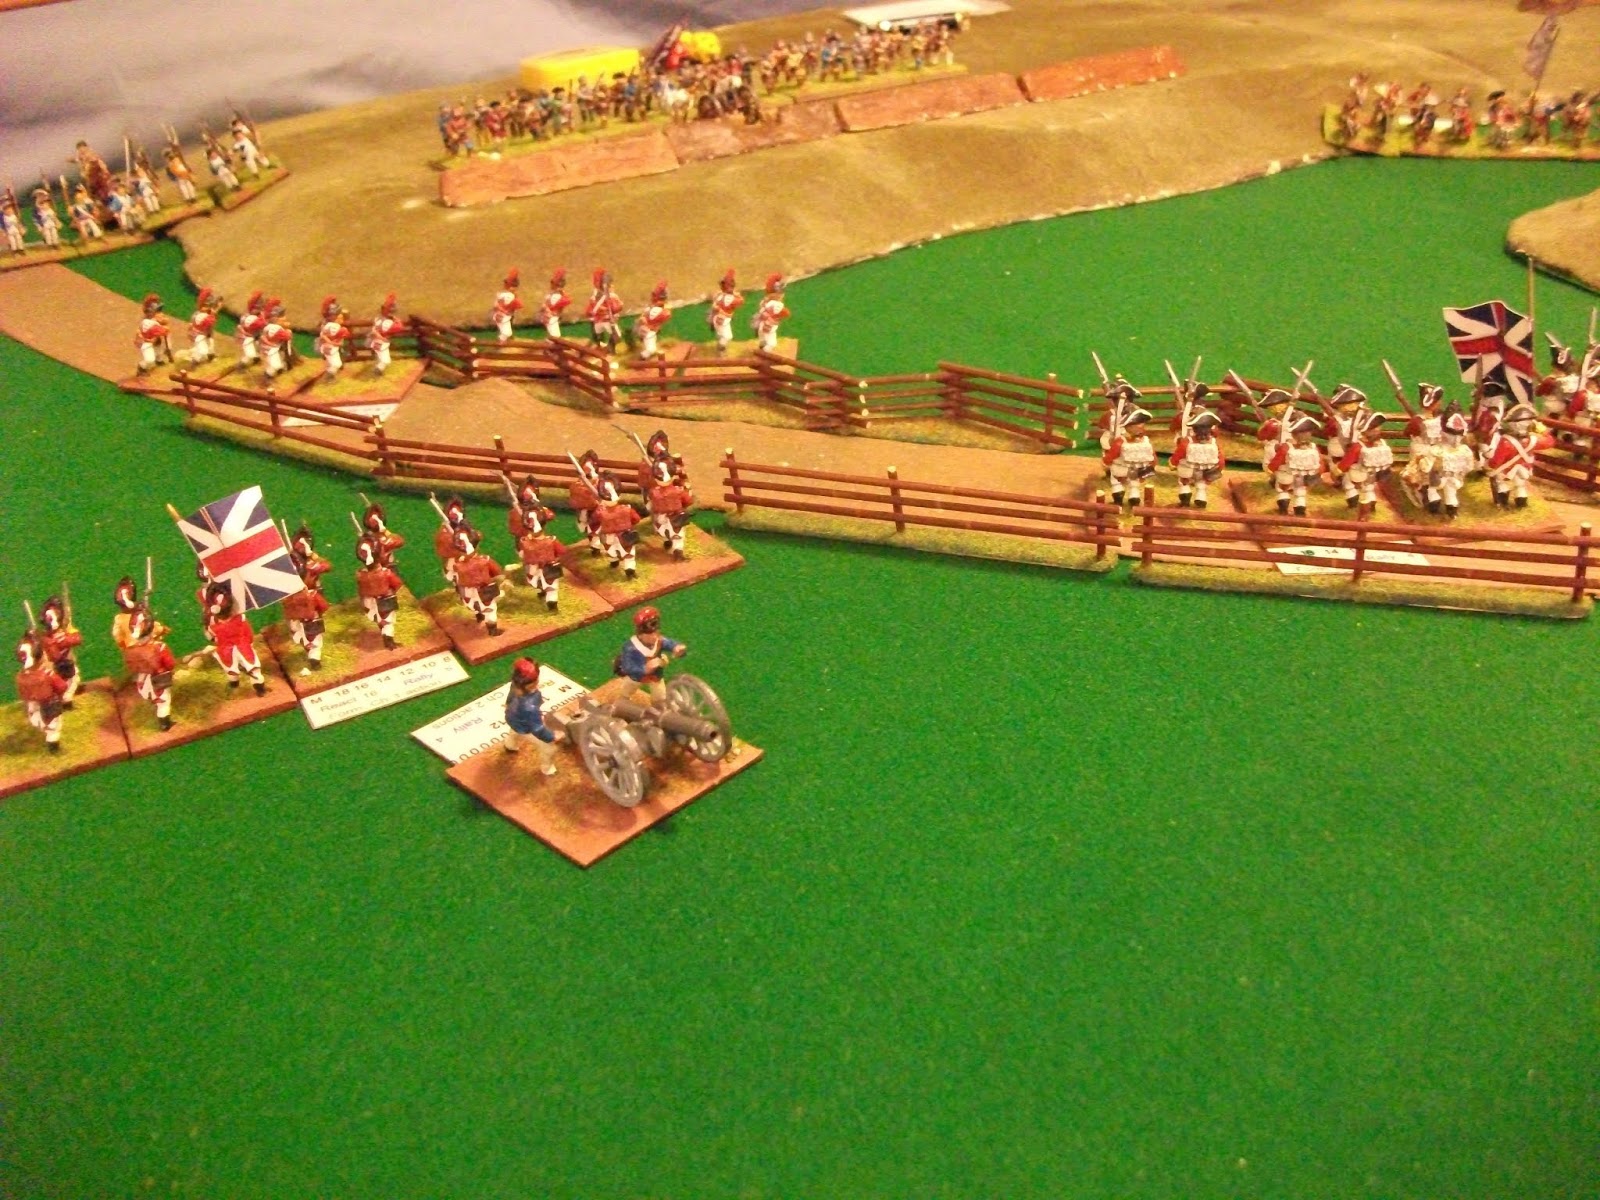
To the left of the cavalry were two brigades of  infantry, each of 4 battalions and a light gun.  The cavalry consisted of four regiments of cavalry in two brigades.

Shapishnikov also had two brigades of infantry, though these had 6 battalions each.  There were also 5 regiments of dragoons in two brigades, the weaker, (of only two regiments), being on his left flank.  In his centre he had two field guns.  

Shapishnikov's force

The Swedes had the initiative and began to advance, at least the infantry did,  the orders to the cavalry seem to go astray.  This gave the Russian left wing cavalry commander a chance to get more manoeuvring room.  As the Russian dragoons on the left swept forward, the commander of the adjacent infantry brigade began to redeploy to extend his front.  On the opposite flank, the Russian dragoons also advanced, hoping to pin the opposing Swedish infantry brigade back.

The proximity of the Russian dragoons seemed to galvanise the Swedish cavalry commander.  His leading brigade charged, eliciting a spirited counter charge from their opponents.  Brave as the Russians were they were unable to deal with the more experienced Swedish troopers and in no time at all they were streaming back in rout.

The Russian dragoons rout
Although defeated, the Russians had inflicted some casualties on their opponents, a delay in following up by the Swedes allowed one of the Russian dragoon units to rally and an infantry battalion to move up to the dragoon's flank to add some support.

On the opposite flank, the Russian dragoons had also advanced.  Their less experienced brigadier had allowed the units to become separated and their attack on the left hand Swedish infantry brigade went in piece meal.  With the garrison regiments in the rear, the experienced infantry leading the brigade dealt with the dragoon attack without any difficulty; driving the horsemen back in disorder.  However, although costly, the dragoon attack had forced the Swedish infantry to halt and this opened up a gap between them and the infantry brigade to their right.

The attack on the Swedish left
 This right hand brigade had advanced steadily and was now nearing the Russian lines.  As it did so the fire from the Russian guns became more effective, inflicting increasing casualties.  To their left the second brigade had to halt again as a second series of attacks were launched by the Russian dragoons.  Once again they failed to break the Swedish line, but again the advance was delayed and as the dragoons fell back they exposed the leading line of the infantry of the right hand infantry brigade which had advanced behind them.  These infantry began firing volleys which swept through the Swedish ranks, once again delaying the advance.  Lindstrom directed the light artillery to assist the embattled brigade  and ordered the reserve cavalry brigade forward to reinforce the attack on the Russian left.


An overview of the battle.  At the top of the photo, the Swedish left is about to be attacked again by the Russian dragoons.  In the foreground the Swedish cavalry is pursuing the retreating Russian left wing dragoons and the reserve brigade is moving up in support.

The leading Swedish cavalry brigade now charged again.  On the right, they caught the defeated Russian dragoons before they had rallied and swept from the field.  In the process they lost a good number of casualties and had to pause to rally.  The second unit charged the infantry which had supported the remnants of the Russian dragoons.  They had been 'softened up' by a volley from the infantry of the right hand Swedish brigade and offered little resistance to the cavalry and routed.  Once again however, the Swedes suffered sufficient casualties to force them to pause to rally.  

The Swedish cavalry break the Russian line
This was galling, as they had nothing in front of them other than routing Russians, the Russian infantry line was 'in the air'.  Lindstrom ordered the reserve cavalry to move round the first brigade and then wheel and attack the Russian centre whilst the first infantry brigade pinned them with a frontal attack.  On this occasion, the normally excellent Swedish staff system failed and the order to Brigadier Wallender was delayed, giving the Russians just enough time to get an infantry battalion in position to oppose Wallender's attack.

In the centre, the Swedish infantry charged home.  The leading regiment disposed of their first opponents easily and moved forward to take on the second line.  They, although a garrison battalion, proved tougher opposition  and although forced to retreat, rallied behind the regiment supporting them.  Glaz, the Swedish brigade commander, ordered a unit to take on the Russian artillery as their fire was proving a problem.  This attack proved a disaster as the close range canister decimated the Swedish ranks and forced them to fall back to rally.  With his attack now beginning to falter, Lindstrom needed some help from his second brigade, but they were struggling.

The Swedish attack on the guns fails
The unit on the right of the right hand Russian infantry brigade was led by Colonel Archibald Fraser, who had served in the Russian army for more than a decade.  he had drilled his men relentlessly and emphasised the need for effective musket fire.  This day his men excelled.  Their fire cause two Swedish units to fall back to rally.  Encouraged,  the rest of the brigade pushed forward, the left of the rear line wheeling towards the centre increasing the pressure on the Swedish right.  Lindstrom, in desperation, attempted to block this attack with one of his garrison battalions, even though it was sorely needed to support the attack.  Their fire did indeed halt the Russians and a charge completed the job.

The garrison battalion pushes back the Russians

However, behind the defeated Russians was another infantry battalion and a volley from them drove the Swedes back.  Lindstom received news from Wallender that the Russian infantry volleys were preventing him charging home.  Gathering the remains of the first cavalry brigade, Lindstrom led them in a desperate charge against the Russian right.  Although they managed to smash through one infantry battalion, they were unable to break a second and had to retreat.

Accepting defeat, Lindstrom began to pull back his weary infantry, covering their retreat with the remains of the cavalry.  For their part the Russians were too battered to pursue.

A close run thing.  The quality Swedish troops threatened to smash their opponents in no time, but with losses mounting, momentum slowed.  A few crucial order failures and some excellent Russian musketry proved decisive. 

Saturday 23 May 2020

Emmanuel Chapel: an AWI scenario

It has been some time since Steve's AWI collection has featured on the blog.  So last week Steve set up this scenario for a skype game.  General Thomas Armstrong has been given command of a force ordered to seize the town of Bridgeford, a vital communications centre for the revolutionary forces.  Until yesterday his march had gone undetected by the enemy forces, but local revolutionary sympathisers had reported his presence.  Therefore, just a few miles from his objective he found a force deployed to block his advance at Emmanuel Chapel.


Armstrong deployed his force with Cavendish's British brigade on the left and Von Stalheim's Hessians on the right.  Each brigade had 4 battalions (two line, one grenadier and one light/jaeger) and a light gun.  Ahead of him, Armstrong saw one unit ensconced in the grounds of Emmanuel Chapel and two more on the ridge.  The units on the ridge were behind cover and had artillery support.  He needed to advance on one or both of the roads available as quickly as possible.

Armstrong's force prepares to advance

Revolutionary forces on the ridge
 Armstrong was unaware that the troops facing him were Collins' brigade, 3 units of militia.  Conversations with other commanders had led him to be wary of advancing across fences in the face of enemy fire and also to avoid being surprised by enemy riflemen lodged in cover.  He therefore ordered that the light troops of each brigade make sure the woods on their flanks were clear of enemy troops.  Also the attack would be down each flank, bypassing the chapel and attempting to outflank the position on the ridge beyond.  Each brigade was to deploy one battalion to occupy the defenders of the chapel.

The attack began with the advance of light troops towards the woods.  On the left, the British light troops encountered no opposition as they advanced and closed up to the wood.  However, the Hessian jaeger were not so fortunate.  As they neared the wood they were fired upon by riflemen.  Casualties were light and undeterred, the Hessians fired in return , fixed bayonets and charged.  Resistance was brief and the riflemen fell back through the wood and attempted to rally in the open ground beyond.

As the light troops advanced on each flank, the line battalions began to advance.  They were presented with a dilemma, should they advance in column or line.  The former would be quicker, but leave them vulnerable to artillery and musket fire.  Line may incur fewer casualties, but lead to delay.  Cavendish opted for column, hoping to get some screening from the light infantry once the wood had been cleared.  Von Stalheim decided on line and as a consequence his advance was slower and his leading unit, Rall's Grenadiers, found its right flank companies impeded by having to move through the edge of the woods.  Each brigade had ordered one unit to wheel and begin firing volleys at the enemy holding the chapel; Cavendish used the 71st Line and von Stalheim the musketeer regiment von Trumbach.  This fire seemed to have little effect on the defenders, but it did draw fire to the units involved, thus preserving the strength of the units who would have to assault the ridge.

The Hessian artillery begins to fire on the chapel
Von Stalheim's advance was slowed even more as his line battalions saw the jaeger running back towards them.  The jaeger had pressed forward, hoping to defeat the riflemen of Collins' brigade again.  However, as they worked their way through the trees they were hit by a volley from the riflemen .  Suffering heavy losses, they had to fall back to rally, giving a check to von Stalheim's advance.

The Hessian jaeger driven back

On the opposite flank, Cavendish had made quite good progress.  The light infantry had moved through the wood and were now screening the grenadiers, whose column was following them closely.  Behind the grenadiers were the 28th line and all three regiments were making for the extreme right of the enemy position.  Collins was contemplating having to abandon his position and leave the force in the chapel to their fate, but a rider arrived with news that Wilson's brigade of continental infantry was approaching and would be in a position to block the British advance.  Morre good news arrived when Collins saw that the British regiment firing at the chapel had had to retreat due to casualties inflicted by the militia holding the building.  Armstrong galloped across to rally the retreating regiment and sent an aide off to request von Stalheim increase the pressure on the chapel defenders.  Von Stalheim therefore deployed his artillery to support von Trumbach and this proved decisive.  After a few rounds from the artillery, the stone walls of the churchyard began to crumble and chips of stone flew into the militia lining the wall.  The volleys from von Trumbach added to the militia's losses and morale cracked; the militiamen running back towards the ridge.  Once they got there they found matters in a dire state.

The militia fall back from the chapel
Von Rall's men had driven the enemy riflemen back with volleys and now turned their attention to the ridge.  Joined by the von Lossberg musketeers they fired at the militia holding the works on the ridge.  Even with the protection of the works, the losses were sufficient to force the militia to retreat.

Cavendish's light troops had seen the advance of the continental infantry and managed to get a couple of volleys at the advancing troops before they could deploy from road column.  Losses at the head of the column were very heavy and the leading unit had to fall back to recover.  The light troops now shifted their focus to the militia on the ridge and soon began eroding their resolve.  Cavendish's grenadiers, (now in line) began firing at the second unit of continental infantry and after a few volleys forced them to withdraw as well.  When Collins saw that the 28th had now crossed a fence was advancing on the ridge in partnership with the light infantry he realised that he could do no more.  Orders were sent for all units to fall back towards Bridgeford in partnership with the continental infantry and to try and delay the Royal forces as long as possible.

Cavendish's troops begin to bring pressure against the militia on the ridge


Monday 18 May 2020

Crossing the Yrque : a Grand Alliance scenario

The French forces were pushing forward into the Low Countries with a view to opening up a line of advance to the Rhine.  An important stage in that strategy was the capture of the fortress town of Yrlm and a siege was under way.  Allied forces were keen to ensure the siege was raised and a force under Graf von Grommit was ordered to cross the river Yrque and establish a bridgehead to enable the main army  to advance and cut the supply route for the French besieging forces.


A general view of the table from the bridge over the Yrque; von Grommit needs to advance beyond the buildings by the corn field and threaten the road passing through the village at the far end of the table.  Von Grommit's force consists of two brigades of infantry, 8 line battalions plus a battalion of grenadiers and a light gun and two brigades of cavalry, each of 3 regiments.

Unfortunately for von Grommit, the French have forces in the area.  The bridge is blocked and there is a barricade across the road between the barn and the marsh.

View along the road from the bridge
At the bridge, the local commander, the Comte de Salle Forde has two units of dismounted dragoons.  There are further forces at the farm by the cornfield; two units of horse and a regiment of foot.  In the village are a further three regiments of foot and a light gun.  Salle Forde needs to hold his position long enough for reinforcements to arrive.

The Hautfort dragoons man the barricade
As von Grommit's scouts had reported that there were enemy defences at the bridge, he ordered the grenadiers to lead the attack, supported by the light gun and a brigade of infantry.  Behind them would be a brigade of cavalry, followed by the second brigade of infantry and finally the second brigade of cavalry.

At dawn the grenadiers advanced across the bridge and started to dismantle the cheveaux de frise.  This proved tricky and in the delay the Hautfort dragoons were able to fire two volleys into the grenadiers.  Fortunately for the grenadiers, the poor light and even poorer shooting of the dragoons resulted in few casualties; though the delay did allow time for the chevalier Clerambault, commanding the dragoons to send off a courier to Salle Forde alerting him to the enemy attack.  Clerambault also ordered the second unit of dragoons, (Royal Dragoons) to cover the gap between the barn and the river.  Eventually the grenadiers cleared away the cheveaux de frise, moved forward and deployed.  After firing a volley they charged the Hautfort dragoons, who gave a rather scattered volley and fell back.  The grenadiers' advance opened the way for the infantry of the Palatinate/Hessian brigade to cross the bridge. One unit, the Palatinate Lifeguard Regiment moved left to attack the Royal Dragoons.  The dragoons were already exchanging volleys with the Erbprinz regiment and offered little resistance when charged, falling back in disorder.

The Allied forces advance
Clerambault's position was disintegrating.  The Hautfort Dragoons, now out in the open, came under fire from the allied artillery and soon began to waver.  Having dismantled the barrier, the grenadiers advanced, fired a volley and then charged the Hautfort Dragoons.  Against the odds the dragoons managed to survive the impact and to the dismay of von Grommit, the grenadiers cracked, routing back towards the bridge.


Fortunately, the Hessian infantry were now across the river,  Lowenstein deployed to face the Hautfort Dragoons, with Erbprinz advancing in support.  Wartensleben moved right to cover the advance, because a new threat had appeared in that direction.

Clerambault's courier had delayed to rouse the troops at the farm before galloping off to the village.  The commander of the cavalry brigade at first deployed his cavalry either side of the road and waited for the infantry, (regiment Royal Italien), to form up.  Lacking orders they simply formed column on the road awaiting events.  Once the courier reached the village and passed on Clerambault's message to Salle Forde; the commander ordered Comte Merlot, the brigade commander to assemble his troops and move them to the farm and organise a defence.  He also sent couriers off to request reinforcements.  Merlot sent orders to Royal Italien to move forward and support Clerambault.  Meanwhile, the cavalry had moved to the left of the farm to oppose any advance from the direction of the bridge.  Von Grommit could only deploy Wartensleben to meet this threat whilst the remainder of his force crossed the river.

Von Grommit's leading cavalry brigade had now crossed the river and made its way round the barn and headed for the gap to the right of the cornfield.  The French cavalry had been ordered to charge Wartensleben twice, but on each occasion the troopers had remained in position.  To add insult, the cavalry had come under fire from the allied light gun and losses had begun to rise.

The bridgehead expands
The Palatinate Life Regiment had now eliminated the Royal Dragoons.  Most of the survivors had been taken prisoner, the remained had routed into the distance.  Once the cavalry had passed, they returned to help the Hessians.  The assistance was required because Merlot's infantry was now arriving to bolster the defence.  Solre had deployed into the cornfield to support Royal Italien and Languedoc and Zurlaben had moved to the left of the farm to face Wartensleben.

With the arrival of Merlot's infantry, the cavalry now moved to the right to counter the allied cavalry.  Regiment Aubusson led, with Regiment Toulouse in support.  Aubusson charged the Jung Hanover cuirassier and managed to hold them back, at least temporarily.  More allied infantry were crossing the bridge and von Grommit sensed that he was gaining the upper hand.  Lowenstein drove off the battered Hautfort Dragoons and then charged Solre.  Royal Italien were now holding off Erbprinz and the Palatinate Life Regiment.  Jung Hanover were now supported by cavalry regiment Fugger and overpowered Aubusson who had to fall back to rally.  The cuirassier also needed to rally and seizing their chance, regiment Toulouse charged.  They proved unable to prevail, indeed, they were shattered in the impact and routed.  As they fled they carried away Aubusson and the French right flank had ceased to exist. 

The French cavalry rout
Salle Forde had little choice but  to order a retreat.  No reinforcements had arrived and he was already outnumbered 2 : 1.

Saturday 9 May 2020

Convoy: an ECW scenario for Pike & Shotte

Following on from the action at Long Furlough (link), the Parliamentary forces needed to regroup.  Sir Victor was assembling forces in the vicinity of Sandminster and a convoy of supplies was heading in that direction.  The Royalists had got wind of the convoy and were determined to capture or destroy it.  Lord Melchett ordered Sir James Fotheringay to take his brigade of infantry and Molyneux's brigade of horse to intercept the convoy.

Sir Victor Meldrew had taken the precaution of providing an escort for the convoy, three regiments of foot, four of horse and one of dragoons.  Early morning found the convoy making it's way along the Sandminster Road, near the cross roads to Walton.  Fotheringay had deployed his infantry, three regiments of foot and a unit of commanded shot in the centre, with two units of horse commanded by Sir Royston a'Dammes on the right and a further two units of horse, plus a unit of dragoons commanded by Colonel Francis Loughton on the left.


The starting position.  Sir Charles Lonsdale, the Parliamentary commander, is in the centre of the convoy.  Colonel John Thursby commands the leading cavalry regiments and Colonel Thomas Bannister the cavalry at the rear of the column.  On the hill between the Royalists and the road is a small unit of Parliamentary dragoons.  To be successful, Sir Charles needs to get the convoy and the majority of his troops off the table in the direction of Sandminster.  If the wagons are forced to take the Walton road, that is a draw.  Capture or destruction of the convoy and dispersal of the accompanying force is a Royalist victory.

The rear of the Parliamentary column
Loughton's first task was to clear the Parliamentary dragoons off the hill on the flank of the Royalist advance.  His own regiment, supported by that of Stanley advanced quickly straight towards the hill; whilst the dragoons moved round to the left towards the road.  Faced by two regiments of horse, the dragoons fell back towards the road.  An understandable response, but it made it difficult for Thursby to get his regiments in a position to attack the Royalists.  The situation was not helped by his own regiment continuing along the road in defiance of his order to halt and redeploy.  Thursby's other regiment, Clayton's, was also slow to respond, meaning that the melee, when it came was next to the road.

The dragoons retreat
On the opposite flank, Sir Royston had wasted no time in getting his regiments forward.  He moved between the wood and hill and was met by Bannister's own regiment.  Fotheringay had hoped that the commanded shot would be able to inflict some damage on the Parliamentary cavalry before their inevitable melee with Sir Royston, but the Royalist advance had been too swift.  The cavalry melee was a fairly even affair with the advantage flowing back and forth, but Sir Royston committed his second regiment, Tyldsley's, before Bannister could bring forward his reinforcements and this decided the affair.  Bannister's regiment routed, but Sir Royston was unable to sweep forward because his leading regiment, Molyneux's, had taken too many casualties and needed to rally.  In addition it blocked the progress of  Tyldsley's regiment.

Fotheringay's foot regiments had been advancing in the general direction of the enclosure and the gap leading to the crossroads.  Hoghton's was on the right, Chorley's the centre and Smethurst's the left.  The latter regiment was rather under strength and also without its regular commander.  Sir Augustus had recently succumbed to gout and had retired to his lodgings.  In his place was his 'nephew' Captain Jonathan Field, who had quickly earned the nickname 'Jonah' from his men. Over the last week the regiment had always seemed to get the worst lodgings, the wettest bivouac and the longest marches.

Sir Royston triumphant
Chorley's regiment had been the first into action.  Lonsdale had ordered Bentham's regiment to pass through the gap in the hedge and prevent any Royalist advance towards the cross roads.   Once again the movement was sluggish and Bentham's regiment was barely deployed before they were hit by a volley from Chorley's regiment.  Although they took casualties, Bentham's stood their ground and gave a lively reception to Chorley's when they charged.  Ignoring the fire, Chorley's closed to contact and a bloody fight ensued.  It was vital that the Parliamentarians stood their ground; if they fell back the wagons would be exposed to attack.  Their resolute defence proved just sufficient to save the day and Chorley's had to retreat.  Both sides now paused to rally their ranks.  Bentham's recovered first and now charged Chorley's regiment.  The Royalists stood their ground, firing a telling volley and then got the better of their opponents in the melee.  Bentham's now routed. Chorley's regiment were too battered by their fight to pursue, but Smthurst's stood nearby and were fresh.  Fotheringay gave the order for them to attack and was dumbfounded to see the regiment about turn and retreat, becoming disordered in the process! 

Hoghton's regiment was by now engaged in a fire fight with Leck's regiment which had occupied the enclosure.  The commanded shot had added their fire to that of Hoghton's and losses had increased rapidly in the parliamentary unit.  Observing a wavering in the opposition ranks, Fotheringay ordered Hoghton's to attack.  This they did; ignoring the desultory closing volley from the defenders and they began to try and force their way through the hedge into the enclosure.     

Bentham's eventually crack

Loughton's men had by now closed to melee with Clayton's regiment.  The Parliamentarians were at a disadvantage, with their backs to the hedge and no room to manoeuvre.  However, they managed to get the better of Loughton's regiment, forcing them to retreat and rally.  Fortunately, Stanley's regiment now came to the rescue, charging Clayton's and, after a tough struggle forcing the Parliamentary cavalry to retreat.  They too now had to pause while they reformed their ranks and fighting in this sector dwindled to the two units of dragoons skirmishing with each other.

Lonsdale had by now got his wagon train up to the cross roads and had to make a decision whether to continue on the road, turn right to Walton, or, attempt to make their way across the open ground towards Sandminster.  The latter was necessary because Thursby's regiment of cavalry and the dragoons were occupying the road towards Sandminster and therefore there was no room for the wagons.  Lonsdale chose the third option and the wagons made their slow, jolting progress across the open ground.

At the rear of the column, Bannister had managed to rally his regiment of horse and had brought forward Mytton's regiment of foot to provide some much needed fire power.  Sir Royston now faced a problem.  He was struggling to rally Molyneux's regiment of horse which was still milling about after their melee.  Tyldsley's, his second regiment could not move forward because of the leading regiment and his direct route to the rear was blocked by the commanded shot.  Galloping over to Molyneux's he brandished his sword above his head and bellowed "Follow Me!" and set off to the left through the gap between the hill and the enclosure.  Fortunately his men followed and the way was open for   Tylsdsley's to advance.  This they did, charging Kippax's, (Bannister's second regiment) and routing them.  Once again an opportunity to reach the wagons presented itself, but once again it went begging because the Royalist unit needed to rally before it could advance.  Tyldsley's were not given this chance.  A volley from Mytton's swept through horsemen and forced them to retreat.

The retreating Hoghton's receive a final volley from Leck's regiment
At this moment Hoghton's regiment, which had been valiantly struggling to drive back the equally determined Leck's regiment were forced to retreat.  As they fell back Leck fired a volley into them and the retreat became a rout.

Fotheringay had only the reformed Smethurst's regiment of foot and the commanded shot  in a state to continue the fight.  Chorley's and Hoghton's were both battered and weary.  Of the cavalry, three regiments had taken significant casualties and the remaining one was wavering.  All chance of intercepting the convoy had been lost and therefore he ordered a retreat.  For his part, Lonsdale breathed a sigh of relief.  His force was almost spent.  Of the infantry, only Mytton's was in a fit state to continue the fight and as for the cavalry only Thursby's, which had spent the entire action penned in the lane, could be relied upon.

That evening, back at Royalist headquarters, Field was called to Fotheringay's room to explain his actions (or lack thereof).  To his credit he didn't try and shift the blame, simply saying that  he must have misunderstood the order from Fotheringay.  Struggling to contain himself, Fotheringay ordered the young man to return home forthwith "to learn how to read".  "If he could demonstrate in due course that this had been achieved, perhaps a place in his 'uncles' regiment may be available"   With a curt nod from the commander the interview was closed.


Saturday 2 May 2020

Ottomans

It has been a long time since I have posted about my progress (or lack of it) with the pile of Ottoman figures requiring painting/re-basing.  Last year I managed to complete 2 x 24 strong units of Janissaries, but since then progress has been glacial at best.  Two units of light cavalry are complete, though to be honest, one was principally a re-basing exercise.


Also two units of sipahi


The first unit of levy infantry is also complete, with another one being painted


Still a long way to go!