Showing posts with label Napoleonics. Show all posts

Friday, 20 October 2023

Battle of Lindenau 1813, a scenario using General d'Armee

 It has been some time, but I have eventually sorted out a further test run for the General d'Armee rules.  This Lindenau scenario came from Steve Shann's book "Lets fight Leipzig".  A review of this book can be found on the Yarkshire gamer you tube channel .  The scenarios in the book provide all you need to play the game, a map, order of battle, objectives and terrain detail.

The Austrian General Guylai was attacking the village of Lindenau which sat astride Napoleon's line of retreat from Leipzig.  His troops were in three separate columns and he planned a concentric attack which would overwhelm the defenders of the village ( a small independent division under the command of General Margaron).  Some redoubts had been erected to strengthen the defence, but Margaron's troops were stretched.  Fortunately for the French, reinforcements were on their way.  Bertand's IV Corps  consisted of the infantry divisions of Morand and Fontanelli and the cavalry brigades of Quinette and Jett. These are on the table as the Austrian columns arrive.  On the Austrian left is Hessen Homburg with 6 battalions of infantry and a 'streifkorps' of light cavalry and cossacks.  In the centre is the column commanded by Guylai  with 5 battalions of infantry and two regiments of cavalry.  Finally on the right is Csollich with 9 battalions of infantry and a 'streifkorps' of light cavalry and cossacks.

Csollich prepares to advance on Plagwitz on the French left

The Austrians' objective for a complete victory is to hold at least half of Lindenau by the end of the game; holding Plagwitz and the three redoubts will give them a tactical victory.  Failure to achieve either of these objectives gives victory to the French.

The scenario special rules create the chance of a uncoordinated attack by the three Austrian columns by making them dice to see if they arrive.  In our case this worked and it took Hessen Homburg three turns to arrive giving the French right ample time to prepare themselves and also meaning that the French commander could concentrate his Adc's on helping Margaron and the artillery.  Csollich's skirmishers took heavy casualties from  Margaron's skirmishers and also the artillery facing them , meaning  he had to deploy one of his light battalions to bolster the line.  nevertheless his battalions moved forward.  In the centre Gyulai was also making progress, though his troops were also taking heavy casualties from the artillery in the redoubts.  His skirmishers tried to pick off the gunners, but suffered severely from the volleys of canister.  The infantry battalions began to engage Margaron and Morand's battalions but made little progress, both sides losing their fire discipline.

Morand's troops move through Lindenau

Hessen Homburg's troops had now arrived and deployed to attack Fontanelli  and Quinette.  

Csollich's leading battalions moved to the left of Plagwitz, pushing back the French skirmishers, but this opened them up to attack by Jett's light cavalry  This caused them to halt and form square stalling the advance.


The Austrian right flank Plagwitz


The developing attack on Lindenau

Csollich at last deployed for attack and  stormed the redoubt to the right of Plagwitz.  His men captured the redoubt but were disorganised in the process and were vulnerable to counterattack.


The Plagwitz redoubt falls

The village of Plagwitz was also attacked and after a prolonged struggle the Austrian infantry forced their way in and ejected the French defenders.

Plagwitz falls

As Hessen Homburg advanced he was attacked by Quinette's dragoon brigade.  Von Mensdorf's light cavalry tried to hold them off but were defeated.  Quinette wanted to push on, but the serried ranks of the  Austrian squares deterred him.


Quinette's dragoons drive off the Austrian cavalry

Gyulai had also managed to capture a redoubt in the centre so the Austrians were edging towards a minor victory.  However, there were still several game turns to go and their gains were vulnerable to counterattack.

It was at this point we ran out of time so a draw was declared.  In retrospect the scenario as I put on was perhaps too big for a 6 x 4 table.  The Austrian deployment areas in particular being too cramped.  Once again the rule mechanism regarding Adc's caused severe problems.  All too often a brigade would advance one turn and then the next would become hesitant.  Now I appreciate that the Napoleonic battlefield, with all its smoke and noise could cause confusion; but once an order to advance had been received and initiated, why would the troops stop, especially if they were outside musketry range and were not threatened by cavalry?  Just getting the adcs in the first place proved difficult for both sides; then there is the additional hurdle of  managing to roll 3+ on a d6 once you have managed to get your adcs.  Both commanders had multiple occasions when a brigade would go hesitant in successive turns, even with an adc attached to give a re-roll.

It will be interesting to see what GdA 2 is like when it is published.

Thursday, 11 May 2023

A trip to the Isle of Wight : part 1

 My wife and I have just spent a very pleasant week on the Isle of Wight.  We stayed in Sandown, which in spite of its "sand, sea and sun" image, has some hidden military links as various display boards show.


The above board gives details of two forts which covered the sea front at different times and were lost or demolished.  There was a third fort, built in the mid 19th century, elements of which still exist, but are now part of the zoo.  During WWII it was the location of eight pumps which were part of  PLUTO, supplying fuel to Normandy.  A more prosaic, typically English survivor is on a local golf course link to historic england .  There were also "Palmerston Folly" forts at either end of the beach.  The northern one at Yaverland  link  is now in a holiday camp and to the one to the south link which was demolished and is now a children's park.

Visible on a headland to the north was Bembridge Fort, which is in the care of the National Trust. link  This was another of the "Palmerston Follies"and there are guided tours, but only on one day a week, which was a day that we already had something planned.

The National Trust also have The Needles Lower Battery, another of the Palmerston forts.  This is open every day and so I had a look round.  The fort is on a narrow headland and the landward approach is covered by a deep ditch.  The limitations of the site meant that when the calibre of guns needed to be increased later in the century a new battery was built further inland away from the cliffs because of fears that gunfire may cause landslides.

Model of the Fort


Battery overlooking the Solent


The fort saw service up to the end of WWII and has a tunnel to a searchlight battery down the cliff.   The first AA gun  a 1lb pompom, was installed here in 1913, There is a second battery built further back up the headland and also a missile firing range used during the Cold War.  link

Mount for AA gun added in 1913


Tunnel to the searchlight position

Not far from the Needles is Yarmouth Castle, which began to be built in 1546.  Its first garrison was a captain and 17 soldiers; with a main armament of 12 heavy guns to defend the town and also the approaches to the Solent..

A  diagram of the original castle

Two sides of the castle were protected by the Solent and the River Yar; the other two by a wet moat.  A distinguishing feature of the castle is the angle bastion which was built to cover the moat.  Further changes during Elizabeth I's reign saw half the central courtyard filled in to make a large gun platform whose gunfire was concentrated out to sea.  More details can be found here .

The next post will cover Carisbrooke Castle.

Friday, 10 February 2023

The Combat at Osma: a General d'Armee scenario

 This week's scenario comes from the "Vitoria"  supplement for General d'Armee published by Reisswitz Press.  It is the first of the 6 in the book and is a fairly straightforward affair involving infantry only, except for a battery of artillery for each side.  The British and Allies need to demoralise two of the three French brigades to win, the French win by avoiding this condition.  Speed is of the essence as the scenario lasts only 10 turns.

An overhead view of the battlefield

The French baseline is at the bottom of the photograph.  They have three brigades of infantry (a total of 11 battalions) plus one battery of field artillery.  One of the brigades is held in reserve on the baseline; the other two each must deploy at least two of their four battalions 24" forward (approximately the front edge of the two fields).  The rationale for this is that Reille, the c in c initially decided to attack what he thought was an isolated brigade of enemy troops.  As more British and Portuguese troops arrived and deployed it became obvious he was outnumbered and he therefore switched to the defensive.  His reserve brigade will only be released if one of the other two brigades has a sauve qui peut or retire result.

The British start with four brigades deployed up to 8" in from their table edge; a fifth brigade will arrive at the beginning of turn 5's movement phase.

The action began almost immediately in our game and as I was commanding an army I had little time for photographs or making detailed notes of events; but I will give a quick resume of events.  Napoleonic gamers will recognise straight away that there are no British or Portuguese troops in the photographs.  I do not have any, so I used Austrian, Prussian and Russian units instead.

The highlight for the Allies in the first game, the attack on the French left goes in.

For the first game I commanded the Allies and Steve the French with Bob umpiring.  I decided to use a veteran brigade with an attached horse artillery battery to outflank the French on their left, with a second brigade, without attached artillery, would attempt the same on the French right.  The two remaining brigades, plus the reserve brigade, would try and pin the French frontally.  A simple enough plan, but the dice intervened and the two flanking brigades were both hesitant and therefore did not move.   

The two 'pinning' brigades did advance and the opposing skirmisher screens were soon in action.  Their line brethren deployed from column and then advanced to musketry range to begin the fire fight.   In this they came off second best and with little help appearing from the flanking brigades they decided to try a charge.  These also failed to make progress and it was just as well that the reserve brigade appeared on the scene as both were beginning to waver.

On turn 9, far too late, the flanking brigades got into position and launched their charges.  That against the French left was successful as the target unit had been 'softened up' by the attached artillery and skirmishers.  On the opposite flank, my brigade failed to attack, (it failed its command roll - again).  With only one turn remaining, there was no way the Allies would reach their victory conditions, so we decided the result was a French victory.


After lunch, Steve and I swapped sides and tried again.  He also tried an outflanking manoeuvre and was making good progress until he failed a command roll and the brigade went hesitant.  This allowed me the time to charge the skirmishers screening his artillery before it deployed.  A volley from one of my battalions rolled double 6 which caused a 'destiny' check and the result was his brigadier was killed by a stray shot.  This meant his brigade was faltering and having failed another command roll it retreated.

The Allies ready to push back my skirmisher screen


The Allied guns exposed

This severely disorganised the attack on my right and bought valuable time.  A similar thing happened in the centre, where a successful French charge caused morale problems for one of the Allied brigades.  Once again time ran out for the Allies and the French were victorious.


A post match review brought up one glaring error on my part, I had neglected to give all the 'British' battalions the superior volley rating.  This undoubtedly made things more difficult for them and went some way to explain their poor showing in the volley exchanges and the ease with which the French were able to avoid the Allied victory conditions.

How did the rules play this time?

 Firstly, things moved a good bit quicker for this second game.  We were better acquainted with the rules of course and had less recourse to checking things in the rulebook.  The look of the game was  improved by increasing the size of the units from 3 to 4 bases.  This meant that attack columns could be easily seen to be different to columns of route.  There are some reservations around the amount of 'friction' caused by the hesitant status for brigades, but this may be a hangover from our familiarity with the Shako rules where all brigades can move each turn.  Looking at accounts of Napoleonic battles not all sectors of the battlefield are active at the same time, apart from mutual bickering between the opposing skirmish lines and artillery bombardments.  There are some areas of the rules which could be clearer, but the Too Fat Lardies website does have a Forum where the questions can be asked.  There is also a FAQ available for download and news on a proposed 2nd ed of GdA.

This particular scenario did not have any cavalry involved, trial run 3 will address that.

Saturday, 28 January 2023

General d'Armee; a trial run

 Followers of this blog will know that for a good number of years I have used the 'Shako' rules for fighting battles in the Napoleonic period.  During this time, I have looked at a number of rules sets, trying to find a 'better' feel to how the battles run.  Recently, the 'General d'Armee' rules by David C R Brown, has attracted my attention and after watching a few videos on you tube and reading various reviews, I decided to take the plunge and purchase a set.  The first trial run was a scenario from the 1813 scenario book published by Reisswitz Press to accompany the rules.  The scenario is based on the  battle of Lutzen and concerns the tussle for the villages of  Gross and Klein Gorschen, Rahna and Kaja.  General Souham commands the French defenders, a force of 4 brigades of infantry and one of light cavalry with attendant artillery.  Attacking him is General Zeithen, also with 4 brigades of infantry, two brigades of cavalry and attendant artillery.  To win, Zeithen has to capture 3 of the villages, or two villages and an area of high ground on the French right.  The French win by denying the Prussians victory.

Map from the scenario book

My apologies for the poor quality of the photograph.  The French can deploy no further forward than Gross Gorschen, the Prussians 6" in from their table edge and no nearer than 12" from Gross Gorschen.

Souham deployed with a brigade of infantry in and around each village, the brigades at Rahna and Gross Gorschen each having the benefit of a battery of field artillery.  The French cavalry were due to arrive on Turn 3.  Zeithen deployed his troops across the battlefield.  Pirch's brigade was to attack and secure Gross Gorschen,;Losthin's brigade to push through the gap between Gross Gorschgen and Rahna and Jagow's brigade was to attack Rahna.  Pirch and Jagow each had an artillery battery attached.  Starkenfeld and Mutis were due to arrive with their cavalry on turn 3 and Horn's infantry a turn later.

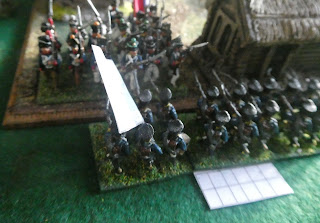
Pirch's brigade ready to attack Gross Gorschen

The Prussians began their attack and their tightly packed columns soon began to suffer casualties from the French artillery.  Their cause was not helped by some hesitancy from Jagow which meant his stationary units were pounded by the artillery.  Pirch edged to his right, hoping to escape the galling artillery fire, but the 2nd battalion of the 1st Silesian regiment continued to suffer casualties.   The 1st battalion of the Silesian regiment did charge the village, but were repulsed by the 1st battalion of the 14th line.  Meanwhile, the Fusilier battalion of the 1st Silesian  regiment and the Silesian Grenadier regiment were moving to attack the two battalions of the 19th line covering the left flank of Gross Gorschen.  Pushing back the French skirmishers they attacked the French line regiments, but were stalled by the defensive volleys.

On the Prussian left, Jagow had managed to begin to advance, but his artillery was still obstructed by the infantry, meaning they lacked it's support.  Losthin's advance drew some of the attention, but both brigades suffered significant losses.

Veran's brigade garrison Rahna

Zeithen's spirits were raised by the arrival of his cavalry.  He immediately ordered Starkenfeld and Mutis to drive back the skirmishers on the flank of Rahna and then advance to the high ground.  The Silesian Uhlans were  keen to obey and quickly saw off the skirmishers.  However, their enthusiasm got the better of them and they charged the battalions of the 22nd line who were deployed at the foot of the high ground.  These relatively newly raised troops formed square and drove back the uhlans with ease.  

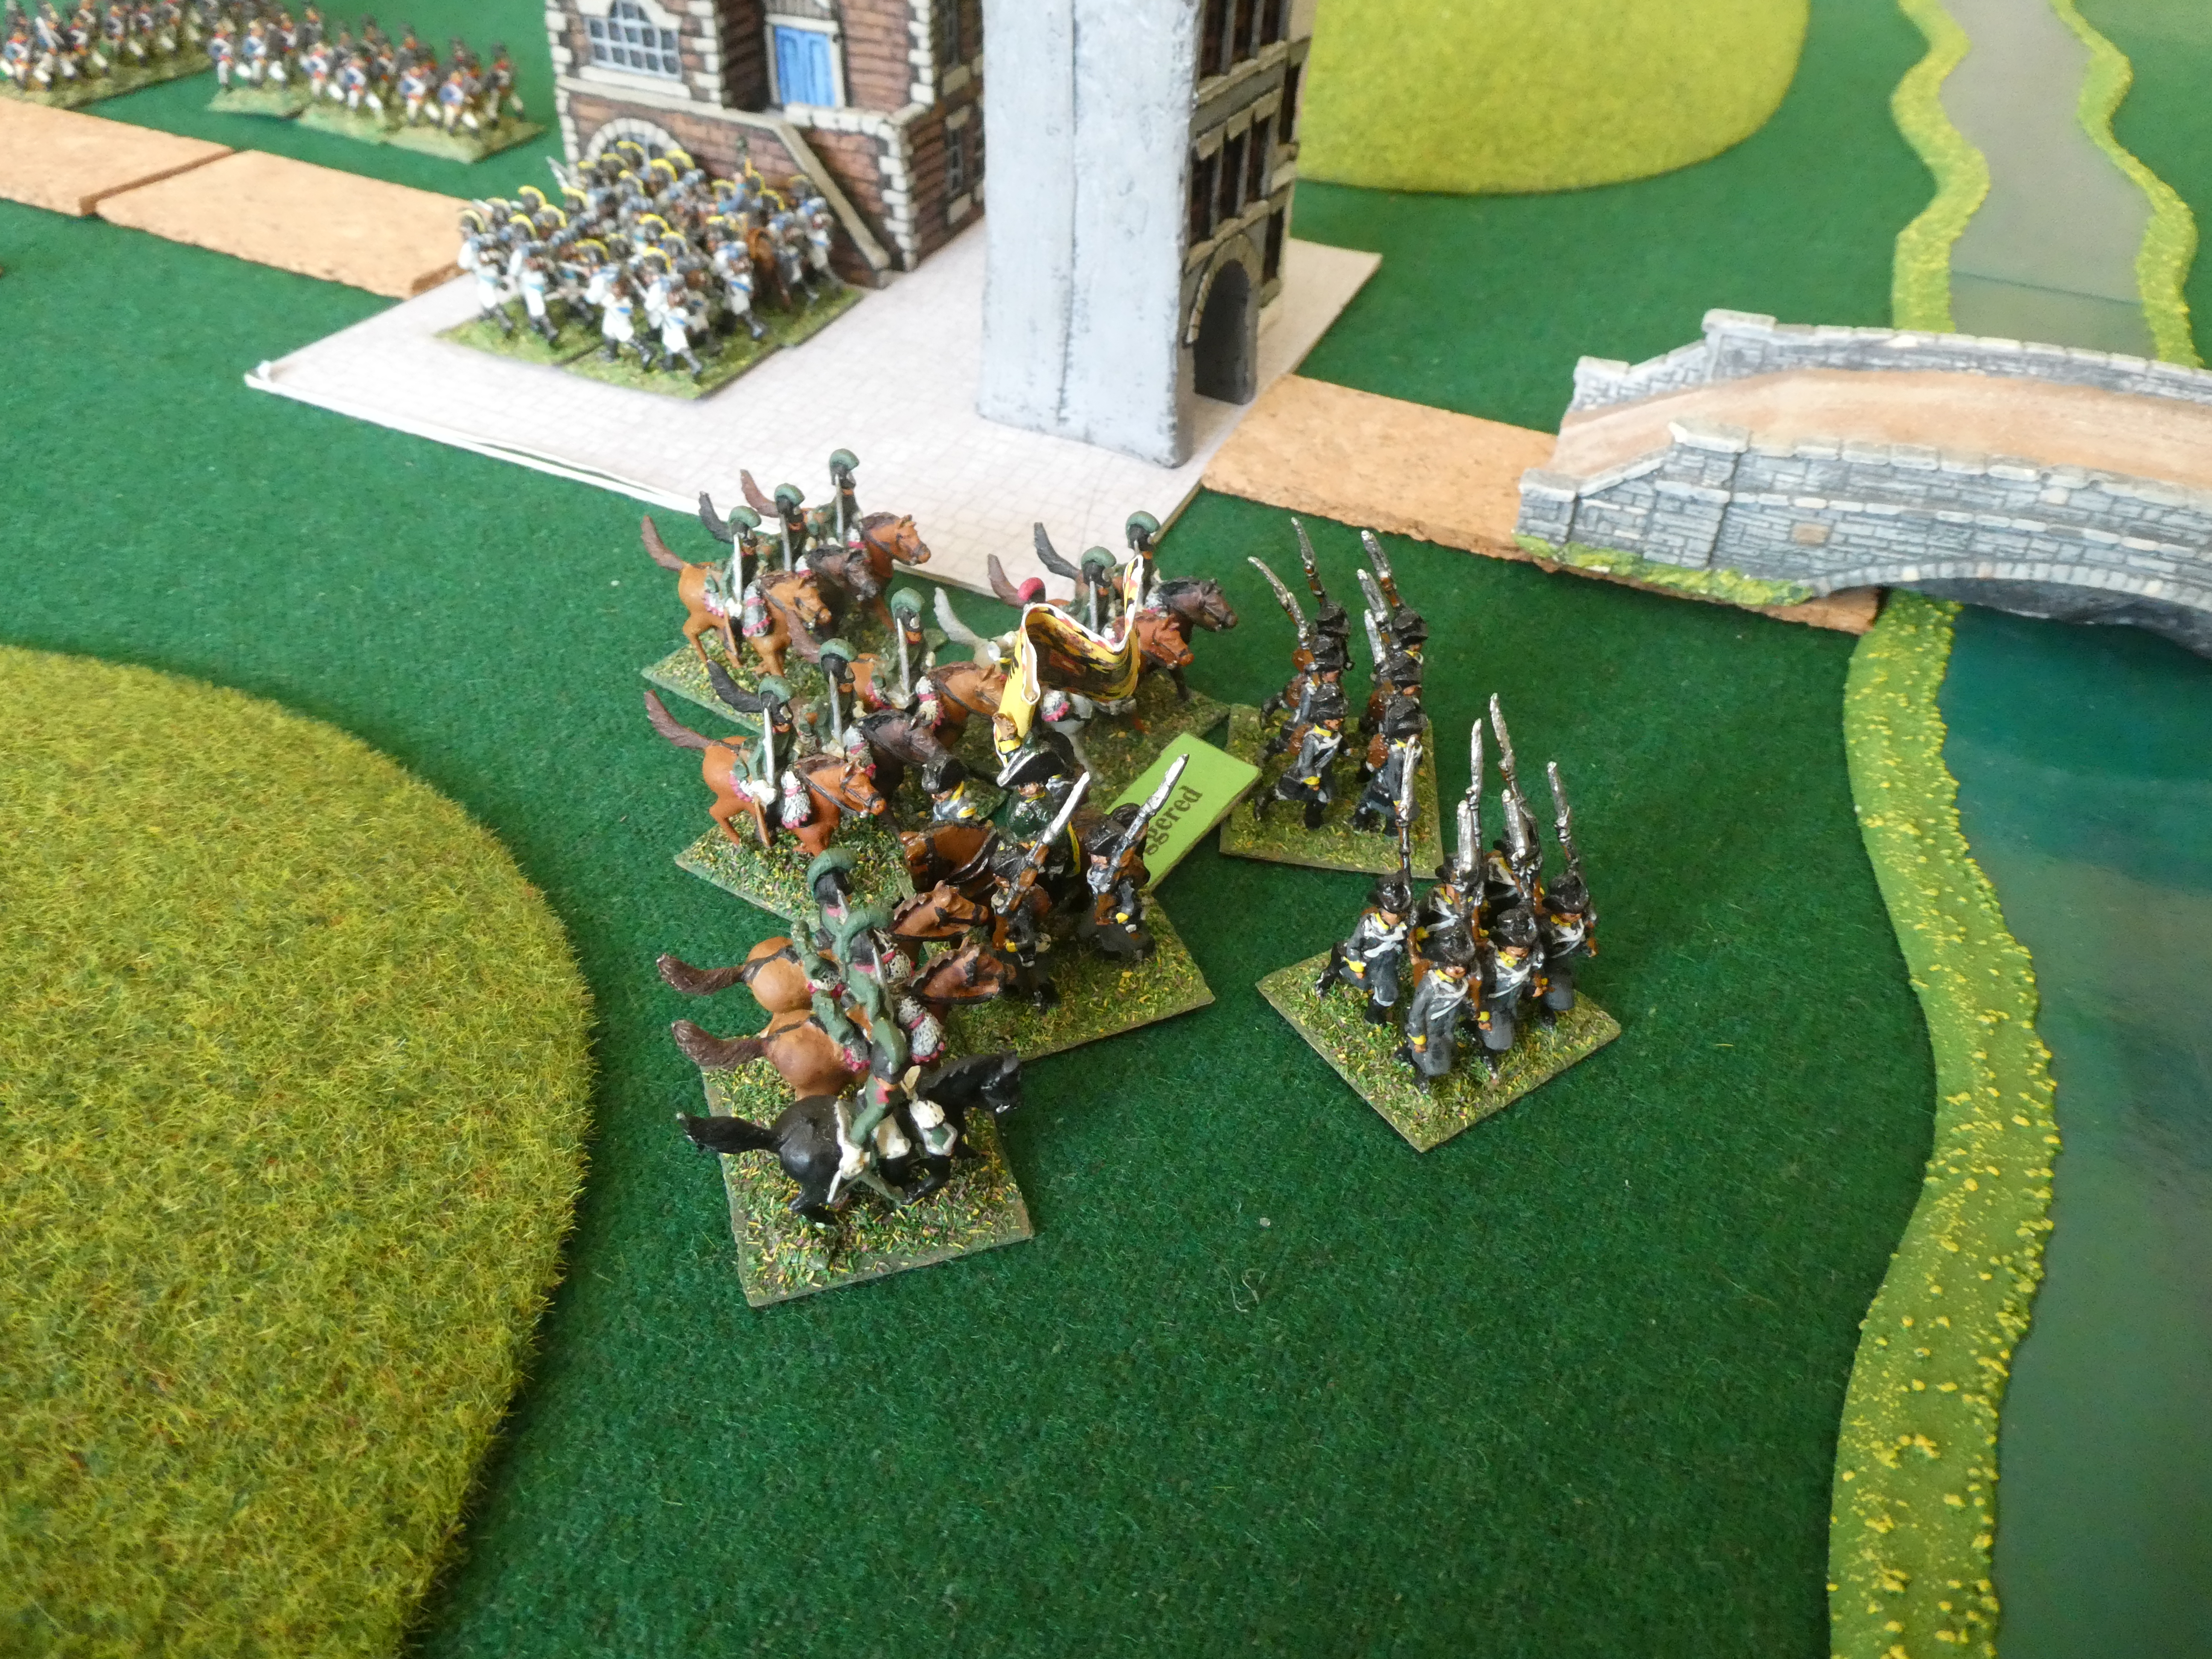
The Uhlans riding to defeat

The discomfiture of the Prussian cavalry opened up an opportunity for Souham.  His cavalry were outnumbered, but, they could attack their opponents before they could recover.  Laboissiere seized that opening.  Placing himself at the head of the Baden Dragoons they charged forward to attack the Prussian cavalry.  Ably supported by the 10th Hussars, the dragoons were victorious and Jagow began to glance nervously towards his left as his cavalry supports were driven back.

At Gross Gorschen, Pirch felt he had at last made progress.  His artillery was now deployed and was pounding the village, the fusiliers and grenadiers had pushed back the French flank and were in position to attack the village.  Even more important, the French artillery, which had caused so much damage had at last been silenced, but at a terrible cost.  The Prussian skirmisher screen had been shredded as it tried to pick off the French gunners and the 2nd battalion of the 1st Silesian infantry regiment had been destroyed in a suicidal final attempt to overrun the guns.  He ordered the 1st battalion of the 1st Silesian regiment and the grenadiers to attack Gross Gorschen, hoping to at last overcome the determined defenders.

The end for the 2nd battalion 1st Silesian I R.

After a final salvo from the artillery the Silesian infantry charged, at least the 1st battalion did, the order to the grenadiers did not get through.  The Silesian infantry attacked gallantly, but once again were driven back.  Pirch had done all he could, his brigade had been broken on the rock of the French defence of Gross Gorschen.  It was just as well that Zeithen had moved Horn's reinforcements to the right to bolster the attack.

Meanwhile, against the odds Jagow had achieved some success.  Supported by artillery the infantry of the West Prussian I R had attacked the village of Rahna and driven off it's defenders.  One village captured, only two more required !

The West Prusssians attack

It was at this point that we called a halt.  The scenario length was given as 20 turns and we had managed fewer than 10.  Given that two French brigades had not been committed and one Prussian brigade was all but lost, the decision went to the French.

How did the game play?  Well one positive aspect was the command system.  It had the benefit of having more order options than 'Shako' and it introduced more 'friction' into the command process.  The accent is definitely on deciding on you priorities each turn, as you are unlikely to be able to do everything you want.  The rules cater for different qualities of troops and commanders, (but then most modern sets do this anyway).

One 'clunky' aspect of the rules is the charge phase which we had to keep referring back for, plus the brigade morale states.  Looking at the message board on the Too Fat Lardies website a new version of the rules may address the first of these items and also streamline a few other things.  Which goes to show that no matter how much play testing you do some areas of a new rules set will probably need revisiting.

Will we use them again?  Well our next game will be another General d'Armee scenario.  We will see how things work out second time around. 

Friday, 28 May 2021

Ober Bruchberg; a Napoleonic scenario using the Shako rules

 The last time my Napoleonic troops were on the table was nearly 18 months ago, a long gap and mainly attributable to the COVID restrictions.  When Steve and I got around to organising 'skype' games it became clear that with the avaliable cameras 15mm figures were too small to use and we therefore concentrated on our 25mm collections.  However, this week, with restrictions relaxed we were able to meet up indoors again and so I dusted off the figures and set up this scenario.  

It is set in the Isar valley during the 1809 Danube campaign.  Rosenburg's Corps is attempting to hold the line of the Isar and cover the flank of the main Austrian army in the Danube valley to the north.  Mouton's corps is marching towards Ober Bruchberg, hoping to seize the bridge and then move north.  Rosenberg has chosen to use the hills on the western bank for his defensive position.


The Isar can only be crossed at the bridge or the ford, the stream flowing into the Isar can be crossed by infantry and cavalry, but artillery must use the ford.  To the north and west of Klein Sandling are woods which reduce formed infantry to half speed and are impassable to cavalry.  The swampy ground from which the stream flows is impassable to all troops.

Rosenberg deployed Bartenstein's infantry division on the hill to the south of Ober Bruchberg with one battalion, 1st battalion Deutschmeister, in the town itself.  Mohr's infantry division was on the hill to the north of Ober Bruchberg and Frimont's infantry division was in the area beyond the stream of the Isar.  Nostitz's light cavalry division was placed in reserve on the eastern bank of the Isar, able to move north or south as required.  Rosenberg's plan was for Mohr to hold the hill to the north of Ober Bruchberg, Frimont to advance onto the high ground and then swing south-west to the line of the stream and threaten the flank of any enemy attack from the direction of Klein Sandling..  Nostitz was to move onto Frimont's left flank and pose a similar threat.  If circumstances permitted, Bartenstein was to swing his left flank north-west to threaten the flank of any direct attack on Ober Bruchberg.

Mouton had the infantry divisions of Franquement (Wurttemburg) and Deroy (Bavaria and Baden) deployed on the line of the road south from Klein Sandling.  Franquement, on the right, was to attack and seize Ober Bruchberg.  Deroy was to attack Mohr's position and pin him in place.  Sevdevitz's light cavalry division, which was deployed behind Franquement and Deroy, was to move south to support Franquement's right wing and threaten any infantry advancing from the hill to the south of the town.  On the 'French' left, Fontanelli's Italian division was only just arriving.  It was to pass to the north of Klein Sandling and attack Mohr's flank with one brigade and use the other to hold the line of the stream.

Preceded by artillery fire, the French attack moved forward.  Initially good progress was made, but Mouton's divisional commanders soon began to face problems.  Franquement had to move one brigade to his right as Bartenstein's  leading battalions moved off the hill towards him.  Sevdevitz's light cavalry took their time moving onto his flank and meanwhile a lively battle had erupted between the rival skirmisher screens.

The French left: Deroy ready to advance and Fontanelli just arriving

The French right: the skirmisher screens come in range

In the centre, Deroi's advance began to break up.  The Bavarian brigade continued towards Mohr, but the Baden brigade halted.  If they advanced further they would be threatened by Nostitz's light cavalry which was massing just beyond the stream.  The plan had called for Deroy's flank to be covered by Fontanelli, but he had run into problems.  

The Klein Sandling bottleneck

The gap between Klein Sandling and the woods  was narrow so Fontanelli continued to advance in column.  However, Frimont had rushed forward his artillery and the columns were in effective range and suffered severe casulaties as they moved forward.  The Austrian skirmishers also made a nuisance of themselves and the Italians deployed into line, slowing their advance.  Encouraged, Frimont now advanced his line battalions onto the hill and then down towards the stream, flanking the Italians.  The leading brigade moved left to meet this threat, slowing the advance of the second brigade which was supposed to be helping the Badeners. 

Nostitz's cavalry preparing to move across the stream


Deroy's advance

Franquement advances with cavalry support

Frimont launched the Stipcisz Hussars against the Baden brigade anticipating that this would force them to form square and provide juicy targets for the Austrian artillery.  In the nick of time a column of Italian infantry moved up on the flank of the Baden Gross Herzog regiment and enabled them to remain in line and deliver a closing volley into the charging hussars.  This emptied a good number of saddles, but not enough to stop the horsemen charging home.  The infantry managed to hold their ground and repel the light cavalry, but this would not be the only charge the Badeners would face.
The Stipcisz Hussars charge home


and are driven off
On the French right Franquement's attack on the hill was not making much progress.  The Austrian Zach infantry regiment had formed square when Sevdevitz's cavalry had moved forward, but the Wurttemburg horse artillery had been unable to disorder the square sufficiently for the cavalry to charge forward and finish the job.  Realising time was slipping away, Franquement ordered the 2nd battalion Prinz Paul regiment to charge the Austrian square supported by the Italian light horse.  The result was a bloody shambles.  The joint attack was driven off with heavy loss, the Italian cavalry lost half their strength and the infantry were so weakened they played no further part in the battle.

Zach stand firm
Deroy's Bavarians were now in position to assault Mohr's position on the hill.  Their skirmishers had been picking off the artillerymen manning the Austrian guns and although Deroy's artillery had had to re-deploy to face the threat from Nostitz's cavalry the Austrian infantry battalions in the front line had been weakened in the earlier bombardment.  To try and disrupt the attack Nostitz advance the Schwarzenberg Uhlan across the stream.  Here they came under fire from Deroy's artillery, suffering quite heavy casualties and instead of continuing against the Bavarians they swung right and charged the Baden brigade.  Once again it was the Gross Herzog regiment which came under attack and once again they drove off the cavalry.

Along the stream Fontanelli was coming under increasing pressure.  Perhaps sensing that the Italians were on the back foot, Frimont ordered his infantry to attack.  The 4 battalions on the 4th and 5th line regiments suffered particularly badly, two being driven from the field and a third suffering heavy casualties
Frimont moves forward

Glancing to his right, Mouton saw that Franquement was closing in on Ober Bruchberg.  After an artillery bombardment the 1st battalion of the von Neubronn Fusiliers charged the village.  The defenders, 1st battalion Deutschmeister repelled this attack and also one by the 2nd battalion von Neubronn.  As the Wurttemburger infantry formed up to attack again, Sevdevitz took matters into his own hands.  To the south of Ober Bruchberg, between the village and the hill, 3rd battalion Deutschmeister had stood firm under artillery fire and also an attack by the 2nd battalion Kronprinz regiment.  Behind them, the battalion of landwehr from the Salzburg district had also suffered losses from the artillery.  Both battalions looked as if they were wavering.  Sevdevitz ordered the Cheveauleger Prinz Adam to charge.  As the cavalry surged forward Deutschmeister began to form square.  Perhaps due to officer casualties this was not carried out as efficiently as usual and before the ranks were formed the cavalry were among them.  In no time the square was swept away and the survivors sought sanctuary in the village.  

3rd battalion Deutschmeister disintegrate

Nearer the river, the Landwehr looked on in horror as the regular line infantry scattered and the Wurttemburg cavalry followed up in their direction.  All cohesion seemed to evaporate and they were swept away by the cavalry.

The Landwehr suffer the same fate

This success was in vain.  Deroy's attack had stalled.  The Bavarians, faced with resolute Austrian infantry to their front and cavalry on their flank, were forced back.  Deroy's other brigade was unable to help and the Italians were fully occupied trying to prevent Frimont breaking through their lines and seizing Klein Sandling.

Mouton had little option but to recall Sevdevitz and Franquement and order them to help Fontanelli hold Klein Sandling and the lines of communication back to the Danube.  Deroy's orders were now to hold the centre as long as he could.  There would be no crossing of the Isar today.

A satisfying game, with both commanders able to take positives from the action.  I was happy that even after such a long break we managed to re-acquaint ourselves with the rules quickly and the game flowed well.  Congratulations to Steve for his stout defence.


Sunday, 2 August 2020

Some reading matter

Lockdown has at least given many of us the chance to either catch up on some of the books we have always meant to get around to reading, or to discover new ones.  Back in April, the Naval and Military Press had a sale and I took the opportunity to purchase several titles at a very reasonable price.  Volumes in the "Napoleonic Library" series were on offer at just over £3 each in hardback and it was impossible to resist getting copies of "Davout, The Iron Marshal" and the memoirs of Baron von Muffling.  One title I hadn't heard of before, but decided to take a chance on was Robert Goetz's "1805 Austerlitz".

 
It was a good choice.  The book covers the campaign up to the battle itself and gives an insight into the strategies followed by each side.  Significant events in the battle are covered in detail and accompanied by detailed maps which allow the reader to follow the fortunes of individual regiments or even their constituent battalions/squadrons.  The appendices include biographies of major figures,  a detailed order of battle and an assessment of the strength of the Allied army.  A thoroughly good read.

Helion titles were also available and I chose one volume in particular which had been on my reading list, John Barratt's "A Rabble of Gentility; the Royalist Northern Horse, 1644-45".  


Formed  in the aftermath of Marston Moor from the remains of the cavalry of Newcastle's Northern Army, the Northern Horse led a nomadic existence for the following 15 months.  They fought in Cheshire, the Welsh borders, the East Midlands and at Naseby, before their disintegration when cornered near Carlisle.  Their unruly behaviour and the desire to return to fight for the king's cause in the North, rather than close to Oxford, caused problems for the Royalist High Command.  Suggesting ways that rules could be tweaked to make some units more difficult to control than others perhaps?

One book that wasn't in the sale, but I had been awaiting the publication of was Bruno Mugnai's  volume on the Ottoman army.


At over 350 pages it is a substantial volume and contains masses of information on the troops, their organisation, clothing, weapons and battles.  There are copious contemporary illustrations, supplemented by the author's own line drawings.  I found the section on the Ottoman art of war particularly interesting, discussing the development of musket armed units to counter the armies of powers becoming more 'western' in their organisation and also the increasing influence of provincial troops over that of the sipahi and janissaries.  One thing that did let the book down was a lack of an index which would tie together the sections dealing with, say sipahi, in the separate chapters on organisation, equipment and dress. 

Wednesday, 26 February 2020

Black Seas

At the RECON show in December, Steve purchased the "Master and Commander" starter set for Black Seas.  With 6 of the ships completed, 2 frigates and 4 brigs, he felt it was time to try out the basic rules and get a feel for the game.


Two views of the completed frigate model.  The ships are fairly easy to assemble and Steve found that painting the parts while they sere still on the sprue made the painting process easier.  What proved to be more fiddly was the rigging, but there are tutorials on You tube and good diagrams in the rule book which comes with the starter set.

Our first game, of one frigate each, was very short.  A couple of broadsides which did minimal damage and then in my next broadside I rolled a 1 (which means a critical hit).  A d6 roll came up '6' which caused a fire on Steve's frigate.  He attempted to put the fire out, but failed and his ship exploded!

The British fire a close range broadside
For our second game, we introduced a brig to each side and this time there was more manoeuvring to gain the 'weather gauge'.  Once again the initial broadsides did little damage, it was only when the range closed that the effects were felt.  Steve's British frigate seized the advantage of sailing with the wind and got in the first close range broadside, which did a good bit of damage.  The French response was poor and when an ill-advised manoeuvre gave the British the opportunity of raking the hapless French, they seized it with both hands.  With casualties on the gun deck and struggling to increase speed, the French were sitting ducks for a final broadside which caused them to strike their colours.

After lunch we played a third game, this time using three ships a side.  This game lasted c 90 minutes and once again was a pounding match between the various ships.  A shift in the wind caused problems for the French and the British gained an advantage which  they held to the end.

Overall we found the games enjoyable.  We used the basic rules, all the crews were trained and the types of ships had the same characteristics, (advanced rules allow for variety in these areas and for marines and special factors).  Gaining the advantage of the wind was an important element of the tactics of the time and this is well represented in the game.  There were one or two minor quibbles over the design of some of the playing aids, (measuring sticks and ship cards) which we thought could have been better designed.  However, the game is easy to pick up and although lacking some detail for combat between small numbers of ships, on a larger scale, with fleets, it will allow big actions to be fought.  (That is if you can afford the models)

Sunday, 19 January 2020

A few days in Eastbourne

I know, holidaying in Britian in January?  what more proof that madness prevails in this country do you need?  Nevertheless last week we spent a few days in and around Eastbourne.  The south coast has seen its fair share of invasion scares (and actual invasions too) and naturally some defensive measures have been taken.  During the Napoleonic Wars three large forts were planned along the south coast, at   Eastbourne, Rye and Dymchurch as part of a scheme which also included 83 Martello Towers.  In the event only 74 Martello Towers were built and the fort at Rye was cancelled.


The view of the moat from the access bridge.  Unfortunately the fort is only open at weekends over the summer months so this was as much as I was able to see.  During the Napoleonic Wars the fort fired only two rounds 'in anger', against a passing French frigate, both of which missed.

At the other end of the promenade at Eastbourne is a Martello Tower, called locally the Wish Tower.  As noted above it is one of the 74 built along the South coast, another 29 were constructed to cover Essex and Suffolk.


The towers were surrounded by a dry moat and had one piece of artillery, housed on the roof.  For details of the other south coast martello towers see this link.

Some time ago Steve and I organised a 'Lion Rampant' game for the RECON show based on the battle of Lewes.  As the town was near to Eastbourne it seemed only right that myself and management should go and visit.  The battlefield site has changed completely of course over the centuries, but the castle still stands proudly over the town and the ruins of the priory can be seen. As part of the castle entry you gain access to the SAS (Sussex Archaeological Society) museum.  This houses several interesting finds including Anglo-Saxon swords and shield bosses


The restored barbican for the castle


Unusually, the castle had two mottes, with an enclosed bailey between them.  The view below looks towards the older, northerly motte from the top of the other.


We enjoyed our stay and there are plenty of interesting sites in the area.  Perhaps we may visit again when longer days and warmer weather arrive.