Tuesday, 27 September 2011

flags and fences

The present SYW game is likely to be spread over a few nights of gaming, so this is by way of a 'pot pourri' post of snippets from recent wargames related activity.

Last month we spent a long weekend in London and visited the Royal Hospital at Chelsea. In the pensioners'dining room has replicas of flags captured during the AWI and French and Revolutionary Wars. Here are a couple of examples.


In the museum there are displays of medals and the history of the regiments of invalids and examples of the certificates proving the right to a pension. You will also find one of the eagles captured from the 82nd regiment of the line in 1809 when it capitulated to British forces in Martinique.


I attended the Stoke Challenge show and bought some fences from Ironclad Games. Earlier this year I bought some of their emplacements which are useful for the large scale Shako games. The fences also painted up quite well


Here they are framing some recently painted artillery bases for my British SYW army.


The Heritage Open Days give plenty of opportunities to visit places you wouldn't normally visit. An added attraction at a local event was a ECW camp organised by the Sealed Knot. Memebers of Lilburne's regiment demonstrated drill to good effect. Certainly the amount of smoke generated by a salvo of 20 muskets made you wonder about the visibility on Civil War battlefields, or any battlefield in the 'black powder' era.

Wednesday, 21 September 2011

Freiburg

This was the last battle of the Seven Years War in the western European theatre A Prussian force under the command of Prince Henry was attacking a Reichsarmee commanded by Prince Stolberg. The Reichsarmee had the support of an Austrian corps under the command of Hadik. Whilst the Reichsarmme held a series of heights in front of Freiburg, the Austrians were in an entrenched camp on the southern flank.


Historically Prince Henry had decided to screen the Austrian positions with a small force, hoping for their inactivity and attack the weaker northern flank with the bulk of his forces. Taking command of the Prussians I, in my wisdom, decided to attack all along the line, hoping to break through in a couple of places and reach the town of Freiburg.

The Prussian cavalry moved forward to force the opposing cavalry to retire and thus clear the way for the infantry to advance. This was accomplished with some ease, but it brought the Prussians within range of the enemy artillery and cuirassier regiment Buddenbrock suffered several casualties. On the Prussian left the cavalry advanced against the Imperial infantry. Their flank covered by hussars a regiment of cuirassier moved onto the heights thorugh a gap in the entrenchments. However, their progress was halted by a square of grenadiers who presented an unwavering wall of bayonets.


Cavalry cannot afford to be static in the centre of an enemy position and they had to fall back. Prince Stolberg had not been idle, he had moved all the cavalry reserve to his right to bolster the defence. This mass of heavy cavalry was a threat to the Prussian dragoons and hussars on this flank. Trying to use the terrain to offset the difference in numbers the Prussian cavalry charged their opponents. A fierce melee ensued but gradually the greater weight of the Austrian cavalry told and the dragoons and hussars routed, exposing the left flank of the cuirassiers on the heights. Indeed the right flank of the cuirassiers was also ,now threatened, Saxon cavalry had moved from the centre to support the Reichsarmee infantry. Fortunately, the supporting Prussian fusilier brigade had now arrived and their volleys removed this threat


Two Austrian curiassier regiments now attacked the single Prussian one, the contest was never in doubt, overwhelmed the Prussians broke and fled from the field. This left the Prussian left wing totally open to an outflanking manoeuvre by the Austrian cavalry. Prince Henry was already making plans for the whole army to withdraw. It was at this point that Hadik 'requested' the return of the Austrian cavalry to support the centre of the position which was under attack. With some relief the Prussian command watched the enemy cavalry turn and move back towards their own lines.

The Prussian fusiliers continued the attack on the heights, but were unable to dislodge their opponents and suffered increasing losses from the enemy artillery.

Meanwhile in the centre Prussian infantry had advanced and a tussle began between opposing units of grenadiers, with the Prussians discovering that their opponents were a stiffer prospect than they had anticipated. To the left of the Imperial grenadiers the brigade from Bavaria were under heavy attack. Even though they were supported by two artillery batteries they were unable to halt the Prussian brigade advancing towards them.

On the left of the Bavarians a stout defence was being put up by Frei Korps Loudon. Their first volley stopped their opponents in thier tracks


Loudon then followed this up by stopping two cavalry attacks with their disciplined volleys. With Frei Korps of this calibre, what would the rest of the Austrian corps do?

The answer was not very much, at least offensively. Hadik's orders were to 'hold his position' and this he intended to do, but no more. He would not risk his command by abandoning his entrenchments. The artillery fusiliers held an exposed position defending a key battery. Behind them stood a brigade in support. This force was attacked all day by the Prussians, who eventually gained the heights, but had no strength to push the advantage so dearly bought.

On the far right of the Prussian army a mixed force of Frei Korps and grenadiers faced the Austrian entrenched camp. I should have moved them further left to support other attacks, but I didn't. Perhaps it was an attempt to counter the almost universal opinion that the Prussian Frei Korps were no more than a liability on the field and would never achieve anything. In any event, forward they went against a brigade of Austrian regulars behind a palisade. s you would expect, they didn't achieve much, apart from closing up to the palisade and exchanging volleys with the defenders. However, once the grenadiers arrived the situation changed. The Hungarian brigade were perhaps a little overconfident and soon found that the grenadiers were a force to be reckoned with


Hadik's confidence that he 'would not give up an inch of his position' was severely dented and he moved his reserves to counter this threat.

However, as night fell the Prussian command could see little gain for the losses they had sustained. All along the line they had gained a little, but nowhere had sufficient progress been made to claim victory. If the force had been concentrated the breakthrough may have been achieved. Note to diary: remember the principle of concentration of force when attacking.

Monday, 12 September 2011

Saxony versus Pappenheim

THis week we are in central Europe during the Thirty Years War. A Saxon army is trying to halt the march northwards of a force commanded by Pappenheim. The latter is not surprisingly strong in cavalry, particularly cuirassier, but lacks artillery and has only two units of infantry. The Saxons have six units of infantry and two field guns, but are weak in cavalry. On their left is a church on a hill, held by a unit of commanded shot. In their centre two hasty artillery positions with five infantry units and a unit of mounted arquebusier. The right is held by the remaining three units of cavalry, one of reiter and two of cuirassier.


Pappenheim decided to use one of his infantry units to pin the Saxon centre whilst the second one attacked the church, supported by a dragoon regiment. His cuirassier would attack the flanks of the Saxons, with the main attack being on the Saxon right.

As the Pappenheimers advanced the Saxon artillery began to find the range. The blocks of cuirassier began to take casualties and edged further out towards the flanks, this left the central infantry unit, Blankhardt, as the main target and it began to take real punishment. A bad day for Blankhardt became even worse once they got into musket range of the Saxon infantry who added their volleys to the hail of shot hitting the Imperialists.
Meanwhile the Saxon commander was shuffling his units to meet Pappenheim's flank attacks. Originally he had ordered his right wing cavalry forward to cover the flank of his infantry, but seeing the masses of cuirassiers coming his way the Saxon cavalry commander decided to fall back and use the infantry to support his troops. The mounted arquebusier of regiment Tauber moved to the right flank to counter the Imperialist dragoons. The Yellow infantry regiment took up position behind the hill on the Saxon left supported by a regiment of reiter.
Whilst the Imperialist attack on the Saxon centre stalled, the attack on the church continued to advance in spite of the galling fire of the commanded shot.


The attempt by the Saxon right wing to draw their opponents onto the waiting infantry supports did not succeed. The Imperialist cavalry commander saw the trap and ordered one squadron to attack the Saxon infantry whilst the bulk of his men continued forward against the cavalry. This 'soak off' attack not only meant that the Pappenheimers charged their opponents unscathed, but also still preparing to advance themselves. In the ensuing melee the Saxon cuirassiers were totally outclassed by their opponents, both units routing from the field. The only saving grace for the Saxon commander was that half of the enemy cavalry chased off the field in pursuit.

Meanwhile in the centre, the plight of Blankhardt meant that Papenheim committed one of his right wing cuirassier blocks to attacking the Saxon artillery. Lumbering forward the armoured horsemen presented an awesome sight which unnerved the gunners who ran for the protection of nearby infantry


The Saxon commander ordered his infantry line to fall back from the threat of the cuirassier and this deprived the commanded shot of support just as the Imperialist infantry closedon the church wall. To add to the woes of the defenders the Imperialist dragoons moved around their flank and dismounted, ready to clear the curchyard. On the Saxon left the reiter bravely charged their heavier opponents and for a time held their own, but numbers told in the end and they were swept from the field. ON the opposite flank regiment Tauber were enjoying some success against the cuirassier they were meleeing. Against the odds they held their position and gave the right wing infantry time to fall back.


The day was lost for the Saxons, the infantry centre had held, but the artillery crews had run from the threat of the enemy cuirassier. With few cavalry remaining they could not hold off the Imperialists any longer and so he ordered his men to retreat and hope to regroup to fight another day.

Tuesday, 6 September 2011

Ballykelly

My apologies for the break in the blog, the weeks have just flown by. Our latest battle was from the Programmed Wargames Scenarios book by C S Grant and as we were using the Williamite and Irish Jacobite armies it has been given the name Ballykelly. The Irish are occupying a low ridge with a small force (two infantry units, a gun and one cavalry unit) and have reserves in a nearby town (four units of regular infantry a light gun, one cavalry unit and a militia unit). An unexpected Williamite advance has caught them off guard, will they be able to hold the position until reinforced? The Williamite force has three cavalry units, eight units of infantry one light and one field gun. Victory would go to the side with uncontested control of the ridge.
I took the part of the Jacobite commander and decided to try and hold the whole ridge, perhaps a mistake as things turned out, but it did force the Williamites to attack all along the line. The game started with a round of artillery and I scored a hit on the enemy cavalry. My intention being to reduce their superiority in that arm before they managed to ride round my flanks.
As the Williamites began their advance, my reinforcements marched out of the village heading for the ridge.


Unfortunately, after their initial success my artillery proved less effective, particularly when the enemy cavalry swung away to the far right to begin their outflanking move. The Williamite grenadiers were advancing quickly along the road towards the centre of my position and it was touch and go whether my reinforcements arrived in time to block them. On my left the two units of enemy cavalry advanced against my single unit and I took the decision to reinforce this flank and trust that the enemy cavalry on the other flank would not advance too quickly.

The Williamite cavalry advanced to attack; one unit meeting my cavalry, the second, stronger one moving round my left flank. I needed to win the melee and therefore it went against me.


Here is my cavalry routing from melee, with the enemy horse about to reform and move against my infantry who are already shaken by artillery fire. In the centre the reinforcements are arriving as are the first of the Williamite infantry. When charged, my infantry routed leaving a gap which fortunately I was able to plug with a battalion which had just arrived. However, this did stop them advancing onto the hill. On my right the atillery was finding the range again and its fire supported by volleys from the infantry unit was stalling the enemy attack. The problem was the enemy cavalry which was now round the flank. This meant that I had to deploy another of the reserve infantry units to cover the rear of the one supporting the artillery. I advanced my last infantry reserve, the militia into the wood on my left and the cavalry reserve charged the second Williamite cavalry. Again the enemy prevailed, although I did manage to reduce their numbers. However, I now had enemy cavalry behind both flanks. The only saving grace was the ineffectiveness of the enemy artillery which with average luck would have swept my infantry from the right flank ridge.

The enemy cavalry on the ridge now charged my centre, the infantry fired an ineffective volley and were routed at the first contact and they were pursued by the cavalry.


The position looked grim. Four enemy battalions were advancing on my left with only a militia battalion to contest the heights. In the centre I had a single battalion facing three opponents, although one of these was reduced in number. On my right things were brighter, the enemy infantry were falling back. However, all the enemy cavalry were now behind my infantry line and I had no effective cavalry remaining.
Fortunately my light gun was in a good central position to take advantage of a stroke of luck. The cavalry which could have charged the rear of my infantry holding the centre failed its morale test and remained stationary. This made it a target for not only the artillery but also the infantry protecting the rear of the unit supporting the artillery on the ridge. Some lucky dice rolls finished the cavalry as a fighting force. The cavalry pursuing the routers broke off their pursuit, but they were also much reduced in numbers. This left only one enemy unit which atempted to charge the light gun. Again the dice let down the Williamite commander and they failed the test. The light gun inflicted more casulaties and the cavalry had to retire from fire.
On the wooded part of the ridge the enemy charged my militia unit. It managed a scattered volley, but it was not enough to stop the charge. Ouclassed and unsupported the militia ran. The Williamites now had half the ridge.


The enemy atillery chose this moment to rediscover its accuracy and the infantry on the right now suffered from shaken morale. With four units retreating or routing, no cavalry and only one fresh infantry unit left I decided that attempting to save the artillery was what the commander on the spot would have done rather than fight to the death against overwhelming odds.

This was a good scenario, the balance can be adjusted to suit different table sizes and quality of troop types. It can be played several times without the result being a forgone conclusion.

Wednesday, 10 August 2011

Halle

This scenario was from "Fields of Glory" scenarios for the Shako rules. A Prussian force of 3 divisions (2 infantry and 1 cavalry) plus a wagon train are attempting to withdraw across the front of a french force of 1 division with two more coming up in support. The Prussians need to score 14 victory points (the wagon train can contribute up to 12 of those if it suffers no losses and leaves by the road nearest Halle). Any lost wagons (ie contacted by a formed French unit) result in a deduction of 2 victory points.


The wagon train has to stay on the road, so the crossroads just outside Halle are the key to the battle. The Prussian force can be seen deployed on the left of the photograph with the cavalry nearest Halle, 1 division deployed either side of the wagon train and the second on the right flank. Dupont's division of Bernadotte's corps is already in Halle, with Rivaud's division just beginning to arrive.
Wurttemburg, the Prussian commander ordered the cavalry forward to try and pin the French within Halle and allow the wagons to pass. His second infantry division (represented by Austrians), were to advance to the far side of the crossroads and contain any French forces which may attack from Halle. His first infantry division (Lilleborg), was to attack Dupont and act as rearguard. However, the initial deployment, on either side of the wagons (which couldn't be interpenetrated), meant that Lilleborg's command took too long to get into position and couldn't exploit the advantage gained by the cavalry.
The Brandenburg Hussars led the way, overran a skirmish screen but were then attacked by the 2eme Hussars. After a short melee the French prevailed. The colonel, perhaps seeking a medal, promotion or "gloire" charged the supporting Meveldt Uhlans rather than rallying back nearer his infantry supports. In the resulting melee the French were eventually obliged to retreat in haste. This allowed the uhlans to charge the 1st battalion of the 5th Legere, catching them in the process of forming square. Although they fought bravely, the infantry suffered heavy losses and were finished as a fighting force.


Although they had pushed back the French, the allied cavalry were unable to hold the ground and their infantry supports were too far away. Dupont ordered his men forward again and this time the allied cavalry were busy reforming, or blocked by the wagon train. The 2nd battalion of the 10th Ligne reached the crossroads, blocking the advance of the wagons. On their right the 3rd battalion moved forward and contacted a wagon, now the Prussians needed 16 victory points! However, this advance by the 10th had exposed their flank and the 2nd battalion of the Pomeranian Infantry regiment charged forward, supported by the grenadiers.


Although supported by their 1st battalion, the 3rd battalion routed and with one third of its effectives lost, Dupont's division began to edge back towards the cover of Halle. It was at this point that Rivaud's column arrived on the eastern bank of the river and attempted to move out of Halle. The Prussian cavalry had recovered from it's earlier exploits and charged forward. Once again a battalion was caught before it could form square and, also the sole artillery battery available was overrun before it could get into action. Things looked black for Bernadotte, but he could see Drouet's division arriving in support. Unfortunately, also arriving was Von Treskow with a detached brigade of infantry and hussars. With no cavalry himself, Drouet marched at the double for the bridge into Halle. He almost made it, but one battalion of the rearguard was left to try and fight off a combined attack of infantry and cavalry, with the inevitable result. Emboldened, Von Treskow attempted to force a crossing over the bridge, but his attacking battalion achieved nothing and incurred heavy casualties.

The first Prussian wagon had now reached the crossroads, but the driver, against orders turned to his right away from Halle. This turn slowed the column and caused even more difficulty for Lilleborg who was trying to advance on Halle. The second Prussian division was now in position to attack the northern part of Halle and prevent any French attack from that direction. However, the battered remnants of Dupont's division stood their ground, trading volleys with their attackers and stopping two successive charges with close range volleys.

Slowly, the battle began to swing in the French favour. Rivaud's men advanced and secured the crossroads again, contacting another wagon. The Prussians again attacked with their cavalry, but this time the French were ready with a volley and then unwavering lines of bayonets. All three units of cavalry tried and failed to break the French line and they retired to play no further part in the action.

Lilleborg tried to relieve the pressure in the centre by attacking Halle from the south. His militia did secure a foothold, but again, poor co-ordination meant that they were unsupported when the counter attack was launched. For Wurttemburg things got worse. The last remaining wagons were captured in spite of the efforts of the Pomeranian fusilier battalion. With the target now 22 victory points (14 plus 4 wagons at -2 each) and only sufficient units to secure 16 he ordered a withdrawal; this day belonged to the French.

Tuesday, 2 August 2011

Affair at the oasis

Earlier this year we met a group of characters in the "Last train to Handub" scenario. They appear again in this report of our latest Sudan game. Colonel Sir Wellesley Tankerton had been ordered south to assist in the latest 'push' up the Nile. He had taken a short cut across the desert to bypass a loop of the river and to secure his lines of communication had detached a force to hold the strategic water supply at the Furaat Oasis. The officer commanding this garrison of Indian troops was an 'old India Man'; Major C P (Clive Plassey) Bloodnok. In addition to the four companies of infantry, he had two gatling guns.

As he left Sir Wellesley assured Bloodnok that there was no immediate threat from the Dervishes; Karim Bey was reported to be further south causing mischief with the main column. As he watched the main force depart Bloodnok hoped his commander was correct, the force he had was not sufficient to hold the full perimeter of the oasis and there was broken ground far too close for comfort. Two days later a foot patrol captured a Dervish who boasted that soon the oasis would be in the hands of Karim Bey and they would all die. Bloodnok asked for a volunteer to try and reach Tankerton to ask for aid and after the gallant man set off began his preparations for the expected attack. Fortunately, the volunteer got through and Sir Wellesley dispatched Fitzwilliam Paget with two units of lancers and four of camel-mounted infantry, with two guns to help secure the oasis.
Learning from his earlier experience at Handub, Paget sent out scouts to try and discover the enemy positions. This did work for the lancers, but not one of the mounted infantry units, who found themselves beset by foes who seemed to 'rise from the ground'


After a fierce struggle the infantry prevailed, but they lost almost one third of their number in killed and wounded. On the far left one of the lancer units fared better against their Dervish opponents, driving them away whilst sustaining minimal losses. However, their captain showed his inexperience by assuming the enemy were no longer a threat and turning his back on them. In a trice they had reformed and surged forward to attack the cavalry again.


This time the ground was in favour of the Dervish infantry and although the lancers were again victorious, almost half the squadron were casualties.
Meanwhile at the oasis Bloodnok's fears about the length of the perimeter had been realised. From his position on the roof of one of the houses, he saw that the defenders of the eastern side of the oasis were in danger of being surrounded and overwhelmed. He immediately sent a runner, ordering the two companies to fall back, one did, but the second failed to receive the order. Dervish artillery opened fire from a nearby mound and the first shot hit the company commander and decapitated the unfortunate runner before he could deliver his message. Before order was restored cavalry had entered the oasis behind them and a body of Hadendoa were almost on top of them, the only option was to run for the cover of the buildings.
Bloodnok's compound was also under attack. 'B' company held the western wall and beat off a Dervish attack, but the gatling was overwhelmed by Hadendoa. It fired, but one of the crew had panicked and adjusted the sights for long range instead of point blank. As a consequence the attackers were almost unscathed and the gun crew paid with their lives.


Bloodnok decided that he should concentrate his forces in the compound closest to the relief column; therefore he led the remnants of 'B' company in that direction before the Hadendoa overan them. Moving around the outside of the buildings the small party of Indian infantry ran into a band of Dervish who were preparing to attack. In the confused melee both sides sustained losses, but it was Bloodnok, rallying the survivors who had to beat a retreat; fortunately his band were moving towards the relief column.

Karim Bey was feeling pleased with his progress. Three quarters of the oasis was now under his command. C Company who had not received the order to fall back, and had retreated to he buildings in their compound had not waited for the inevitable Hadendoa attack but had run for the perceived safety of the desert. Only one compound remained to be captured and the relief column was making slow progress. Two Dervish and two Hadendoa units charged forward against the outnumbered defenders. The Indian infantry stood their ground and fought like lions. The Dervish infantry pressed the attack in spite of their high casualties, but in the end, they had to give ground and fall back to regroup. The Hadendoa charged forward into a hail of gatling fire and infantry volleys, they almost reached the barricades, but supporting fire from the relief column, directed by Bloodnok, caused them to halt. Victory had been so close, but Karim Bey could see that with the added firepower of the relief column the defenders would not be defeated and decided to call off the action. Little did he know that the Gatling which had caused so many casualties to the first Hadendoa charge was now out of ammunition. A second attack may well have succeeded.

So, the water supply was secured and the Imperial forces could continue their advance. Losses had been high, but the troops had acquitted themselves well. Special mention must be made of Corporal Lanchester of the mounted infantry. His resloute action secured the right flank of the relief column late in the day as a late attack by a unit of Hadandowah threatened to halt the advance.

Monday, 18 July 2011

Hubbardton 1777

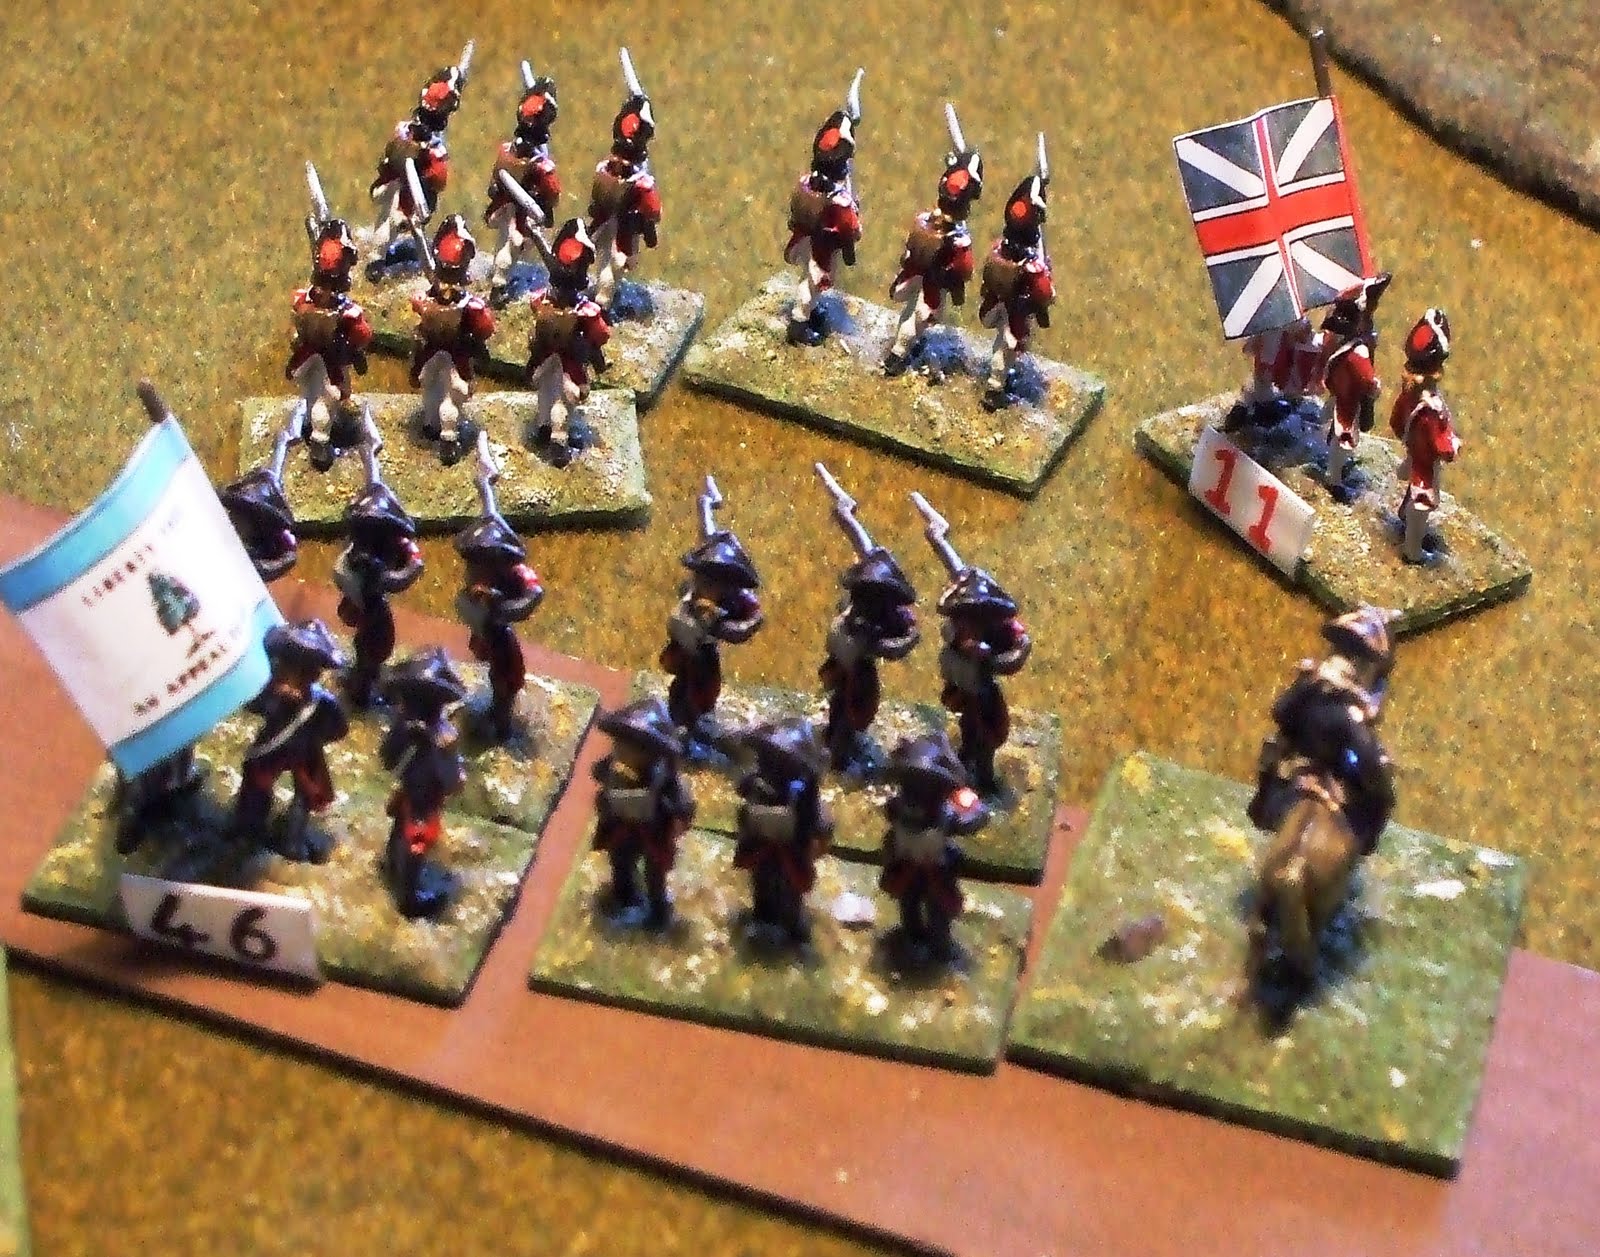
This week our battle was from the American War of Indpendence and the scenario was the rearguard action at Hubbardton following on from the capture of Fort Ticonderoga by Burgoyne. The American forces under Seth Warner had outposts near the bridge over Sucker Brook (in photograph below) and a picket on the trail leading through the hills along which any British force would advance. The main body was encamped near Hubbardton, just behind the hill on the left hand side of the photograph. Warner's orders were to delay any British pursuit and give time for the main army to reorganise. The British force was under the command of Brigadier General Simon Fraser. It comprised one unit of grenadiers, four light companies, two detatchments from the 24th Foot and a small body of Indians. Fraser's orders were to push forward quickly and disperse or destroy any 'rebel' forces he encountered. We used the computer moderated version ofWill McNally's rules for the action (http://www.freewargamesrules.co.uk/18th-century.html) which means that you are never really sure how your units are going to react.


Shortly after dawn the British light companies encountered the American picket line and the action began. The scenario required the American player to roll a 7 or more on two d6 to activate each of his units. Demonstrating a readiness to enter the action 8 out of the 10 units passed the test and began to move towards the line of the Sucker Brook. One of the British light companies pushed the American picket away to the left allowing the remainder of Fraser's command to advance towards Sucker Brook. Fraser had detached the Indians to carry out a flanking manoeuvre, they were to advance to the right, making use of the broken terrain and approach Hubbardton from the west.


As the British approached the brook they found the Americans waiting for them and they received a hot reception in the form of some telling volleys. Two British units were forced to retire to reorganise, further encouraging their oppoents. However, Warner's deployment, although maximising his firepower, meant that he had no reserve. Fraser therefore ordered the grenadiers to charge across the bridge over Sucker Brook. In a one-sided encounter, the light infantry routed towards Hubbardton, leaving the grenadiers with a foothold on the far side of the brook.


Warner's response was to pull back his two separated wings, leaving the road to Hubbardton open, but posing the major of grenadiers the problem of how to advance without exposing himself to flank attacks. In the end he decided to move to his left and try and secure the hill to protect the flank of any advance on Hubbardton. Combining with one of the light companies the grenadiers moved to attack the American units on Warner's right. Again they were successful and both American units routed, but Warner's reserve units had now moved forward and they threatened the flank of the grenadiers. Facing about, the grenadier's rather ragged volley was not sufficient to halt the American charge, led in person by Warner, and now it was the grenadiers who were routing!


Warner now concentrated his forces, covering Hubbardton and the road to the south west, his main line of retreat. As the British advanced the Americans slowly retreated, beating back attacks by the light companies, who were now becoming disorganised after leading the attack and taking casualties. Fraser received three units of reinforcements in the form of Major Von Reidsel's jaeger's and grenadiers.


The Indians had eventually reached their intended position and charged the flank of Warner's line, but, after a fierce melee both sides had to pull back to regroup. Wary of attacking again, the Indians decided to move further to their right, searching for an open flank. An attack by the 24th Foot caused another American unit to rout, leaving Warner with only half his force still under command. The routing unit had the misfortune to cross the path of the Indians. The result was never in doubt and those who could ran for their lives. As the Indians 'mopped up' the remainder they were charged by two American units keeen to avenge their comrades. The Indians beat a hasty retreat back to the safety of the woods, but the attack had moved reserves away from the main position and the 24th attacked again, breaking the line and cutting the line of retreat for three American units. Warner's only option now was to order a general retreat across country, hoping to find a trail which would lead him to the main army which was concentrating on the town of Manchester. The troops which could have severely hampered this march, the light companies and Indians were too beaten up to pursue and so the action came to an end.


The result was as the historical event, with the Americans being forced to retreat across country and the British suffering sufficient casualties to prohibit any qctive pursuit.