Monday, 6 November 2017

Action at Hunter's Ground - an AWI scenario for Patriots and Loyalists

It has been some time since Steve has been able to organise an AWI game, but this week the figures  returned to the table.  He had been working on a rule variant to differentiate the shooting efficiency of the various grades of troops (grenadiers, British line, Continentals, militia).  This was the opportunity to try it out; would the British be able to prevail against a greater number of rebels?

The British lines from their right flank, Bracegirdle's brigade nearest the camera

The arrival of the Rebel troops
Hunter's Ground is a large estate owned by the Hunter family.  The present head of the family is James Hunter and he is known to be sympathetic to the cause for independence.  Nevertheless he has afforded the commander of the British force in the area, Sir Hugh Thornleigh every hospitality, even inviting him to stay in his house, though the presence of two brigades on infantry probably influenced his decision.  The house is in the centre of the photograph above.

In the fields behind the house are the battalions of Bracegirdle's brigade; to their left, in the lee of Robert hill can be found the battalions of Clark's brigade.  This information has been passed to the commander of the local rebel forces, general Greene, who has assembled three brigades of infantry with the intention of carrying out a dawn attack on the unsuspecting British forces.

Caldwell's brigade

Archer's brigade
As the rebels approach they are hampered by early morning mist. Archer 's brigade, on the right blundered into a picket line of loyalist riflemen.  A few shots were exchanged and a few casualties occurred.  The shots attracted the attention of the riflemen skirmishing in front of the central column formed by Brewer's brigade.  Outnumbered, the loyalists were gradually forced back towards the big house.  The rebel battalions continued their advance, Archer towards Robert hill and Brewer towards the fields by the big house.  On the rebel left, Caldwell's brigade made relatively slow progress as the mist was thicker here. 

On the British left, Clark's brigade roused themselves and as reports came back from the light companies on Robert hill  plans were made to deal with the rebel attack.  Two battalions moved to fill the gap between Robert hill and Hunter's Ground whilst two more moved further left around Robert hill to threaten the flank of any attack.  On Robert hill the light companies were joined by the brigade artillery.
It was in the centre that things were unravelling for the  British.  Thornleigh waited with increasing impatience for Bracegirdle's brigade to move forward and support the riflemen.  As knots of riflemen began to fall back he decided to see what was causing the delay and made his way to Bracegirdle's camp.  Here found the staff rushing around trying to form up the battalions.  Finding one of the colonels he asked brusquely to be taken to the brigade commander.  The colonel haltingly informed him that Bracegirdle had decided to take up residence at an inn two miles back down the road, rather than use the tented accommodation provided.  "Are you the senior colonel?"asked Thornleigh.  "Right, you are now in command.  Restore some order and send Mr Bracegirdle to me when he deigns to appear!"

The Loyalist riflemen fall back
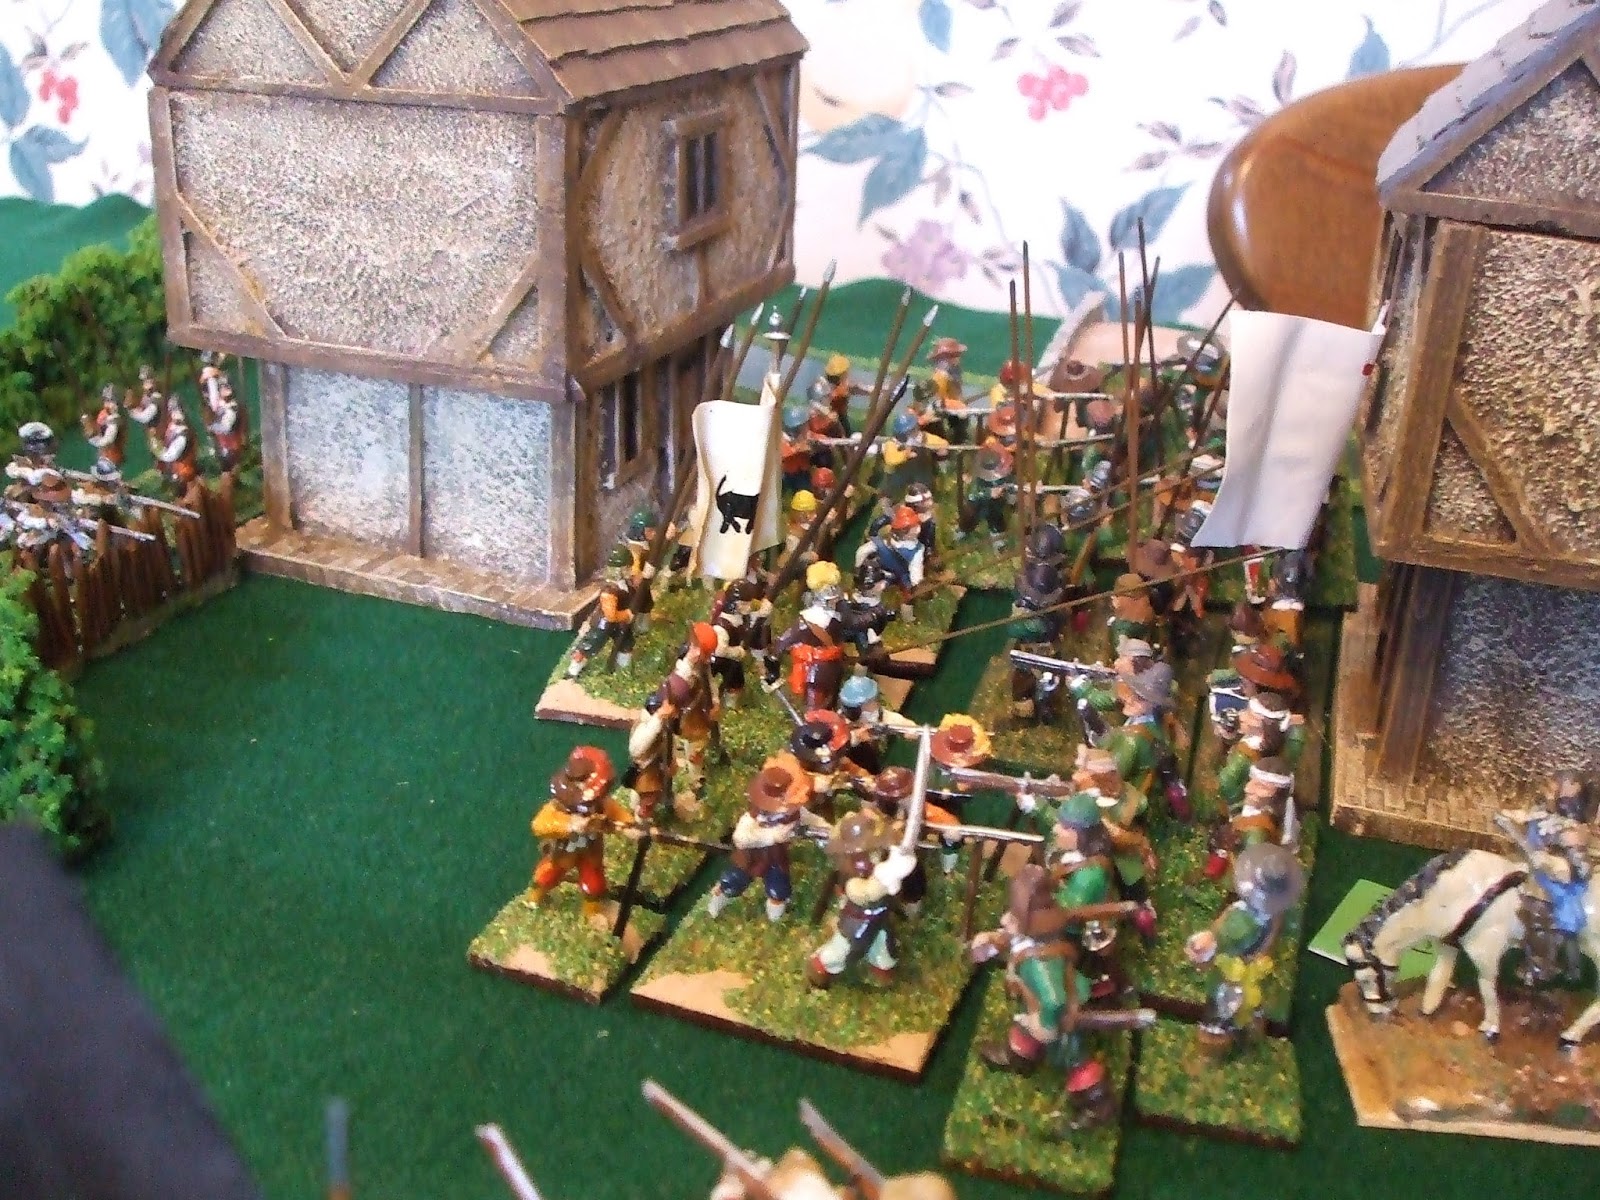
Bracegirdle's brigade had almost formed up when the front line of Brewer's brigade reached the fields.  One battalion was caught unawares when the first volley from the rebels ripped through their ranks.  Two more volleys followed and the sergeants struggled to maintain the line.  Even the renowned British discipline faltered when further volleys reduced the front rank to a bloody ruin and the remains of the battalion fell back in disorder.

Brewer's men advance
On the extreme right, the grenadiers had formed up quickly and advanced towards the cornfield.  As they neared the hedge they found that the rebels were there first and received a welcoming volley at close range.  The grenadiers responded in kind and a prolonged fire fight now developed with neither side willing to give ground.  Bracegirdle's other battalions were now ready and they moved forward to try and push back the rebel forces.  Some sort of stability had now been achieved in the British lines, but Caldwell's brigade now entered the fray. 

Caldwell's men begin their attack 
Their approach had been slow, but unopposed and Caldwell took the opportunity to manoeuvre his force into the right position.  He had moved round Brewer's left flank and now deployed  at right angles to the British line, enfilading it.  Thornleigh saw the threat and ordered two battalions and the brigade artillery to move to the right.  As they did so they were almost caught up in the rout of one of their fellow battalions which had been shredded by musketry.  Then the leading battalion suffered heavy casualties as the same rebel battalion fired into its flank.  The gun had moved forward and deployed, but it now found itself under fire from rebel infantry and artillery.  Although it did manage to drive back one enemy battalion another took its place.  Two rebel volleys felled a good proportion of the gunners and the rest fell back, abandoning their gun.

The British line before the collapse
The grenadiers now found themselves under fire from front and flank and they too were eventually forced to fall back to reform.  Thornleigh was desperately trying to re-establish a line when Bracegirdle galloped up.  "What are your orders sir?" he asked,  "Take command of the grenadiers and form a flank guard" was the reply.

On the British left Clark's men were gradually gaining the upper hand.  Two attacks had been driven back and the rebels were having to give ground.  Indeed, Clark's men were now supporting the loyalist riflemen who were moving  to outflank Brewer's men around Hunter's Ground.

Archer's men are forced back
 In the centre, Bracegirdle, keen to escape the threatening glare from Thornleigh, busied himself rallying the grenadiers.  That achieved he moved them forward with the intention of gathering up the gunners and recovering the brigade artillery.  Thornleigh had managed to reform the other battalions and they were now protecting the grenadiers' flank.  As the grenadiers reached the gun they were met by a volley from the waiting rebel infantry.  Halting, they returned the favour and with Bracegirdle riding up and down the ranks encouraging the grenadiers to greater efforts, further volleys were exchanged.  The right hand battalions of Brewer's brigade had been driven back and Thornleigh saw the chance of attacking the flank of the remainder of the rebel line, thus relieving the pressure on his centre.  He was about to issue the order when, on his right he saw the grenadiers fall like wheat before a scythe.  Two devastating musket volleys followed by two rounds from the rebel artillery decimated the grenadiers' ranks.  Among those lost was Bracegirdle. 


All thoughts of counter attack now evaporated.  A new flank was required to cover the withdrawal of the remainder of the British force.  This was achieved remarkably quickly.  Archer's men were in no fit state to attack, half of Brewer's battalions had taken heavy losses, so the only pressure would come from Caldwell.  He would have to attack on a narrow front and so negate his numbers.  The final position around Hunter's Ground can be seen below. 


The final position
An enjoyable game, with a different feel to it than with the traditional Patriots and Loyalist rules.  Steve's amendments did give an advantage to the British.  However, to be effective they need to be able to engage the enemy  at long range and hope to establish superiority.  The British around Hunter's Ground did not have this opportunity to 'soften up' the enemy as they advanced and really struggled, especially as they were outnumbered and outflanked.  One outing does not prove or disprove the efficacy of a rule amendment so no doubt we will be returning to the colonies again before long.


Sunday, 29 October 2017

Millbridge - an ECW scenario for Pike and Shotte

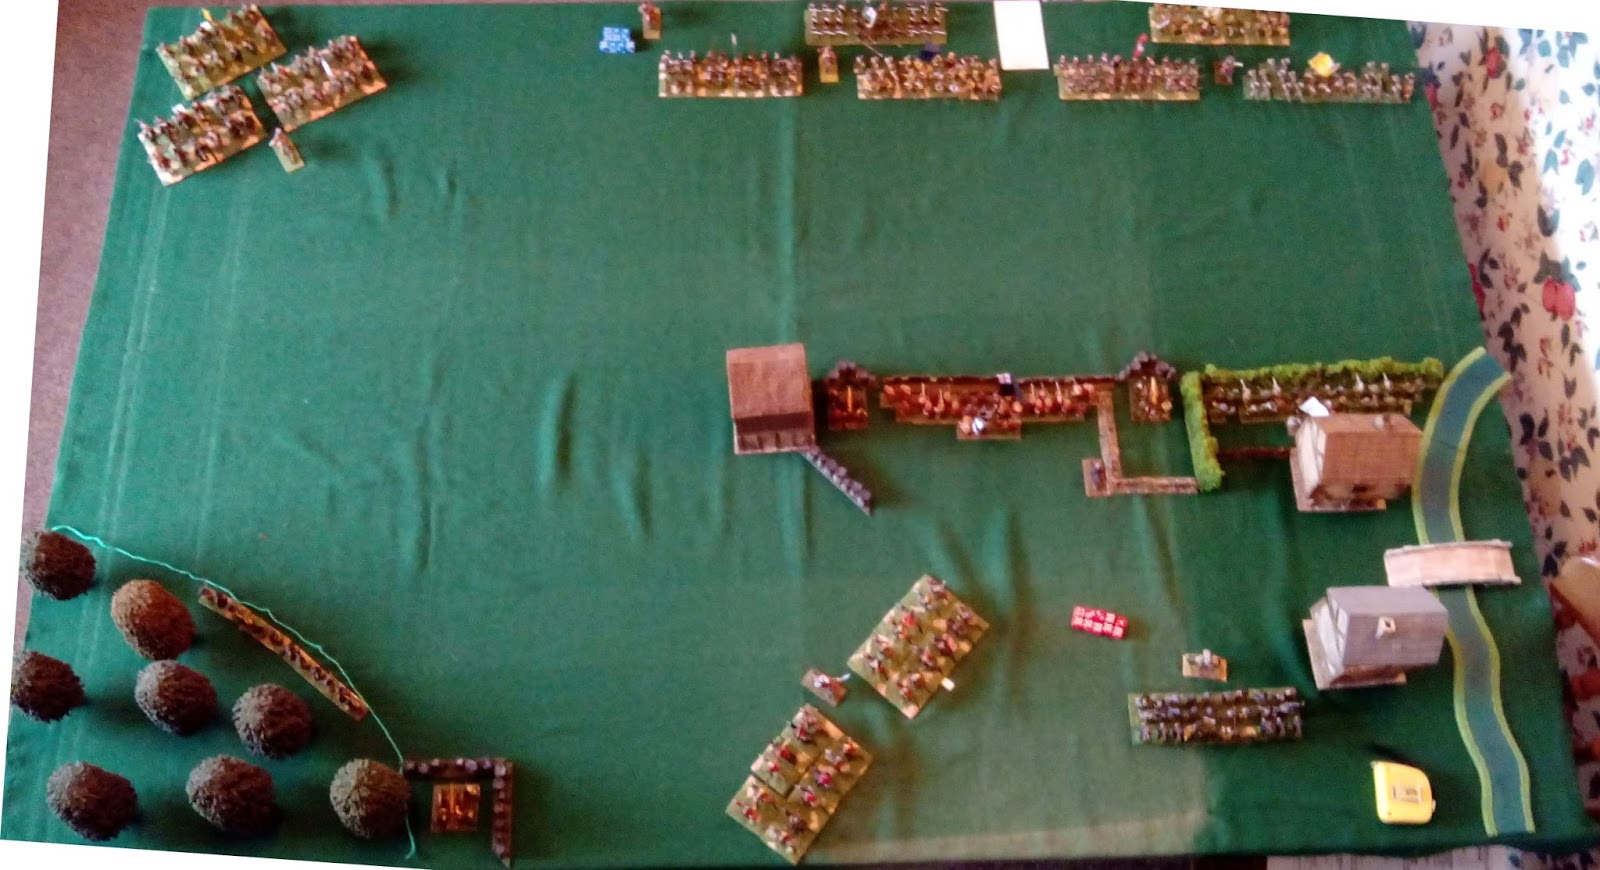
Once again we are in Kelhamshire and the idea for this week's game came from a post on TMP  linking to an AAR on a battle based on Grant's "Scenarios for wargamers" ( link ).  An overview of the table set up is shown in the photo below

Millbridge is a vital crossing of the river Kelham.  It's importance has been identified by the Royalist command and defences have been constructed to secure it against attack.  Lord Melchett had deployed three regiments of foot, a unit of commanded shot, a unit of dragoons and three units of cavalry as a garrison.  Three redoubts had been constructed, each holding a medium gun.  One further medium gun was in a barn across the river, waiting for a fourth redoubt to be built.

The Parliamentary command also recognised the importance of Millbridge and made a plan to capture it.  A small part of their forces made a destructive raid on Royalist properties several miles away and drew off the majority of Royalist troops.  Sir Victor Meldrew then made an overnight march with 6 units of foot and 5 units of cavalry to arrive at Millbridge shortly after dawn.  The speed of the advance meant that he had no artillery support, but he hoped a quick advance would quickly overcome the enemy resistance.

The Royalist defences
Lord Melchett had placed the dragoons in the wood on his left and the commanded shot in the barn to the left of the infantry defending the fences and hedges in front of Millbridge.  The two of the three infantry regiments (under the command of the experienced Sir Hugh Tipton) whilst a third, under the personal command of Lord Melchett, was to be the reserve.  Sir Hesketh Fleetwood had two regiments of cavalry covering the left flank.  The third regiment was away foraging and had been ordered to return immediately.

Stewart's brigade

Meldrum's brigade
Sir Victor had deployed his infantry regiments on his left (the brigade of Nathanial Parker) and centre, (Sir Walter Stewart, a veteran of the European Wars).  On his right was the cavalry brigade of Colonel James Meldrum.  Sir Roderick Murgatroyd's brigade was delayed, having missed its way in the dark.  His plan was for the cavalry to try and force its way through the gap near the barn and draw off the Royalist reserves.  At the same time he would send his infantry forward and break through the defences and secure the bridge.

Sir Victor waved his sword aloft and the attack began; at least the infantry advanced.  For some reason, Meldrum missed the signal and his cavalry remained stationary.  As the Parliamentary regiments advanced the Royalist guns began firing, although their early rounds were wide of the mark.  However, the infantry soon got the range and Gell's regiment in Parker's brigade took heavy casualties.  Sir Victor had his trumpeter sound the alert and then repeated his signal with his sword. Still Meldrum did nor move.  His temper fraying, Sir Victor sent a courier to Meldum with a terse message, "Get your men moving, or I will replace you with someone who will !"  This had the desired effect and the Parliamentary cavalry at last began to move.


Parker's brigade prepare to charge
By now the Parliamentary infantry were nearing the Royalist defences, they had taken casualties, but gathered themselves and charged home through the closing volley.   A fierce melee took place across the hedges and fences but the defences held and all the attacks failed.  Two of Parker's regiments, Gell's and Blackburn's routed and had to be rallied by Parker and a thoroughly displeased Sir Victor.  Stewart had ordered Broughton's regiment to drive the commanded shot from the barn, but this proved difficult.  The first attack was pressed home with determination, but a resolute defence eventually forced Broughton's to fall back to recover.

Blackburn's rout
Meanwhile Fleetwood was anxiously awaiting the arrival of his third regiment of cavalry, especially as the enemy had at last bestirred themselves.  Fortunately their approach route took them close to the wood and the dragoons emptied quite a few saddles as the Royalist troopers passed.  Seeing some disorder in the opposing ranks, Fleetwood ordered a charge and was rewarded by seeing his regiments drive back the attackers.

Although the first Parliamentary attack had been driven off, there was no let up for the defenders.  Before a second attack was launched Parker and Stewart resolved to 'soften up' the Royalists with musketry.  This was quite effective, Taylor's regiment on the Royalist right took such losses it was forced to rally.  Lord Melchett galloped over to encourage his men and as he rode along the ranks a musket ball hit him in the shoulder, a second hit him in the thigh and he slid from his horse.  He was carried from the field to receive medical attention.  The second in command, his cousin, Sir Marmaduke Cathcart, stepped forward to rally the men, but within 5 minutes he had gone to a better place, felled by a musket ball between the eyes.  Sir Hugh Tipton was fully employed trying to hold the line in the centre. Apsley's was coming under increasing pressure and Sir Victor sent forward a fresh regiment to press his advantage.


Apsley's attacked again
After a brief melee, the attackers prevailed and the Royalists fell back.  Seizing their chance the Parliamentarians forced their way over the defences and their rallied colleagues moved forward in support.  Tipton turned to Gerard's the reserve regiment, and led them in a counter attack.  A close range volley, followed up by a charge, drove back the Parliamentarians and restored the defence line.  Sir Walter Stewart fell in the melee, severely wounded and was carried from the field.  Sir Victor sent Colonel Boyes to take command in Stewart's place.

Some further help was on it's way for the Royalists as Fleetwood's third regiment galloped across the bridge and made its way toward the left.  Fleetwood was glad to see it arrive because Murgatroyd had at last found his way to the battlefield and was moving forward to support Meldrum.  When he had all three regiments available Fleetwood attacked again, destroying one enemy unit and driving back two more.  However, Murgatroyd restored the situation forcing the Royalists to fall back.  The melee flowed back and forth for some time, each time Parliamentary cavalry neared the woods the dragoons would fire at them, whittling away at their numbers.

Sir Victor sent forward another attack against the barn, surely the musketeers there would be running short of ammunition?  Once more the Parliamentary infantry charged the building; and once more the Royalists desperately contested each opening, using the butts of their muskets to bludgeon their attackers.  For a brief moment it seemed that the attackers would prevail, but the defenders rallied and pushed back with renewed vigour.  The colonel fell in the melee and the fight drained from his men, slowly at first,  then with gathering speed, the Parliamentarians fell back.

The crisis of the battle took place by the river.  Parker's leading regiment, Catterall's, had by now reached the road leading to the bridge.  Only Taylor's battered  regiment stood in their way.  Tipton hurriedly galloped over to Apsley's regiment and ordered them to support Taylor.  This they did, moving to Taylor's left flank.  Catterall's had Gell's regiment in support, but they were becoming disordered by moving through the enclosures and buildings of Millbridge.  Catterall's charged anyway and the volley from Taylor's was ragged and ineffective.  The Royalist line staggered under the impact, but the moral support offered by Apsley's was just enough to prevent a rout.  Indeed as the melee continued it was the Parliamentarians who were flinching.  Their supports were still too far away and now the gun stored in the barn was being moved to fire on their flank.  A final push and it was the Parliamentarians who ran, taking with them their erstwhile supports.

The Crisis of the battle
Sir Victor once again tasted the bitter fruit of defeat, it had been so close !  One fresh unit could have proved decisive, but that was something he did not have.  With a heavy heart he ordered a retreat; for their part the Royalists were too weary to pursue.  Losses had been heavy and their commander had been carried from the field.

A nicely balanced scenario producing a close and exciting game.  Interestingly the slow  Parliamentary cavalry duplicated events in the report on TMP.

Could I take this opportunity to once again thank those commenting on my various posts.  Your comments are very welcome and are a continuing encouragement to continue chronicling our games.

Tuesday, 24 October 2017

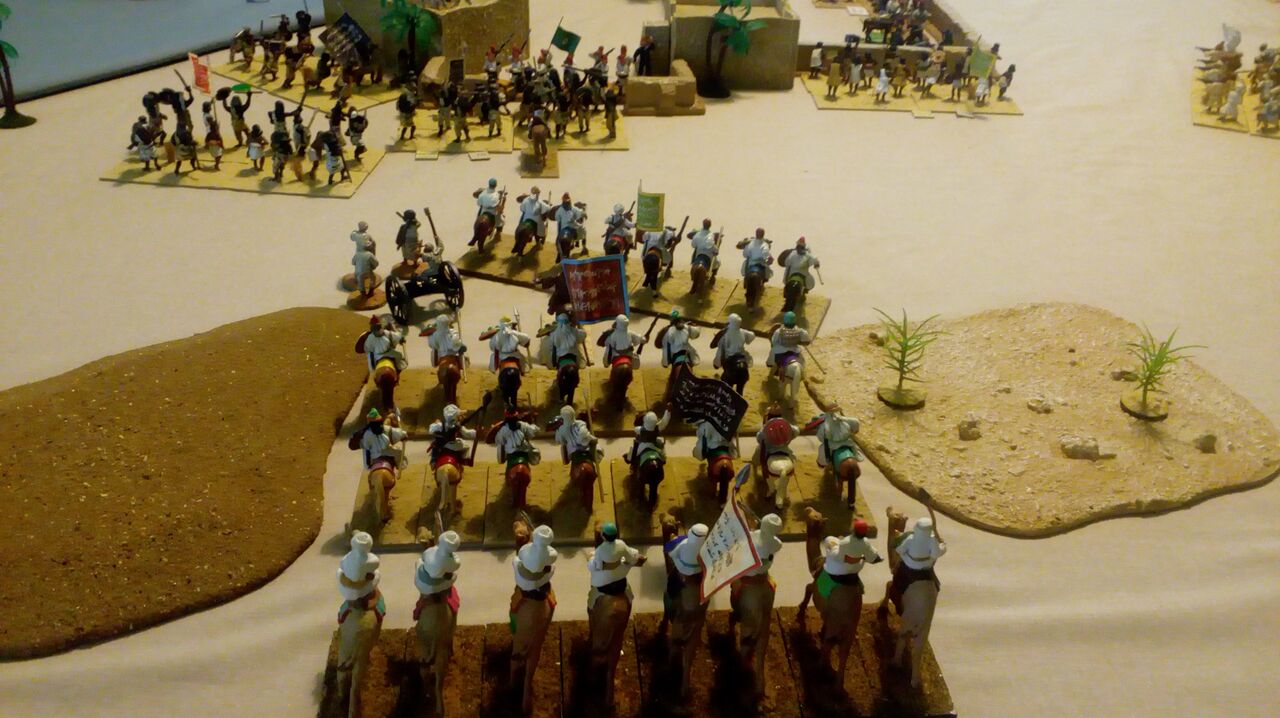
Once again into the sands dear friends, once more....

As you may have guessed, this week we are back in the Sudan.  The small garrison town of El Kohl sits on the banks of the Nile, upstream from Aswan.  It has a garrison of three units of Egyptian infantry, a unit of Egyptian cavalry, a field gun and a machine gun.  Until recently it had had a garrison of British troops, but they have returned to Aswan for further training.  The rank and file were happy to leave, the town had little to offer, the defences were weak and too long for the garrison provided.  They had exercised little ingenuity in nicknaming their posting El Ohl.  For their part many of the officers were glad of the opportunity to return to Aswan and its social possibilities.


Here is a photograph of the table showing El Kohl and neighbourhood,  The Nile flows right to left along the western edge of the town.  The small hamlet of Al Kohol (to the north east) was the billet of the cavalry unit.

One of the liaison officers with the Egyptian garrison has been sent back to Aswan by the commander, Suleiman Bey, to report on the increasing level of Mahdist activity and his assessment that an all out attack on the outpost is imminent.  The report asked for reinforcements and further supplies of ammunition.  In response, the general commanding has put together a force of 3 units of mounted infantry, (South Essex, North Rutland and Borsetshire regiments), a unit of cavalry, (Prince John's Own Royal Lancers), a field gun and a machine gun.  The ammunition and other supplies are to be transported on the steamer Assad, commanded by Lieutenant DR Beatty.  Overall command of the force has been given to Captain CV Firth-Newsome.  Although the column set off without delay, events at El Kohl outpaced them.

Shortly after dawn a patrol galloped back to report large numbers of Mahdists approaching from the east.  The Garrison stood to arms and Suleiman Bey deployed his men around the walls of the town
The 3rd Infantry regiment with the machine gun in the North East corner of El Kohl 

The 2nd Infantry regiment with the field gun cover the eastern wall

The 1st Infantry regiment cover the southern gate
The cavalry at Al Kohol
 All too soon the dust clouds could be seen in the east as the Mahdist troops approached.  When they came within range the defenders opened fire and their efforts succeeded in stopping the first attack, but ammunition was running low.  Runners were sent to the central square where supplies were kept and a mule was loaded with cases of ammunition and dispatched.  As a new assault gathered, the field gun redoubled it's efforts, firing shell after shell into the Mahdists, buying time for the infantry.

As the eastern attacks reached their peak, a unit of Mahdist riflemen broke cover from the rocks near the river bank.  They fired at the troops defending the barricade, causing some casualties.  The cavalry in Al Kohol fired in retaliation, as did the garrison of the Administration building.  None of the Egyptian fire was particularly effective and that from the Administration building became even less so when some native artillery began firing.  Shells began to thud into the walls and although no casualties were caused, most of the defenders sought cover.  As the defensive fire slackened a second unit of Mahdists broke cover and charged forward, heading for the barricade.  Suleiman sent forward his reserve company to help the defenders.  They arrived too late to help defend the barricade, but the defenders had managed to hold the line, though at considerable cost.

The attack on the barricade
For the Egyptian defenders there was no time to rest. No sooner had the first wave of Mahdists been driven back than another charged forward.  This time the reserves were on hand to help, fortunately; as the original defenders were almost wiped out by the new attackers.  Before the Mahdists could take advantage, the reserves charged in and drove back their opponents in total disarray.  The machine gun also played its part, first stopping and then driving back an attack on the eastern wall.  Unfortunately, they ran short of ammunition in doing so.  For the moment, the north east corner was secure.

The second attack on the barricade
It was on the southern side that the next blow fell.  Four large groups of Mahdists broke cover from rough ground not far from the southern gate; two made for the gate itself, the others moved towards the south east corner.  The 1st infantry managed to stop one group with rifle fire, but the second charged home.  A fierce struggle took place in the gate.  The Egyptians were forced back by the sheer force of the Mahdist attack. but managed to hold on.  The Colonel Omar Ghul ran up some steps to get a clear shot at the attackers.

Action at the southern gate

The line breaks
In the end the numbers were just too great and the Egyptians gave way.  Ghul fought on until his revolver was empty, then resorted to his sword, but eventually he was overwhelmed by his assailants.

From his command post in the tower  of the Coptic church, Suleiman Bey was anxiously scanning the northern horizon for sight of the relief force.  With relief, he saw the thick, dark smoke of the steamer in the distance.  Surely, the reinforcements must be near?  Then a rocket was fired from Al Kohol, the signal that indeed the British column was approaching!

The desert column arrives
Firth-Newsome was riding near the front of the column with the lancers.  He decided to send the mounted infantry and artillery around the eastern side of Al Kohol under the command of Captain Dyson, whilst he went with the lancers to sweep the area between Al Kohol and El Kohl clear of the Mahdists.  As the lancers moved forward a body of Mahdists broke cover and charged them.  Caught by surprise, the lancers took casualties, but they recovered and drove off their assailants.  Meanwhile, the Egyptian cavalry, their outpost duties done, mounted up and galloped off to go to the aid of their comrades in El Kohl.

It was as well they did for the garrison were coming under heavy pressure.  Further attacks had been made against the south eastern corner.  The infantry had beaten back one attack, but the field gun had been overrun and now Mahdists were threatening the defenders' flank

The field gun is overrun
Luckily for the defenders, the ammunition mule had been moved towards the northern wall before the Mahdists flowed over the wall and it was thus able to resupply the machine gun.  The 2nd Infantry regiment had stepped back from the wall to face the threat to their flank.  They held the charge from the Mahdists, but couldn't resist a second attack when another unit came over the wall.  The battered remnants of the regiment ran for cover in the Administration building adding to its garrison, which now included the whole of the 3rd Infantry regiment.  Things looked bleak for Suleiman Bey as the whole of the southern half of El Kohl was now in the hands of the Mahdists  and large groups of them were gathering across the square from the Administration building.  As his position in the church tower was becoming threatened he decided to move his command post to the Administration building too.

On the river, Beatty had at last managed to get the steamer into a position where he could assist the garrison.  For the last half an hour as the Assad had crawled upstream he had been sending increasingly strong requests to the chief engineer, Montgomery Scott, for more speed.  The reply was always the same, "I'm givin' her all she's got lieutenant". 

The Assad
Landing a unit of troops was out of the question, the landing stage was too close to the Mahdists, so Beatty order the blue jackets and machine gun to concentrate on driving back the Mahdists with fire.  However, the effect was disappointing.  The rifle fire was woeful, with more shots hitting the buildings than the Mahdists.  At the bow, the machine gun started spraying the square with fire and at first it was effective.  None of the Mahdists dared to venture towards the Administration building.  But suddenly the firing stopped, the gun had jammed.  The crew immediately began to strip down the machine to clear the blockage.

Unseen to Firth-Newsome, but all too clear to Suleiman Bey and Captain Dyson fresh Mahdist troops now entered the battle, mostly cavalry.  They swept around the eastern walls and headed toward Al Kohol.

The Mahdist cavalry arrive
Captain Dyson deployed the North Rutlands together with the field gun to fire at the Mahdists which had appeared from the rocks by the Nile and were now shooting at the Administration building.  The Borsetshires with the machine gun faced the oncoming cavalry.  To their left were the South Essex who were faced by yet more cavalry.  The main pressure fell on the Borsetshires with the first unit of Mahdist cavalry charging them.  However, as the cavalry closed a wave of Mahdist infantry attacked from the rough ground to the Borsetshires' left.  Facing two opponents would be tricky to say the least, but the machine guns now proved their worth.  The gun with the Borsetshires cut a swathe through the enemy horsemen.  It was joined by the gun in El Kohl which also exacted a heavy price.  Very few horsemen reached the British line and those that did achieved nothing.  The Mahdist infantry had more effect, but not enough to budge the resolute British line.  Undeterred, a second cavalry charge was launched, but this met the same fate due to the concentrated fire of the machine guns.  The threat from this direction was now cleared.

The Borsetshires stand firm
However, Firth-Newsome seemed to have disturbed a hornets' nest by his advance with the lancers.  No sooner had he successfully driven off one attack than another was launched.  Although determined, the troopers were becoming tired and for each Mahdist chopped down two more sprang forward.  Groups of lancers were becoming isolated and slowly overcome.  Gathering what men he could Firth-Newsome ordered the bugler to sound the retreat and began to hack his way clear, hoping to make his way to Dyson.  Behind him the other groups of  lancers also tried to hack themselves clear, but far too many were dragged down and butchered.  Prince John's would require a long period of rest, training and reinforcement before they were fit for battle again.

The lancers flee
Back in El Kohl the final phase of the battle began.  With the fire from the Assad dwindling away, the Mahdists readied themselves for an attack on the Administration building.  The defenders did their best to hold them back with rifle fire, but there were just too many.  Aboard the Assad, Beatty fumed as the gun crew tried to clear the machine gun.  It didn't help that under his blazing gaze they had bungled the first attempt and had to begin again.  Torrents of abuse were heaped upon them (and their unfortunate parents to several generations) by the increasingly frustrated officer as he saw the tide of Mahdists flow towards the Administration building.  The garrison held the first rush, defending the ground floor windows and doors with a reckless bravery.  However, a second push, from the side found an undefended window and soon the fight was room to room.  Some men escaped from the northern side of the building and made their way towards the British lines, but those trapped on the upper floors fought to the end.  Now all that remained of the garrison were the cavalry, still holding the north east barricade area and the machine gun.

Attack on the Administration building
Near Al Kohol, the North Rutlands, with the assistance of the Field gun had driven off the riflemen and also a second unit of Mahdists who were massing to attack.  However, the South Essex were having a much tougher time.  Like the Borsetshires they had been charged by cavalry, but having no artillery support found that rifle fire alone had proved insufficient to stop the charging enemy.  A prolonged melee followed which the infantry had won, but the cost had been high and the ranks were now considerable thinned.  As the commander gazed south he saw another Mahdist mounted unit approaching, this one on camels.  He immediately sent a runner to Dyson asking for assistance.  Dyson sent orders to the Borsetshires to aid the South Essex and this they did.  Turning about and wheeling to their right, they took up a position to fire into the flank of any unit attacking the South Essex.  As the camelry approached the South Essex they were met by the combined fire of the two units.  Although it thinned the ranks, it did not stop the attack, but the South Essex managed to hold the first impact.  The melee continued and slowly the camelry gained the upper hand.  Eventually the South Essex line disintegrated, the survivors fleeing towards Al Kohol.  The camelry now turned to face the Borsetshires and charged.  With admirable steadiness the British infantry waited until the enemy was almost on them and fired a devastating volley which totally destroyed their opponents.

In El Kohl the Mahdists were now flowing between the Administration building and the Nile.  Beatty received the news that the machine gun was now in full working order grim faced and tersely said "Well, you had better b******y well get it trained on those d****d Mahdists then !!" 
The gun crew leaped into action and the first wave of Mahdists was reduced to a bloody heap.  The second wave began to suffer the same fate, but then the gun jammed again!  The fire of the blue jackets was again ineffective and a steady stream of Mahdists now moved towards Al Kohol.

The Egyptian cavalry, unaware of the enemy moving around behind them were fully engaged repulsing an attack by Mahdists moving from the Church.  Seeing the clear ground towards the British lines the commander of the cavalry ordered the machine gun crew to take their gun to the British and he would cover their withdrawal.  As the gun moved away, the cavalry saw a unit of camelry coming down the street towards them.  The gun had no sooner moved around the barricade than it was charged by Mahdist infantry.  The crew gallantly stood by their guns, but they were cut down to a man.  Moving on, the Mahdists charged into the rear of the cavalry just as the camelry charged from the front.  The result was never in doubt with the cavalry totally destroyed.  The village was now in Mahdist hands.

The end of Egyptian resistance
Spurred on by their success, the Mahdists now attacked Dyson's force.  As they moved forward they were first hit by shells from the artillery, then the North Rutlands fired a volley and the first wave  of attack dissolved.  However, a second wave continued the attack and by now the field gun was low on ammunition.  It's fire was nor effective and although a volley from the North Rutlands slowed the assault it still came on.  The Borsetshires once again saved the day.  Adding their fire to that of the North Rutlands proved too much for the remaining Mahdists and they fell back to the village, where they moved into the buildings.  Here they were safe from the fire from the Assad (such as it was) and Firth-Newsome's forces were too weak to attack.  Therefore the British gathered their wounded and together with the pitiful remnants of the garrison, they fell back to Aswan.

A Mahdist victory, but at heavy cost.

Steve had created an enjoyable scenario which lasted two full gaming days.  The Mahdist reinforcements were randomly timed and placed by dice roll and created plenty of excitement.  The 'low ammo' rule, together with the jamming of the machine gun created plenty of uncertainty and stopped the Imperial player (me) blazing away all the time.






Friday, 13 October 2017

City break and carts

Another week without a game as my wife and I had a city break in Glasgow.  We also travelled to the coast to meet Alasdair, my long time wargaming opponent and had a lovely day chatting, catching up on projects etc.  Whilst in Glasgow we visited the cathedral where there were various memorials to those who lost their lives in various colonial campaigns.  The one shown below (Eusofzai) was new to me and I must delve a little into the background.


There are also memorial windows to the services, although most were too far away for me to take a decent photograph.


The day before we set off I managed to complete a couple of wagons I had purchased from Colonel Bill's stand at Partizan.  The instructions said they were easy to build and I can report that they were, even for a ham-fisted modeller like myself.


They will no doubt feature in a future ECW scenario.

Saturday, 30 September 2017

Rowton Heath: a Pike and Shotte scenario

Our first tabletop action for a month featured an action from the English Civil War.  This was an almost exclusively affair, which took place not far from Chester in 1645.  The King's forces had advanced northwards to try and raise the Parliamentary siege of the city.  They had been shadowed by Sydenham Poyntz with a force of  cavalry and now he and Langdale faced each other across Rowton Heath.  Each had 8 regiments of cavalry, with Poyntz having a slight edge in the quality of his troops.  In addition, Poyntz has two small units of commanded shot sent from the forces besieging Chester.  Both commanders had the objective of driving off their opponents.  The terrain is very basic, the heath was a relatively flat expanse with no major obstacles to the cavalry manoeuvres.  Along the western edge of the field are some enclosures, (cover for the musketeers) and I added a barn for interest.

The Royalist left

Parliamentary left
The battle opened with Langdale advancing quickly, perhaps hoping to neutralise the enemy musketeers on his flank.  However, his right hand brigade struggled.  Their initial charge was repulsed and as they fell back they disordered their supports.  These were then hit by the successful Parliamentary cavalry.  Against the odds, the Northern Horse held their ground and drove back their assailants; inflicting sufficient casualties to 'shake' them and force them to halt to recover.

On the opposite flank the fight was more even, perhaps favouring Langdale.  Indeed, it was only Poyntz's veteran units from the  Eastern Association which prevented a total collapse.  However, the repeated Royalist attacks pushed most of the units to 'shaken' status and soon they were driven back by the renewed Parliamentary advance.

Jones' musketeers move into position

The initial clashes on the western side of the Heath

Jones' men prepare to fire


On the opposite flank, Jones' musketeers were causing problems for Langdale's regiments as they tried to recover from their clash with Poyntz's men.  This harassing fire delayed their full recovery long enough for the refreshed Parliamentarians to gain the momentum, driving their opponents back in disorder.

Livesey's start the Royalist rot

More Northern Horse quit the field 
 In no time, over half of the Royalist units were in rout and the day was lost.

After lunch we ran the scenario again, this time Langdale prevailed.  His attacks were more co-ordinated than in the first game and Jones' musketeers seemed less effective, allowing the Royalist right the opportunity to recover from their melees.

Sunday, 24 September 2017

An outing and some new recruits

After 3 weeks where family commitments took precedence, Steve and I visited Shrewsbury this weekend to attend the "Century of the Soldier" conference hosted by Helion and Company (details here ) .  This is the third such conference and once again there was a varied programme of speakers on various topics linked to the period  1618-1721, but concentrating on the Civil Wars in the British Isles.  I found the papers by Simon Marsh ("This Disarmed Multitude- the impact of the Lostwithiel campaign on the Earl of Essex's army") and Alan Turton, (Basing House, The Archaeology of the Siege), particularly interesting.  Also Jon Day's "Bloodier than Cromwell?  Michael Jones and the defeat of Royalist Ireland 1647-49" introduced me to a campaign I knew nothing about.

In the 'down time' between battles I have been busy re-basing a collection of ECW figures which came to me from a fellow Gentleman Pensioner, Dave.  So far I have worked my way through the Royalist cavalry and in Kelhamshire Lord Melchett now has 8 new regiments to commit to his ongoing tussle with Sir Victor Meldrew. However, Sir Victor also has reinforcements on the way (a bigger table is going to be necessary I think).

Here are a few photos of the new recruits.


Tuesday, 12 September 2017

Battle of Gospic (Bilaj), May 1809.

Games in September are going to be few and far between because of family commitments, but Steve and I did manage to get together for this Napoleonic scenario.  The details came from the Napoleonic pages on TMP, but I tweaked it a little for the Shako rules.

The overall situation is that Marmont has been ordered to advance with his forces in Dalmatia, moving towards the Danube valley and then to join the main army near Vienna.  In recent days he has checked an attack by local Austrian forces and then advanced through the Velebit Mountains and moved NW towards Gospic.  Austrian forces have tried to hinder his advance along the narrow valleys but the various blocking positions have taken by the French.  Among the prisoners taken by the French was GM von Stoichevich, the Austrian commander.  He was succeeded by Oberst Rebrovic von Razboj, who concentrated his forces behind the Licca river and destroyed all the bridges in the area, except the one behind which his forces awaited the French.  The Licca and its tributaries flowed through deep, narrow channels which meant that they could only be crossed at bridges  Marmont's scouts had reported the destruction of the bridges, but suggested that the one at Barlete over the Jadova, a tributary of the Lissa may be practicable and it would outflank the Austrian forces.  Recognising that attacking equal numbers across a bridge would probably result in heavy casualties, Marmont combined all the light companies and sappers and sent them ahead to try and seize a bridgehead at Barlete.  He accompanied the remaining two brigades of infantry and the baggage train.  The train not only contained supplies and the pontoons but also the wounded from the earlier skirmishes.  News came back that the light troops had indeed managed to push back the Austrians defending Barlete and had established a bridgehead allowing the sappers to begin to build a bridge.


Early on the morning of the 21st May, Rebrovic's scouts reported that the French were crossing the plain beyond Bilaj towards Barlete.  He had received news of the French success at Barlete in the early hours and realised that it would take too long to move his forces to cover the flanking manoeuvre.  Rebrovic took the bold decision to cross the Licca and attack the French column, hoping to seize the wagon train and force Marmont to abandon his advance.  His forces were predominantly 2nd rate reserve units and border troops, but he suspected that he had a slight numerical advantage and the French would be hampered by the wagon train.  In all Rebrovic had 3 Grenz battalions. a composite unit made up of companies from various line battalions, 6 landwehr/border battalions and a light battery.  Marmont's troops were all regulars, but the two brigades were separated by the wagon train and the ranking Medical officer, Surgeon Pasteur was adamant that regular troops would be needed to defend the train and the wounded.  Marmont has to decide how many of his 10 battalions to detach for this task.  He has to bear in mind that Austrian irregulars have been operating in the hills and the sight of undefended wagons would be too tempting for them.  It is also essential that no supplies/equipment is lost.

Marmont's force on the march
The main French force had just emerged from a wooded valley and begun to cross the plain towards Barlete when reports came back to Marmont that two columns of troops were emerging from behind the low hills near Bilaj.  He immediately ordered his leading brigade of 5 battalions commanded by Montrichard to form line to meet this attack and cover the advance of the wagon train towards Barlete.  Orders were sent to Launay, commanding the 2nd brigade to detach two battalions to act as wagon guard and use the remainder of his command to support Montrichard.  Rebrovic's plan was for his left hand column under Jellacic to pin Montrichard in place, whilst his other column (Meyer) would concentrate on the remaining French forces and the wagon train.

The Austrians advance past Bilaj
Advancing at their best speed the Austrian columns quickly closed the distance between them and their opponents.  The French artillery quickly found the range and ball shot carved deep gashes in the white clad ranks.  However, led by the Grenz units the Austrians maintained their pace, deployed into line and engaged the French in musketry.  Marmont watched as the wagon train made agonisingly slow progress across the field and his infantry line struggled to maintain its position.  Montrichard's men  also had to deal with the Austrian artillery which now opened up on their right flank.  The 5th legere suffered heavy casualties from canister and was charged by the reserve battalion of the Chasteler regiment.  Under intense pressure, the French gave way; Jellacic urged his men forward to exploit the opportunity and seize the train.

The 46th defend the wagon train
Just in time, the two battalions of the 46th Line, who were acting as wagon guard, formed line and fired a volley which stopped the Lindenau battalion in its tracks.

On the other flank, Meyer was attempting to move around Montrichard's line.  Unfortunately, the commanders of two landwehr battalions were drawn towards the conflict and came under accurate artillery fire.  As they halted to recover the remaining battalions of Launay's brigade could concentrate on the leading battalions of Meyer's command and crushed them with devastating musketry volleys.  They then moved around the flank of the still shaken Landwehr and overwhelmed them too.

The end is nigh for the Salzburg Landwehr battalion
With half his force streaming to the rear and his remaining brigade column struggling to maintain it's position  Rebrovic had no choice but to withdraw and let the French continue to Barlete.

We ran the scenario again after lunch, this time with the Austrians starting closer to the French marching columns.  This resulted in a closer game, but the French just managed to hold on (again). The determining factor was the better French morale, they could be 'staggered' but they recovered more easily than the 2nd rate Austrian units.

Historically, Marmont did not wait for the Austrians, but attacked and Rebrovic took up a defensive position on the hills.  He managed to hold his position and inflict significant casualties.  However, overnight, the Austrians decided that in view of the shortage of ammunition it would be best to fall back.  So they destroyed the bridge and retreated to Gospic.