Friday, 25 February 2011

Banja Luka

Our most recent game was a first venture into the continuing eighteenth century wars between Austria and the Ottoman Empire using the Konig Krieg rules. The battle of Banja Luka was chosen, the attempted Ottoman relief of the Austrian siege of this vital fortress. The rapidly advancing Ottomans arrived on the field just as Hildeburghausen, the Austrian commander was moving his main force into position to attack. They therefore found themselves sandwiched between an Austrian force in field entrenchments and Hildeburghausen's force.


Ali Pasha, the Ottoman commander, decided to attack Hildeburghausen with two thirds of his force and directed the remainder towards the Austrian entrenchements. The walls of the fortress facing the river were weaker than the rest of the defences and this is what had persuaded Hildeburghausen to deploy his main siege battery facing that section of wall. A small bridge also crossed the river at this point and provided the defencescould be subdued it provided a good place to attempt an assault. It was this siege battery which was the target for the secondary Ottoman attack. There was also a smaller Austrian battery and camp on the other side of Banja Luka, communications with this were via a ford, just beyond the town.


As the main Austrian force began to deploy into line the auxiliary Ottoman forces of Azabs and Wallachs surged forward, followed by the Janissaries. Those facing the main siege entrenchments were into action first and ignoring the volleys from the defenders closed to close quarters. After a fierce melee the first wave was repulsed, just in time to be caught in the flank by Austrian cuirassier who had moved forward in support. This unit of cavalry had sustained casualties from a light battery which the garrison of Banja Luka had dragged forward to support the relief force, but undaunted, had charged home. Pursing the routing Ottoman troops the cavalry also overran a supporting unit, but was halted by the Janissaries in the third line.


More Austrian cavalry moved forward, but, just in time the Spahis arrived, though Ali Pasha directed most of those to the attack on Hildeburghausen, who was hoping the Austrian infantry would hold their nerve as the Ottomans continued their advance. All along the line the volleys rang out as the Ottomans came in range. Some of the units halted or fell back, but enough continued to come to close combat. Ali Pasha hoped to pin the Austrian line long enough to get


his cavalry on their flank and then roll them up. Hildeburghausen's only cavalry was a unit of hussars which although successful avoiding melee for a time, eventuallycharged the leading Spahi unit and routed it. They then dealt with a supporting light cavalry unit in the same way. It was just as well they did because the Austrian infantry had now to face the Janissaries, who charged home through deadly volleys. In the ensuing melee the Austrians prevailed, but the neutralising of the cavalry threat played a large part in their victory.


The threat to the siege works was also removed as the Austrian cavalry forced back the Ottoman troops. One unit of Janissaries was driven into the river and only a few survived the swim to the far bank. Ali Pasha himself only narrowly escaped capture, his lifeguard dying to a man to cover his flight. Looking around, Ali Pasha decided that the day was lost and ordered his remaining cavalry to cover the retreat of his battered infantry. As Hildeburghausen was receiving the congratulations of his staff for his decisive leadership, a rider from the hussar unit observing the southern face of the town rode up to say that the garrison of Banja Luka had sortied and were even now attacking the detatched camp in that sector. Catching the defenders off balance, the first wave suffered few casulaties as they swarmed over the works, routing the defending Puebla regiment. Von Browne the camp commander had moved his reserves forward, but the speed of the collapse of the battalions of the Puebla regiment meant that they were caught deploying and the lead battalion was all but destroyed.


The second battalion, personally led by Von Browne, managed to get into line, but even he couldn't get them to stand against the Ottomans. One battalion of Puebla did reform and covered the retreat of the camp followers and wagon drivers, but the camp was lost, together with the siege artillery.

Historically the Austrians were defeated, in our game they triumphed (in the main) with relative ease. It could be that the factors Koenig Krieg allocates to the Ottomans means that they are always going to struggle, especially against heavy cavalry.

Sunday, 6 February 2011

Battle of Coventry 1642

This week we refought an early action from the English Civil War. In August 1642, prior to the Battle of Edgehill, Charles I approached Coventry and was refused entry. He attacked it, but was repulsed. The game used a small number of figures, but resulted in a close encounter that was in the balance until the last roll of the dice.
The defenders consisted of a unit of the trained band, which their colonel divided, putting the musketeers on the walls, covering the gate and the pikes held back to counter attack any Royalist incursion. To their right the mayor had raised a local militia to cover a breach made by the royalist artillery. Two light guns were available, one covered the gate, the other the breach.

The King, with a bodyguard of Gentlemen Pensioners, had a unit of foot (Penderell's), a forlorn hope of dismounted dragoons, a unit of firelocks and a unit of horse. Two light guns covered the gate and the field guns were on a hill, quite a way from the walls.


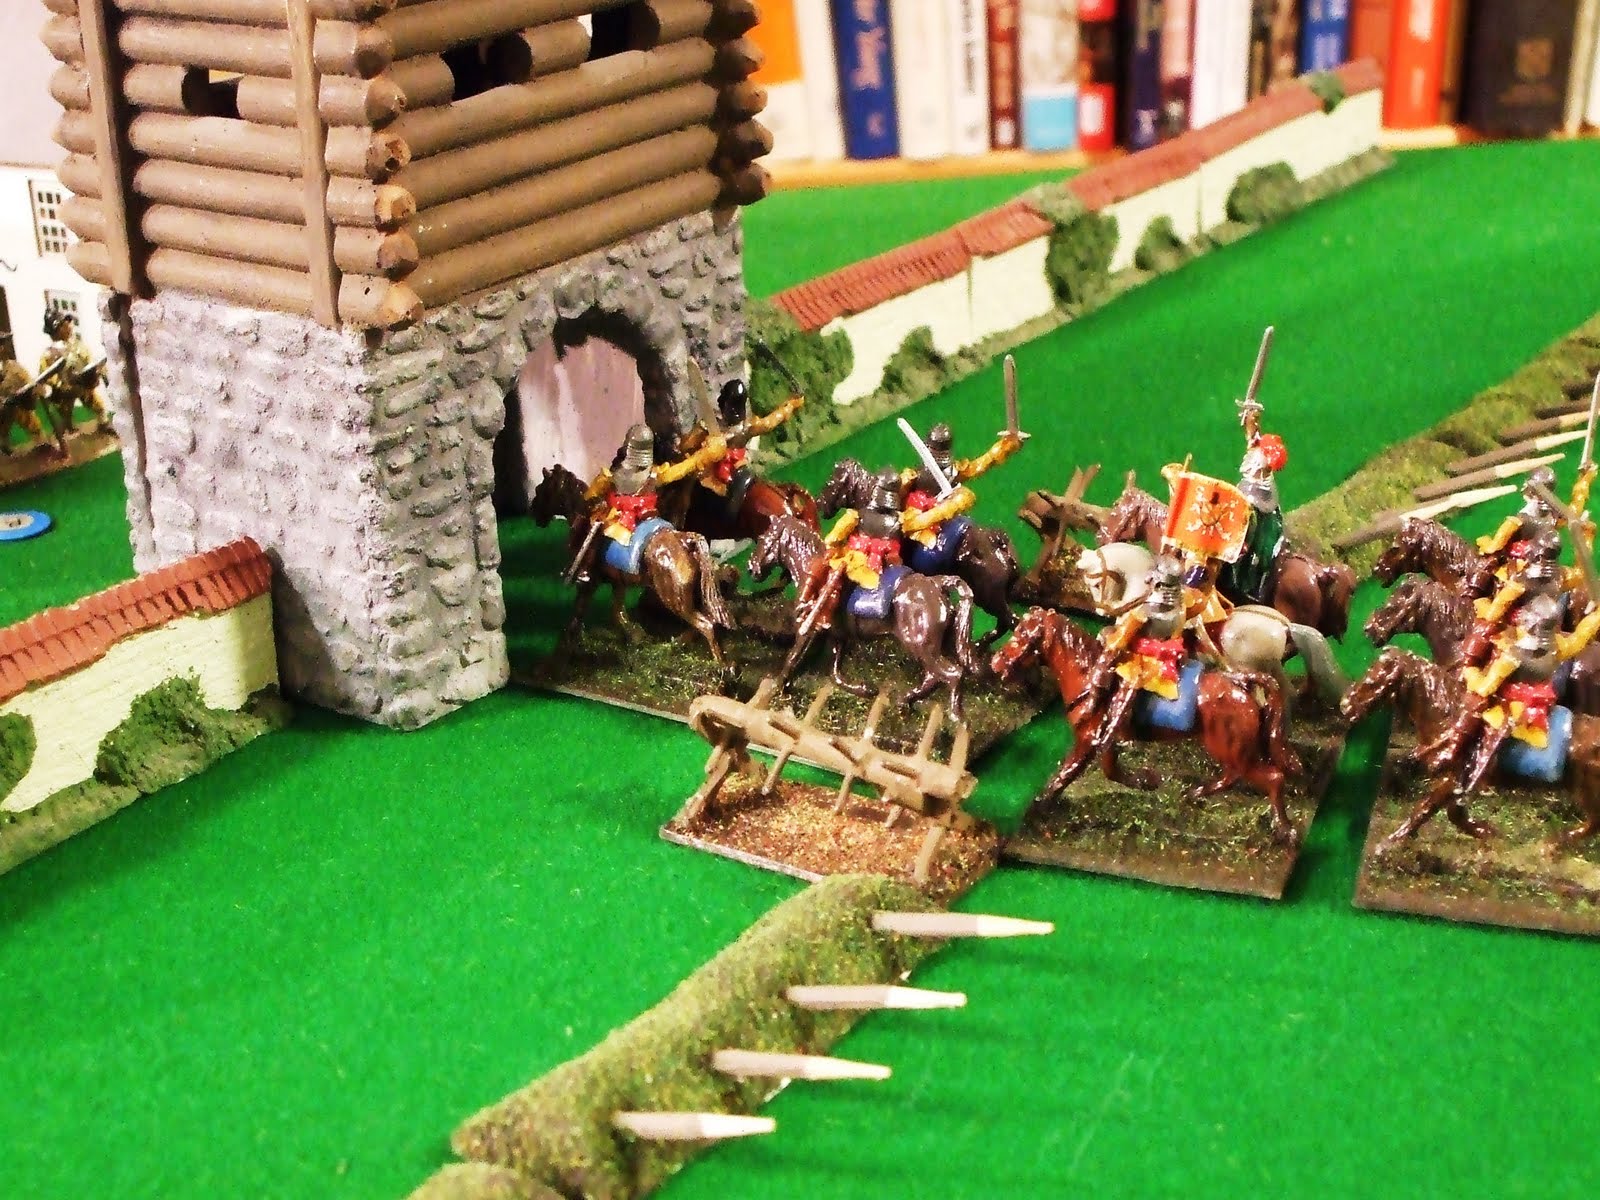
The King's plan was simple, demonstrate an attack on the gate, but put the main effort into carrying the breach. The line of stakes seen in the photograph represent a muddy ditch, passable to infantry, but not cavalry.

Stepping forward with purpose and covered by the dismounted dragoons, Penderell's advanced on the breach. They were supported by the battery on the hill, but the guns had little effect, other than to bury themselves in the ground, or thud into the old town walls. The defenders were unscathed and as the Royalists neared the wall, casualties began to mount.

Over by the gate the 'demonstration' had had more effect. The light guns had opened a telling fire on the trained band holding the wall and the firelocks had advanced to add their fire. However, by advancing the firelocks had drawn the attention of a sniper in the gatehouse tower and two of the officers were casualties. The royalist sniper, 'Old Ned' was ensconced in a house near the gate, waiting for a suitable target. With officer casualties rising he was ordered over to the firelocks to try and subdue his opposite number. Gathering his tackle together, he ambled across the street, confident he was far enough away from the walls. Just as he neared the cover of a barn he was felled by a shot from the parliamentarian sniper. One-Nil to the parliamentarians! Fortunately for the Royalist cause, the sniper seemed to lose his touch after this feat and he inflicted no further casualties on the firelocks. The King was further encouraged by the arrival of a further unit of horse and a small company of dragoons.


By now the attack on the breach was well under way. The forlorn had moved aside and Penderell's pikes struggled across the ditch. As they reformed they were astonished to see the local militia charging towards them. A confused melee took place in the breach, with the locals putting a gallant, but ultimately doomed, defence. Penderell's musketeers scaled the walls, hooping to gain a secure lodgement in the town, but the Parliamentarian commander had moved forward his pike reserve and they charged the unfortunate musketeers. Another one-sided melee ensued with all the musketeers killed or captured. Penderell's pikes now found themselves in an awkward position. A parliamentarian light gun was close enough to employ 'hail' shot against them, which caused severe casualties; they were also now threatened by the trained band pikes, who outnumbered them. Confusion reigned and they began to edge back towards the ditch. The Royalist main attack had stalled, but what of the 'diversion'?

Encouraged by the decline of fire from the walls, the firelock's commander sent a message back saying the way was open for the cavalry to burst through the gateway. Needing little encouragement the cavalry surged forward. The light gun 'defending' the gateway fired one ineffectual shot before the gunners ran and the cavalry broke into the town.


All that faced them was the remnants of the trained band musketeers, but they stood their ground, fired a volley and managed to hold the cavalry. This gave just enough time for the pikes to get back and join in the melee. A fierce fight now began on the streets near the gate. On cue the Parliamentarian reinforcements arrived, threatening the flank of the Royalist position. Luckily, Charles' advisers had prevailed upon him to keep his reinforcements in hand for just such an eventuality. A confused cavalry melee now took place, with the Royalists having the advantage of numbers and quality of troops. These advantages prevailed and the Parliamentarian cavalry quit the field almost as quickly as they had entered it, but importantly, they took with them the Royalist cavalry who refused, or were unable, to rein in. The cavalry, which could perhaps have helped in the town, had gone. Charles had been passive in command, leaving matters to his officers, who he assumed knew best. His opposite number had been far more active. He personally had led reserves to where they were wanted and he was again to be on the spot when it mattered.
Gradually the royalist cavalry had made progress, they were on the point of breaking through the rapidly thinning line of infantry. Colonel Braford gathered half a dozen officers together and turning to them cried "let us charge together for Coventry and our cause". Charging down the bloodied street they struck the Royalist cavalry. Hemmed in as they were the Royalists could not see how many were attacking, only that their line of retreat was threatened, losing heart, those that could, escaped, the rest were captured. Coventry had been held for Parliament.

Sunday, 30 January 2011

Kloster Kamp

Our most recent game,re-fought the Seven Years War battle of Kloster Kamp (1760). Details (including a map) can be found by following the Seven Years War link on the right, which leads to the excellent Seven Years War website.

Briefly, the forces on the extreme left of the French position, were attacked unexpectedly by Allied forces under Ferdinand, which had carried out a flank march during the night. Action took place on either side of the Fosse Eugenica, which was only crossable at two bridges. The opposing light forces skirmishing in the vicinity of the Kloster Kamp convent, whilst the main action took place in and around the French camp.


This is a general view looking from the French right. On the right can be seen the French camp, with the infantry hastening to their positions, beyond them lie the village and the the Fosse Eugenica. To the left can be seen the convent of Kloster Kamp. In the centre is the first wave of the allied attack, comprising four battalions of Highlanders and Grenadiers. Behind them are the British cavalry, one regiment each of dragoons and light dragoons and 6 battalions of infantry, four Hanoverian and two British. Hampered by the camp, the French infantry had not managed to form into a line of battle before the British were upon them. The first battalion of the Regiment Berry was the first into action, although they were on the receiving end of a telling volley from the 87th (Keith's Highlanders). Almost half the Frenchmen were casualties, but they passed their morale test with elan and bravely held their position. As the French line formed up it became clear that although the British infantry were a threat, far more dangerous were the cavalry, who were manoeuvring to charge the French flank or rear. Some aid to the French came from a battery of light artillery which supported them with fire from their right flank. This fire was sufficient to force Fraser's Highlanders to retreat and thus release some pressure on the French line. Urgent messages had been sent to French headquarters for reinforcements , if the line could hold for another hour the day may be saved.


On the other bank of the fosse the light troops continued their skirmishing. A battalion of the Chasseurs Britannique were advancing on the French chasseurs, supported by Luckner's Hussars. Opposing them were the Bercheny Hussars and a small squadron of Saxon hussars, together with three companies of Grenadiers de France. The officer commanding the grenadiers saw that his opponents 'were not proper soldiers' and decided that he could quickly disperse them. Advancing, the grenadiers received a scattered volley from the allied infantry, accepted this as further proof of their opponents poor quality and moved forward again. The French chasseurs had also moved forward and they began a harassing fire, which caused some wavering in the enemy line. The grenadiers surged forward, confident of an easy victory and were met by a shattering volley from the Chasseurs Britannique. The volley was followed by a spirited counter-charge which completely overwhelmed the French and they took no further part in the action. Artillery fire from allied batteries now began to fall on the French light cavalry and the Saxon hussars were driven from the field. With the advantage of numbers now lying with the Allies, the French light forces fell back hoping to hold their original positions.

Meanwhile the main Allied attack was progressing very well. Half the original defenders of the camp had been dispersed, the baggage train was hampering enemy reinforcements deploying and those reinforcements were widely separated. Here we can see the three brigades of French reinforcements. The Swiss and Saxons beyond the hill, the Irish and Germans approaching the ridge and the French tangled with the baggage train and the camp. The British dragoons are moving over the hill, looking for an open flank, whilst the 15th Light Dragoons are threatening an isolated French battalion, whilst British infantry move on their flank.


Inevitably the fight within the camp became a very confused affair, with the British and French infantry exchanging volleys, but making little progress. The French battalions outside the camp were in a far less happy situation. Caught in the open two were ridden down by the Light Dragoons, one stood and fired a volley, but this had no effect on the cavalry, who plunged into the infantry, sabring left and right. The second battalion seeing this turned and ran, but were caught and butchered. The heavy dragoons had seen that they would be unlikely to make progress against the Irish brigade supported as it was by an artillery battery and so they fell back.

This gave just enough time for the baggage train to depart and allow the French reinforcements to deploy in support of the battered defenders of the camp. All the French cavalry, apart from the hussars was on the far left, nothing in the vicinity of the camp. Not only that, once they arrived the cavalry did nothing, not even moving to support the advance of the Saxon and Swiss infantry. These were faced by three regiments of Hanoverian horse which meant that their progress was very slow. Near the camp a more dangerous situation arose. The British heavy dragoons saw that the gap between the hill and the camp was only held by the baggage guard; here was an opportunity to break the line and cause havoc. They surged forward and dispersed the guard with ease. Seeing this the light dragons, emboldened by their earlier success decided to intervene in the fight in the camp. Regardless of the ropes, tents and sundry gear they charged forward and suffered the inevitable result. Caught in restricted terrain, with no means of co-ordinating their attack, they were defeated, and fled to the rear, taking no further part in the action.


Meanwhile, the heavy dragoons had moved to their right and charged the battery which had deployed on the hill. It had been successfully attacking the Hanoverian cavalry holding the Allied left and its removal may allow for a more active advance. The Irish battalions were unable to help the battery as the dragoons threatened them as well. The battery was overrun, but the dragoons now found themselves isolated from the rest of their army, with no clear way out.

For Ferdinand things were going well. Although outnumbered his infantry had captured the enemy camp, secured the village and when the second division arrived the French reinforcements would be forced to withdraw. He ordered the Hanoverian brigade to advance on the Irish, whose cramped position on the hill meant they were unable to bring their full fire power to bear.
Securing the hill was vital if the threat of the Swiss and Saxon infantry was to be nullified. Even as the Hanoverians began their advance Ferdinand observed that the French general had at last decided to take the initiative and had ordered his infantry forward, although curiously the cavalry remained in position.
Whilst mulling over this odd tactical development, Ferdinand was approached by a courier dispatched by the commander of the Hessian brigade, part of the second division, announcing his troops arrival on the field. However, this good news was tempered by a further statement from the Hessian's commander that the position of the rest of the division was unknown to him.
Looking around the field, Ferdinand assessed the position, he had 5 fresh battalions, (the Hessians would take another half hour to reach the front line), with 5 more reduced to half strength or less. His cavalry were equal in numbers to the French, but had recently come under artillery fire. His own artillery would only reach the line of battle at the same time as the Hessian foot. Opposing him were 8 fresh battalions (4 of them elite), plus 5 others and if his right was pushed back, he was in danger of being surrounded. He therefore ordered the Hessian brigade to take up position to cover the withdrawal of the Hanoverian and British infantry, whilst the Hanoverian cavalry held their positions as long as possible to slow any French advance. The withdrawal was carried out with precision, but one Hanoverian battalion, the most advanced failed to fall back in time and was taken prisoner.
On balance an allied victory. The French camp ransacked, two batteries of artillery destroyed and two brigades (eight battalions) of infantry severely damaged, with the Allies suffering the equivalent of 3 battalions of casualties.

Sunday, 16 January 2011

Picts v Romans part 2

At the close of play last week, I thought that a Roman victory was fairly certain, but this week's events changed all that. The right hand warband surged across the stream and attacked the Roman archers. An ineffectual shower of arrows failed to halt the Picts and they charged forward screaming war cries, falling on the archers, inflicting heavy casualties. The small swords of the archers were no match for the axes and swords of their attackers and in no time the archer unit was reduced to a few scattered men desperately seeking safety.


The Roman commander moved over to his right flank and ordered his legionaries to advance on the village. One century was to move into the wood, the other to move around the wood's edge. As they moved forward the scorpion artillery which had previously inflicted heavy casualties on the Pictish centre divided. Two units accompanied the legionaries, the others stood their ground to give fire support. Before the supporting artillery could deploy they were overrun by the warband which had dispersed the archers. It was at this point that the second warband attacked out of the wood. Caught unaware the lead century took heavy casulaties, but managed to stand its ground and counter attack. The century in the wood fared worse. Hampered by the trees the Romans could not make use of their main advantage, unit cohesion. A bloody melee ensued, with casualties mounting on both sides, but with the Picts having the advantage of numbers.

On the Roman left, the two centuries of legionaries continued their advance, though they were suffering casualties from archers in some rough ground to their flank. Doggedly, they advanced, crossing a final ridge and found their way open to the Pictish village.
The Roman cavalry on the Roman right had defeated the last of the chariots, but was struggling to disperse a small unit of slingers (This was one aspect of the rules which we decided needed to be amended. Several times a light infantry unit defeated cavalry, or at least traded casualties at one to one). The Pictish cavalry was also struggling to win a melee against the Roman commander, who had charged with his bodyguard to protect the flank of his legionaries.
The vicious melee by the wood was eventually won by the Picts, after they charged in with their second warband. Outnumbered by 5 to 1 the legionaries fought to the end, but were finally overwhelmed. In the centre the Roman commander fought on against the Pictish cavalry, but his luck ran out and he fell to a spear thrust. His opposite number was also suffering in the desperate fight. Most of his bodyguard were dead or wounded and has he looked around he saw that the Romans had almost reached the village. The warbands were still recovering from their long melee with the legionaries. The day may well be lost. However, the new Roman commander, saw things in a different light. He had only two units remaining, one of which was down to half strength. If he fell back now, he may just, with luck, reach the camp they had marched out of that morning. The garrison would add to their number and they may then be able to reach the relative safety of Britannia.
A good game, in a period we don't often play, was in the balance right to the end. Fortune favoured the Picts with some fortitous die rolls and the late discovery of the advantages for warbands fighting in woods.

Sunday, 9 January 2011

Return to action

A much longer lay-off than originally planned over the Christmas and New Year break. Three games were cancelled due to the weather and ill-health; but this week saw a return to the wargames table.

The action was set on the northern borders of the Roman empire, with a punitive expedition against some Pictish tribes. The Roman orders required the destruction of the barbarian village, the Picts had to stop the Roman advance and save their village. The Picts had gathered three warbands, a largish force of cavalry, some chariots and some missile troops, slingers and archers. Their opponents had 4 centuries of legionaries, two units of auxilia, three units of archers, two small units of cavalry and some scorpion missile engines.


The Pictish army may not have been totally historically accurate, but it made for an interesting game and it also gave us a chance to try out the chariots for the first time. As the Pictish commander I decided that my tactics should be to disrupt the orderly advance of the Roman force and if possible destroy the auxilia and missile units and then deal with the legionaries. To this end I placed all my cavalry on my right supported by the chariots. Two warbands defended the stream in front of the village, whilst a third was on the flankof the Roman advance.

As the Roman advance began my cavalry advanced hoping that their superior numbers would quickly overcome the Roman cavalry on that flank and thus threaten the legionaries' flank. Meanwhile the chariots manoeuvred around the flank of the auxilia hoping to get a chance to charge home. Unfortunately, I got too close to the auxilia and the main Roman archer unit and lost a third of the chariots to their javelins and arrows. The ground must have been too bumpy to allow for accurate fire from the chariots because the Roman were virtually unscathed. As the chariots withdrew the Roman commander (counting as heavy cavalry) charged them and caused even more casualties. However, some balance was restored as one of my archer units inflicted heavy casulaties on a unit of auxilia as they advanced. On the right flank, the cavalry melee was not going too well. Even though I outnumbered the Roman cavalry, I couldn't drive them backwards.


Even worse, two units of legionaries were coming to their aid. The melee dragged on with casulaties rising, yet the Romans held on. Then, the infantry joined in. Suddenly I had lost half the unit and breaking off seemed the only option. The remaining remnant of Roman cavalry did pursue, but losses inflicted by them were small in comparison to what the infantry had been causing.

On the left flank the warband on the hill thought they saw an opportunity to attack the advancing auxilia whilst they were preoccupied by the chariots. Surging forwards they edged away from the legionaries focussing on the auxilia. However, the second Roman cavalry unit had moved round behind them, threatening to charge them from the rear. The rear of the warband turned to face the new threat and managed to hold off the cavalry, but the pause in the advance gave just enough time for the legionaries to get into contact. Attacked in the flank the warband was in serious trouble. As the legionaries got to work butchering the warband, the cavalry withdrew, ready to intervene if necessary.
The unequal contest was over quickly, with the Romans barely losing a man. Although the Roman orderly advance had been disrupted my casulaties had been heavy and those of the Romans very light.
Perhaps emboldened by their success the auxilia pressed forwards towards the stream. One unit was destroyed by combined archery and slingshot, the other charged across the stream to attack the nearest warband and also fell to a man.
So,with the Roman main force nearing the stream, less two cohorts of legionaries who were moving around my right flank and the affair in the balance, battle will hopefully be rejoined later this week.


Friday, 10 December 2010

Action at Steinbrugge

Thanks to the thaw we managed to meet for a game this week and returned to the Seven Years War, with the Action at Steinbrugge; a small scale action in Pomerania. The Swedish army was advancing tentatively southwards, hoping to profit from the main Prussian army's pre-occupation with a large Russian force advancing from the east towards Berlin. All that stood in their way was a scratch force of second-line Prussian units who had orders to demolish the bridge at Steinbrugge. The Swedish force, commanded by GL Lantingshausen, comprised of 2 brigades of line infantry (8 battalions), a battalion of grenadiers, two units of light infantry, 3 batteries of atillery (two of which were light) and a brigade of heavy cavalry. This general view of the battlefield is looking towards the west, the complex of buildings in the centre represent Schloss Steinbruggen. The Prussian commander, Colonel Belling, garrisoned the Schloss with a battalion of grenadiers, a brigade of fusiliers covered the approaches to the bridge, supported by two light batteries. His two units of Hussars were posted to the east of the Schloss and a unit of Frei Korps 'secured' the southern approach to the bridge. All Belling had to do was wait for the sappers to do their job, then fall back over the bridge and then demolish it. Oh, and it would be useful to inflct heavy casualties on the Swedish forces, whilst minimising his own losses.


Belling felt reassured in his dispositions when a message arrived from the grenadiers that the Swedish army was advancing straight down the road from the north, curiously no cavalry was reported. Undaunted, he ordered the Werner Hussars to threaten the flank of the Swedes. No sooner had he ordered this manouevre than another report from the grenadiers reported that the Swedish cavalry was approaching from the west. Confident that the wood protected the flank of his fusiliers, Belling held his position.


The Swedish infantry attack on the Schloss, nine battalions strong, was now forming up and Lantingshausen sent forward a small unit of skirmishers to test out the grenadier garrison. Concentrating on the Schloss, the light infantry did not see the Prussian hussars to their left flank. Seizing their opportunity, the hussars charged and dispersed the Swedes with little loss to themselves. Surging forward they then charged a line battalion, hoping to cause confusion and delay to the Swedish advance. However, the Swedes stood their ground and the Prussian charge failed and it was the the hussars who had to retreat in confusion. The grenadiers in the Schloss fired volleys at the advancing Swedish battalions, but this did not halt their progress. Seeing that he could not hold the whole of the perimeter the major of grenadiers decided to hold the main hall on the southern face of the schloss. Unfortunately his runner did not reach the captains of the flank companies and it was a rather disorganised 'fallback'. Seeing the enemy crossing the wall the Major countermanded his order and decided to charge. A surprisingly telling volley caused heavy casualties amongst the grenadiers and the determined Swedes were victorious in the resulting melee, causing an ignominious retreat on their more illustrious opponents.


Meanwhile the Swedish cavalry had moved forward towards the crossroads. One unit had moved near the river to pin the fusiliers' flank, whilst the light artillery and more light infantry moved up in support. The Swedish cavalry commander was impatient, after all, their opponents were mere fusiliers, not proper infantry. One charge could win the battle. Forming the dragoons into line the colonel then led them forward. The crew of the Prussian light artillery decided to seek security in the formed unit rather than fire a last minute salvo. Sweeping forward the dragoons were met by a devastating volley, which almost brought them to a halt. Before they could recover, a second volley emptied yet more saddles and they retired in confusion.


Belling was relieved to receive a message from the captain of sappers that the bridge was now ready for demolition. It was time to fall back before the Swedish infantry got too close, even now the enemy light infantry were sniping at his gunners. In addition, a second unit of light infantry had marched unobserved into the wood flanking the fusiliers' position. One battalion had formed up ready to march south when a courier arrived in great haste. His despatch altered everything.


Belling could not retreat. Just beyond the river a supply train was moving slowly eastwards to resupply the garrison at Stettin. He had to deny the enemy any chance to advance and capture this prize. Taking his aide to one side he dictated an order for the captain of sappers, "explode your charges now". He then told the aide to cross the bridge, witness the effectiveness of the demolition and then ride south to reaasure the commander of the supply train that the Swedes could not attack him.


Turning again to the battle he watched his gallant fusiliers try and stem the tide of Swedish infantry. They fought well, but once they heard the explosion and saw that the bridge was no more, the fight went out of them and surrender was inevitable. Lantingshausen could not savour his victory because he too received a despatch. A large Prussian force had sortied from Stettin and was threatening to cut him off from his base, so an immediate retreat was necessary. The day thus ended with both sides able to claim a victory, the Belling could point to the destruction of the bridge and the casualties suffered by the Swedish elite units. Lantingshausen had captured the majority of the Prussian force.

Sunday, 5 December 2010

Match postponed

Like many other gamers our regular weekly meeting has fallen foul of the snow. Not that we had the amounts seen in the North East and Scotland, but what we had, plus frost, made the drive over back roads more than a little foolish. The weather also put paid to a planned visit to the Recon show at Pudsey; not that I am going to feel the 'pinch' as far as painting and other wargaming activity is concerned; my painting table is still groaning under too much lead.
Some months back I mentioned that I was going to read Zoe Oldenburg's book on the Crusades, well I started, but I found it hard going, however, I did find the book below.


The Crusades have fascinated me since I studied them at university, the interplay of politics and religion through the medium of miltary campaigns generate all sorts of unlikely alliances and scenarios. As you can gather from the title, this book does not go into great detail on individual battles, but does give an idea of the background which framed the various campaigns. Having read this book over the last few weeks, I started wondering if a 'Diplomacy' type variant could be created for the Crusades. In addition to the 'national' players for the Latin states and their Moslem opponents, you could have the Papacy, Byzantium and Italian merchants; the uncertainty could provide plenty of entertainment. This period would also be suitable for a club campaign at various levels. The strategic would involve the national contingents, but there is also the possibility to game at 'skirmish' level, with individual knights and their retinues taking part in local raids. Not that crusading was limited to the Latin Kingdoms and the eastern Mediterranean. You could opt for the campaigns of the Teutonic Knights and their 'guests' against the peoples of Northern Europe (this is really well covered by Eric Christiansen in "The Northern Crusades"). Also you could try the campaigns to recover Spain from the Moors, or perhaps, the campaigns in southern France known as the Albigensian Crusade. The period also offers plenty of variety in troop types and army composition. There is also the opprotunity of using some figures 'out of period' to create the armies.