Monday, 27 February 2012

Polish and Russian recruits

Progress has been slow on the painting front of late, but I have eventually managed to complete this command base for the Polish foot. The flag is for the Trzywdar clan and I downloaded the image from a Polish heraldry website.


I have also done some restoration work on these 40mm homecast Great Northern War Russian dragoons. Some had developed a case of the dreaded 'lead rot' and needed cleaning up and repainting.

Friday, 24 February 2012

London break

Over the half term we visited London and as usual I managed to fit in a few military history linked visits. The principal one was the Imperial War Museum. The collections concentrate on the First and Second World Wars plus later conflicts and therefore outside my usual interests, but the galleries and exhibits are fascinating.


The scene is really set by these magnificent 15" naval guns outside the entrance. Artillery on a smaller scale can be seen outside the Tower of London


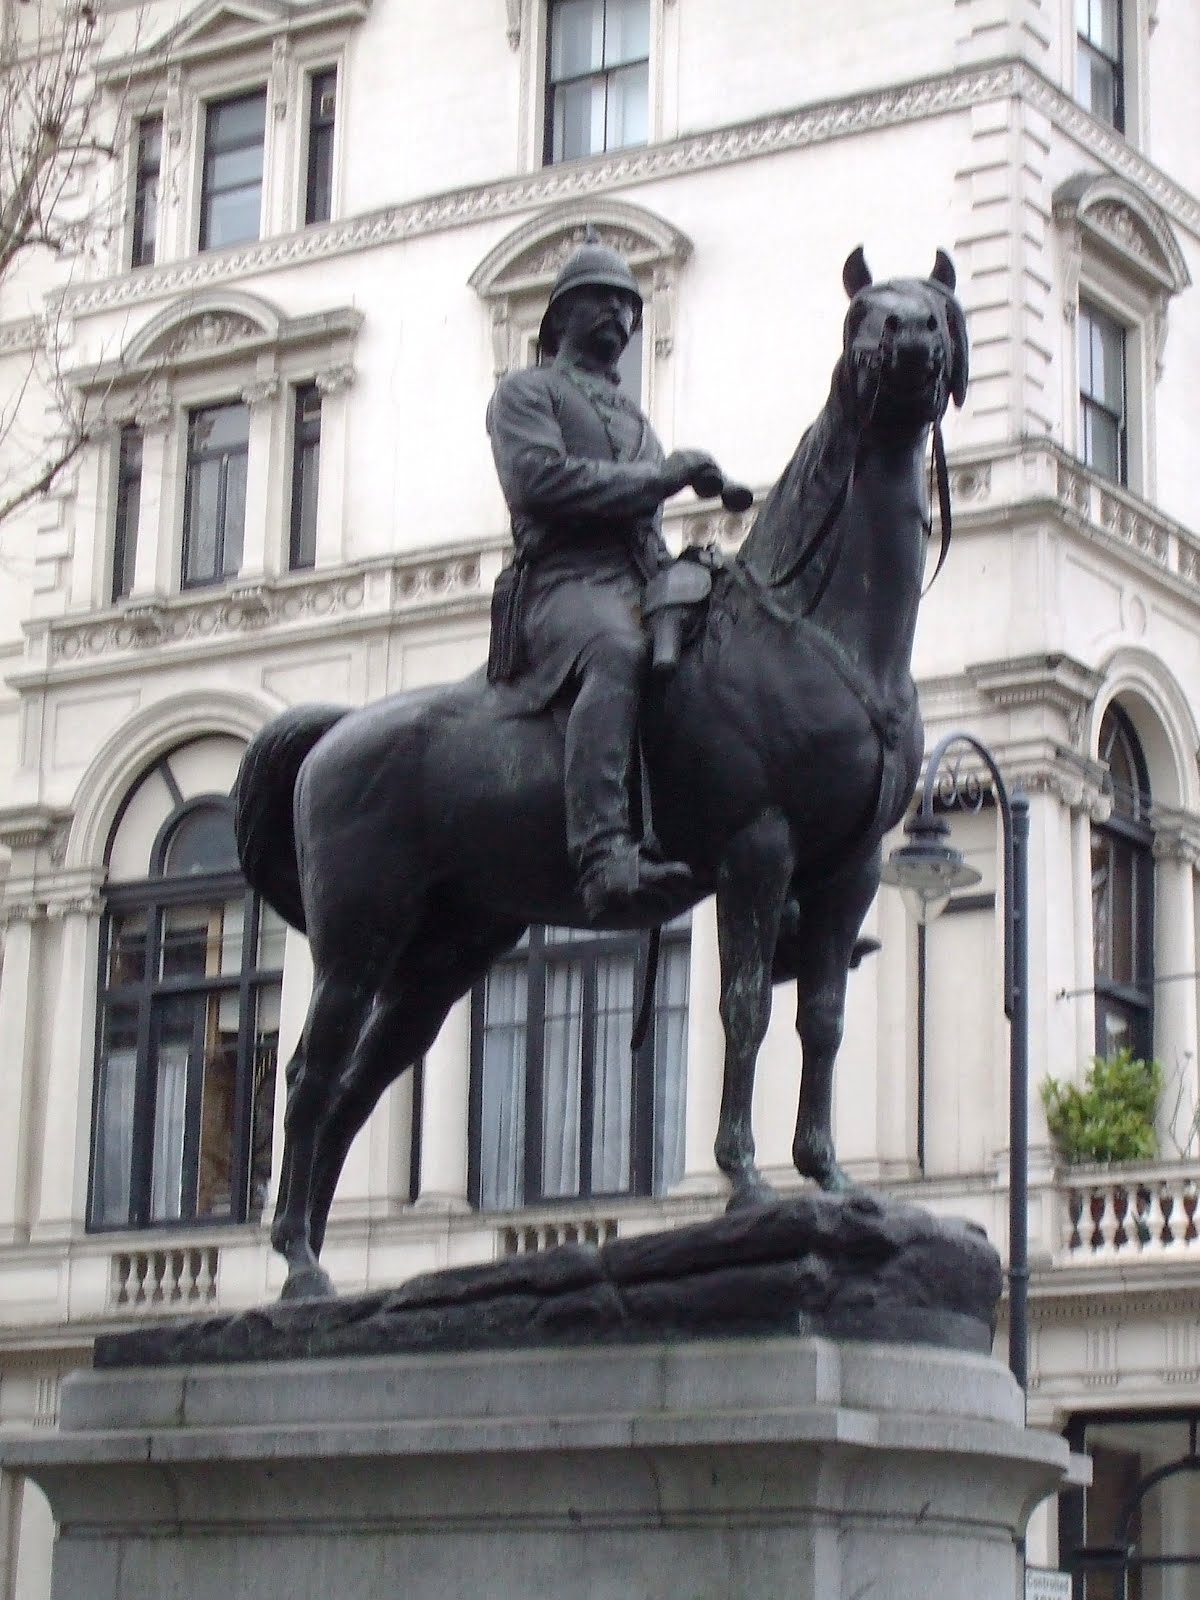
London is well known for the number and variety of commemorative statues, featuring many military figures from the past. Whilst walking near the Albert Hall I spotted this statue to Field Marshal Robert Napier who had an active career featuring in the Sikh Wars, Indian Mutiny and Abysinnian campaign.


Even unlikely venues can provide objects of interest. The Victoria and Albert Museum is best known for its art and desgn collections, but in one of the galleries I found this plaster cast of Trajan's column. It is so big that they have had to cut it in two.


Nearby are casts of the memorials to knights in the Temple Church. The casts were made in the mid 19th century and it is fortunate that they were, because Temple Church was hit during the blitz. Part of the roof collapsed and damaged the originals. These can still be seen in the restored church.

Wednesday, 8 February 2012

Back to the Sudan

Last weekend was pretty busy, including not only a visit to the Vapnartak show at York on the Sunday, but also an excellent Sudan game on the Saturday. The participants were all members of the "Gentlemen Pensioners" group and the scenario involved an attempt by Imperial forces to secure a small town on the Nile as a base for a further advance southwards.


The Imperial forces consisted of a British brigade under the command of Colonel Sir Wellesley Tankerton, an Egyptian brigade commanded by Hartley Pasha; an exiled officer who had secured a position in the Khedive's army only because no one else would have him and a desert column under Captain Fitzwilliam Paget. This latter force consisted of two units of camel mounted infantry and a detachment of the Irish Lancers. All three forces also had a field gun and a machine gun. The land forces were supported by the steamer 'Windsor' under the command of Captain Arthur 'Tiffin' Arbuthnot, an old Egypt hand who had many years service with the Thomas Cook company. His normal crew had been augmented by a detachment of marines and two gun crews.
Tankerton's plan was for the Egyptian brigade to advance close to the Nile, supported by the Windsor whilst he held the more exposed 'desert' flank. Paget's force was to make a flank march and divert atention from the main attack before joining the main force.

The strength of the Dervish force in the area was unknown, but scouts had reported that a large force of cavalry had moved to the south yesterday.


As the main Imperial force advanced they found that the 'Red House' had been fortified and garrisoned by the dervishes. The house lay in the path of Hartley Pasha's Egyptian troops and, conscious of the need to maintain their morale he decided to halt and 'soften up' the defenders with his artillery before committing his infantry to an attack. Hartley signalled to Artbuthnot requesting supporting fire from the river and soon the Red House was under heavy fire.

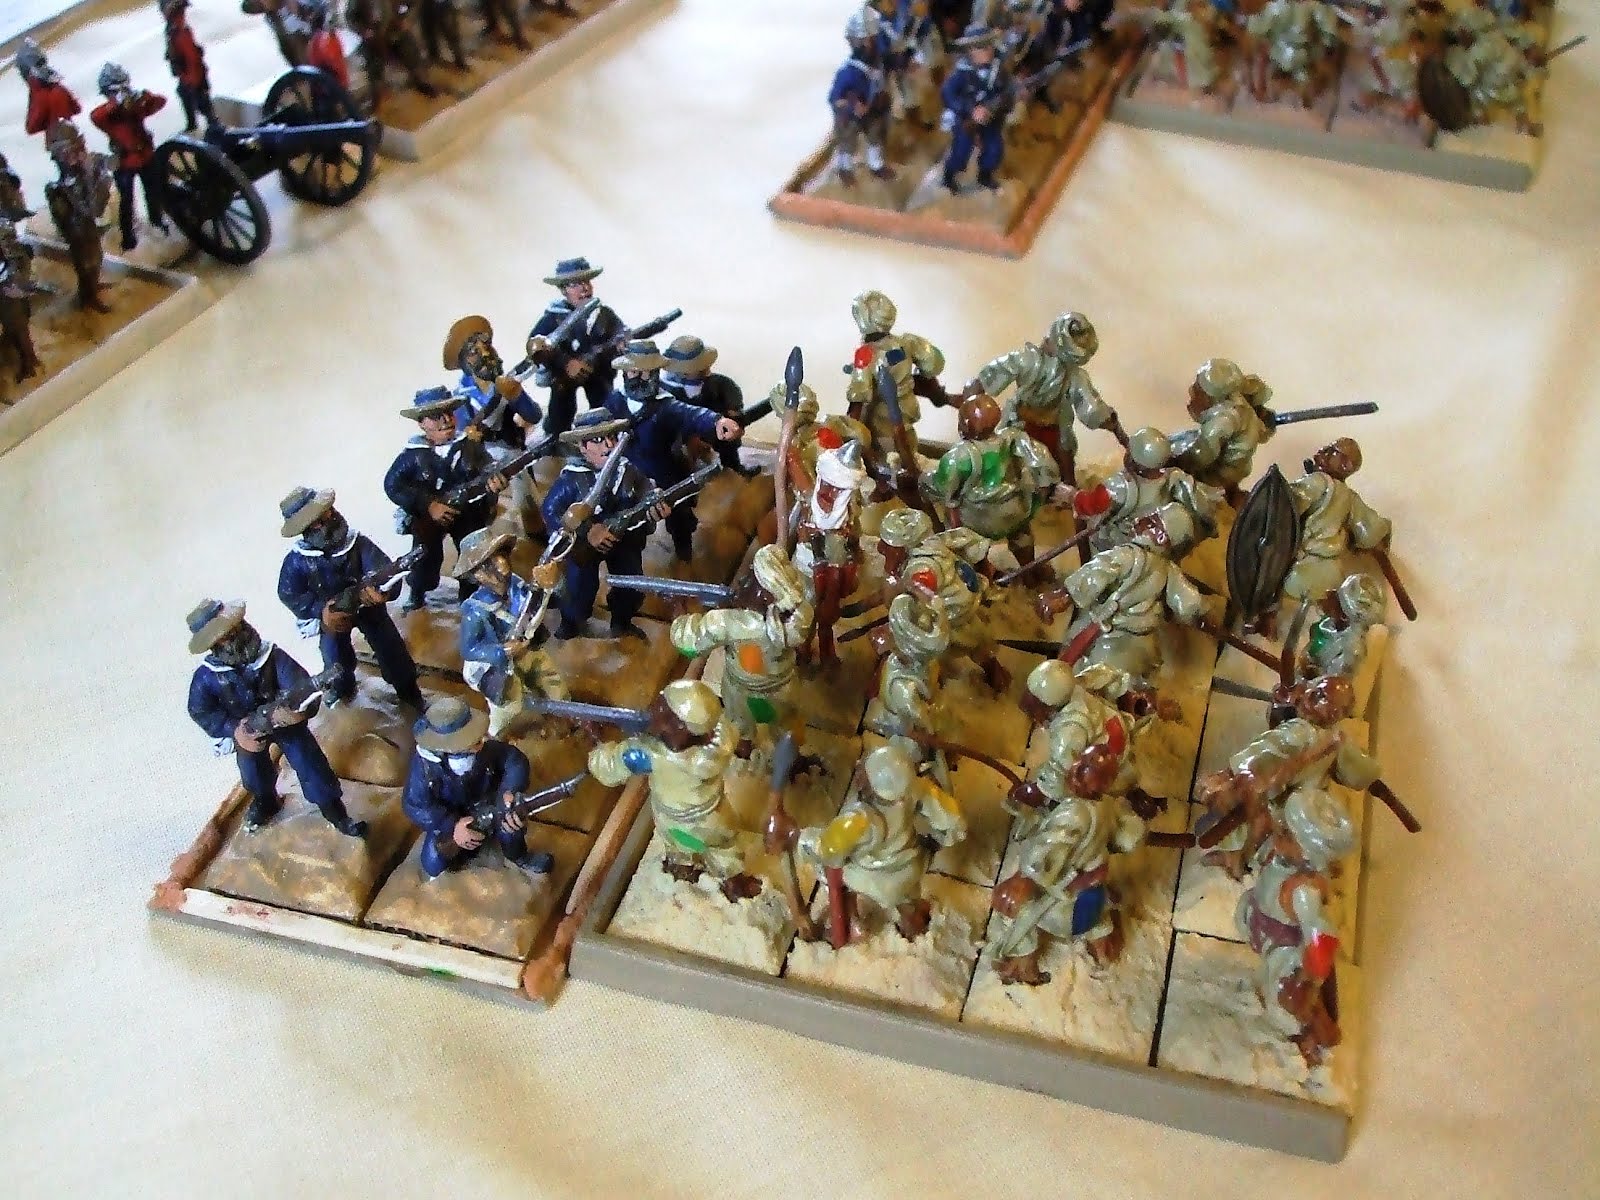
Tankerton's advance was soon in trouble. Dispensing with scouts his forward line of 'blue jackets' was suddenly charged by two units of dervish infantry led by the renowned veteran Inshallah Ayg. There was little time for the naval infantry to fire before the enemy were upon them.


In the brief melee which followed the line was overwhelmed and the sight of British troops running from native opponents was mercifully not noticed by the reporters from the 'Times'. Fortunately for Tankerton his second line held and the dervish foot were eventually driven off with heavy casualties.

Further to the south Paget had arrived and moved to secure an isolated village, before moving towards the town. A small garrison of Hadendowah moved away as Paget's force approached the town and the mounted infantry gratefully took possession. As Paget's force assembled a cry rang out and Hadendowah infantry seemed to spring from the earth.


The village was quickly retaken and its British garrison slaughtered. The machine gun crew were also lost causing Paget to remark "B****r, I was counting on them". Not all the Hadendowah closed with the British and one unit was driven off by the Lancers, though at high cost as most of the officers were killed. Then, from the desert the dervish cavalry appeared, led by Agar Bey. All Paget's men were committed to trying to hold off the Hadendowah and so the dervish cavalry swept down upon them unopposed. Only a few of the lancers managed to break off and desperately sought to reach the main force; the mounted infantry died where they stood; hacked down by the Hadendowah, or stabbed by the horsemen. The lancers did not make it to the main force, but were surrounded by the dervish cavalry who were on fresher horses. Delayed by fighting the cavalry, the Irishmen were caught by the pursuing Hadendowah and cut down.

Unaware of the disaster befalling Paget, Tankerton and Hartley were congatulating themselves on clearing away Inshallah Ayg's men and the defenders of the Red House. Hartley was now forming up his men ready to advance on the town itself and Arbuthnot was moving upstream to open fire on the town's defenders. As Tankerton's men moved forward Inshallah Ayg attacked again. Goading the British infantry with sporadic rifle fire and then opening up with a field gun. As the British dealt with the gun a unit of Hadendowah charged forward.


This time the British infantry held their ground and after a fierce struggle drove off the Hadendowah. His front clear at last, Tankerton advanced towards the town, but as he breasted the low ridge he saw the mass of dervish cavalry moving towards him. Further back dervish infantry were moving to reinforce the town's defences, just as the Egyptians were reaching the walls.

The Emir had fought his battle well. Inshallah Ayg had delayed the main force long enough for the desert column to be defeated by the bulk of his best troops. Now they could reinforce the defence. Hartley Pasha had two battalions ready to cross the walls of the town, a third was covering his flank and linking with the British brigade. Confident in the firepower of his artillery and infantry Tankerton watched the dervish cavalry move towards him, riding to their death. However, they survived the volleys and crashed into his line; hitting the already depleted blue jackets. The naval men fought bravely, but were overrun, the line was broken, the British and Egyptian artillery was open to attack. The 3rd Egyptian battalion was also hit by dervish cavalry and managed to drive them back, but lost almost a third of its strength in doing so. On the river flank, the 1st Egyptian battalion had been charged by the dervish infantry and in spite of the efforts of the officers, the men turned and ran for the supposed safety of the 'Red House'. Arbuthnot, watching from the river saw the turn of events and with an increasing number of shells being directed at his command by the dervish artillery he drew off to the south. His men tended to those onboard wounded by shell fragments and he ordered his boy to prepare tiffin as the sun was already past the yardarm.

Tankerton and Hartley gathered what men they could and drew off to the north leaving the day and town to the celebrating dervish warriors.

Tuesday, 7 February 2012

Back to Ireland

We had a further installment in the on-going Irish campaign this week. The scenario came from "Scenarios for all ages" by Grant and Asquith and concerned the attempt by the Jacobites and Williamites to each seize a vital bridge. Each force is split into two brigades of similar composition. One brigade from each side advanced directly along the road towards the bridge, whilst the other entered from their respective left flanks. The Williamites were slightly disadvantaged by their flanking force being delayed by up to five moves.
I commanded the Jacobite force and decided to ford the river and concentrate on the first Williamite force.


Meanwhile the brigades on the road both advanced their cavalry at full speed to the bridge. The Jacobite horse halted short of the bridge whilst their opponents continued across. The Williamites were hampered by the narrowness of their formation and were pushed back after the initial clash. Now the fight took place on the bridge with both sides hampered by the lack of space to wield their weapons and manoeuvre. The melee swayed back and forth with neither side able to gain an advantage. Eventually both units had to fall back exhausted with no one controlling the bridge.

Both sides moved infantry up to the line of the river and a musketry duel began. The Williamites had been quicker to get into position and thus got their volley in first. As the fire fight continued the Williamites began to get the uppper hand and lacking support the Jacobites fell back.

By now the second Williamite brigade had appeared and was advancing on the right flank of the Jacobite force on the road. The second Jacobite force were now across the river and had begun its advance towards the Williamite side of the bridge. However, the line of march was hampered by terrain and a large manor house. This had been garrisoned by a Williamite battalion which opened fire on the Jacobite infantry. One of the Jacobite units halted to try and suppress the fire, but as it's casualties mounted, the officers were unable to hold them in place and they broke and ran back to the ford.

.

Ahead, the cavalry vanguard were charged by the Williamite horse. Although they had the advantage of the ground the Jacobites were completely routed by their opponents and the victorious Williamites swept on towards the enemy infantry. Surprised, the infantry struggled into formation and for a time held off the cavalry, but eventually, the horsemen broke into the infantry formation and a rout resulted.

Across the river, the Williamites were closing in on the bridge, using a copse to cover the advance. They were aided by a second cavalry advance. This was unopposed because the Jacobite cavalry had moved to the opposite flank to oppose yet more Williamite cavalry which were threatening the line of retreat.


My infantry tried to hold off the cavalry, but were unsuccessful and disregarding the urgent orders of the brigadier broke and ran. Another push by cavalry against my light artillery failed because, against the odds, they lost formation in the river. However, the final nail in the Jacobite coffin was the successful attack by the final Wlliamite cavalry which swept away the Jacobite cavalry covering the line of retreat. Now the 'road' brigade had no cavalry and was outnumbered by the enemy infantry. The 'flank' brigade had lost half of its infantry and half its cavalry. The remaining cavalry had the opportunity to charge the unsupported enemy infantry, but failed the test to charge and was thus stranded in musketry range and at risk of losing a significant proportion of its strength. Thus what units could, retreated off the field and the victorious Williamites gained control of the bridge.

Our after action discussion highlighted the faulty decision to cross the river, particularly into constricted terrain which favoured the defence. Perhaps, it would have been better to concentrate all forces at the bridge. Food for thought should the same sort of situation crop up.

Sunday, 29 January 2012

Paltzig

Well, this week we managed to finish off the battle of Paltzig and a bloody affair it was too. The background can be found on the Kronoskaf site.
Wedel had taken over command of the Prussian army from Dohna, who was considered too passive by Frederick. The King's instructions to Wedel were simple, attack, attack, attack! Unfortunately, neither appreciated the fact that the Russian army, commanded by Saltykov was at least twice the size of their own and had an even bigger advantage in artillery.


An attack on the Prussian centre was impractical. A marshy stream barred the advance and was crossed by a single bridge. This bridge was covered by artillery in a redoubt and three brigades of infantry. Wedel decided to move to his left and attack the Russian flank. Saltykov had anticipated such a move and had concentrated his artillery and grenadiers to block the Prussian attack. A further handicap for Wedel was that his artillery were not well placed to support his attack, being
positioned in the centre. Nevertheless, with his king's orders in his pocket Wedel ordered the attack and the brigades of Manteuffel and Hulsen moved forward flanked by grenadier battalions. Behind them the cavalry formed up to cover the infantry's flank and the infantry reserve under Flemming took up position in the rear.
The Prussian infantry soon came under artillery fire, but pushed on in spite of the losses. As they neared the low ridge on which the Russian artillery were placed the fire slackened, but only because the Russian grenadiers were in the way. Now it was musketry volleys which plagued the determined Prussian infantry. However, the accuracy of the grenadiers' fire was not to the liking of their generals; the Prussians halted dressed their ranks and returned the compliment, causing heavy casualties amongst their opponents.


In the centre the Prussian artillery had had some success against the Russian infantry, causing battalions to retreat because of casualties. Saltykov saw that the Prussians were bringing forward their howitzer battery to assist the infantry attack and decided to counter this threat with one of his Pandour units. The central Russian artillery battery gave assistance by targeting the weak brigade supporting the Prussian guns. This comprised garrison and Frei Korps troops and they quickly demonstrated that they had no appetite for standing under artillery fire and fell back to the lee of the ridge in the Prussian centre. This left the howitzer battery vulnerable to sniping fire from the Pandours, but fortunately the gunners spotted the threat and managed to drive off the Russians with a salvo of grape. After this events in the centre were limited to exchanges of artillery fire.

Seeing the Prussian attack develop, Saltykov began to move troops to his right, particularly his cavalry as the Cossacks and Hussars originally stationed on that flank were over-matched by the Prussian dragoons and cuirassiers now advancing towards them. In the van were the von Schorlemmer (or Porcelain) Dragoons. The Russian light cavalry did an excellent job slowing the Prussian advance and just in time the lead regiment of Russian horse grenadiers moved into the line covering the flank of the grenadier brigade. This marked the 'high water mark' of the Prussian advance. Against the odds the Prussian infantry were gaining the upper hand over the Russian grenadiers, though at fearful cost. One of the Russian Observation Corps regiments had been driven off by the right flanking Prussian grenadier battalion and a battered battalion of the Itzenplitz regiment was taking on the artillery fusiliers who were the last line of defence for the Russian batteries.


The Horse Grenadiers and Dragoons smashed into each other and the Prussians lived up to their nickname, being broken and fleeing to the rear. A second regiment of dragoons tried their luck, but they too were trampled underfoot by the Russians. The cuirassiers fared no better, they were also defeated and had to retire to reform. Von Schmettau and Von Normann struggled to cobble together forces to oppose the seemingly invincible Horse Grenadiers; it was vital to try and hold the ground in order to protect the infantry. Eventually, perhaps more by good luck than management, the Von Buddenbrock Cuirassier managed to attack the flank of the Horse Grenadiers and drive them off. However, there was not time to celebrate, as Buddenbrock were in their turn hit in flank by a supporting Russian Dragoon regiment.

Wedel could see the remnants of his infantry attack falling back off the ridge; he sent an aide requesting Von Flemming to advance to support the attack. It was too late, Manteuffel and Hulsen between them had only four battered battalions in the line and these were under strength. The final Prussian cavalry units were driven from the field by the Russian reserve cavalry and a fresh unit of Horse Grenadiers charged Von Flemming's line. One of his battalions broke and the cavalry surged through. Ahead lay the broken Prussian infantry units heading for the pontoon bridge across the marshy stream, all was lost for the Prussian army. Those units which could closed ranks and slowly moved off the field. For Alt Dohna, still fighting the grenadiers there was no escape, the cossacks saw to that.


The Prussians also lost their general. Wedel, waiting for the supports saw some infantry moving towards him from the ridge. He moved to rally them and was taken prisoner by the Pandours he had mistaken for Prussians.
At supper that evening with his victorious opponent he confided that "war is a horrid business, but murder is a good deal worse and that is what my orders today amounted to".

Saturday, 21 January 2012

Pfalzdorf

As you can see from the title, the conclusion of the SYW battle of Pfaltzig has been held over for another week. We decided to dust off the medieval figures and try out a scenario using the WAB Armies of Chivalry supplement. Prince Abel of Denmark had raised an army to extend the Danish influence within the borders of the Holy Roman Empire. Poptkopf Von Gissenheim had, at the request of the Emperor, assembled a force to resist this unwanted intrusion and this was camped under the walls of Pfalzdorf.
With the confidence of youth Prince Abel decided to attack. His force contained militia infantry raised from Kefeld, Wissemburg, Magdeburg, Speyer and Bartenstein (crossbows), plus some mercenary archers. In addition to a unit of knights led by his second in command Gottfreid von Alderhelm, he had a unit of mounted men-at-arms. Poptkopf had used the influence of the emperor's name to hire mercenaries from Bohemia (crossbows and foot) together with militia foot from Mainz and Hagenau. In addition to knights led by the warrior bishop of Wissengen, many minor gentry had responded to the imperial 'request' and so Poptkopf had two units of mounted men-at-arms.


The action opened with both sides advancing. Poptkopf, keen to exploit his advantage in men-at-arms, moved one unit to his left, by the town walls, threatening the Magdeburg militia on Abel's right flank. The archers to Magdeburg's left were busy responding to the fire from the opposing Bohemian crossbowmen and so were unable to fire at the advancing men-at-arms. Un-nerved by the approaching enemy the Magdeburg militia took to their heels opening up Abel's right flank. Fortunately, Gottfried was able to move his knights over to counter this threat and a prolonged melee began.

On the opposite flank the Krefeld militia advanced against Hagenau, whom they outnumbered 2 to 1. Hagenau's supporting archers were involved in the same sort of exchanges as on the other flank with the Bartenstein crossbowmen. As the two bodies of militia came together Hagenau managed to hold their ground and a slogging match developed.

In the centre Mainz and Wissemburg clashed and although the Mainz contingent had the advantage of numbers they too were held.


However, Abel had spotted an opportunity for his mounted men-at-arms. The Hagenau archers were blocking the advance of Poptkopf's second men-at-arms unit and were also vulnerable to attack. The archer's attempt to disrupt the men-at-arms advance with arrows was ineffective and the mounted men crashed home. In spite of 25% casualties the archers held, but Poptkopf could do little to help them in their unequal struggle. As the men-at-arms broke into the archers' formation order disintegrated and they broke. As the archers ran for the temporary security of the town Poptkopf's men-at-arms moved to oppose their victorious enemies.

On his right, Abel had managed to rally the Madeburg militia and now they advance to join in the melee between Gottfreid's knights and the men-at-arms. Initially they exerted no influence, but slowly they began to increase the pressure on their opponents and suddenly the men-at-arms broke. As they turned their backs Gottfreid's knights attacked with impunity and pursued the remnants as far as the town walls.


However, in the centre Poptkopf had had some success. Mainz had at last overcome the militia from Wissemburg and bishop and his knights had moved forward and attacked the militia from Speyer. The Bohemian troops had attacked the mercenary archers and although the foot had been pushed back, the crossbowmen had been very effective.

The battle looked evenly poised, but lady luck now played her hand. On Poptkopf's right, the Hagenau militia after a valiant fight, broke. His men-at-arms also broke and seeing this the Mainz militia fell back. On his left the remnants of the Bohemian militia were charged by Gottfried's knights and fled. This meant that he only had the Bohemian crossbowmen and the bishop's knights as functioning units. With enemy horsemen bearing down on him, Poptkopf sought the security of Pfalzdorf's walls; the day was Prince Abel's.

This action was very much an experiment with the WAB rules. They are fairly easy to follow and have their own distinctive feel. I found it odd that you can throw bucketfuls of dice and nothing happens for two or three turns. On the other hand if things go badly then they go bad very quickly. Both of Poptkopf's men-at-arms units lost their respective melees by only one casualty but then failed the command test and broke. The main cause of their demise was the low rout dice (a total score of 8 on 3 d6)which was fairly easily surpassed by their pursuers and resulted in the men-at-arms being overun and eliminated. On another day they may well have been a different result.

The town walls which feature in one of the photographs are from the collection of that well-known wargamer Phil Olley. Thanks very much Phil!

Saturday, 14 January 2012

New recruits

For our first gathering of the new year we returned to the Seven Years War and a scenario based on the battle of Paltzig, an action between the Prussians and Russians a few weeks before the major battle at Kunersdorf. We had intended to finish the game this week, but in the event it was held over to next week. A full report should appear in the next blog, but here is a general view from the right flank of the Russian position prior to the battle.


Over the last couple of months I have been painting up some figures I purchased from ebay. They represent one of the provincial streltsy units rather than the Moscow ones which usually feature in the main Russian army.


The flags, supposedly representing Suzdal, are pure invention I am afraid, but they do add a bit of colour. The huts in the background are from Pegasus and could be used for battles in eastern europe over quite a wide range of periods. As I was basing the streltsy another lot came up on ebay and I was lucky enough to win it. These Hinchcliffe figures will form a unit of levy infantry raised by one of the great Boyars alongside the feudal cavalry. In the background is a unit of mercenary 'German' foot, together with their command stand. Again, the flag is pure fiction; this time courtesy of a wine bottle label!