Wednesday, 10 October 2012

Freeman's (or should that be Threeman's) farm

As I said in the last post, this third run-through of the Freeman's Farm used the 'Patriots and Loyalists' (P & L) rules.  The game began with a British advance, Eccles on the British right, moving towards the hill to the right of Freeman's Farm to provide support for Moriarty's advance in the centre.  Thynne, on the left was to advance and pin down the American forces facing him under Sheridan.
The Americans decided on securing the farm in the centre, Tempest standing on the defensive and Sheridan advancing to threaten the flank of any advance by the British centre.  Tempest's moved his unit of riflemen into the wood on his left flank, from there they could fire on any British troops which advanced.  Eccles' men moved forward in a rather disjointed way which resulted in one unlucky battalion becoming the target for the concentrated fire of three units of American infantry and their supporting artillery.  The rating of British infantry does enable them to withstand fire better than the majority of the American units, but having to roll four times does test the rating rather.  However, Lady Luck obviously smiled on Eccles as the unit came through unscathed.  Now the British replied and soon two American militia units had been forced to fall back to rally.  (Long range volleys are usually ineffective, so this result was down to some rather unlucky dice rolls by the American commander).
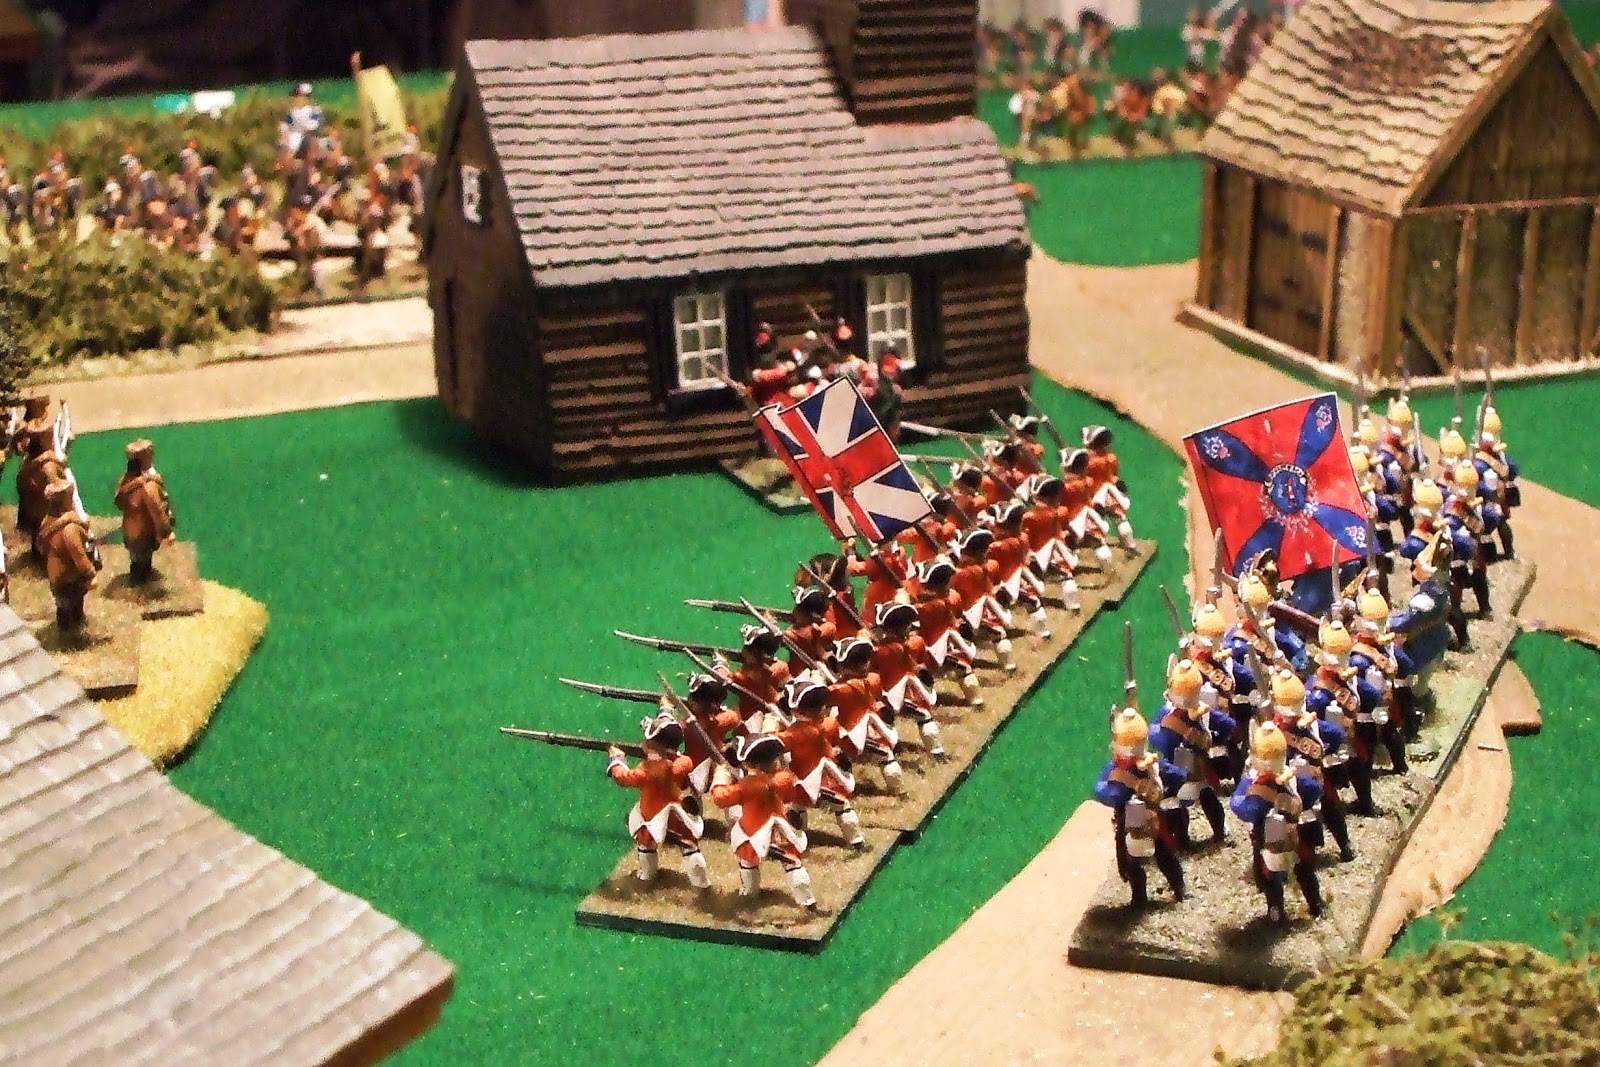


Moriarty was moving units forward to try and take control of Freeman's Farm. In this he was forestalled by Shore who managed to take the central building just before Moriarty's grenadiers arrived. A melee then took place as the grenadiers charged home.  ( In  P & L a melee can last for several phases as a deck of cards is used to discover what action takes place; eg  Defensive fire, Attackers fire, Defenders check morale, resolve melee).  After a short melee (the first card turned was 'resolve melee), the American defenders were ejected and the grenadiers took up residence.  To their right a line battalion occupied the barn and these successes enabled Moriarty's second line , comprising two line battalions, to move to their left and move towards the American troops threatening the flank of the British advance.

On the British left Thynne had moved forward cautiously, delayed by finding an advantageous position for his artillery.  Sheridan had moved a unit of French infantry forward, supported by his cavalry; but with the bulk of his infantry being militia he was keen to defend against Thynne and move those units he could to assist Shore's flanking manoeuvre.  However, Sheridan's artillery did force Thynne's light infantry to fall back and this relieved a little of the pressure.


Eccles was finding it very difficult to make any headway beyond the crest of the ridge.  His units were beginning to acquire damage markers from the American fire (units can have up to five markers, the fifth means the unit is removed from play), and although the American units were also suffering, he was outnumbered five to three.  He sent his reserve battalion towards the wood to dislodge the riflemen who had forced his artillery crew to rally back.  Seeing a steady line of bayonets advancing towards them the riflemen fell back, their hurried shots causing no damage to the British infantry.

In the centre volleys were exchanged between the grenadiers and Shore's elite light infantry unit.  Neither was able to gain an advantage; the British volleys were restricted by occupying buildings and the Americans by the cover afforded by the buildings.  Shore's flank attack was not going well. His riflemen had been unwilling to meet a charge by the British line battalion and when they fell back to rally they were caught by artillery fire from Thynne's command.  Two supporting militia units were also forced to fall back to rally.  The one continental unit standing its ground found itself outflanked and had to give ground.


Sheridan tried a cavalry charge to relieve the pressure. Thynne's men stood and fired a volley and also had the advantage of having a second unit in support.  The infantry managed to withstand the first impact and following a positive morale check their supporting unit came forward to fight a second round of melee.  This too was inconclusive and both sides fell back to recover.  On the British move the infantry was able to fire a volley which further damaged the cavalry ,forcing them to rally back.
On the following move the infantry advanced and fired another volley at the French battalion which was also forced to rally back.  At this stage there was a group of five American units trying to rally.  Having two or three units already carrying three damage markers, the American commander decoded that it was time to fall back before the army disintegrated, so the day belonged to the British.


Overall we thought that these rules were the best of the three that we had tried.  They allowed for different grades of troops, and, those ratings could be adjusted to accommodate specific scenarios.  The bulk of the British troops were more likely to withstand enemy fire, but were not 'supermen'.  Historical tactics by the American player; ie using his militia to fire at long range and then fall back behind his 'continental' infantry to act as supports, would be rewarded.  The British would advance but would also tend to suffer some damage before they came to contact, levelling up the resulting melee.  We liked the idea of the multiple phase melee and the variable number of actions available to each side (decided by a dice roll; again ratings could be modified for specific scenarios).  In fact there were only two things which we thought we would alter; one I mentioned last week, adjusting the effectiveness of riflemen at long range.  The second was the the difficult of turning a column around.

Thursday, 4 October 2012

"Patriots & Loyalists"

We are having a trial run of a third set of AWI rules at the moment and for comparison purposes are using the same scenario as before, so you could perhaps call it Threeman's Farm.  The mechanisms are quite different from the norm; one of the biggest differences being that you don't roll to inflict casualties, but to 'save' the casualties indicated by the tables and variables in the rules.  Good quality troops are more likely to be unaffected and you can try and use your non-commissioned officers to offset the risk.  However, this also carries a risk and you could find yourself with reduced morale anyway. 

At the moment we are part way through the scenario and I will post a fuller report once the action is settled. So far, the American troops have proved to be more likely to suffer casualties and need rallying, but the British have not had things all their own way.  After capturing part of the village a line battalion was driven from the buildings by close range artillery fire, suffering quite heavy casualties in the process.  One thing that we may well alter is the fire from rifles.  Although they fire less frequently than muskets, they are very effective at close range.  We felt that the historical role of rifles would be to fire at longer ranges, so we may well amend the values to reflect this.


Meanwhile a couple of new units have been added to the Eastern Renaissance forces.  The Poles now have a unit of mounted dragoons, the dismounted figures came via an ebay purchase and just need a touch of paint and re-basing.

The ragamuffin force reflecting the Tartar horde has also had a small reinforcement.

Monday, 24 September 2012

Kirbekan

We seem to be in a phase of looking at various rule sets at the moment and this week we tried out the "A Good Dusting" set for the Sudan.  The scenario was based on the action at Kirkeban, with an Imperial force under the command of William Earle attempting to capture a village held by the Madhists.  Even though the Imperial forces were outnumbered, Earle had detached a flanking force of three battalions plus all his cavalry to attack the enemy whilst his artillery supported by a few companies of HLI pounded their position and occupied their attention.  It was a high risk strategy given the mobility of the Madhists and their considerable numbers.  To the left centre of the Imperial position was a zariba with two machine guns, a detachment of Naval infantry and the hospital corps; supported by a battalion of Indian infantry.


The Madhists occupied three hills forming a ridge facing the Imperial position.  Their best troops, the Beja, were in the centre, covering the village, whilst the Arab troops covered the flanks.  The Madhists lacked any artillery and had few cavalry.  Initially, their orders were to hold their position and wear down the infidels with rifle fire.

Earle's flanking march did not get off to a good start.  His lead unit, the Light Horse strayed into rifle range and suffered heavy casualties from the Arab riflemen occupying the rocky hill to the right of the Madhist position.  Quickly seeking cover in a palm grove the remaining cavalry dismounted and began to fire at the Arabs, but a combination of the long range, rocky cover and reduced numbers meant that the fire had little or no effect.

In the centre the main Imperial artillery battery, supported by two machine guns was having much more success.  The Zanzibari riflemen suffering more casualties than they were inflicting and one unit fell back and had to rallied by the Madhist commander.  Realising that he needed to relieve the pressure on his centre, the Madhist general ordered his right flank to attack the Imperial zariba.  Although they suffered heavy casualties crossing open ground, Arab rifle  occupied two rocky mounds close to the Imperial front line and began to shoot at the machine gun crews.  Understandably, this 'put them off their game' and the main body of Arab swordsmen  closed in on the Imperial defences.


Inside the zariba, every soldier able to stand was called forward to man the defences as a second body of swordsmen broke cover and headed for them.  A breathing space was gained by the actions of the Indian Army battalion from Bombay.  Their measured volleys drew one of the Madhist groups towards them and then as the range shortened, inflicted such heavy casualties that they never charged home.

The colonel in charge of the zariba had sent a young lieutenant off at the gallop, to inform Earle of the attack and request assistance.  When he received the message, Earle had immediately ordered two battalions to countermarch to support the left flank and ordered the commander of the Egyptian battalion to advance slowly towards the enemy right firing volleys to pin them down.  His cavalry were by now involved in a protracted melee with the Madhist cavalry and he hoped they had enough sense not to set off in a madcap pursuit.


Now came the crisis of the battle.  Seeing the fire from the zariba weakening the Madhist commander ordered forward his Beja troops, sensing that they would reach the Imperial defences before Earle's men could intervene. Covered by the remaining Zanzibari riflemen the mass of fighters surged forward.  The Imperial artillery fire was too weakened by losses to slow down the Mahdists and they crashed into the zariba defences.  Red-coated infantrymen stood shoulder to shoulder with their comrades from the Royal Navy and desperately tried to force the forest of spears back.  But the Madhist tide was relentless and step by step the Imperial troops were forced back into isolated clumps of fighting men.


By the time Earle's men reached the zariba it was all over.  The Madhists had pulled back, leaving only the dead and dying.

We found the rules fairly easy to use, but a couple of aspects didn't seem to work well.  Firstly, it seemed no more difficult to shoot deployed gun crews than close order infantry; nor did we find a modifier for shooting at skirmishers.  This meant that the Arab riflemen's fire on the gun crews quickly reduced their effectiveness.   Secondly, the morale (Pluck) test did not get more difficult as losses mounted or rounds of melee were lost.  This enabled the Arab horse to remain in melee with the British cavalry for several moves and allowed the Madhist left flank to redeploy to cover the village.

These results may have been unfamiliarity with the rules or just an example of 'eccentric' dice rolling


Sunday, 16 September 2012

Montrose moves north?

Back in March we re fought the Battle of Inverlochy and last week we looked at a 'what if?' scenario in which Montrose moved north up the Great Glen instead of south and had met the forces of Seaforth near Fort Augustus. 
Seaforth's forces were more numerous 8 units of foot, (of which two were raw) and three of cavalry, but his heavier artillery were delayed by the terrible condition of the roads.  He also had a unit of Campbells and some archers.   Montrose was hampered by having his clansmen 'foraging' in the surrounding countryside and so was left with his elite Irish foot and two units of Gordon foot plus three small units of cavalry and an ultra light gun.  Seaforth's job was simple, destroy Montrose's army.  Montrose had to hold his position and then under cover of darkness use one of the two available roads to slip past Seaforth's men. The umpire controlled the arrival of the Covenanter artillery and the clansmen.


 Montrose deployed his men with the Gordons in the flanking villages, the Irish in the centre and the cavalry in reserve. Rocky, wooded terrain made any outflanking manoeuvre by the Covenanters extremely unlikely.  Having taken command of the Covenanter army and knowing about Montrose's use of terrain to spring ambushes I sent the Campbells to my right and the archers to my left to investigate the woods. I decided to attack on a broad front to exert pressure along Montrose's line and held back the cavalry to either 1) exploit any gaps created by the infantry, or 2) help shore up my flanks from the anticipated attacks.


The attack moved forward slowly, taking time to deploy.  Fire from Montrose's line inflicted casualties, but, once the infantry got sorted themselves out they halted and returned the compliment.  Lady luck seemed to be smiling on me because, even though the Irish had a higher fire factor I managed to achieve parity in causing casualties.

On my left the archers pushed into the woods, but suffered casualties from  the Gordons and also some snipers.  Home's regiment moved to attack the village on Montrose's right but although they reached the boundary of the village they were repulsed. They were then counter-charged and began to give ground.


On my right the Campbells had reached the woods when suddenly the first of Montrose's clansmen appeared. Pausing only to fire a volley, both sides rushed forward into melee.  The battle swayed back and forth, but eventually the Campbells prevailed.  Forgetting any notion of following orders they set off in pursuit of their defeated foes and paid no further part in the battle.


As the prolonged fire fight in the centre dragged on with casualties mounting on both sides, pressure on my left increased when another unit of clansmen appeared there and I moved two units to support Home's regiment.  Their movement took them across the front of my cavalry just as the first signs of a loss of command appeared in the Irish foot.  This would have been the moment to launch a charge, but my own infantry were in the way!

The covenant infantry on my right had eventually reached a position where they could charge the village on Montrose's left.  At first the Gordon foot (the Strathbogie regiment) held their ground against superior numbers and summoned up  their reserves.  These should have decided the matter in Montrose's favour, but Lady Luck decided otherwise and against the odds the Gordons routed.


At last my heavy artillery had arrived and with the threat of further casualties to his centre Montrose decided that he should withdraw, covered by his cavalry.  My infantry in the centre were too battered to move forward and it took time for the cavalry to come forward, so the action ended.  Neither side achieved their objective, but unlike the Covenanters, Montrose would find it difficult to replace his losses, particularly to his veteran Irish foot.

Tuesday, 11 September 2012

Freeman's Farm Mark II

After the experiment with the "Black Powder" (BP) rules a few weeks ago, we decided to try the same scenario with the  'British Grenadier' (BG) rule set.  The troops were set up in the same way, three brigades per side and we used the same terrain.
When we started moving the units one advantage of BG became apparent, there was none of the rather eccentric moves which had occurred with BP.  The distance moved was not guaranteed, but at least units did move, even if they sometimes became entangled.  Units in line were twice as likely to pick up disorder markers  (by throwing a one), as those in column and militia units were twice as likely to pick up disruption markers (by throwing a one or two) as regular troops.  These markers could be removed by the unit remaining stationary; so immediately the commander has to make a decision whether to keep advancing or dress the line.  Brigades are allocated orders at the beginning of the game, but these can be changed in the light of events (if you throw high dice, that is).
Units only begin to suffer casualties once they have three disorder markers, so two regular units standing at long range exchanging volleys are unlikely to achieve a decisive result.


The rules reward properly planned co-ordinated attacks by several units and the maintenance of good order.  That being said the element of chance is always present.  Both sides committed themselves to a cavalry charge against an isolated infantry unit.  In one case the dice decided that the British infantry were so unnerved by the American horse that their volley was totally ineffective and the resulting melee ended with the British routing. When the British cavalry charged the American volley emptied 25% of the saddles and the shaken horse lost their impetus and the melee.  Just for good measure they were hit by another volley as they fell back.


In the post game discussion BG seemed to be the preferred set, though I think that a few more games will be needed to make sure that we grasp all the basics of the rules.

Painting figures has taken a back seat after the rush to get units ready for the Borodino game; but I have managed to finish these TAG Russian artillerymen I picked up at the Gauntlet show.


Over the weekend we visited a Heritage Open Day event and watched a living history demo by the Sealed Knot.  The 'Knot' did a superb job getting the youngsters interested in history.


Wednesday, 5 September 2012

Velletri 1744

This is an interesting battle from the Austrian campaign against a joint Neapolitan and Spanish army in Italy during the War of Austrian Succession.  The scenario is based on an attack on the town of Velletri by an Austrian force under the command of Marshal Browne.  The objective was to capture the King Charles of Naples, the enemy commander, who was based there. 
Browne had two brigades of regular line infantry (8 battalions), 4 battalions of grenadiers and two battalions of Croats. In addition he had one regiment of Horse Grenadiers and two light battalion guns.  Charles' forces were more numerous, but varied in quality from grenadiers to second rate line. In the pictures you will see that French, Swiss, Irish and Saxons played the part of the joint Neapolitan/Spanish army.  The activation of the bulk of Charles' force (and him as well) was decided by a dice roll and just for extra spice, the umpire threw a few unexpected twists into the mix.


We began with Browne's force almost at the gates of Velletri, having routed a unit of cavalry back into the town. On a ridge close to the gate were the battalions of Irish in Spanish service.  Browne decided to attack them with his grenadiers and then move his line battalions round their flank and into the town.  Perhaps this was his first mistake as it meant his best troops were not leading the attack.  However, forward went the grenadiers against the Irish.  To the left of the Irish was a unit of Dragoons, to prevent them interfering in the infantry action Browne ordered his Horse Grenadiers to attack them. This they did, pushing the Spanish horse back into the broken ground below the walls of the town.  Just as the Austrian cavalry commander was reforming his men ready to attack the flank of the Irish foot, he was informed by an aide that the Spanish horse had returned, and were now moving around his flank.  Changing face again the Horse Grenadiers re-engaged in melee with the Spanish and although they had the best of the ensuing fight they were drawn away from the main action for some time.


The first unit through the gate at Velletri was one of the Croat battalions, closely followed by the second.  Browne's orders had been specific; one battalion was to advance down the main street, the second on the street to the right.  Both units were to make a swift march and meet at the town hall, where Charles was reported to have set up his headquarters.  If possible they were to seize Charles and hold the building until reinforcements arrived.   March discipline as far as the gate to Velletri had been excellent, but once inside the gate, some men took the opportunity to slope off in search of plunder.  (This was one of the umpire's 'extra's').  With numbers reduced by 25% the Croats moved forward.  Now a second 'extra' was revealed.  Some rather reckless plundering had started a fire.  Alarmed, residents took it upon themselves, to start firing at the men in the streets, assuming they were the enemy.  Detachments would have to be allocated to 'suppress' these locals.
The Croat unit which was to advance down the street to the right of the main street became emeshed in a fight with elements of the town watch and a light battery which was covering the gate.


At this point the dice favoured the Spanish/Neapolitan commander as both the reserve brigades, plus the grenadiers passed their activation test.  So troops began moving to seal off the Austrian attack.  Dice also roused Charles from his cups, the Mayor of Velletri, being the proud owner of an excellent cellar; (at least until yesterday).  Helped by his aides and pausing only to empty the last goblet, Charles joined his escort of Hussars and galloped off down the street as the first element of the Croats approached the Town Hall.  The bird had flown, but Browne didn't know that and continued to feed men into the town.  He was hampered by the determined resistance of the Irish battalions.  They had driven off one grenadier battalion with over 50% losses and were trading volleys with the other three. One of the Irish battalions was driven off the ridge by a determined charge by the Austrians, but that battalion then suffered heavy losses from a devastating volley and had to fall back.  The balance was pushed in the Austrian favour by the eventual return of the Horse Grenadiers.  They charged one of the Irish battalions from the rear and destroyed them.  Reforming, they faced the final Irish battalion, now much reduced in numbers.  An officer rode forward under a white flag with the intention of offering the gallant Irish terms.  He offer was rejected with disdain by the knot of men gathered round the battalion colours.  They stood their ground, firing a weak volley as the horsemen moved forward, but although they fought like demons the action was a foregone conclusion.  For the Austrians it was a Phyrric victory.  The grenadiers battalions had suffered heavy casulaties and would take no further part.


In the town pressure was increasing on the Austrians.  A brigade of Spanish troops, including grenadiers was advancing up the main street.  To their right another brigade, supported by a heavy battery was threatening to capture the gate and trap the Austrian units.  To the left of the main street a third brigade was threatening the Croats tackling the town watch and light battery.


When Browne reached the gate he realised that the game was up.  He ordered the units to fall back in an orderly manner.  However, by the time the last units fell back pressure meant that order was lost and Spanish pursuit was only checked by the Horse Grenadiers.

This was a very enjoyable small action, with plenty of unexpected twists.

Wednesday, 29 August 2012

Blesankovic 1812

This fictitious scenario is set during Napoleon's ill-fated Russian campaign.  When we played the Borodino game in July one of the few things which the Shako rules didn't seem to cater for was corps on defend orders being able to manoeuvre.  The players suggested that this hampered the defence and was unhistorical as divisions would not be left unsupported by neighbouring formations.  Therefore we looked at the problem and came up with a few ideas.  Divisions could manoeuvre within the Corps Commanders 'zone' (18"), even under defend orders, as long as they did not go beyond the front of the unit nearest the enemy.  At an army level, Corps could be given a command to move to a specific location and then revert to defend until new orders arrived. To try out the modifications the Blesankovic scenario was drawn up.


 To buy time, Barclay de Tolly has taken up a position behind a tributary of the Dvina river at Blesankovic, not far from Vitebsk.  His force of three small corps has to delay the advancing French long enough for the First and Second Armies of the West to combine near Smolensk.  Barclay's position is within a loop of the river. To his left is a low hill and a lake, in the centre the town of Blesankovic and on the right another low hill near the river as it flows to the Dvina. Scouts have reported that the corps of Ney and St Cyr are advancing towards Blesankovic, what they have missed is that Davout's corps is also in the area, approaching the Russian left.

In the centre, Tolstoy's corps is deployed with Neverovsky holding the town of Blesankovic and Bahmatyev's division in support behind the town.  The artillery is forward supporting Neverovsky and Denisov's light cavalry cover the gap between Tolstoy and the corps of Dokhtorov to the right.  Dokhtorov has deployed Kaptsevich forward holding the river line and Likhachev on the low hill to the rear.  Emmanuel's light cavalry have been held centrally, where they can support either flank.  Barclay has place Bagration's corps in reserve.


St Cyr wasted no time and pushed forward his infantry straight towards Blesankovic.  The artillery had little effect on the defenders, though the French did suffer casualties as they struggled across the river under canister fire.  Dessaix attacked Blesankovic with Morand on his right charging a Russian heavy battery.  Ledru crossed the river heading for the gap between Tolstoy and Dokhtorov.  Although heavily outnumbered, Neverovsky's men held their ground and with losses mounting and no progress being made (ie low dice) Dessaix's division fell back to regroup.  Morand also had to fall back as his men failed to reach the Russian guns (low dice again).  St Cyr's light cavalry, commanded by D'Ermeonville, had crossed the river with Ledru and once reformed charged Denisov's Uhlans.  After a vigorous fight the Russians prevailed and the French cavalry broke and galloped for the safety of the western bank of the river.  With their 'blood up' the Russain cavalry espied Ledru's division, still forming up after crossing the river.  Lowering their lances, the Russians charged and drove the French back in disarray.  So, all St Cyr's men had now been repulsed  and the officers were frantically trying to restore order.

Ney had made better progress against Dokhtorov.  The Russian infantry had been deployed in the open and Kaptsevich's men in particular had suffered from the attentions of the French artillery.  The Russian guns had also found their targets, but problems with ammunition (throwing double 1) meant that the Russian guns fell silent just as they were needed.  Delzons division stormed across the river and fell on Kaptesich's men.  After a brief, but bloody struggle the Russians were driven back in disorder and this created a large gap in the Russian line.  Likhachev was fighting Broussier's division and had forced them to retreat, whilst Emmanuel's cavalry had had to move to the Russian right to counter a move by Pajol's light cavalry. 


Fortunately for Barclay, Tolstoy had given orders for Bakhmatyev to move forward to support the right flank of Neverovsky.  This manoeuvre placed Bakhmatyev in front of the victorious Delzons and delayed French progress. Barclay was just about to order Bagration to support Dokhtorov when scouts arrived to say that a third French corps (Davout) was approaching the Russian left.  Not knowing the strength of the French attack on his left, but seeing the danger to his right, Barclay ordered Bagration to occupy the low hill by the lake and hold it against any attack.  But he stripped Bagration of one of his infantry divisions (Olusiev) to help Dokhtorov contain the attack by Ney.  With his Cossacks and Dragoons leading the way, Bagration moved his troops to the left.

Dokhtorov needed all the help he could get.  The French and Russian cavalry had fought each other to a standstill and both sides fell back to regroup.  The loss of Kaptsevich's division had also resulted in one of the Russian batteries being overrun and now a third French division, that of Compans, was moving forward to attack.   Compans' men crossed the river and moved against the low hill to join Broussier's attack on Likhachev.  In their way were two batteries of artillery.  The French infantry muttered a silent prayer and followed their officers up the hill into the mouths of the guns.  Perhaps the gunners were unnerved by the steady French advance, but the volleys of canister were poorly executed (low dice) and the French closed in to melee the gunners.  The artillerymen were defeated but the delay caused allowed just enough time for Olusiev's division to join the fray.  Unfortunately, Olusiev's haste meant that he was in a very restricted formation when the melee started.  The French lapped around the Russian flanks causing disruption to add to the casulaties and before long the Russians were falling back.  Likhachev had by now prevailed over Broussier and the French were so battered that they took no further part in the battle. However, he now faced Compans and a regrouped D'Ermeonville.  In the nick of time Emmanuel's men arrived to take on the French cavalry; catching them unaware and driving them from the field.  The success was only temporary, as Compans overcame Likhachev, securing the hill and causing such casualties that  the division played no further part.


St Cyr had returned to the attack and this time is men crossed the river and drove Neverovsky from Blesankovic.  Neverovsky's artillery was lost and the centre was now in French hands.

On the Russian left, Klasov's Cossacks reached the hill at the same time as Davout's dragoons (Triare and La Houssaye).  Sensing an easy victory, the French galloped forward, but the wily Cossacks evaded, drawing their opponents forward and out of formation.  They were then it by Sievers dragoons and driven back in disorder..  Behind the French cavalry were two veteran divisions of infantry.  Keeping formation these men reached the crest of the hill. Bagration could see that he was outnumbered, but looking behind him he could see that the rest of the Russian army needed time to regain formation following the hammer blows by Ney and St Cyr.  Therefore he ordered Wurttemburg's infantry and Sievers cavalry forward in a desperate attack.  Sievers men were met by a solid wall of bayonets presented by the French veterans and could make no impression.  Wurttemburg's men advanced up the hill bravely, but met a more numerous and determined foe.  After a fierce melee the Russian survivors fell back down the hill.  Karpov's Cossacks screened the Russian retreat from the prowling French dragoons, but the day was lost.  The Russian army fell back, disorganised and defeated.

Reflecting after the battle we felt that the 'manouevre' option had worked reasonably well and will try it out again before testing it in a 'big battle' setting.