Friday, 22 November 2019

Midway

This week Steve and I had a change from gaming and went to see the new film by Roland Emmerich on one of the decisive battles of the Pacific war. 

Image result for midway film

Although it is over 2 hours long the time passes quickly with the plot moving along at a pace.  From my admittedly limited knowledge of the battle the film seems to stick to the historical facts.  Nor does it ignore the 'other side of the hill'.  The Japanese perspective is shown, including the tensions within the navy and also between the army and navy.  I liked the depiction of the difficulties faced by the opposing commanders, who had to make a crucial decision, often with only partial information of the enemy position.  It reminded me of the similar episode in WWI when Jellicoe had to deploy his fleet without knowing exactly the location or the High Seas Fleet.  In these days of the all-seeing eye of the satellite we tend to forget how difficult it was for commanders in the past.

The film could not have been made without the use of CGI and on the whole these are very impressive, the opening sequence with a plane landing on an American carrier in particular.  However, the sinking of the Arizona seemed to be a little too much like an arcade game.    

Sunday, 17 November 2019

Teugn-Hausen, a Shako scenario

I am getting a bit behindhand with the game reports due to various commitments.  This scenario was sparked by a post on TMP and I decided to try and set it up on my 6 x 4 table.  I didn't really have the large ridge required so I had to settle for two smaller ridges, but the table seemed reasonably cluttered with hills and woods.

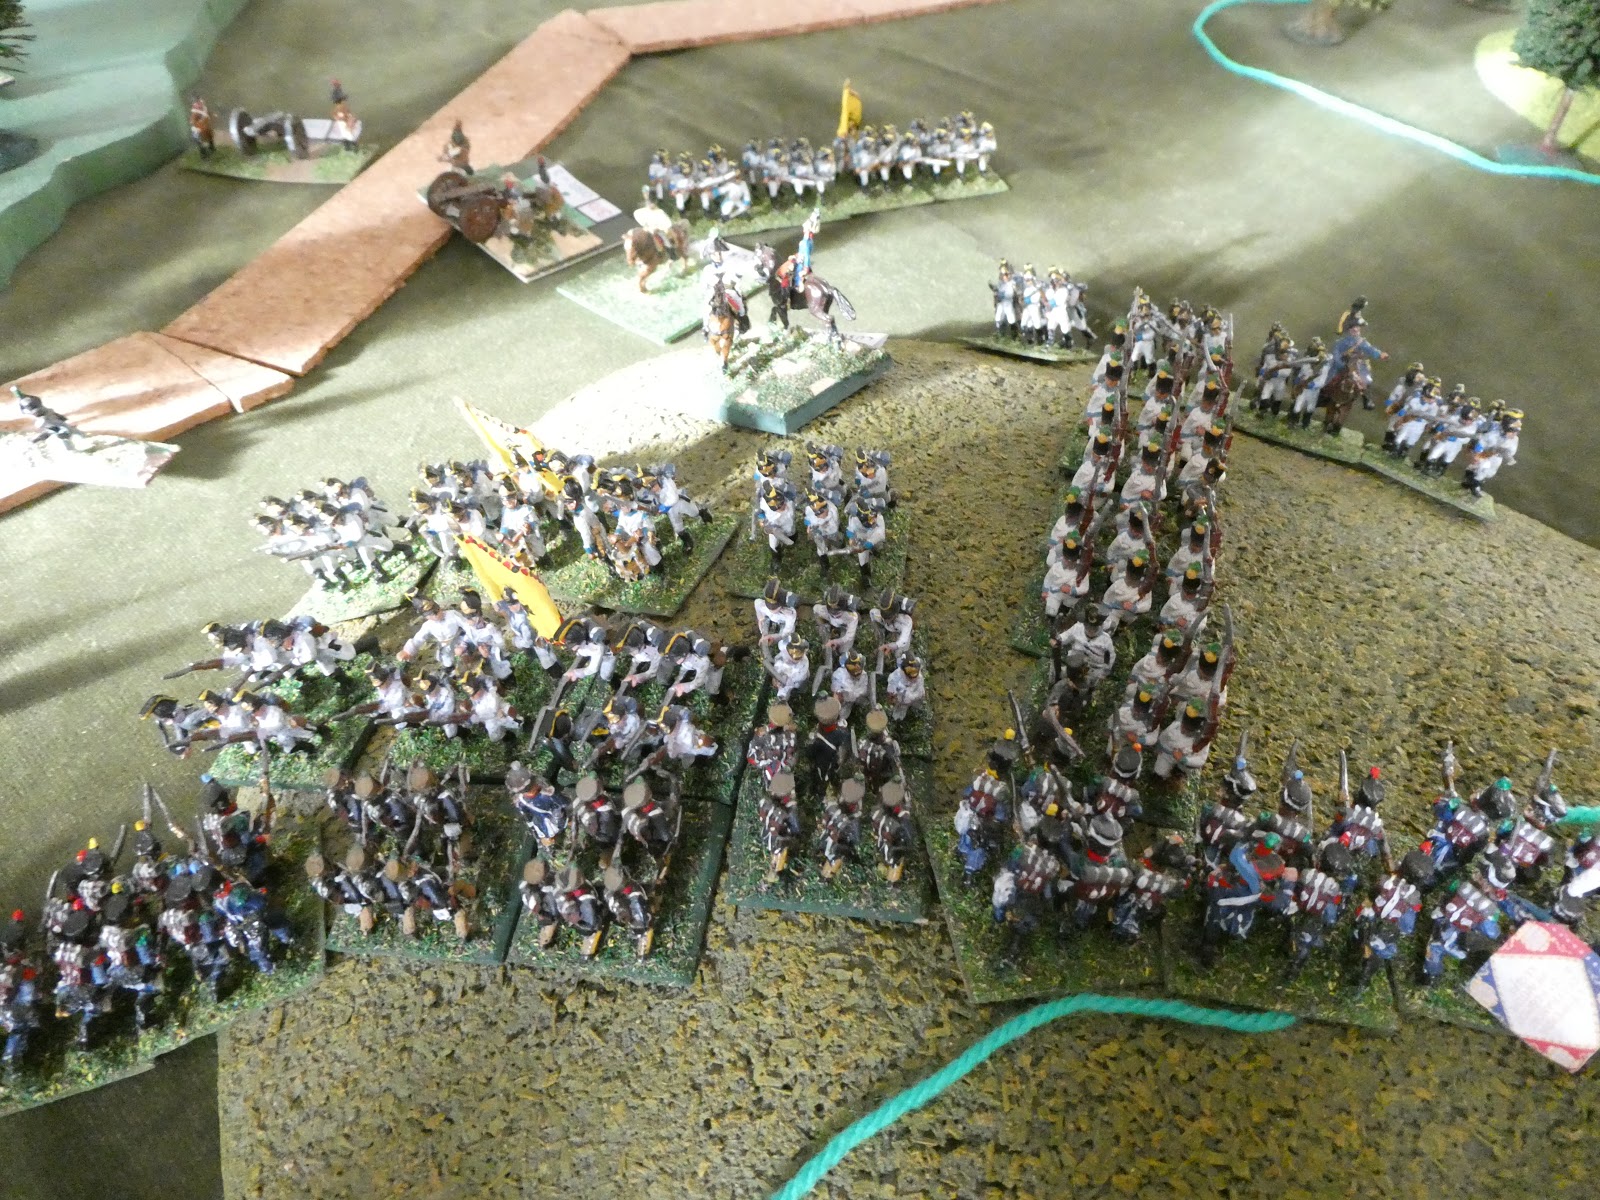
In the early stages of the 1809 Austrian campaign Berthier had directed Davout's 3rd Corps to Regensburg.  With the Austrian advance into Bavaria, Davout was now in danger of being surrounded.  As he began to withdraw westwards along the southern bank of the Danube three Austrian columns attempted to intercept him.  The action at Teign-Hausen involved the divisions of St Hilaire and Friant from Davout's corps and  elements from Hohenzollern's corps, (also the 3rd).  My scenario starts with St Hilaire's corps at Hausen with the corps baggage train behind it, with Friant's division following the baggage.  On the wooded ridge above Hausen are Vukassovich's advance guard passing through Teugn on the way to support them


The view from behind Hausen with Friant's division marching along the road westwards.  Their skirmishers have just come under fire from Austrian jaegers in the woods.  The French objective is to get the baggage train along the road and off the western (right hand) edge of the table, and keep the road clear for Friant's division to pass westwards.  For the Austrians, they need to stop the French withdrawal.

As the skirmishing intensified, St Hilaire sent his leading regiment, the 3rd Legere towards the western ridge to support his skirmishers and the 46th Line up the road to Teugn, where an Austrian light battery had appeared.  The 10th Line initially covered the advance of the baggage train. On the western flank, the 2nd battalion of the 3rd Legere attempted to clear the Austrian skirmishers and the French skirmishers moved westwards trying to find a way round the Austrian flank but they were met by a volley from the Grenz battalion placed in support and driven back

A first success for the Austrian defence

St Hilaire's division moves forward
A similar exchange was taking place on the eastern ridge, with the Austrian skirmishers and their Grenz supports attempting to halt the French advance.


In the centre, the Austrian battery had been joined by a battalion of Austrian infantry, (2nd bn Chasteler,) and two battalions of the 46th moved towards the western ridge to oppose them.  In the western woods the French had managed to gain the initiative and were pushing back the grenz and skirmishers, though at a considerable cost.  The tussle in the eastern woods had reached a stalemate, with a battalion of the 46th trading volleys with 1st bn Chasteler whilst the opposing skirmishers bickered away.

Austrian reinforcements, in the shape of Lusignan's command were now arriving; which was just as well, because St Hilaire had at last managed to get his artillery forward and it was firing to good effect against the Austrian centre.  Lusignan sent 1st and 2nd Deutschmeister onto the western ridge and the two battalions  Reuss-Greitz and Lindenau to the centre.  Back at Teugn, the lead elements of Meyer's brigade were beginning to arrive and Hohenzollern sent them forward post haste.  Deutschmeister arrived on the ridge just in time to meet an attack by battalions from the 46th supported by the 3rd Legere which had worked it's way up through the woods.  The 2nd battalion was driven back with some loss, but a counter attack by the 3rd battalion, which had been held in reserve, managed to regain the heights.

The initial French success

The Austrian counter attack
In the east, the fight was entering a new phase.  The baggage train had at last passed through Hausen, releasing the battalions of the 10th Line to support the attack.  St Hilaire sent all these against the Austrian position on the eastern ridge.  An initial push was driven back by volleys from the Grenz, but more and more battalions became embroiled in the fighting in the eastern woods

The first attack by the 10th Line driven back

Pressure mounts on the eastern ridge
St Hilaire's weary battalions were lifted by the sight of Friant's division arriving from the east and launched another attack on the western ridge.  Once again the blue coated ranks surged up the slopes but once again the weary white coated line held.


At his position near Teugn, Hohenzollern received the news that the French had been reinforced by a fresh division.  Vukassovich and Lusignan had fought hard, but were now reaching the limits of their strength, with approximately 50% casualties.  Meyer's force was not large enough to push forward against the French and the main prize, the baggage had moved west.  He therefore ordered that his troops should attempt to hold their ground and then fall back under cover of darkness.

For his part Davout was happy to hold onto Hausen and the road.  St Hilaire's division was exhausted and had losses of 50%, Friant's men were sufficient to hold the line and allow their comrades to withdraw and then move westwards.

A difficult scenario for the Austrians to win, perhaps Lusignan and Meyer needed to be nearer to put more pressure on the French.  The wooded and hilly terrain did hamper both sides and considerably aided the defence.


Sunday, 3 November 2019

West Dene; an ECW scenario for Pike and Shotte

Following the battle of Catlow Moor, (link) both armies opted for a period of rest and re-organisation.  Sir Victor was by the far the most active, he had the most to accomplish, his forces having had the worst of the encounter.  Nevertheless, it was the Parliamentary forces which were ready for action first and true to form, Sir Victor was determined to seek the initiative.  His scouts reported that Royalist forces had still not assembled and that the infantry element was isolated in the vicinity of the small town of West Dene.  Orders were immediately issued for an advance on the town to seize this opportunity.

For his part Lord Melchett had ordered his forces to assemble at West Dene.  The infantry had reached the town, to find their commander very comfortably ensconced in the main inn, the Angel.  Lord Melchett chose the Angel not only because of it's reputation as an inn with good food and excellent beer.  It's proprietor was one "Bonnie Bess Bentham" a wealthy widow with a warm welcome for favoured guests.  That night he had  a meeting with his officers in the inn's parlour and laid before them his plan for an advance, once the cavalry arrived on the morrow.  They were dismissed with orders for defensive positions to be taken up around the town and for all officers to assemble at 9 the following morning for further orders. 

View of West Dene from behind the Parliamentary position

In the morning Royalist scouts reported that the Parliamentary forces were approaching.  Having found his subordinates' dispositions satisfactory, they had made good use of the enclosures surrounding West Dene, Lord Melchett returned to the town.

Lord Melchett takes his leave of 'Bonnie Bess'
The infantry were once again under the command of Sir James Fotheringay and Colonel William Saville, with Sir James on the right and Colonel Saville the left.  Lord Melchett had retained two regiments in West Dene to act as a reserve.  The Royalists were in for a nervous morning; Lord Melchett  had just received news that his cavalry would not arrive before noon.   Lord Melchett  thanked Bess for her hospitality and  prepared the defence of West Dene.  

Sir Victor had deployed with his infantry, two brigades under Colonel Ezekial Cooper and Sir Richard Clayton, in the centre.  On his flanks were the cavalry, Colonel James Livesey's brigade of on the left and on the right Sir Walter Foote's.  Noticing the absence of enemy cavalry, Sir Victor decided to send Livesey and Foote on flanking movements to try and cut off any Royalist retreat.  Cooper and Clayton were to push the enemy infantry back into the arms of the cavalry.

Having reached the battlefield, a kind of inertia seemed to settle on some of the Parliamentary commanders and their units.  Livesey advanced slowly on his flank; nowhere near as quickly as Sir Victor would have liked, but at least he was moving.  Sir Walter Foote's command however seemed rooted to the spot.  Seeing no sign that his orders were being carried out, Sir Victor sent a rider with a reminder of the importance of a speedy manoeuvre before the arrival of any enemy cavalry.  Foote's command still remained in position.  Finally, losing patience,  Sir Victor rode over himself and suggested to Foote that if he felt unable to carry out his orders, perhaps he should appoint someone else?  Red-faced, Foote galloped over to the leading regiments and led them forward.

Cooper's men ready to advance

Foote's cavalry on the Parliamentary  right
Meanwhile the Parliamentary infantry had begun their advance.  Clayton's men were met by fierce fire from the enclosures in front of them but they plodded forward, paused, fired a volley of their own and then resumed the advance.  As they charged home another volley swept their ranks, but, undeterred they closed and fought their opponents across the hedgerow. 

Clayton's men close up to the Royalist defences
On the opposite flank, Cooper also faced stiff resistance.  The newly raised Riding's regiment faced a unit of commanded shot.  Cooper had thought that the advancing pikes would 'encourage' the musketeers to fall back rather than stand their ground.  He was proved wrong.  As Riding's crested the ridge they received a volley which stopped them in their tracks.  The officers struggled to establish order prior to advancing again, but a second volley from the commanded shot wounded several of those officers and raw recruits turned and ran back over the ridge.  Cooper managed to stop them before they left the field but even he struggled to restore order.  It was only the arrival of Sir Victor which steadied the men and allowed Cooper to return to oversee his brigade's attack.

Riding's raw recruits rout
Clayton's attack had had some success.  He had pushed back a unit of commanded shot and his leading unit was now over the first hedge line.  Seeing the fugitives streaming towards West Dene, Lord Melchett sent one of his reserve regiments to steady the line.  The other regiment had been moved to the right to oppose any attempt by Livesey's cavalry to enter West Dene.

Cooper leads his men against Fotheringay's flank
Indeed, Livesey had met little resistance in his flank march.  That didn't mean it was swift however and Lord Melchett was able to deploy not only an infantry regiment, but also a light gun to fire  on the Parliamentary cavalry.  Livesey's advance did mean that Cooper felt able to do a flanking manoeuvre of his own.  After leaving Riding's regiment with Sir Victor, he galloped over to his own regiment and led them around the flank of the Royalist infantry holding up his brigade's advance.  The Royalists had been having the better of the melee across the hedgerow, almost routing their opponents, but the flank attack by Cooper changed that.  Assailed to front and flank and with their retreat route threatened, the Royalists broke, running back towards West Dene.  Fotheringay managed to stop them, but it would take time for them to be ready to return to the fray.

The melee between Fleetwood and Livesey
Foote meanwhile had advanced as required.  To his left was enclosure with an infantry regiment in it and he decided to give this a wide berth and screen his flank with the dragoons which accompanied him.  Unfortunately, one of his regiments strayed too far towards the enclosure and suffered heavy casualties from the ensuing volley.  They fell back, disordering  the dragoons and exposing them to a volley from the Royalists before they could deploy.  The resulting casualties caused the dragoons to fall back as well.  Foote's day was going from bad to worse and not helped by the appearance of  Colonel Richard Foster's brigade of horse.  Foote now found himself outnumbered and any hopes of getting to West Dene had evaporated.  His only hope was to try and hold the Royalists back whilst Clayton's infantry continued to advance.

Sir Hesketh Fleetwood had by now arrived to oppose Livesey.  He quickly sent his dragoons to West Dene, with orders to flank the Parliamentary cavalry.  With his remaining units, he attacked Livesey's regiments. A fierce struggle took place with fortunes swaying back and forth.  In the end, Livesey's superior numbers told, but by then Livesey did not have the strength to threaten the Royalist position in West Dene.  Indeed, the fire from the town and its adjoining hedges was whittling away at his flank.  His only option was to pull back ready to oppose any Royalist attack.

Cooper faces stiffening resistance
Cooper's advance was slowing.  Having cleared one hedge line he was now faced with another.  The defensive line had been strengthened by Melchett being able to release his last reserve from the defence of West Dene following the repulse of Livesey.  Clayton was also facing stiffening resistance.  An attack by Newell's regiment had been stalled by volleys from the defenders.  Taylor's regiment had also failed to make any headway and the site of Foote's cavalry falling back in the face of the advancing Royalist horse made him reluctant to advance further.

Sir Victor too had seen enough.  He ordered a retreat and on his way back to Twiston mulled over some possible changes in senior commanders.  Lord Melchett was happy to see the Parliamentary forces pull back.  It had been a near run thing.  The cavalry had arrived just in time to swing things his way.  However, a great deal of powder had been expended and more supplies would be be needed before an advance could be contemplated.  What could be contemplated however was a return to 'the Angel' for a well deserved supper.

Wednesday, 23 October 2019

Mollersdorf : a Shako scenario

Once again we are in Germany in 1813.  In the aftermath of Lutzen the Prussian and Russian forces are falling back, closing on their supporting formations.  The French (and allies) are naturally moving forward quickly, hoping to turn this retrograde movement into a rout.  Close to Mollersdorf the Russian rearguard, (1 division of infantry and 1 of light cavalry), has chosen to take up a delaying position to give the main army more time to escape.  In pursuit is Vandamme's provisional corps, (3 divisions of infantry and a light cavalry brigade), with orders to give the enemy no respite.


An overview of the table.  Mollersdorf is on the left with the main road leading west passing through the villages of Klein Prim and Prim (the latter is nearest to the French deployment zone on right hand side of the table).  The Russian player can deploy anywhere in the area from Prim back to Mollersdorf.  Troops not visible from the French deployment zone can be marked on the map.  In total the Russians have 10 battalions of infantry (in two brigades of 5) and 5 skirmisher stands, 4 are with the rearguard under Markov, the most westerly brigade and one with Kamensky nearer Mollersdorf.  The cavalry under Ulanius has 4 light cavalry regiments and two small units of cossacks.  Borisov, the Russian commanders has orders to delay the French as long as possible.

Vandamme has 24 battalions in 3 divisions under Dupas, Dumonceau and Mouton.  Pully commands the cavalry brigade of 4 light cavalry 'regiments; all of which are under-strength and 2 are composed of new recruits.  The French have two divisions arriving on turn one and they can deploy anywhere within the rectangle shown on the map.  Each of the remaining divisions arrive after a delay of 2 or 3 moves, determined by a die roll.

A roll of the dice allocated command of the Russians and he  I deployed his troops on the map.  I then deployed the divisions of Pully and Dupas in the rectangular area astride the road.  Dupas was to attack Prim while Pully was to cover the area between the northern lake and the wood.  Once I had done this, Steve deployed Ulanius' division near the marsh and stream, a single battalion in Prim with a gun and skirmisher stand next to the road.

The French ready to advance
Ulanius bars the way
With the skirmishers leading the way, Dupas' division  advanced on Prim.  Some casualties were inflicted by the Russian artillery, but the first attack was made by the two battalions from the 9th legere.  As they charged home they were met by a deadly volley from 1st battalion 26th jaeger which stopped them in their tracks.  The French rallied, but to their right the 1st battalion 8th jaeger advanced round Prim to threaten their flank.  Dupas immediately ordered the battalions of the 54th line to counter this threat.  By the road, the 2nd battalion 46th, flanked by other battalions of the regiment, charged the Russian skirmish line sweeping them away.  Ignoring a discharge of canister they then charged the artillery, capturing the guns and driving off the few gunners who had survived their charge.

The attack on Prim develops
Pully was following his orders and covering the flank of Dupas' attack; however, Ulanius' division had artillery support and this was beginning to find the range.  With his raw recruits showing signs of wavering, Pully began to gradually pull back.  This encouraged the Russian cavalry to push forwards north of the lake, seeking to outflank the French force.  Vandamme ordered Pully to counter this threat and the French cavalry moved left onto the low hill to the west of the lake.  Leading the Russian advance was a unit of Don Cossacks, these were charged by the 13th Hussars, but the raw recruits were bested by the Cossacks who, jeering,  moved aside to let the mounted Eger carry on the attack.  The Eger were charged by the 4th Chasseurs a Cheval, who drove them back in disorder and then, maintaining their order, returned to the ridge to await the next Russian attack.

The cossacks drive back the French hussars
Dumonceau's division now arrived and Vandamme ordered them to advance on Mollersdorf  by the northern route, bypassing the villages.  As they advanced they came under fire from skirmishers in the woods and  some battalions veered off in an attempt to clear this irritant.  They of course became enmeshed in a messy fire fight in the woods and were lost to the main advance.  In front of Dumonceau he could see a field battery, (belonging to Kamensky) and the horse battery attached to the cavalry.  Their fire was having limited effect and so the French continued to advance.  The balance of power changed slightly when the cossacks moved right to support the artillery.  Some of the raw French recruits began to hesitate and the orderly advance broke up.  Seizing their chance the Bug Cossacks charged the nearest French unit, the 3rd battalion 10th line.  Their attempt to form square was too slow and carnage followed as the infantry were speared or cut down.  A few survivors made it back to their lines, but the majority lay on the field. Waving a captured fanion, the cossacks returned to their lines.

A field day for the cossacks
Over at Prim Dupas' attack was running into trouble.  The 46th's attack, which had captured the battery had drawn the attention of more Russian troops.  From the wood the 2nd battalion 8th jaeger fired volleys into the flank of the French battalions.  More skirmishers emerged to snipe at the officers and from behind Prim the 2nd battalion 26th jaeger emerged, to join the fray.  The 2nd battalion 46th now found itself isolated and attacked from both flanks.  Losses in the battalion mounted and the troops began to edge backwards.  This 'edging' inevitably gained speed and before long the surviving men were running back to their lines.  To the south of Prim, the 54th's attempts to cover the flank of the attacks on the village were faltering.  The 1st battalion had  had to withdraw because of high casualties and the 2nd battalion was struggling to hold its ground against the scything volleys delivered by the Russian jaeger battalion.  Attacks on Prim continued.  Four or five were made, but each one foundered against the rock solid defiance of the defenders.  Losses continued to rise, (approaching 50%) and then suddenly, the French resolve cracked and Dupas' remaining battalions retreated.  As Dupas tried to rally his men, Mouton's division arrived and Vandamme wasted no time in ordering it forward towards Prim, partly to deter the Russians from following up their success and partly to provide some shelter for Dupas' men.

On the left, Pully was still holding his ground, but again losses were approaching significant levels.  Attacks by the Vladimir and Siberian Uhlans had been repelled but at some cost.  The 4th Chasseurs a Cheval and the Lancers were both at the end of their tether and the 13th Hussars were still shaky after their earlier contact with the Cossacks.  With only the weakened 2nd Hussars in any state to fight, Pully sent a status report to Vandamme.  The commander, seeing the chaotic state of Dupas' command and the apparent strength of the Russian position decided, reluctantly, to call of the attack and request reinforcements from headquarters. 

A valiant defence by the Russians which rightly won the day.

Monday, 14 October 2019

The Battle of the Chinorro Hills,an Italian Wars scenario for Pike and Shotte

Almost 6 months ago, I posted a report on a Italian Wars game at Steve's. (link)   Following that inconclusive clash the Franco-Swiss force had fallen back across the Borgogno hills, with the Imperial force of the Duke of Tempranillo  following them.  Hoping to catch his opponent off guard Le Compte de Carignan had halted and then marched towards the approaching Imperialists.  When they were sighted, crossing the Chinorro Hills, Carignan deployed Gamay on the left, then Carignan's command, with the Swiss under Landroter next and Merlot on the right wing.

The armies deploy
For his part Tempranillo had deployed with Trebbiano's cavalry on his right, then his own command of  arquebusiers and pikemen, with Graf von Spatburgunder's landsknechts and then Count Barbera's cavalry on the left.  Tempranillo's plan was to take the low hill in the centre with his arquebusiers and hold the narrow gap between it and the wood with his pikes.  The lansdknechts were to advance and deal with the Swiss, supported by Barbera's cavalry.    Trebbiano was to hold the right against the French cavalry, covering the flank of Tempranillo's infantry.

The battle did not start well for Barbera as part of his cavalry ignored his order to advance, leaving one unit of gendarmes close to the French cavalry and unsupported.  However, Signora Fortuna seemed to be smiling on Barbera as Gamay's cavalry remained rooted to the spot.  Tempranillo had no such problems with his arquebusiers who quickly established themselves on the central hill and prepared to defend it against Carignan's crossbowmen.  However, Spatburgunder's landsknechts advanced only slowly and the two units got in each other's way passing through the gap by the wood.

Temparanillo's men advance
Carignan had his own problems; Lord Randroter was once again proving difficult.  As usual the main stumbling block was money, this month's pay was late and veiled threats had been made about the Swiss returning home.  Using his courtier's charm, Carignan at last persuaded Landroter to stay with the army for another two weeks and in the meantime his participation in the day's battle would be 'much appreciated' (ie there would be a 'bonus').  At least Merlot's cavalry were following orders and moving forward at speed against Trebbiano's force.

Barbera's gendarmes take on Gamay's men at arms
Barbera had at last got his men moving, the gendarmes in particular now keen to attack.  They first clashed with Gamay's leading unit of men at arms and quickly scattered them.  Seeing a unit of gendarmes in front of them, the Imperialists charged into them as well.  The French gendarmes provided far tougher opposition, but in the end they too gave way routing back towards their own lines.  Barbera's men, now isolated and weakened by their losses  were in a rather precarious position, not helped by the moves of a unit of Swiss halberdiers which was attempting to work round onto their flank.

The first clash between Merlot and Trebbiano
On the Imperialist right, Trebbiano was trying to hold back Merlot's men.  After some skirmishing between the opposing units of light cavalry, the men at arms joined the fray.  Initially, the Imperialists gained the upper hand, driving back their French opponents.  However, before they could recover from the melee they were hit by a unit of French gendarmes.  This proved too much and they routed.  The rot was stopped by Imperialist gendarmes who charged the victorious French gendarmes and after a fierce struggle forced them to fall back.  Harassed by the Imperialist light cavalry the gendarmes lost all order and continued to fall back.  Their destruction was completed by Trebbiano himself, who, galloping over to his reserve unit of gendarmes, led them in an unstoppable charge which drove the hapless gendarmes from the field.

The Imperialist halberdiers attack the French crossbowmen
In the centre, Carignan and Tempranillo were urging their men forward. The Imperialist arquebusiers  won the race onto the central hill and their fire halted the French crossbowmen in their tracks.  A second unit of crossbowmen attempted to force a path through the gap between the hill and a wood, but they were met by a charge from a unit of Imperialist halberdiers.  These tough fighters made short work of the crossbowmen who turned and ran for their own lines.  Carried away with their success, the halberdiers pursued the fleeing French, only to be hit by a unit of French pikemen.  The much outnumbered halberdiers were driven back with very heavy casualties and played no further part in the battle.  In their turn, the French were charged by Imperialist pikemen and a prolonged melee took place.  Eventually, the French had had enough and fell back.  Determined not to over reach himself, Tempranillo ordered his pikemen to stand and recover their order before they advanced, trusting his arquebusiers to keep the French in check.

Swiss pikemen force the Imperialist cavalry to fall back

Tempranillo prepares to lead forward his pikemen to repel the French advance
Further to the Imperialist left, the Swiss and landsknechts had eventually begun to advance.  The smaller Swiss pike block outpaced their companions and pushed back a unit of Barbera's cavalry; the cavalry unwilling to charge the phalanx of pikes.  A unit of Imperialist arquebusiers also fell back before the Swiss and a gap opened up in the Imperialist line.  Fortunately, Spatburgunder had a unit of landsknechts on hand to plug that gap.  A fierce melee followed as the two between the two opposing pike blocks pushed home.  Although the initiative swung back and forth  the decision eventually went the way of the Imperialists.  However, these now found themselves 'out on a limb'.  To their front were Gamay's cavalry and the Swiss halberdiers, the second Swiss pike block had now advanced beyond them and was heading for the remainder of Spatburgunder's command.  Their nearest friendly unit were Barbera's gendarmes who were gradually falling back to reform after their earlier exertions.  The landsknecht commander eventually decided that the best course of action was to fall back in concert with the gendarmes.  To the left of the Imperialist gendarmes had been a unit of men at arms, but they were scattered by a charge from Gamay's final unit of gendarmes which followed up this success and moved forward towards Barbera's rallying units.  Disaster was averted by confusion in the French ranks.  Gamay was far away, trying to rally the survivors of the earlier clashes.  Imperialist light cavalry were hovering on the flanks of the gendarmes, peppering them with shot.  No one seemed to be taking charge and whilst they dithered the Imperialists regrouped.

Gamay's gendarmes drive back Barbera's men at arms
Urged on by Landroter the large Swiss pike block swept forward crushing a unit of arquebusiers which happened to be in their way.  Spatburgunder ordered his last reserve to stop them and a second mighty clash of pike took place.  Losses were heavy on each side and initially the Swiss were gaining the initiative.  Summoning their last reserves of energy the landsknechts halted the Swiss push and then moved forward themselves.  Slowly, step by step, the Swiss fell back, the landsknechts keeping up the pressure.

The unstoppable Swiss?

Irresistible force and immovable object
Surveying the field, Carignan saw he had done all that he could.  On the left, Merlot's attack had stalled and his men were now in danger of being surrounded.  In the centre, his own attack had failed and the Swiss had again failed to be the battle winners they claimed to be.  Gamay's men had also taken a beating.  His best option was to fall back while he had strength remaining to deter any close pursuit.  For his part Tempranillo also was keen for the battle to die down.  All his troops needed time to reform from the heavy fighting; any pursuit would have to be undertaken on the morrow.

Merlot's command (by trees), surrounded by Trebbiano's units
Thanks once again to Steve for hosting the game.

Sunday, 29 September 2019

Sagasu : A GNW scenario for Pike and Shotte

This week we return to the Great Northern War using the Prince August figures.  A coalition of forces is besieging a Swedish garrison in the port of Sagasu on the Baltic coast.  The Swedish command has organised a relief force of 3 brigades of infantry and 1 of cavalry to raise the siege.  For their part the Russian, Saxon and Danish besiegers have begun to construct defences against such an attack.


, 

An overview of the battlefield, Swedes on the left, the Danish defensive work between the woods and the Saxon camp on the right.

The Danish brigade had suffered heavy losses and had been re-organised into 4 under strength battalions.  They had almost completed a redoubt covering the approach to Sagasu from the south, but the northern face was unfinished.  In the camp are a brigade of Saxon infantry and a field gun.  To the west, a brigade of Saxon cavalry.  Once all the Saxon units are activated the coalition commander can start to roll for the arrival of the Russian infantry brigade, which will appear to the east of the camp.

The 'Danish' redoubt
The Swedes arrive one brigade at a time, the order determined by the Swedish commander before the game starts.  Victory conditions are straightforward; for the Swedes, breakthrough and raise the siege, for the allies prevent the Swedes breaking through.

Initiative lay with the Swedes, but their first move was cautious,meaning the Danes had a chance to fire a volley before the inevitable Swedish charge.  However, the Danish fire inflicted little damage, unlike the Swedish response which disordered the Danes facing them.  Encouraged, the Swedish infantry charged home losing a few more casualties to the closing volley.  Against the odds the Danes managed to hold the defences and prolong the melee.  Other Swedish units now began to move to assault the sides of the redoubt whilst the much lauded Swedish cavalry entered the field.

The Swedish attack
Back at the Saxon camp the sound of the musketry roused the Saxon forces.  Not all responded immediately but as they did the infantry marched out to support the redoubt and the cavalry formed up ready to support the infantry.  In fact the cavalry responded quickest and as they moved forward on the right of the redoubt they met the Swedish cavalry.  The Swedes had been  slow to advance and now the Saxons seized the initiative and charged.  Once again the Swedes were slow to react and were caught at the halt.  The first unit was swept away in no time and disordered its supports as it routed.  Sensing victory the Saxons pursued crashing headlong into the immobile Swedish cavalry.  This was a more prolonged affair but eventually the Swedes gave way leaving the Saxon cavalry triumphant but, disordered and well away from their supports.

View from the Saxon camp before the Russian arrival
At the redoubt the struggle continued.  One of the flank attacks had failed but the defenders on the southern face eventually gave way unable to resist the pressure of the Swedish attack.  They fled through the open northern face of the redoubt making for the camp.  A battalion turned to face the Swedish infantry as they swarmed over the defences, but being a raw unit, they became disordered attempting the manoeuvre.  The Swedes had also lost order as they entered the redoubt, but their volley inflicted sufficient casualties to cause the raw unit to rout.  Seeing the redoubt could not now be held, the last remaining defenders fell back in good order.

The Swedes in the redoubt
On the Swedish right a brigade of veteran infantry advanced past the redoubt.  Their fire swept away the last remaining Danish unit and then they moved against the Saxon infantry who were now forming line covering the camp.  A welcome sight for the allied commander was the arrival of a Russian brigade of four battalions to the left of the camp.  This now moved forward towards the veteran Swedish brigade.  In the rear, the final Swedish brigade arrived, but it's commander seemed unable to get them to move forward.  Their slow advance eased the pressure on the Saxon infantry who now just faced the first Swedish brigade which had already been weakened by the attack on the redoubt.

The Swedes attack the Saxon infantry
The cavalry contest continued to favour the Saxons.  Although reduced to only two units the Swedes attacked and managed to drive the Saxons back, but did not break them.  When the Saxons counter attacked the Swedes gave way and were now too weak to influence the battle.  An attempt by the Saxon cavalry to attack the Swedes in the centre came to nothing as the leading unit was wrecked by a Swedish volley.

Saxon cavalry driven off by musketry
In a final throw of the dice the Swedish commander launched his veteran brigade against the Russians.  The Russian front line was unable to hold the Swedish charge, but it fell back without disordering its supports.  This enabled the second Russian line to attack and they pushed back the Swedes with heavy loss.  The eventual arrival of the third brigade was too late to influence the outcome of the battle, merely to cover the withdrawal of the rest of the Swedish force.

The Russians arrive
A close run thing, with lady luck definitely favouring the Saxons in the 50/50 situations.

Tuesday, 24 September 2019

The Wells, the wells ! - a Sudan scenario

Our battle this week was a Sudan scenario set up by Steve.  The story, which received much coverage in the London press after the event, began when a group of officers arrived at base camp.  They had been sent south from Cairo, with orders, direct from London, that "something must be done" to reach the city of Khartoum.  The ranking officer was Brigadier Reginald Stowell Peregrine Bloodnok; "Birdy"to his staff.  After consulting the maps at headquarters the solution seemed obvious to Bloodnok, make straight for Khartoum across the desert using the wells to resupply with water.  The officers at base camp pointed out the logistical difficulties this would entail and that such an enterprise was unlikely to escape the attention of the Dervish forces in the area.  Bloodnok's response was that steamers would arrive tomorrow afternoon with troops that had extensive training in the deserts around Cairo and the plan was to depart at dawn the following morning before local sympathisers could send reports to the Dervish forces.

Therefore, at the appointed time the 'flying column' set out for Khartoum.  It comprised three detachments of mounted infantry and five detachments of cavalry accompanied by a field gun and a machine gun.  Their departure was of course common knowledge among the locals and the news soon reached the ears of Emir Khat.   After 3 days the column was nearing the Allah's Tears well.

The well and the small settlement surrounding it
Bloodnok was not going to approach the well without scouting ahead.  He deployed his small force with Captain Archibald Thynne's mounted infantry in the centre, accompanied by the field gun.  To the left were Captain St John Bannister's three cavalry detachments and on the right, Captain James Moriarty's cavalry with the machine gun.  Whilst Thynne's infantry waited, Bannister and Moriarty sent forward scouts to check for any evidence of Dervish forces in the area.  Bannister's scout moved onto a low hill directly in front of the well but saw nothing.  Signalling it was safe to advance he moved to his left to check more dead ground.  On the right the scout crested a low ridge and immediately saw a unit of Dervishes massing to advance.  As he turned to warn Moriarty's command two Dervish sprang from behind the rocks and pulled him from his horse.  A tide of Dervishes swept over the ridge and towards Moriarty's leading unit, the 23rd, Duke of Albermarle's Lancers.

Bannister's command, Royal Scottish Lancers with Prince George's Hussars and the Welsh Horse
Moriarty had his hands full.  Before the appearance of the Dervishes to his front another unit had broken cover on his right and were bearing down on the Prince David's Lancers.  He had ordered the machine gun to unlimber and cover the flank of Prince Davids and then moved forward to get a better appreciation of the threat.  Before he knew it, he was embroiled in the melee as his men fought for their lives.  Outnumbered,  the cavalry thrust with their spears and then in the press, changed to their swords.  Moriarty had managed to shoot two assailants with his revolver but as he reached for his sword he received a spear thrust to his thigh.  A trooper helped him to the rear of the melee, but Moriarty  ordered him to return to the fight.

Prince David's Lancers in melee
 To their left, the Duke of Albermarle's Lancers were also struggling.  They had lost heavily in the first rush by the Dervishes and Bloodnok sensed that they may break.  Telling Thynne to move his men forward, Bloodnok galloped forward to try and steady the Duke of Albermarle's.

Thynne deployed the 3rd (Middlesex) to cover the advance of the other two units of mounted infantry, the 15th (Radnorshire) and the 84th(Clackmannanshire).  The Middlesex were soon exchanging volleys with the Dervish riflemen ensconced in the buildings around the wells and their fire seemed to be having some effect.  Encouraged, the 15th moved quickly towards the wells, dismounting before entering the settlement.  Once reformed they began a steady advance which was checked when a unit of Dervish broke cover and charged towards them.  A closing volley downed most of the front rank of the Dervish but this did not stop them and soon the 15th were fighting for their lives.  The 84th had moved left but as they crested a rise they came under fire from a Dervish field gun.  This inflicted little damage and the 84th quickly moved into the buildings to the left of the 15th.

The end of Brigadier Bloodnok
On the left, Bannister's scout had spotted another unit of Dervishes.  He signalled to Bannister, with an estimate of their numbers and direction of advance and then moved further to the left.   Bannister halted the Royal Scottish Lancers and ordered his other two regiments to move further to the left to outflank the Dervishes waiting in ambush.  They did not have the chance to take up their positions as a crowd of Dervish swarmed over the rise and headed towards the Lancers.  Accepting the challenge, the lancers charged and crashed into the enemy mass.  As the melee swayed back and forth the Hussars and Welsh Horse moved into position.  They were just in time as the lancers were being overwhelmed.  As the few remaining lancers broke off and attempted to save themselves, the Hussars crashed into the Dervish flank.  The Dervish were unable to withstand this new impact and turned to run, only to be hacked down by the vengeful cavalry.

The Hussars cut through the Dervish infantry
Away on the right, Bloodnok was unaware of Bannister's struggles, he had problems of his own.  A message from Moriarty arrived saying that he may have to fall back as his command was in danger of being overrun.  Bloodnok turned his field glasses on the melee further to the right just in time to see Prince David's Lancers disappear under an avalanche of Dervish infantry.  Very few of the lancers survived and among the dead was Moriarty, fighting to the end.  Distracted by events on his right,  Bloodnok was too slow to react to the shouted warning as a group of Dervish infantry broke through the Duke of Albermarle's and headed for the command group.  Bloodnok and his staff tried to fight off the attackers, but Bloodnok's horse took a spear in the flank, reared and fell trapping his rider beneath him.  Before he could get free Bloodnok was assailed by three Dervish and died under their attack.  What was left of the Duke of Albermarle's broke contact and routed to the rear.  All that remained of the Imperial right flank was the machine gun team.

The Dervish cavalry arrive
Unaware of events to their right, the mounted infantry fought on.  The 84th were exchanging volleys with a unit of Dervish among the buildings on the far left and gaining the upper hand.  Although battered, the 15th were managing to hold their own against their assailants.  Further back, the Middlesex had driven off their opponents and were contemplating advancing in support of their comrades when a shout of 'Ware cavalry' was given.  Out of the desert appeared 3 units of Dervish cavalry.  Two made straight for the Middlesex, whilst the third moved into the settlement.  The Middlesex were supported by the field gun and their combined fire destroyed the first unit, but the second one charged home on the infantry.  To the right the machine gun had fired to great effect against the remnants of the Dervish infantry which had wiped out Moriarty's command, eliminating that threat for good.

The Hussars come to the rescue
Bannister's command now resumed the attack.  The Hussars buoyed by their success now charged the Dervish field gun which had fired on the mounted infantry.  Not wishing to take on the cavalry, the gunners quickly took to their heels and the Hussars entered the village.  Here they hit the flank of the Dervish fighting the 15th and wiped them out.  Hardly pausing to re-organise they then charged the Dervish cavalry which was entering the settlement.  These too were overcome, but when further Dervish infantry swarmed out of the buildings, the Hussars decided that discretion was the better part of valour and fell back.  What of the Welsh Horse?  They had moved even further to the left and were just about to turn and enter the settlement when they were charged by a unit of Dervish infantry which suddenly appeared on their flank.  Caught unformed and at a great disadvantage they had no chance and only a few remnants of the unit made it back to safety.

The Welsh Horse are ambushed
Bannister gathered the remnants of his command and fell back towards the centre.  Here he was met by Thynne who told him of the deaths of Bloodnok and Moriarty and pointed out that he, Bannister, was now in command.  Looking about him Bannister assessed that his only course was to withdraw, the supply camels were intact and with luck, sufficient water remained to enable the survivors to cross the desert back to base camp.  He ordered Thynne to order the 15th and 84th to fall back and for the Middlesex and field gun to cover the retreat of the mounted infantry.  The machine gum would cover the centre until the retreat began.

The last stand of the 'fighting Middlesex'
The 15th and 84th, plus the remnants of Bannister's command gathered and then began their return journey, but there was still one more disaster to befall the Imperial force.  The Middlesex, you will remember had been charged by the remaining Dervish cavalry unit.  They fought gallantly, but, not being in square, were outflanked and overrun.  The field gun, with it's crew working like demons fired round after round into the Dervishes but the wave of cavalry swept over the gun and made for the machine gun.  However, here they met their match and the machine gun's fire proved too much and the remains of the cavalry fell back to the wells.

Limbering up the weary machine gun crew quickly made off to catch up with the remains of the force, leaving the field to the enemy.

Another enjoyable scenario from Steve, with plenty of interest.