Tuesday, 30 March 2021

"There'll be an awful row at home about this" a The Men Who Would be Kings scenario

Back in the desert this week and the further trials and tribulations of Imperial forces.  A varied group of replacements for units at the front have gathered at base camp and are being sent south to join their regiments.  The officer in charge one Captain Wilberforce Malplaquet Thackeray, is on his way back to join his regiment, the Royal Barsetshires.  Just as he is about to leave he is summoned to the brigadier's office.  "While you are going forward I want you to take a look at this hill" said the brigadier.  "The cartography department believe it will be ideal for an observation post; only a mile from the telegraph office at El Abdab Halt.  The area's been quiet for a couple of months, should give the new chaps a chance to experience the desert".  As Thackeray was leaving the brigadier added "Oh, Latimer will be going with you.  Wants to give his chaps some scouting training.  Good luck.  Have your report back to me within the week."

Two days later Thackeray gathered his troops together as they waited for Captain Latimer and his troopers to get their horses out of the trucks.  There were three small companies, one from the Highlanders, one from the Borsetshires and a detachment of Blue Jackets who were to join the steamers at Wadi Halfa.  The previous evening he had agreed with Latimer that the cavalry would scout ahead and the infantry would follow.  Broken ground and scrub would be avoided to ensure good progress.  Once the infantry had secured the hill and an assessment made, the Imperial troops would return to the train and continue south.

The battlefield, the hill in question is the large one to left of centre.  The Imperials enter on the right hand table edge 

The cavalry were soon ready and headed west towards the hill. Behind them came the infantry, they made good progress other than coming across a few areas of soft sand.  Ahead, the cavalry spotted some movement in an area of scrub north of the hill and moved south westerly after informing Thackeray of the sighting.  Later, an inquiry established that this was most likely due to a desire to have a good field of fire should enemy troops break cover and attack.  Whatever the reason, Latimer's men did not lengthen the range enough, as they were came under very effective fire as they neared the hill.  The unexpected casualties caused some hesitation, which resulted in yet more casualties, before Latimer gathered the survivors together and they continued south west to a position from which they could see the hill and it's reverse slope.  What they saw was not encouraging.  Three units of warriors were waiting for the Imperial infantry.  Thackeray was informed and his response was to place the Highlanders on the right to subdue the Dervish riflemen, the Borsetshire's in the centre to face the Dervish and the Blue Jackets on the left to fire into the flank of any Dervish attack.

The Dervish spearmen readying for the attack


The Imperial advance, Latimer's cavalry about to come under fire from the riflemen


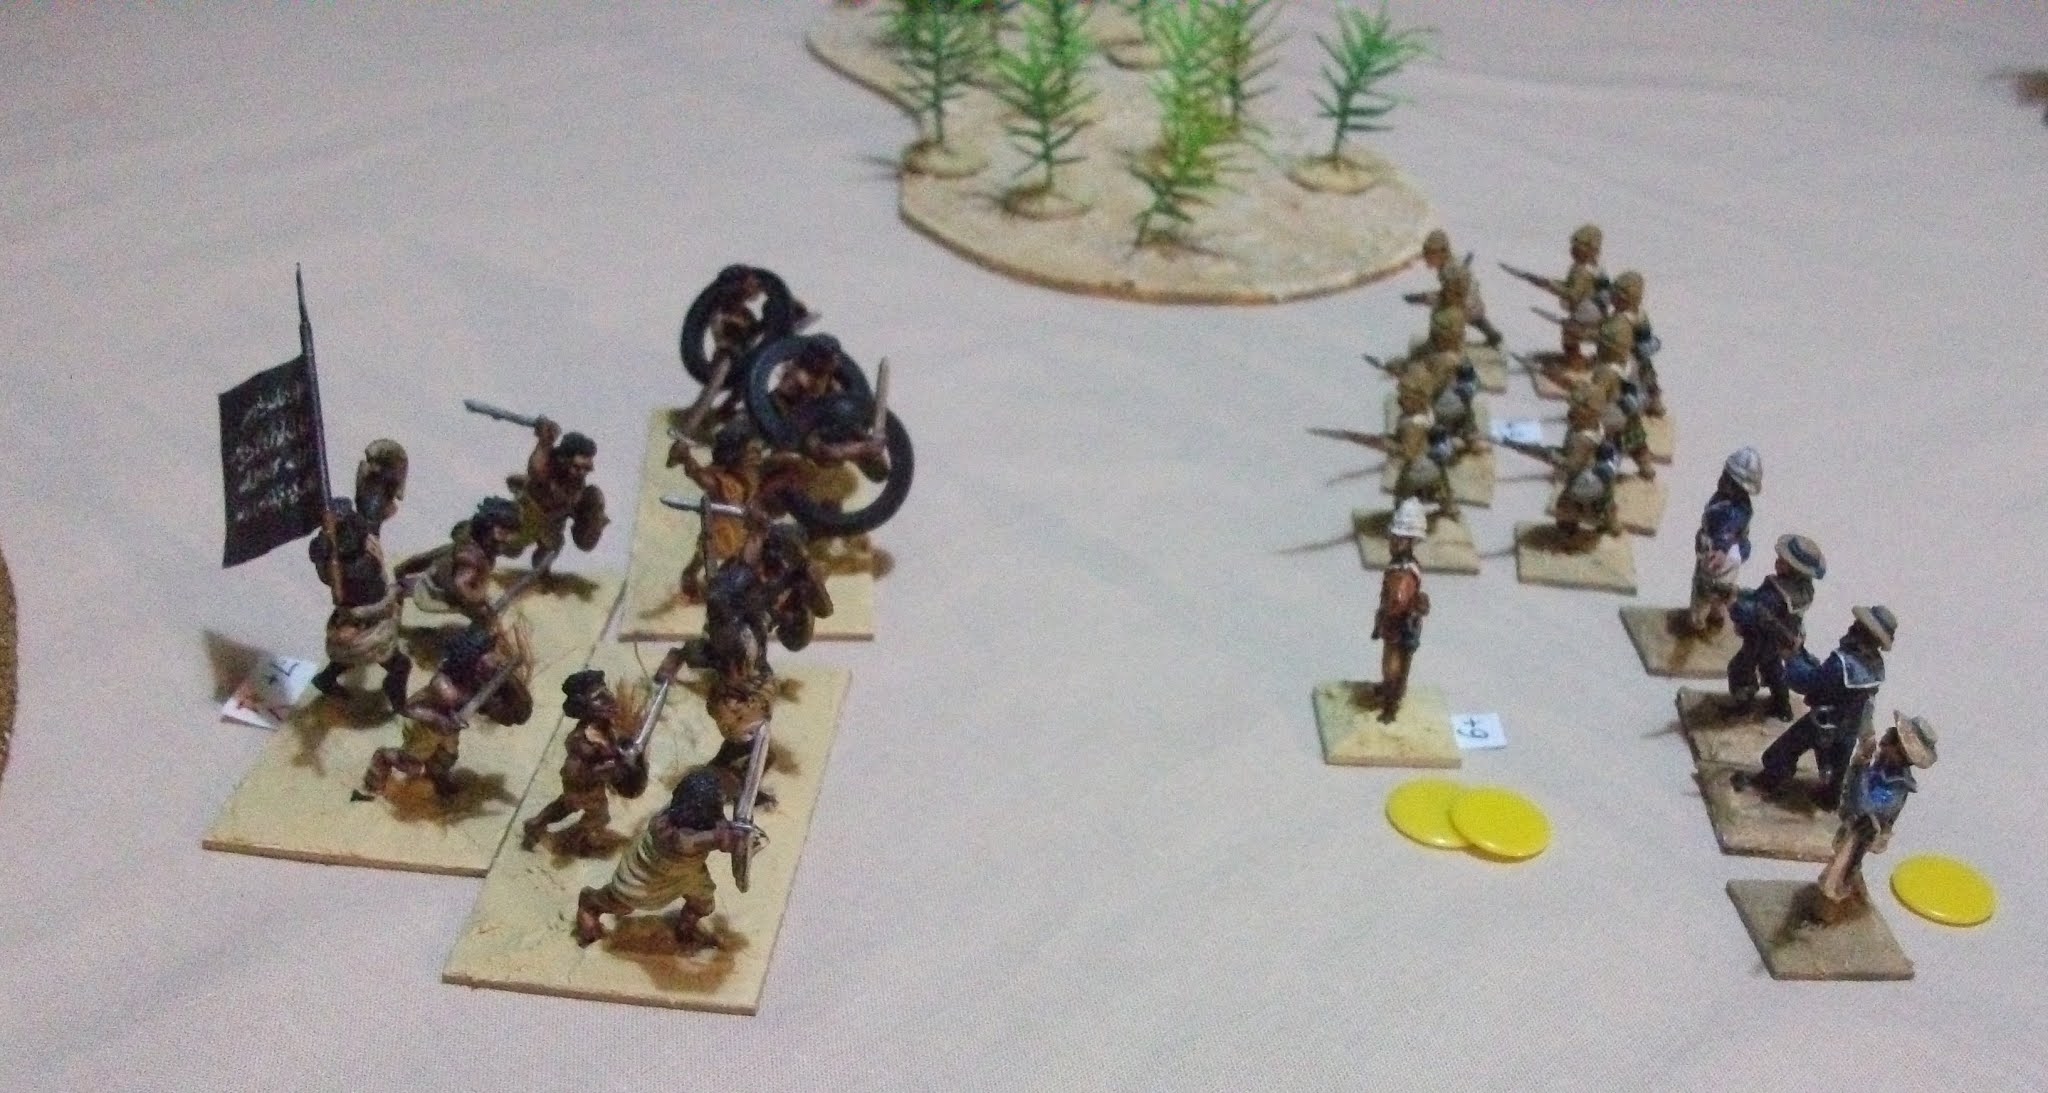
The first wave of Dervish tribesmen charged over the hill towards the Borsetshires.  They were met by a volley which stopped them in their tracks and when the red coats closed up their ranks ready to charge the Dervish fell back over the hill.  Encouraged, Thackeray joined the British infantry as they marched up the hill.  To his right, events were turning against the Imperial force.  The Highlanders were now facing the riflemen and they fared no better than the cavalry.  With their captured modern rifles the tribesmen shot as if they had been trained on the Bisley range.  Men fell on all sides and the command group suffered severe losses too.  First the piper was seriously wounded then the commander of the Highlanders was felled by a shot to the chest.  In disarray the Highlanders fell back and the young officer in command of the Blue Jackets moved his men to the right to cover the Highlanders as they tried to reform.


The Borsetshires advance onto the hill in close order

On the hill, the Borsetshires reached the crest just as a second wave of Dervish moved forward.  There were more enemy on their right as a second unit moved towards their flank.  Fortunately, this was stopped by a volley from the Blue Jackets, but nothing could stop the avalanche of tribesmen hitting the Borsetshires.  Though outnumbered, their tight formation should have saved the Borsetshires, but the shock of their first hand to hand encounter with the Dervish caused some gaps to appear in the ranks and these were ruthlessly exploited by the Dervish warriors.

The Blue Jackets cover the Highlanders as they attempt to rally

In no time at all the close formation disintegrated and a few knots of red coats fell back off the hill.  Thackeray was not among them having fallen when the formation broke.  Latimer had attempted to intervene in the fight on the hill.  Attacking the Dervish unit which had been shaken by the Borsetshire volley, but his remaining troopers were too few in numbers to succeed and were driven off.  Looking about him, Latimer decided that it was time to fall back and he turned his few remaining men towards the railway line.  However, their attack had roused the Dervishes and seeing their opponents retiring, they pursued, catching the horsemen as they became bogged down in some soft sand and wiping them out.  


The remnants of the Blue Jackets fall back behind the sole survivor of the Borsetshires

The writing was on the wall for the remaining British infantry.  The Dervish warriors now advanced and hit first the Blue Jackets driving them back with over 50% casualties.  Next it was the turn of the Highlanders who were cut down to a man.  Following up the Dervish ensured the Blue Jackets now suffered the same fate.

The Blue Jackets are eliminated the Highlanders have already suffered the same fate

So ended a less than glorious episode in the history of the Imperial campaign in Sudan.  The Imperial force was all but wiped out, a single figure from the 44 which started the game made it back to the base line.  Highly effective shooting by the Dervish riflemen weakened the Highlanders and cavalry and suffered no losses themselves.  Both were finished off by the Dervish warriors.  Although in close order, the Borsetshires lost their melee by a wide margin and when the Dervish followed up the Imperials were all but wiped out.  The Blue Jackets were caught in skirmish formation and suffered the consequences.  At brigade headquarters one old Indian hand said the affair reminded him of the infamous retreat from Kabul when only Doctor William Brydon was said to be the only survivor.

It must be said in Thackeray's defence that the dice gods were definitely not helping him.  On several occasions adverse dice rolls proved his undoing.  That being said, the Dervish commander played a skillful defence and throughly deserved his victory.  My thanks to Steve for setting up the scenario and to David for being the Dervish commander.

Tuesday, 16 March 2021

Battle of Dennington (Bennington) 1777: an AWI scenario for Patriots and Loyalists

 For our latest game Steve set up this re-working of the action near Bennington, which was part of the Saratoga campaign.  Burgoyne was moving south from Canada, but his army was hampered by poor roads and supply problems.  When he heard that supplies and horses were available in the town of Bennington, he detached part of his force under a Lt Col Baum to search for them.  Although the bulk of the rebel forces had pulled back, the local militia units gathered to resist Baum's force.  Realising he was outnumbered and expecting  the arrival of some reinforcements, Baum set up a defensive position near Wilcox bridge, where the Bennington road crossed the Walloomsac River.  

The table layout

Dennington (left of photo) is to the east, the lower edge of the photo is north)

I was allocated the Crown forces and had von Mirbach's Musketeer regiment in redoubt A and von Knyphausen's Fuslier regiment and a light gun in redoubt B.  In addition I had 2 units of jaeger and von Lossberg's Fusilier regiment plus an 'amusette' or 'wall gun' which I could deploy in support of the two redoubts.  For this scenario the Walloomsac river could only be crossed at the bridge.  Steve (as umpire) had told me that the rebel forces could be 'anywhere' and that I may receive reinforcements at point C.  

Crown forces deployed

In the end I placed von Lossberg in column facing the bridge, ready to support where necessary, one unit of jaeger facing away from redoubt B to screen that flank and one unit of jaeger across the river supporting von Mirbach.  The amusette was on the bridge also to provide support for von Mirbach.  All I could do now was await the arrival of the rebel forces.

David, as the rebel commander, General Rushe had the initiative and moved first.  As his troops moved forward it became clear that not only was I heavily outnumbered (15 units to my 5), but two thirds of those were advancing on redoubt B from opposite sides of the road.  I now realised that von Mirbach's position in redoubt A was dangerously exposed.  Although protected from the brigade of Brigadier Longshanks advancing from Dennington any enemy units on the opposite bank of the Walloomsac would have a clear shot at them.  Orders were therefore sent for von Mirbach to pull back over the river, covered by the jaeger.  This would of course require the amusette to also fall back as it was blocking the bridge.  Von Mirbach had fired a volley at the rebel riflemen moving towards them and then formed up into column and began to move towards Wilcox bridge.  Unfortunately, they didn't move quickly enough.  The riflemen advanced rapidly and fired into the flank of the musketeers, which caused them to break and head for the bridge.

A success for the rebels as von Mirbach are forced to pull back

Meanwhile redoubt B was under attack.  A brigade commanded by Brigadier Quicke was moving from the north.  A unit of riflemen moved into the wood and began firing at the redoubt and a unit of continental infantry deployed into line to cover the militia who were still advancing in column.  The continentals moved into musketry range and added their fire to that of the riflemen.  Von Knyphausen replied with a volley of their own and then the gun joined in.  This volume of fire proved too much for the continentals, who had to fall back to rally.

A setback for Brigadier Quicke

The rebel advance from the south also faced difficulties.   General Rushe had pushed forward his riflemen and the continental line unit in line but they made slow progress.  Impatient to get forward, Rushe ordered two of the militias units to advance through the woods on either side.  On the right the militia made good progress but once in the open it took them time to form line again.  On the left, the militia tried to deploy into line in the woods, again a slow process.  Thus, when the continental infantry moved forward they quickly outpaced their supports.  Baum's jaeger's harassed them as they advanced and so the continentals elected to drive off the jaeger at bayonet point.  However, rather than evade, the jaeger stood their ground (a misreading of the rules, only discovered later) and supported by the von Lossberg fusiliers engaged in a bruising melee with the rebel unit.  Although the jaeger suffered severe casualties it was the rebels who eventually fell back.  A brief respite had been gained on the southern flank.


The first push from the south repelled

To the north, Quicke had resumed his attack, following the repulse of the continentals.  Two militia units had deployed into line and were engaging the redoubt frontally. The jaeger were working around the western shoulder of the redoubt, threatening the road down which any reinforcements would arrive.  On the eastern flank of the redoubt, by the river, a column of militia was heading for the bridge.  To Baum's relief, the volleys from von Knyphausen's fusiliers plus the artillery drove back one of the militia units in disorder.  This allowed time for the fusiliers to re-deploy and move sections of the regiment to cover the flanks of the redoubt.  This made immediate impact as the rilemen were driven back in disorder by fire into their flank.  By the river, the column suffered not only from flanking fire from the redoubt, but also a volley from von Mirbach, who had reformed on the bridge.  The combined weight of fire proved too much for the militia, who broke and routed to the rear.

The attack on the bridge fails

In retrospect this proved to be the 'high water mark' of the crown day; several of the units had taken heavy casualties and this was to prove decisive in later events.

On the southern flank, General Rushe had reorganised his forces and was resuming the attack.  The militia unit on the right moved forward and fired into the rear of von Mirbach who were focused on driving back Quicke's men.  Caught by surprise, the morale of the unit failed and they routed back towards the redoubt on the hill.  The jaeger had pulled back west to recover from the melee, leaving von Lossberg to face the majority of General Rushe's brigade.  The jaeger continued to skirmish with the militia in the woods on the rebel left and Rushe moved his reformed continental infantry in that direction to bring pressure to bear on the road west.

Von Mirbach rout

It was not a moment too soon as up the road appeared a unit of musketeers and a unit of grenadiers.  These deployed into line and shored up Baum's right flank and threatened the flank of any frontal attack on the redoubt.  The musketeers covered the militia in the woods while the grenadiers moved forward and attacked the militia in Rushe's centre.  Firing a volley and following it up with a charge, the grenadiers were confident they would sweep away the militia; they proved to be sadly mistaken in that belief.  Standing their ground, the militia gave as good as they got, ably supported by the continental infantry.  Against the odds, it was the grenadiers who gave way, routing back down the road towards the Crown base.  Perhaps unnerved by this, the musketeers soon followed them.  Disordered by a volley from the militia in the wood, they received another before they could recover and they too ran off down the road, past the final element of Baum's reinforcements, a field gun.  This deployed by the road where the jaeger had been deployed.  They too had left the field, swept away by a volley from one of Quicke's militia units which had moved round the left flank of the redoubt.


The jaeger leave the field

Followed by the musketeers

But what of events on the other side of the Walloomsac, where the lone jaeger battalion faced Longshanks brigade.  Longshanks had determined to overwhelm the  jaeger with fire rather than an attack and deployed his forces in an arc around the unfortunate light troops.  Eventually the fire from three units proved too much and the pitiful remains of the jaegers fell back over the bridge, finished as a fighting unit.  With the way clear, Longshank's now launched a column of militia over the bridge to establish a foothold on the opposite bank.  Unfortunately for him, the amusette, which had spent most of the battle so far moving slowly back towards the redoubt and firing the occasional ineffective shot, chose this moment to make an impact.  The heavy calibre musket ball tore through the ranks of the column and caused such consternation that the militia stopped and then ran back to their lines.

The amusette's one success

The militia rout

In desperation, von Lossberg attempted to charge the nearest militia unit from Rushe's brigade, hoping to buy some time to organise a proper defence.  Von Mirbach had failed to rally and were joining the rest of the units heading back down the road west, so only von Knyphausen, the amusette and the field gun remained.  The light gun deployed with von Knyphausen had now exhausted its ammunition so the situation was critical.  Before the charge could be launched the militia fired and the casualties inflicted proved too much for the weary fusiliers who routed.


The final position, the only Crown forces remaining apart from the routing von Lossberg are those in the redoubt on the hill

With this Baum had no option but to surrender,  He was surrounded, outnumbered and with no hope of relief.  A notable victory for the rebel forces.

A game which duplicated the historical result.  Although ultimately a defeat, playing the Crown forces was quite enjoyable, if at times frustrating.  Many thanks to Steve for organising and hosting the game and to David for taking command of the rebel forces.


Saturday, 27 February 2021

Battle of Egra 300 AD: a Hail Caesar scenario

For the last few weeks Steve and I have been joined by another gamer, David, for our weekly skype/zoom game sessions.  David has hosted a couple of games and this is the most recent. 

The initial deployments; Sassanids nearest the camera

 A Roman army has invaded Sassanid territory and the local Satrap has raised a force to oppose them.  The Sassanids have positioned their infantry  behind a dried up river bed, to offset the Roman infantry's numerical and quality superiority.  On the more open terrain the best Sassanid troops the cataphracts and supporting light cavalry have a clear run at the Roman cavalry.  The Sassanid objective is to hold their position and prevent the Romans from advancing further east.  For the Romans, they need to break through this force and head for the Sassanid capital.

Having won the initiative, the Roman forces (or at least most of them), advanced rapidly and soon the opposing light cavalry were in missile range exchanging arrows and javelins.  As is the nature of light cavalry they proved rather 'skittish'  falling back after taking casualties and evading at top speed from charges.  Both generals were having difficulty persuading their heavy cavalry to actually move forward and the centre of action moved to the centre where one of the Roman heavy infantry units was closing up to the river bed.  

The Roman commander deployed his light troops to the flank to shoot on the Sassanid levy and unsettle them before the heavy infantry charged.  The light troops were driven off by a charge from the reserve unit of cataphracts, but the cavalry were unable to catch the infantry before they reined in.  Undeterred, the Roman heavy infantry charged across the dried up river bed and into the levy.  Against the odds, the levy held then counter-attacked and pushed the Romans back.  The Roman general decided to  bring forward his second unit of heavy infantry and charge the now weakened levy.  They passed through their reforming comrades and readied for the charge.  Unfortunately, the Roman general rolled a 'blunder' at this point and followed it up with a '1'.  This sent the fresh unit back through the other heavy infantry in disorder, stalling this section of the infantry attack.

The Sassanid right turn to face the threat from the Roman archers

On the Roman left, one unit of archers was skirmishing with the Sassanid javelin men covering the front of their spearmen, whilst the second unit embarked on a flank march through the woods, intending to fall on the flank of the levy on the Sassanid right.  Surprisingly, the javelins got the better of the archers, who had to fall back after becoming disordered.. On the flank, once the Roman archers had reached their position and shot at the levy, the levy turned and then returned the favour much more effectively; forcing those archers to fall back disordered as well.  On the right flank of the Roman line the skirmishers had moved forward again to try their luck against the weakened Sassanid levy.  Once again the reserve cataphracts charged to drive them off.  This time they caught the skirmishers and destroyed them.

The cataphracts catch the Roman skirmishers

Back on the Roman right, the heavy cavalry were lumbering forward, although the Roman units had moved out of supporting distance of each other.  At just the right moment the Sassanid cavalry general managed to exert his authority and get his cataphracts moving.  One charged the isolated Roman heavy cavalry unit, the other supported them in their charge.  In this devastating charge the Sassanid cataphracts broke the Roman unit and drove it from the field.  

The Sassanid cataphracts drive off the Roman cavalry

This was the decisive moment of the battle.  The Roman infantry line was now open on its right flank and the reserve Sassanid cataphract unit was well-placed to exploit this weakness.  The remaining Roman heavy cavalry unit was outnumbered and the rival light cavalry forces were fighting each other to a standstill.  With his infantry having made no headway against the Sassanid infantry the Roman general had little option but to pull back.

Many thanks to David for hosting the game.  It was enjoyable and though we both had our difficulties with getting units to do what we wanted it was a balanced scenario.  The rules had sufficient similarities to our version of Pike and Shotte so as to be fairly easy to use.  The main differences being the mechanism whereby one side moves and shoots whilst the opposition do nothing, and rolling a '6' whilst shooting imposes a test on the opposition.  All the troops were David's and he took the photos.


Sunday, 14 February 2021

Desert column

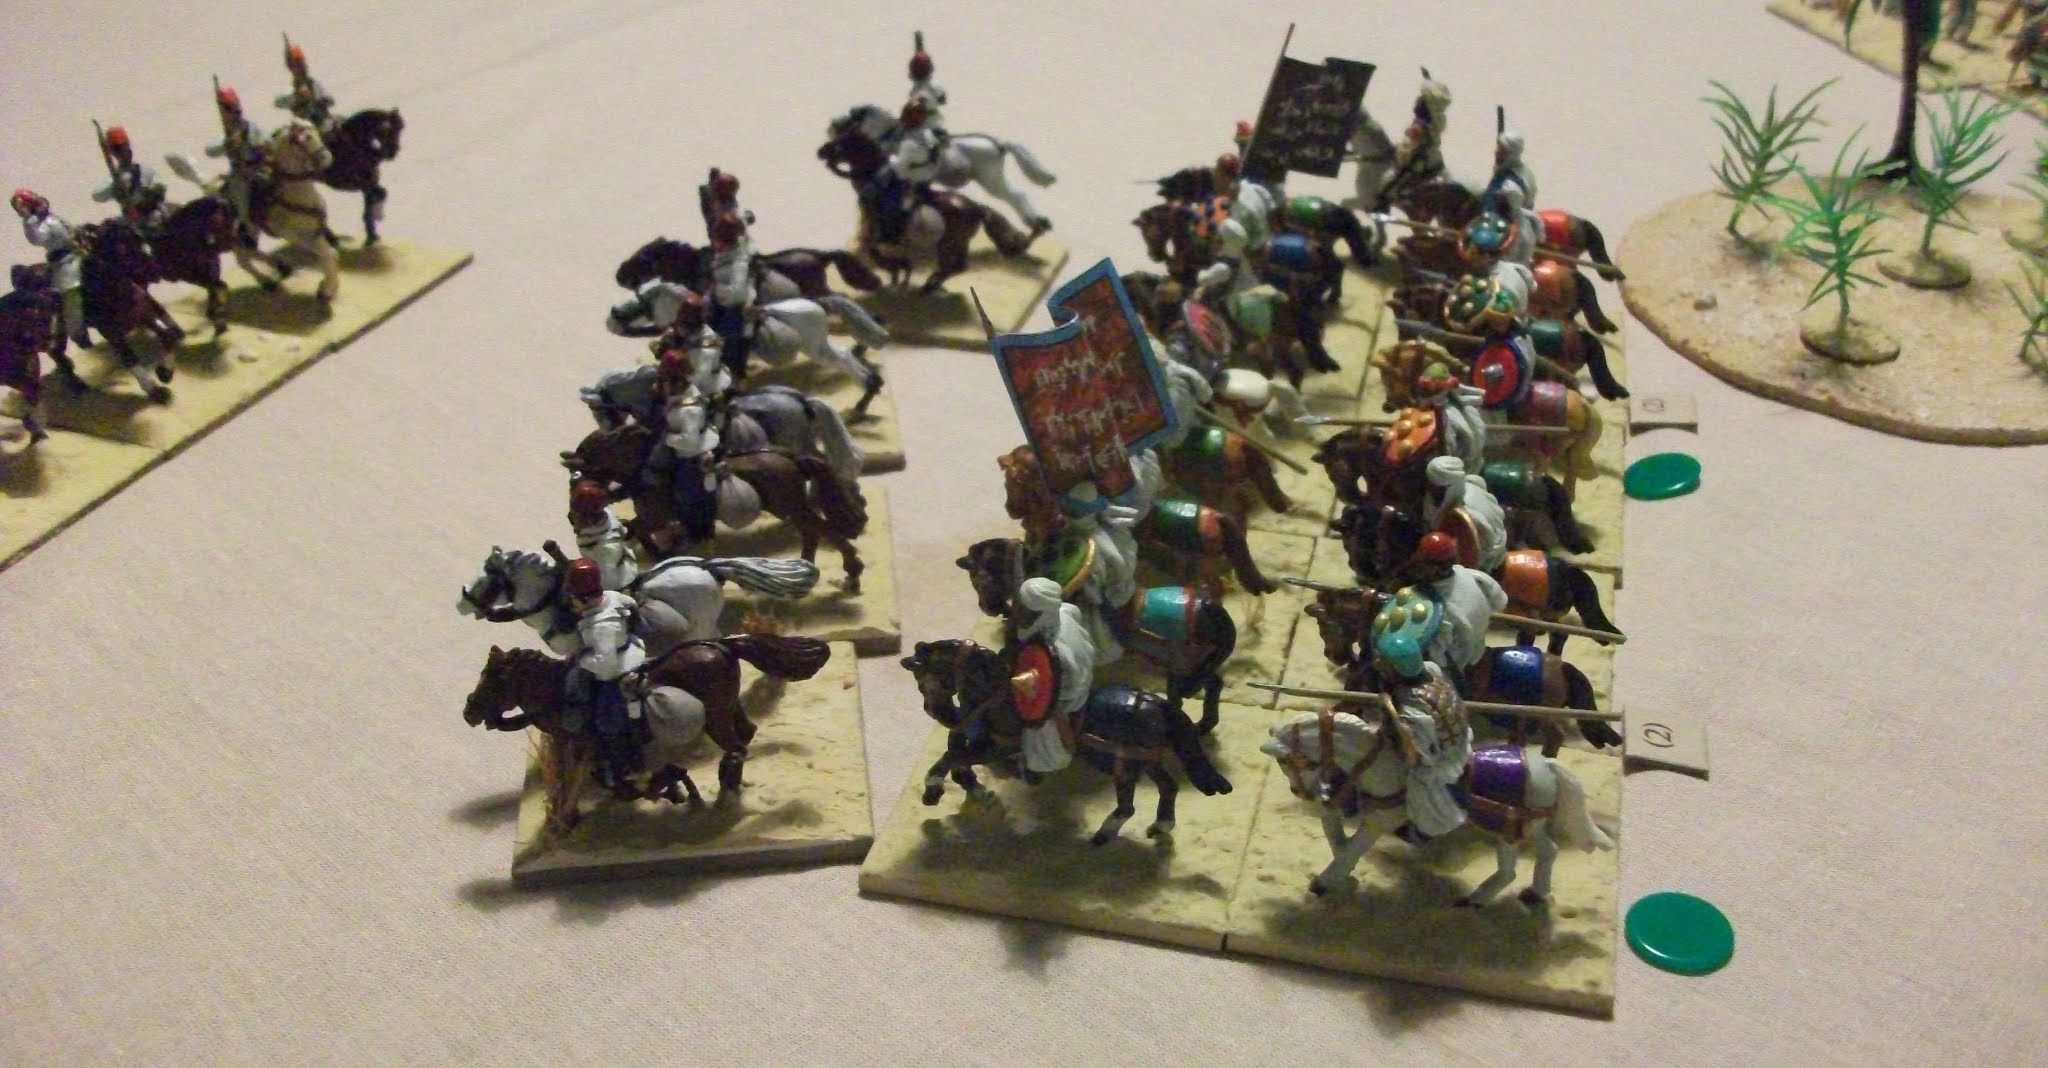
A return to the Sudan this week with the action surrounding a mounted column which is returning to the Nile after a fruitless search for the Mahdist leader Mullah Mak-En-Hah who is stirring up trouble for the Imperialists.  The Egyptian force had been brought up river on steamers and the infantry brigade deployed to hold the landing at Wadi Yahmeen while the Egyptian mounted column set off into the interior.  For over a week the column had been chasing one false lead after the other and now, running low on supplies and ready for a return to barracks they have turned back towards Wadi Yahmeen.  For the last two days they have been pursued by an enemy force, but this morning the menacing dust cloud has disappeared.  Before them lies the last short stretch of desert before the village and the steamers ready to take them back north.

Overview of the table.  The mounted column arrives at point A

The infantry and steamers at Wadi Yahmeen

The column commander was just about to order the advance when a mass of cavalry suddenly appeared, cresting a small rise to the south east.  There was just time to wheel the cavalry to face the threat and also dismount the mounted infantry before the enemy was on them.  The sheer impetus of the Dervish attack broke through the first Egyptian cavalry regiment, scattering the few survivors who turned and fled back into the desert.  Behind them, the second Egyptian cavalry regiment managed to hold the exultant warriors, but took heavy casualties doing so.  On their right, the mounted infantry had attempted to stop the enemy charge with a volley.  They failed and were soon fighting for their lives.  With casualties rising, the infantry line wavered, stepped back, stepped back again and then broke into knots of desperate men.  One by one these were eliminated and then the cavalry swept off into the desert, searching for those who had run away.

The devastating Dervish cavalry attack

When the second Egyptian cavalry regiment was assailed by a second unit of Dervish cavalry, the die was cast and they too were driven from the field.  The only remaining unit from the column was a unit of Bashi Bazouks who the commander had considered  unsuitable for combat against the desert warriors, but useful only for scouting.  This unit was only saved from destruction by the need for the Dervish cavalry to rally and reorder after their melees.

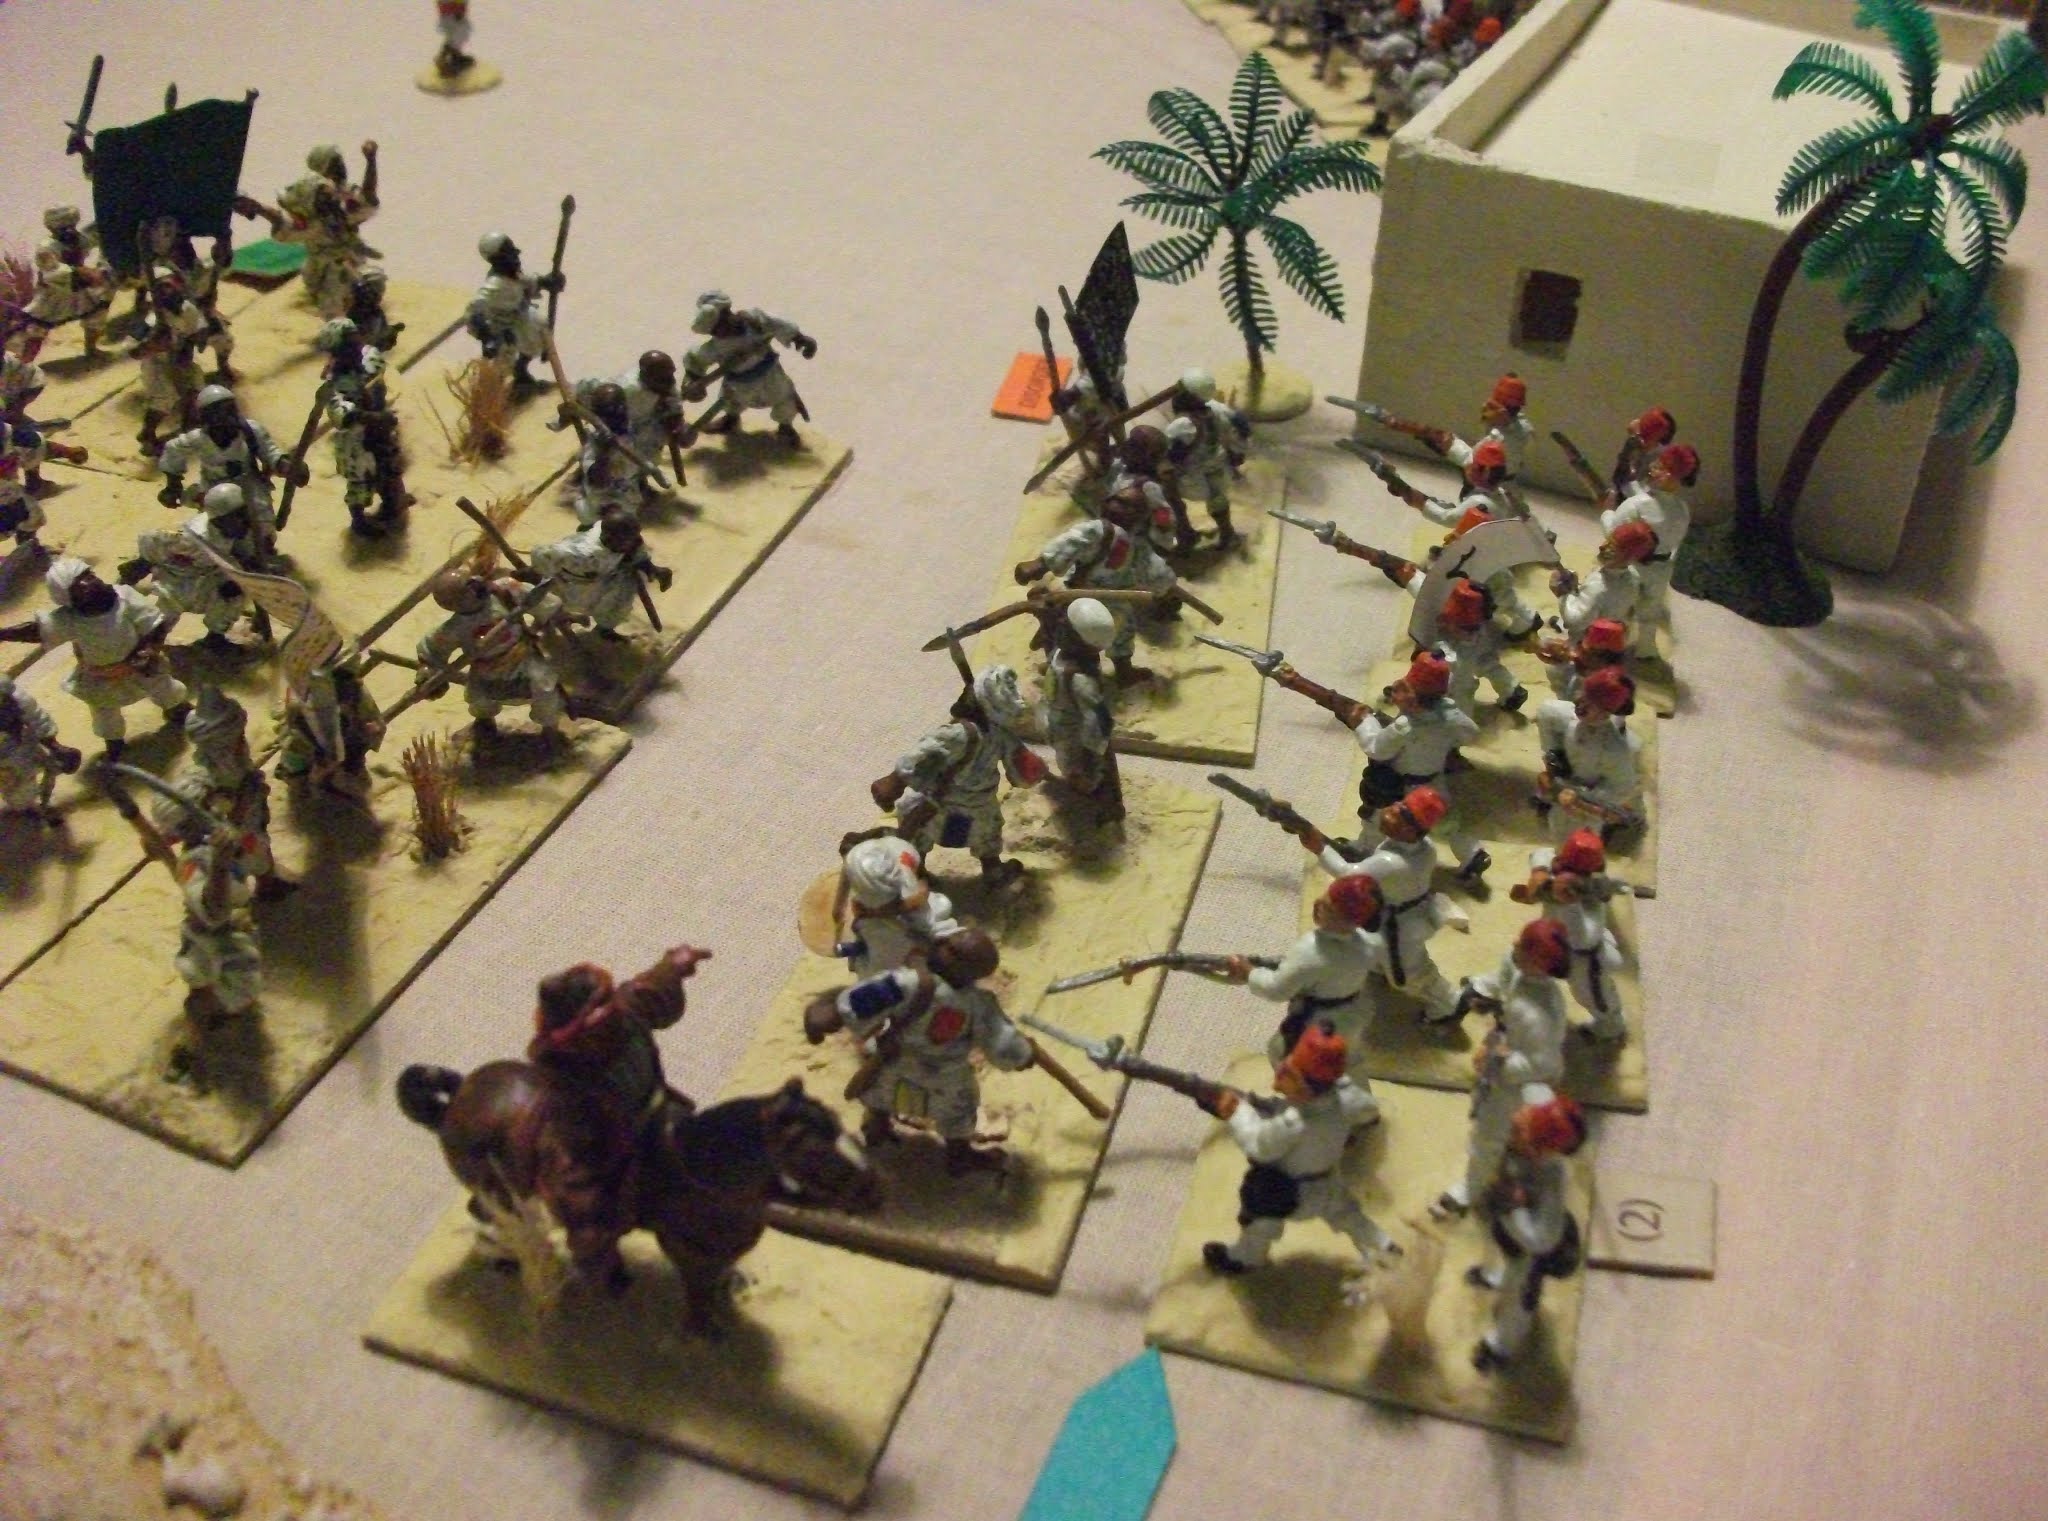
In Wadi Yahmeen the Egyptian infantry had been unwilling spectators to the unfolding disaster, now they were to experience the fury of the Dervish attack as masses of enemy infantry swept towards the village.  From the north came Beja warriors, from the south Ansar.  On the Nile, the steamers tried to move into position to offer supporting fire to the defenders.  The more southerly, the Balmoral did manage to disorder the leading wave of Ansar and give the defenders of Wadi Yahmeen time to move into position and try and deter the attackers with firepower.

The Ansar attack

As the Ansar attack developed, one body moved against the western face of the village, the other against the southern.  The unit defending the southern face of the village had swung to face westwards to meet the attack.  This allowed them to fire full volleys at the attackers but it also masked the Ansar from the fire from the Balmoral.  In the event, the volleys proved sufficient to stop the leading Ansar unit in its tracks.  Seeing the indecision in the enemy ranks, the commanding officer ordered his men to charge and they drove back the Ansar in disorder.

The southern attack stalls

The unit on the western face also managed to fire volleys against the incoming attackers, but in doing so they ran low on ammunition.  Even worse, they did not inflict sufficient casualties to drive off the attackers.  In the ensuing melee both sides took heavy casualties, but the Egyptians were saved by the fact that the leading unit of Ansar had outpaced their supports.  When the Ansar were routed the Egyptians were thus granted a short respite before the next attack came in.

To the north, the Beja attack had been hampered by poor command and the difficult terrain.  The riflemen had been disordered by the defenders' fire and hampered the spearmen behind them.  When the first attack was launched the Windsor was in position to fire into the flank of the attacking warriors.  The fire from the machine gun and the blue jackets inflicted casualties on the attackers and gave the defenders the edge in the ensuing melee.  After a tough struggle the Beja were driven off, but all too soon another wave of attackers swept forward.  This time the fire from the Windsor was much less effective; the machine gun jammed and the efforts of the blue jackets depleted their ammunition stocks without inflicting many casualties.  It was left to the Egyptian infantry to provide their own salvation and once again they were up to the task.  Although battered they stood their ground and it was the Beja who gave ground first having lost the melee.

The Beja driven off

The Windsor covers the northern edge of the village

 To the south, Mullah Mak-En-Hah had decided to make a personal intervention.  Galloping forward he led the second Ansar unit against the Egyptian infantry.  Ignoring the final volley from the Egyptians the Ansar crashed into the enemy line.  Men fell on all sides, the Mullah urged on his followers, the Egyptian officers ordered their men to stand firm.  In the end it was the Egyptians who prevailed.  The Mullah fell back with the Ansar anxious to get out of range of the Egyptian rifles.

The final struggle on the southern side of the village.
   
The attack against the western edge of the village had also been repulsed and the battered Ansar now fell back towards the desert.  Seeing them go the Beja also fell back.  For their part, the Egyptian infantry were content to let them go, they were conscious they had won a victory, but the cost had been high.  They had lost many friends in the mounted column, but at least the Bashi Bazouks had survived.  Taking advantage of the disarray in Dervish cavalry they had galloped for safety, led by the brigade commander.  As the last Dervish attackers ebbed away, the Bashis galloped into Wadi Yahmeen just ahead of a group of pursuing enemy horsemen.

During the night the remaining Egyptians embarked on the steamers, ready to sail north at first light.  One of the last to embark was the commander of the joint force, who had accompanied the mounted column.  He had had more than a few anxious moments as he made his way towards the village, avoiding Dervish patrols and almost being shot by the sentries guarding the perimeter.

A rare success for the Egyptian infantry forces, though not for the cavalry.  The Dervish, particularly the Beja were unlucky with their command rolls and attacked piecemeal rather than 'en masse' as they prefer.  One definite loser was the Mullah Mak-En-Hah.  His claim to be a new prophet was sadly dented by his failure as a leader (consistently failing command rolls) and his lack of success when leading an attack.  
    

Monday, 8 February 2021

A sort of Steinkirk (Steenkirque) scenario for Pike and Shotte

Something a little different for this game. Instead of the usual set up with two full Grand Alliance/WSS forces lined up ready to do battle, for our recent game I organised something which drew on the battle of Steinkirk  (1692).  At this battle the Allied army tried to carry out a surprise attack on the right flank of the French army, which, not expecting to be attacked in its strong position had positioned most of its forces further back.  The Allied advance guard had advanced close to the French encampments unobserved and when they advanced and deployed there were only a few units to oppose them.

The Initial set up

The Allied objective is to capture the village on the right of the table, the French have to prevent this.  More Allied battalions will arrive, but the commander of the advance guard does not know exactly when, or whether they will arrive on his right or left.  The French commander knows that the main body has been ordered to advance, but they will arrive piecemeal and again, he doesn't know when, or on which flank.  Fortunately for the French, the Allied commander has been ordered to await reinforcements before advancing.  (In the battle there was a 2 hour wait before the Allied advance).  I gave the Allied commander a chance of 'turning a blind eye' to his orders after 2 turns as he would be able to see his chances of success diminishing as more French approached.  In the actual battle the main Allied army never arrived.  Cavalry had been placed at the head of the column, as was normal practice.  But the terrain was totally unsuitable for them and they simply impeded the infantry.

Initially, the French had two battalions of line infantry, two of dismounted dragoons and a field gun;  the Allies 5 units of line infantry and a light gun.  After two turns of artillery fire, the Allied commander was lucky with his 'ignore orders' dice roll and was free to advance.  Fortunately for the French their commander's dice rolls had triggered the arrival of the first brigade of reinforcements, 4 battalions of line infantry.

The view from behind the French line as the Allies begin their advance

The Anglo-Danish brigade on the Allied left advanced into musketry range and were met by a volley from regiments Royal Italien and Montroux, the response from the two British battalions was disappointing; and this set the pattern for the rest of the battle on this flank.  On the Allied right, the Dutch/Danish brigade advanced against the dismounted dragoons.  Their volleys also proved ineffective, but the dragoon commander could see that in melee his men stood little chance and prudently fell back.  This move did disorganise the dragoons, but it created space for the newly arrived brigade to move into the line. The odds were now shifting in favour of the French, as they 6 line battalions against the five Allied ones.

The French infantry move to the left to face the Danes and Dutch

On the French right regiment Montroux continued to punish Erle's regiment with musketry volleys.  The final straw for the British regiment was when the French gun added its weight to the exchange and inflicted heavy casualties.  Unable to take any more, the regiment broke and ignoring the commander's order to stand, fell back off the battlefield.

The Allied commander was delighted to see the arrival of three battalions of Hessians on his right.  However, they brought the news that the main body was not going to appear, nor were any more troops.  When the Allied commander also saw the head of yet another column of French infantry appearing it became apparent that the best he could do was to form line of battle and then slowly fall back, preserving as much of his command as possible.

The Hessians arrive

The Dutch and Danish battalions were doing their best to slow the advance of the French infantry and buy time for the Hessian battalions to deploy.  However, they were paying a heavy price and when the French charged the Danes were bested in the melee and routed.  They were rallied by the brigade commander, but the Dutch were now isolated.  Just when they were needed the Hessians entered the fray.  Their volleys stopped the French advance, at least for the moment and gave time for the Danes to reform.  Unfortunately for the Dutch they now became the focus of fire from two French units and the resultant casualties forced them to retreat.  They too were rallied and now it was the French turn to suffer a setback as the two leading battalions of the brigade leading the attack were both routed by volleys.

The Languedoc and Bavaria regiments rout

Now the second brigade of French infantry made it's presence felt.  Moving forward on the left of the French line it began to engage the Hessians.  This move was supported by the dismounted dragoons who were trying to work their way round the flank of the Hessian right wing.  On the Allied left the Anglo-Danish brigade was coming off second best against Royal Italien and Montroux.  Both remaining battalions were on the verge of becoming shaken and could not be counted on as holding their ground much longer.  Therefore the commander of the advanced guard gave the order for a controlled retreat; alternately firing volleys and falling back toward the broken ground.  The day belonged to the French.

Always a difficult task, the Allied cause was not helped by some poor musketry which meant they made little headway against the original French force.  They were fortunate in getting a prompt release from their hold order and the arrival of the Hessians, but so were the French with their reinforcement rolls.  It did however provide a satisfactory evening's entertainment.


Thursday, 28 January 2021

Greenfield: an AWI scenario for Patriots and Loyalists

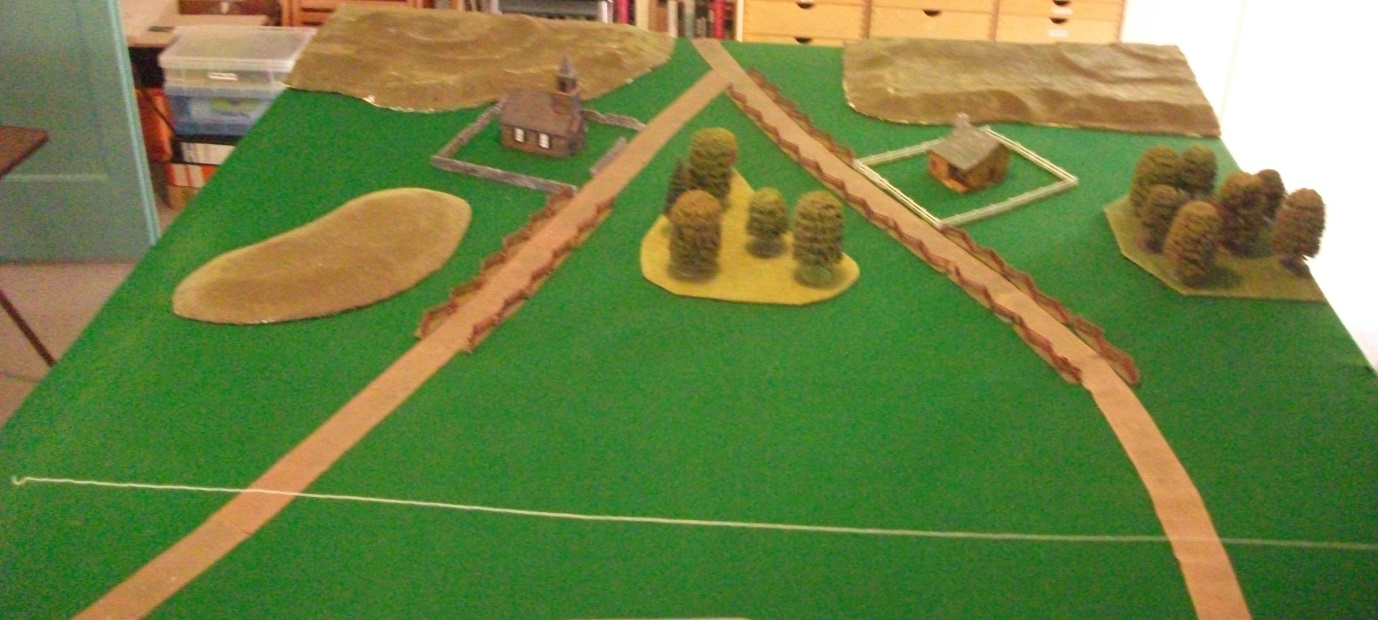
 This week's game saw a return to the other side of the Atlantic for an AWI game.  The Crown forces are pushing back the rebels, who decide to make a stand to prevent an outflanking manoeuvre.  Two rebel brigades hold a ridge position astride a vital road at Greenfield; it is the task of General Scarlet, commanding a joint force of British and German troops, to break through the opposition and advance to a position blocking the supply and communication route of the main rebel force.

The position facing General Scarlet

Uncertain as to the strength, or exact location of the forces facing him, General Scarlet elected to concentrate his effort on the enemy right.  Experience gained in earlier actions had given him a wariness about close, wooded terrain; it was usually the location of enemy riflemen and they had exacted a high toll on his officers.  The buildings provided obvious strongpoints and the ridge good fields of fire.  However, possession of one ridge would probably encourage the enemy to fall back.  He therefore ordered Brigadier Cornwall to advance with his British brigade over the small hill on the left and then onto the ridge, before swinging right towards the road junction.  

Cornwall decided to lead the attack with his light infantry, who, once across the small hill would move right and try and secure Emmanuel Chapel.  The advance towards the ridge would continue, led  by Fraser's Highlanders supported by the grenadiers.  The two line battalions (28th and 55th)  were to engage any enemy units holding the gap between the chapel and the central wood.  In the centre, Brigadier Danzig would attempt to take the central wood with his jaegers, supported by Von Donop's musketeer battalion.  On the right, the Hessian artillery, von Mirbach's musketeer battalion and the grenadier battalion were to engage the enemy in the vicinity of Greenfield.  They were to exert sufficient pressure to prevent any rebel troops moving to reinforce the flank being attacked by Cornwall's brigade.

Brigadier Bannister places on of his militia regiments in the chapel grounds

Brigadier Able surveys his troops at Greenfield

Cornwall began his advance, but the pace was dreadfully slow, the light infantry were anything but light on their feet.  Catcalls from Fraser's  and a rebuke from Scarlet barely increased the speed of advance and by the time the light infantry crested the hill the militia defending the chapel had had plenty of time to prepare a volley of welcome.  However, the volley was not effective and a reply from the light infantry picked off a few rebel officers perhaps lowered the resolve of the defenders.  Meanwhile, the 28th and 55th had moved into position and began to fire at the militia holding the road by the chapel.  Their volleys took their toll on the militia and feeling they had done enough, they fell back behind the supporting continental infantry.

Cornwall's men move over the hill

In the centre, the wood was, as expected, held by rebel riflemen.  These were engaged by the Hessian jaeger, who continued to advance and once in close range charged.  The riflemen were caught at a disadvantage, not only having no bayonets, but also opposed by two units, as von Donop had also charged, supporting the jaeger.  In a very one-sided melee the riflemen took heavy casualties and ran for their own lines.  Von Danzig had achieved stage one of his orders, but the terrain made exploitation of his success difficult.

The Hessians drive off the riflemen

On the right, von Mirbach and the artillery were exchanging volleys with the rebel line.  In addition the Hessians were coming under fire from riflemen in the woods on the extreme left of the rebel position.  Von Danzig saw that the grenadiers would need to move further to the right to have any field of fire, so he sent orders for them to move to the other side of the road and then attack the woods, driving off the riflemen. He could really have done with von Donop's musketeers to support von Mirbach, who were beginning to suffer from the fire from two rebel units and artillery placed by the road.  However, von Donop had followed the jaeger into the woods and become disordered in the process.  There was success, the grenadiers had advanced quickly, fired a volley and were preparing to charge when they saw that the enemy riflemen had not stood their ground; they were falling back in a hurry towards Greenfield.

Cornwall was still struggling to get some impetus into his attack.  Although the militia had been driven from the chapel grounds by the Light Infantry, his opponent, Brigadier Bannister was leading another unit up to support the militia who still held the building.  The light infantry fired at the new arrivals, causing a wavering in the ranks.  With the militia halted and the regimental officers plus Bannister trying to keep them in place, the light infantry had time to fire again.  Although the militia didn't break, there was a significant casualty; Bannister was felled by one of the shots and taken from the field mortally wounded.  To their credit, his brigade continued to stand their ground, although General Browne did, on reviewing the overall situation, order the militia to fall back to the ridge.

The Continental infantry by the chapel continued their musketry duel with the 28th and 55th, both sides taking casualties.  Weight of numbers eventually told  and the Continentals broke and had to be rallied far to the rear by General Browne.

The Continentals rout under pressure from the 28th and 55th 

The militia which had previously suffered from the musketry of the 28th and 55th were now exposed to it once again.  Although they were covered by the wall of the chapel enclosure their morale was brittle and two telling volleys proved too much.  They fled, only stopping several miles to the rear. 
The militia rout
Browne was growing anxious about his right wing.  He had only 3 units left and they had all taken casualties.

On the rebel left Brigadier Able was also worried.  The riflemen ejected from the woods by the Hessian grenadiers were reluctant to return to the fray and his other rifle unit, which had been bested by the Hessian jaeger was in a parlous state.  The militia holding the road between the central wood and Greenfield was starting to show signs of breaking and his artillery were almost out of ammunition.  His fears about the militia proved all too correct as a volley from the grenadiers routed them, leaving the gun unsupported. 
Another militia unit routs

Able was fairly confident the Continental infantry in the second line would hold their ground, but he needed more pressure to be brought to bear on the Hessian infantry, to prevent them advancing any closer to the vital crossroads.  He therefore ordered the militia holding Greenfield to advance to the fences at the edge of the settlement and fire on the von Mirbach musketeers.  This they did to good effect, supported by the Continental infantry and it proved too much for the Hessians who broke and had to be rallied at the rear by von Danzig.


Brigadier Able was not allowed to bask in the glow of this success for long.  The Hessian grenadiers and artillery turned on the militia and exacted a heavy toll with their fire.  It all proved too much and the militia routed, heading for the ridge in the rear of the rebel position.  Their was a pause while von Danzig led the reformed von Mirbach back to the fight.  They and the artillery then began to concentrate on the Continental infantry who were the last major obstacle to a Hessian advance to occupy Greenfield.  Von Danzig sent orders to the grenadiers to manoeuvre to bring their fire to bear as well, but in doing this they became entangled in the woods and it proved a lengthy process to reorder their lines.

The militia abandon Greenfield

On the Crown left, Cornwall was anticipating success, all it needed was for the Highlanders to see of the wavering militia facing them and the way would be open.  Fraser's advanced, supported by the grenadiers and fired a volley at the militia.  The rebels shrugged this off and fired a volley in reply.  Several officers were struck and the attack stalled.  As uncertainty began to rise in the ranks, a second volley, this time from the chapel, hit the Highlanders in the flank.  Uncertainty turned to panic and the Highlanders ran for the rear.

Fraser's rout

At this point we ran out of time.  The rebels were awarded a narrow victory as they had held the position and denied the Crown forces the opportunity to block the rebel lines of communication and supply.  However, this had been achieved at a high cost, with most of the remaining rebel units in a parlous state.  Not that the Crown forces were unscathed, they would take time to recover.  Once again the close terrain had made manoeuvre difficult and the various 'choke points' had enabled the rebels to gain a superiority in numbers.

A most enjoyable game, many thanks to Steve for hosting it.   


Friday, 22 January 2021

Plan for the year

Uncertain as the times are, it is always best to at least make an effort to have a bit of structure to what you would like to do for the next few months.  Up to easter the main project will be the Austrian fleet for the battle of Lissa (1866).  This is my part of a joint project with Steve, who will be painting up the Italian fleet.  The ships are produced by Spithead Models and come in four batches, the first at the end of last year and the remainder at monthly intervals this year, starting this month.  They are 1:1200 scale
Here are the first squadron of gunboats, four more are nearing completion

Hum, with her sisters Vellabich and Dalmat

Steve has assembled the Italians' frigate squadron, here are two of them


The next batch are Austrian Avisos and Italian ironclads, plenty to look forward to.  

In between the ship painting and rigging I hope to plod on with the Eastern Renaissance collections, Ottomans, Poles and Cossacks in particular, though at some stage I would like to fit in a couple of units of reiter for the Muscovites.