Thursday, 26 October 2023

"Recover those stores" : a Sudan scenario using Black Powder rules

 For our latest game Steve set up this scenario where a force of Egyptian troops (3 brigades of foot and 1 of cavalry) were given the task of recovering a cache of arms and stores which Emir Khat had 'liberated' from several defeated Imperial forces.  Information received suggested that the arms and stores were located in a village deep in enemy territory.  The Dervish had a small force protecting the village, but reinforcements could be expected.  The time and point of entry of each element of the reinforcements was the subject of a dice roll and so was unpredictable.

After a hard march the Egyptians were nearing the village.  After several battles in which the Imperial troops had been surprised by hidden enemy troops catching their extended lines, the Egyptian commander decided to hold one infantry brigade back as a reserve, to meet contingencies.  His cavalry were to carry out a sweep around the enemy left to check for concealed enemy units.  The remaining infantry brigades were to advance to two hills and use their firepower to reduce the enemy numbers before a general assault was launched.

The Egyptian cavalry move off to the right

The cavalry brigade set off to the right and for the first two turns met no problems.  On the next turn, as they crested a low hill the were met by the sight of a mass of Dervish infantry moving towards them.  As the cavalry commander looked around the landscape he saw a second mass of enemy infantry to his left.  There was no way he could tackle such numbers, his job was to get back and report the weight of numbers heading towards the village.  He ordered his rear unit to turn around and head back, to be followed by his other two units in quick succession.    Unfortunately, his rear unit did not receive, or misunderstood his order and remained where they were.  To buy time he ordered his leading unit to attack the Dervish troops in front of the brigade.  Gallant though they were, they could not make any headway against the mass of enemy troops and as they struggled, the second regiment of cavalry was charged in the flank by a unit of Hadendoa from the second group of Dervish.

The Hadendoa strike

By now, the rearmost unit of Egyptian cavalry, the Bashi Bazouks had turned to retire towards the centre.  However, they saw that a unit of Dervish was swinging round on their left hoping to prevent any escape for the cavalry.  They charged them and manage to keep the way back open, at least for the moment.  

Behind them all order was breaking down.  The leading unit, unable to hold the mass of enemy infantry routed after the brigade commander was killed.  Then the unit hit in flank did the same.  At least the efforts of the Bashi Bazouks had left open an avenue of escape but the victorious Hadendoa now charged into the back of the Bashis sealing their fate.


The rout of the Egyptian cavalry brigade

As the mayhem was unfolding on the Egyptian right, the leading infantry brigades continued forward.  The left hand brigade established itself on their hill, put out a flank guard, deployed the artillery and then deployed two infantry units forward to fire at the defenders of the village.  In the centre, the second brigade was almost in position, ready to cover the village and the compound.

The infantry brigades move into position

Perhaps encouraged by the rather ineffective fire from the nearest house one unit of infantry charged forward and tried to force their way in.  They met stern resistance and had to fall back to lick their wounds.

Egyptian infantry attack the village

In the centre the second Egyptian brigade had reached its position.  As the leading unit crested the ridge they were charged by enemy cavalry.  Their fellow units were still in column so it was vital that they hold their ground.  This they did, driving off their attackers.  

The second brigade comes under attack from cavalry...

Other units of cavalry swept around the hill heading for the remaining Egyptian formations.  This gave the rest of the centre brigade to form up facing outwards and the left hand unit was just in time to receive a charge from one of the Dervish units in the village

and infantry

On the left, the situation was deteriorating. The unit which had attacked the village had fallen back to regroup, but took further casualties from enemy rifle and artillery fire.  This caused their nerve to break and they routed. To their left, their supporting unit had run low on ammunition and as their rate of fire declined an emboldened enemy attacked them.  Perhaps shaken by their lack of ammunition the Egyptian infantry faltered as the enemy charged.  They could not hold their ground and had to fall back.  This meant that the supply mule sent forward to resupply them fell into enemy hands.  The brigade commander moved forward to steady the wavering unit and the Sudanese, who had been covering the flank, took up position behind them offering support.  It was to be in vain.  The enemy charged again, totally routing the Egyptians and killing the brigade commander in the process.


Surging forward, the Dervish then took on the Sudanese.  These proved to be made of tougher stuff and not only held their ground but forced the Dervish to retreat.  At the same time a unit of cavalry was charging the brigade artillery.  Fortunately, the artillery fire was enough to stall the charge and save the brigade.

The left hand brigade under severe pressure

As all this was happening the final act in the drama that was engulfing the Egyptian cavalry was played out.  Attempting to restore some order, the Egyptian C in C galloped over and rallied one unit of cavalry.  With no other commanders available, the other units continued their rout and left the battle.  The rallied unit was still reforming when it was hit by the pursuing Hadendoa infantry.  Carnage ensued with many of the cavalry and the C in C falling beneath the swords and spears of the enemy.  Only a few cavalry remained to follow their comrades who had left the battle.

The end of the Egyptian cavalry

Behind the Egyptian cavalry, the commander of the reserve brigade had formed up his men in a firing line to drive back the approaching enemy.  The Hadendoa charged the unit on the right of the line, which refused to stand and fell back in disorder.  Fortunately, the other units held and prepared to fire.  However, something was amiss with either the ammunition or the supply held by each soldier because the two battalions and the artillery all fired and found that not only had they had inflicted no casualties, but they had all gone low on ammunition as well.  The brigade still had its supply mule, but it would be a nervous time before all were resupplied.


At this point we had to end play as we had run out of time.  Victory was given to the Dervish, because the Egyptians did not really have the strength to push forward and capture the village.  Added to that the C in C and two brigade commanders were dead, and, two more supply mules had been captured to further boost the supplies available to Emir Khat.


A most enjoyable game.  Thanks to Bob for handling the Dervish so well and to Steve for devising the scenario.

Friday, 20 October 2023

Battle of Lindenau 1813, a scenario using General d'Armee

 It has been some time, but I have eventually sorted out a further test run for the General d'Armee rules.  This Lindenau scenario came from Steve Shann's book "Lets fight Leipzig".  A review of this book can be found on the Yarkshire gamer you tube channel .  The scenarios in the book provide all you need to play the game, a map, order of battle, objectives and terrain detail.

The Austrian General Guylai was attacking the village of Lindenau which sat astride Napoleon's line of retreat from Leipzig.  His troops were in three separate columns and he planned a concentric attack which would overwhelm the defenders of the village ( a small independent division under the command of General Margaron).  Some redoubts had been erected to strengthen the defence, but Margaron's troops were stretched.  Fortunately for the French, reinforcements were on their way.  Bertand's IV Corps  consisted of the infantry divisions of Morand and Fontanelli and the cavalry brigades of Quinette and Jett. These are on the table as the Austrian columns arrive.  On the Austrian left is Hessen Homburg with 6 battalions of infantry and a 'streifkorps' of light cavalry and cossacks.  In the centre is the column commanded by Guylai  with 5 battalions of infantry and two regiments of cavalry.  Finally on the right is Csollich with 9 battalions of infantry and a 'streifkorps' of light cavalry and cossacks.

Csollich prepares to advance on Plagwitz on the French left

The Austrians' objective for a complete victory is to hold at least half of Lindenau by the end of the game; holding Plagwitz and the three redoubts will give them a tactical victory.  Failure to achieve either of these objectives gives victory to the French.

The scenario special rules create the chance of a uncoordinated attack by the three Austrian columns by making them dice to see if they arrive.  In our case this worked and it took Hessen Homburg three turns to arrive giving the French right ample time to prepare themselves and also meaning that the French commander could concentrate his Adc's on helping Margaron and the artillery.  Csollich's skirmishers took heavy casualties from  Margaron's skirmishers and also the artillery facing them , meaning  he had to deploy one of his light battalions to bolster the line.  nevertheless his battalions moved forward.  In the centre Gyulai was also making progress, though his troops were also taking heavy casualties from the artillery in the redoubts.  His skirmishers tried to pick off the gunners, but suffered severely from the volleys of canister.  The infantry battalions began to engage Margaron and Morand's battalions but made little progress, both sides losing their fire discipline.

Morand's troops move through Lindenau

Hessen Homburg's troops had now arrived and deployed to attack Fontanelli  and Quinette.  

Csollich's leading battalions moved to the left of Plagwitz, pushing back the French skirmishers, but this opened them up to attack by Jett's light cavalry  This caused them to halt and form square stalling the advance.


The Austrian right flank Plagwitz


The developing attack on Lindenau

Csollich at last deployed for attack and  stormed the redoubt to the right of Plagwitz.  His men captured the redoubt but were disorganised in the process and were vulnerable to counterattack.


The Plagwitz redoubt falls

The village of Plagwitz was also attacked and after a prolonged struggle the Austrian infantry forced their way in and ejected the French defenders.

Plagwitz falls

As Hessen Homburg advanced he was attacked by Quinette's dragoon brigade.  Von Mensdorf's light cavalry tried to hold them off but were defeated.  Quinette wanted to push on, but the serried ranks of the  Austrian squares deterred him.


Quinette's dragoons drive off the Austrian cavalry

Gyulai had also managed to capture a redoubt in the centre so the Austrians were edging towards a minor victory.  However, there were still several game turns to go and their gains were vulnerable to counterattack.

It was at this point we ran out of time so a draw was declared.  In retrospect the scenario as I put on was perhaps too big for a 6 x 4 table.  The Austrian deployment areas in particular being too cramped.  Once again the rule mechanism regarding Adc's caused severe problems.  All too often a brigade would advance one turn and then the next would become hesitant.  Now I appreciate that the Napoleonic battlefield, with all its smoke and noise could cause confusion; but once an order to advance had been received and initiated, why would the troops stop, especially if they were outside musketry range and were not threatened by cavalry?  Just getting the adcs in the first place proved difficult for both sides; then there is the additional hurdle of  managing to roll 3+ on a d6 once you have managed to get your adcs.  Both commanders had multiple occasions when a brigade would go hesitant in successive turns, even with an adc attached to give a re-roll.

It will be interesting to see what GdA 2 is like when it is published.

Friday, 15 September 2023

Another Deluge scenario: the Battle of Wojnicz, 3rd October 1655.

 It has been a while since my last post, real life intervened as it is prone to do from time to time.  This scenario is a follow up to my previous one and concerns the campaigns of King Charles X of Sweden against the main Polish Crown army.  Details have again been taken from volume 2 of "Charles X's Wars" by Michael Fredholm von Essen, which is published by Helion.   

Having heard that the Poles were in and around Wojnicz, Charles led a force of c 5,200 men, (the vast majority being cavalry) in that direction.  The Polish army under the command of Hetman Stanislaw Lanckoronski was slightly larger, numbering c 6,200 men all mounted.

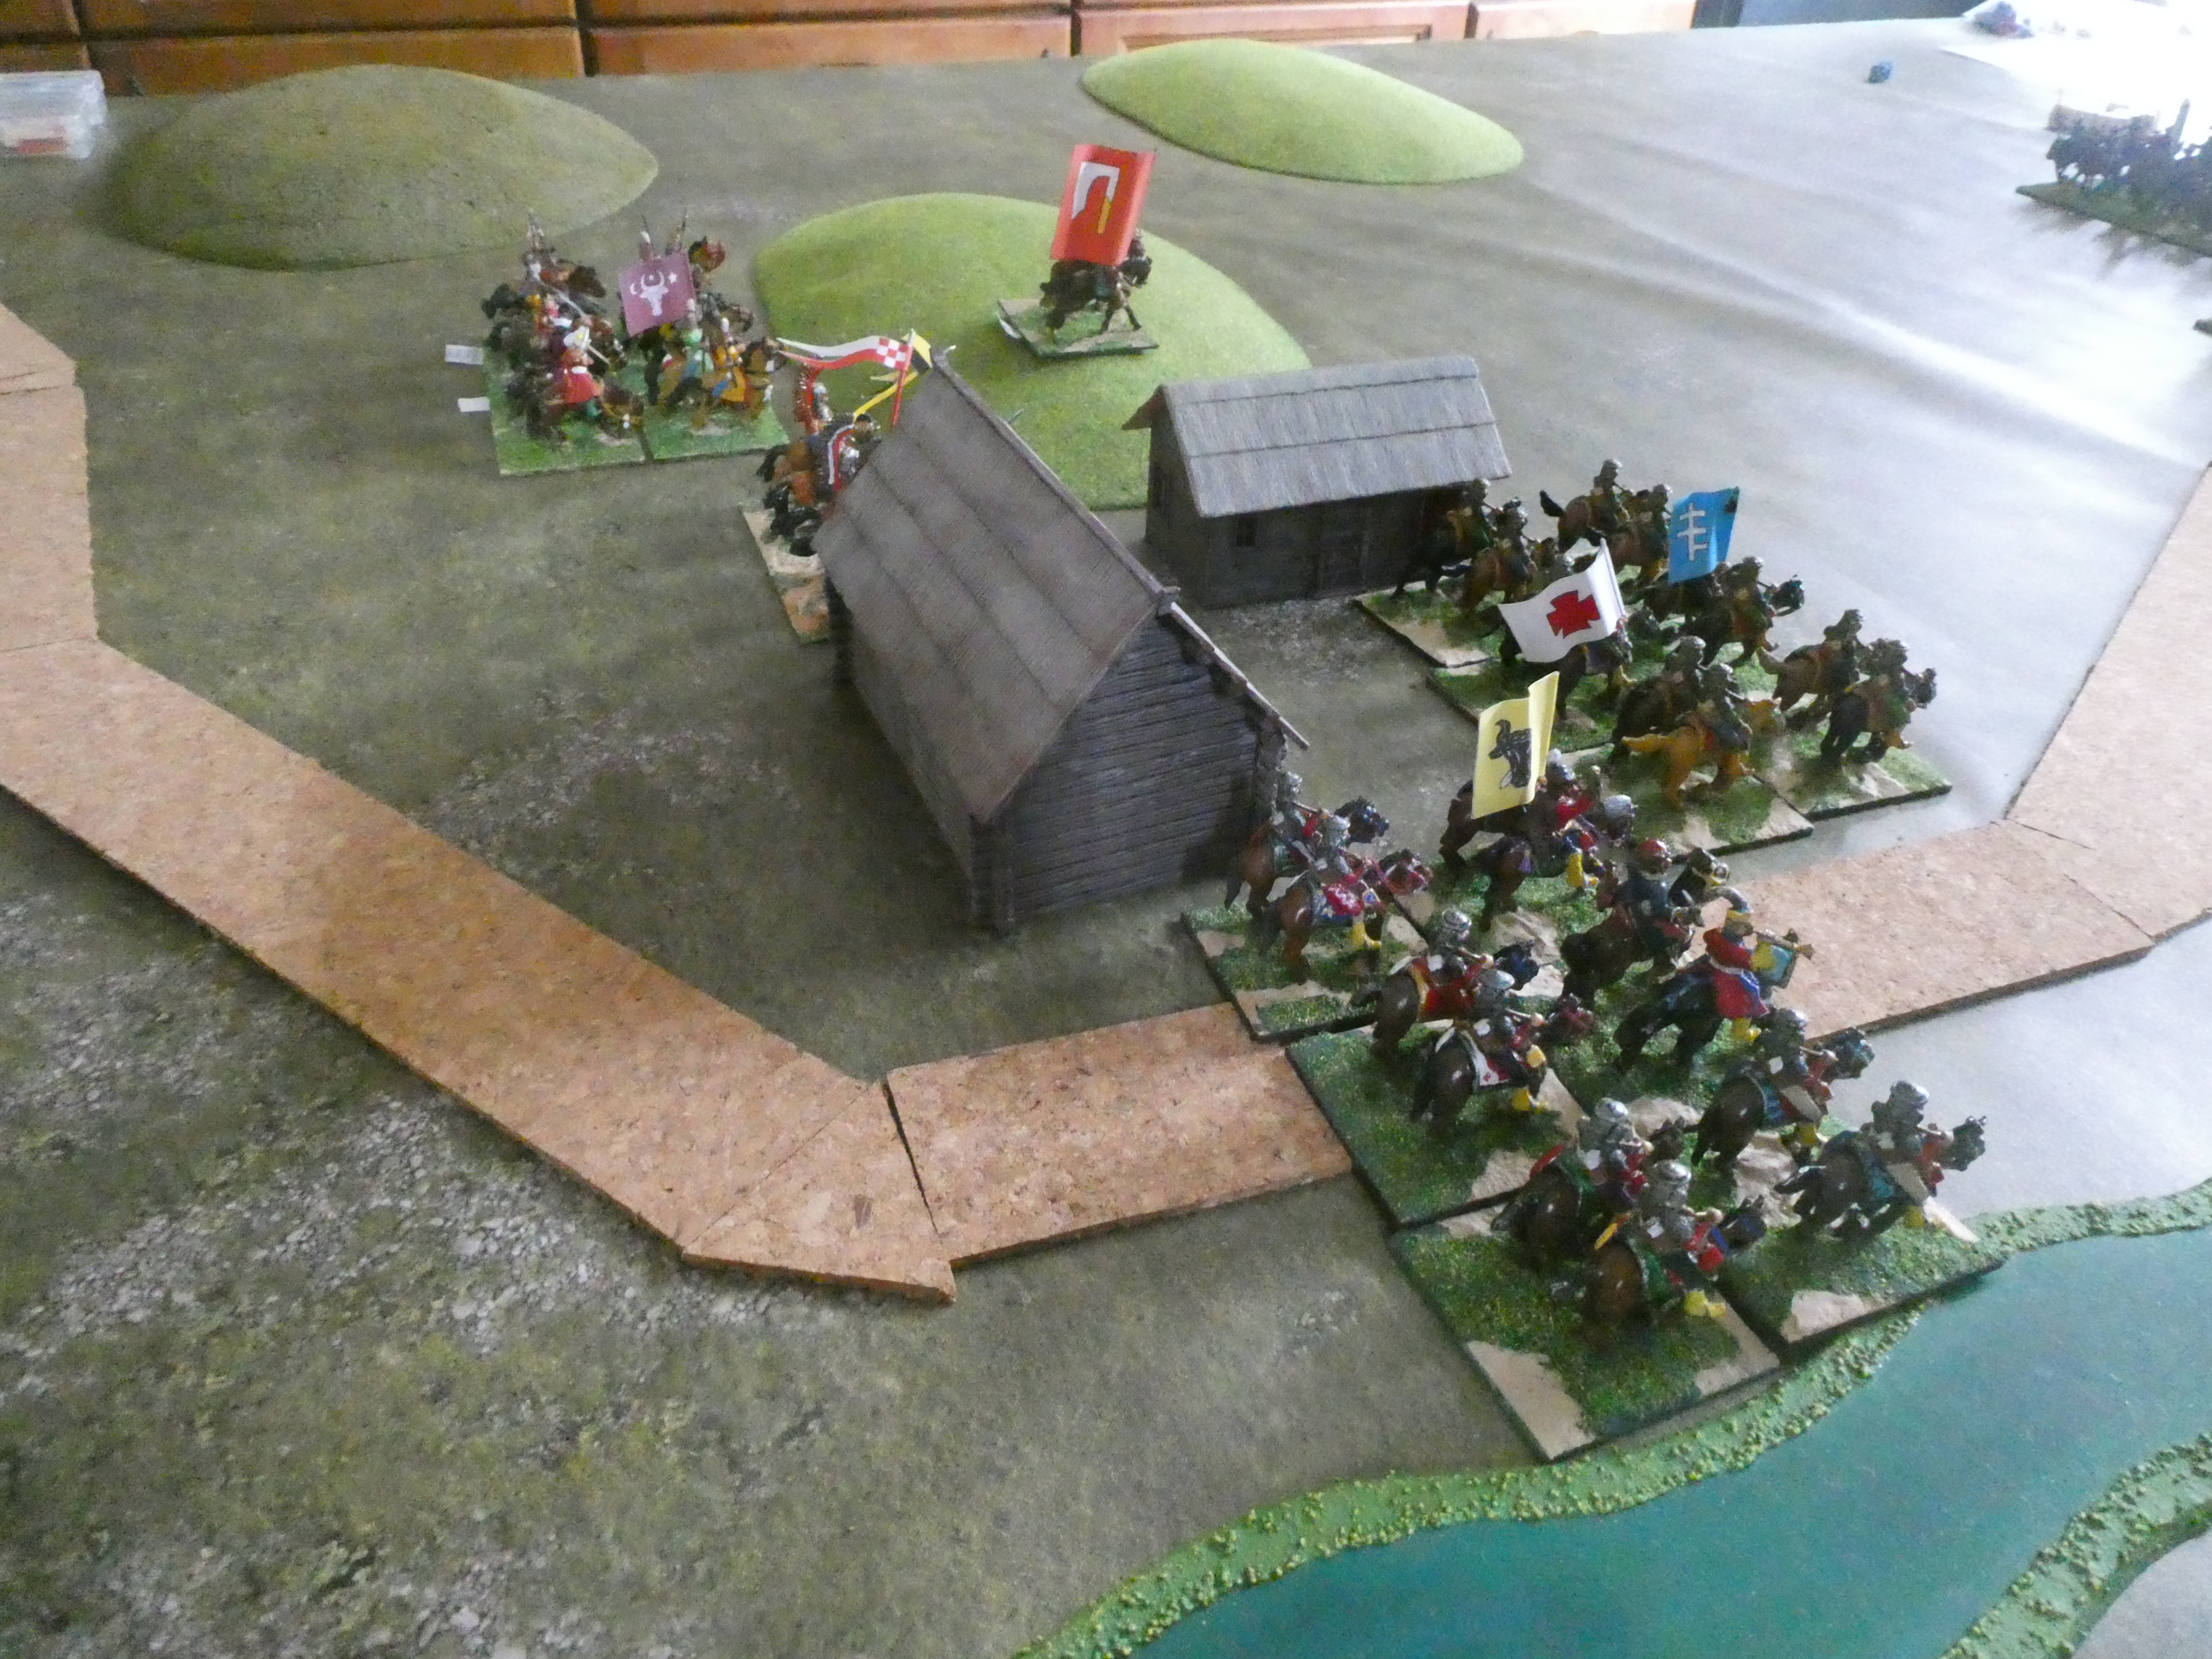
After an initial skirmish between the outposts the two forces deployed.  The Poles deployed in three divisions, pancerni on the wings and hussars and pancerni in the centre.  A regiment of dragoons was ordered to defend the camp.  The Swedes placed their cavalry on the wings and the centre was held by dismounted dragoons and a few infantry, which took advantage of "a defensible gorge"


A view of the table with the Swedes on the left

.The objective for the Poles is to drive back the Swedes and protect their camp; for the Swedes, they would like to break this part of the Crown army and capture the baggage, so both sides need to attack  I rated the Swedish horse as slightly better than the pancerni, but not as tough as the hussars.  There was only one small unit of hussars and the bonus for lance only counted in the first charge.  To account for the "defensible gorge", any defenders would gain the benefit of the attackers charge bonus being nullified.  The dragoons in the Polish camp counted as being in hard cover.  The cavalry wings each had 4 regiments and the Polish centre had one unit of hussars and one of noble levy.  I used the levy mainly because I didn't have enough pancerni.  It did weaken the Poles slightly, but they did have more units.

First the Poles win


Then the Swedes

The Hussars prevail

The Swedes won the initiative and moved forward, as did the Poles.  Battle was soon joined and the Swedish right, which had two veteran units began to gain the upper hand.  The Polish centre decided not to charge the Swedish dragoons, but moved to bolster the Polish right which was coming under pressure from the Swedish left.  As usually happens the Polish hussars charge proved  unstoppable and they overcame two Swedish units.  However, they became isolated and were overwhelmed.  By now the Polish left had disintegrated and losses on the right were high so a Swedish victory was declared.

A rare sight, routing hussars


After lunch we swapped sides and ran the scenario again.  Once again the Polish right was in trouble and needed the centre to help them out.  One notable event was when a fresh unit of Swedish horse charged a small, shaken unit of Polish noble levy.  In the melee the Poles inflicted no hits on their opponents while receiving 8 in return.  Against the odds they managed to save all 8, but as they were shaken in a drawn melee they had to take a break test.  This came up double one so they routed.  Once lady luck proved how fickle she can be!

Historically the battle was a Swedish victory and the Poles lost their baggage and also parts of their army changed sides.  The catalyst for the loss was the unsuccessful charge by the hussars against the dismounted dragoons.  The leader of the hussars was Prince Dymitri Wisnniowiecki and being young and inexperienced perhaps his enthusiasm overcame his common sense.  Among the Poles who changed sides was one Jan Sobieski who later went on to be king of Poland.


Saturday, 29 July 2023

The Battle of Golab (Golomb) 1656. An Eastern Renaissance scenario for Pike and Shotte

 This week's game is a scenario set in the 'Deluge' when Poland/Lithuania was beset by enemies on all fronts.  The basic details come from Michael Fredholm von Essen's book "Charles X's Wars, Volume 2 The Wars in the East, 1655-57 which is publish by Helion in their Century of the Soldier series.

In early February 1656, King Charles X of Sweden moved south with an all cavalry force, hearing that a Polish force under Czarnieecki was close he set out to attack it.  On the 18th February he crossed the Vistula (which was frozen) and surprised and defeated a Commonwealth unit.  This retreated north, pursued by the Swedish vanguard commanded by General Henrik Horn.  At the village of Golab (or Golomb as it was known to the Swedes) they met the remainder of Czarniecki's force.  A general battle developed, with both sides receiving reinforcements.  Eventually superior numbers allowed the Swedes to outflank the Commonwealth troops and threaten their line of retreat.  When Czarniecki ordered a retreat it became more of a rout, as the Commonwealth troops were vigorously pursued by the  Lithuanian and Tartar units in the Swedish force.

The view from behind the Swedish vanguard

It is difficult to determine exact numbers involved in the action.  Charles had approximately 11000 men in his force when he set out, (8000 Swedes/Germans and 3000 Polish, Lithuanian, Tartar and Ruthenian  allies).  This will have dwindled during the campaign and not all the force was present at the battle.  What can be said is that the Swedish force was certainly more numerous than the c2500 Commonwealth troops under Czarniecki's command.

For the scenario I decided on the following forces

Swedish vanguard

2 standard units of Swedish Horse                 2 standard units of 'Cossack' cavalry

Swedish reinforcements

2 veteran units of  Swedish Horse (1 standard, 1 small)        1 standard unit of Lithuanian pancerni

2 standard units of Polish noble levy cavalry 


Commonwealth vanguard

2 standard units of Pancerni                       1 standard unit of Transylvanian light cavalry

1 very small unit of veteran Hussars

Commonwealth reinforcements

2 standard units of veteran pancerni                 1 small unit of veteran Hussars

Notes

Veteran Swedish and Commonwealth pancerni units were  rated 'Stubborn'

Hussars and the Lithuanian pancerni were given 'lance', but this was only available for their first charge.

Polish Noble Levy and Transylvanian cavalry started as trained but dropped to raw after they became 'Shaken'

Overall, the Swedes had a 3:2 advantage in numbers, but the Commonwealth had more veteran troops. 

The Commonwealth vanguard at Golab

Our battle began with a rather uncoordinated advance by the Swedish force, which was met by a determined move forward by the Poles and their allies.  The first clashes took place between the pancerni and the Swedish horse and each side had a unit routed.

First round to the pancerni

With Cossack support, the Swedes prevail

The Cossack units continued forward, and into the Transylvanian light cavalry.  Perhaps the Transylvanians were rather unwilling allies, because they were driven off in no time at all with one unit of Cossacks hot on their heels.

The Cossacks gang up on the Transylvanians

Meanwhile the Polish Hussars now entered the fray  They were too late to save their allies, but they made short work of the unfortunate Cossack unit that was in their way.  Continuing forward, the Hussars now made a nuisance of themselves disrupting the advance of the main Swedish force which was now reaching the battlefield.

The Polish Hussars in action

At the opposite end of the battlefield a unit of Cossacks could also see the main enemy body approaching.  However, there was little they could do to delay them and so they fell back towards their supports.

A second wave of encounters now took place with units charging and counter-charging across the field.  Units became shaken and or disordered and by the time we had to call a halt it was the Poles who had the advantage.  

The Lithuanian Noble Levy attack the Pancerni

Looking back, I perhaps made the Poles too strong in proportion to the Swedes, another two units of Swedish horse would have made a significant difference.  The use of 'stubborn' for the veteran units seemed to work well as did the amendment to the morale state of the Lithuanian Noble Levy and Transylvanian units. Definitely food for thought for future scenarios for this period.


Thursday, 13 July 2023

Kenilworth Castle

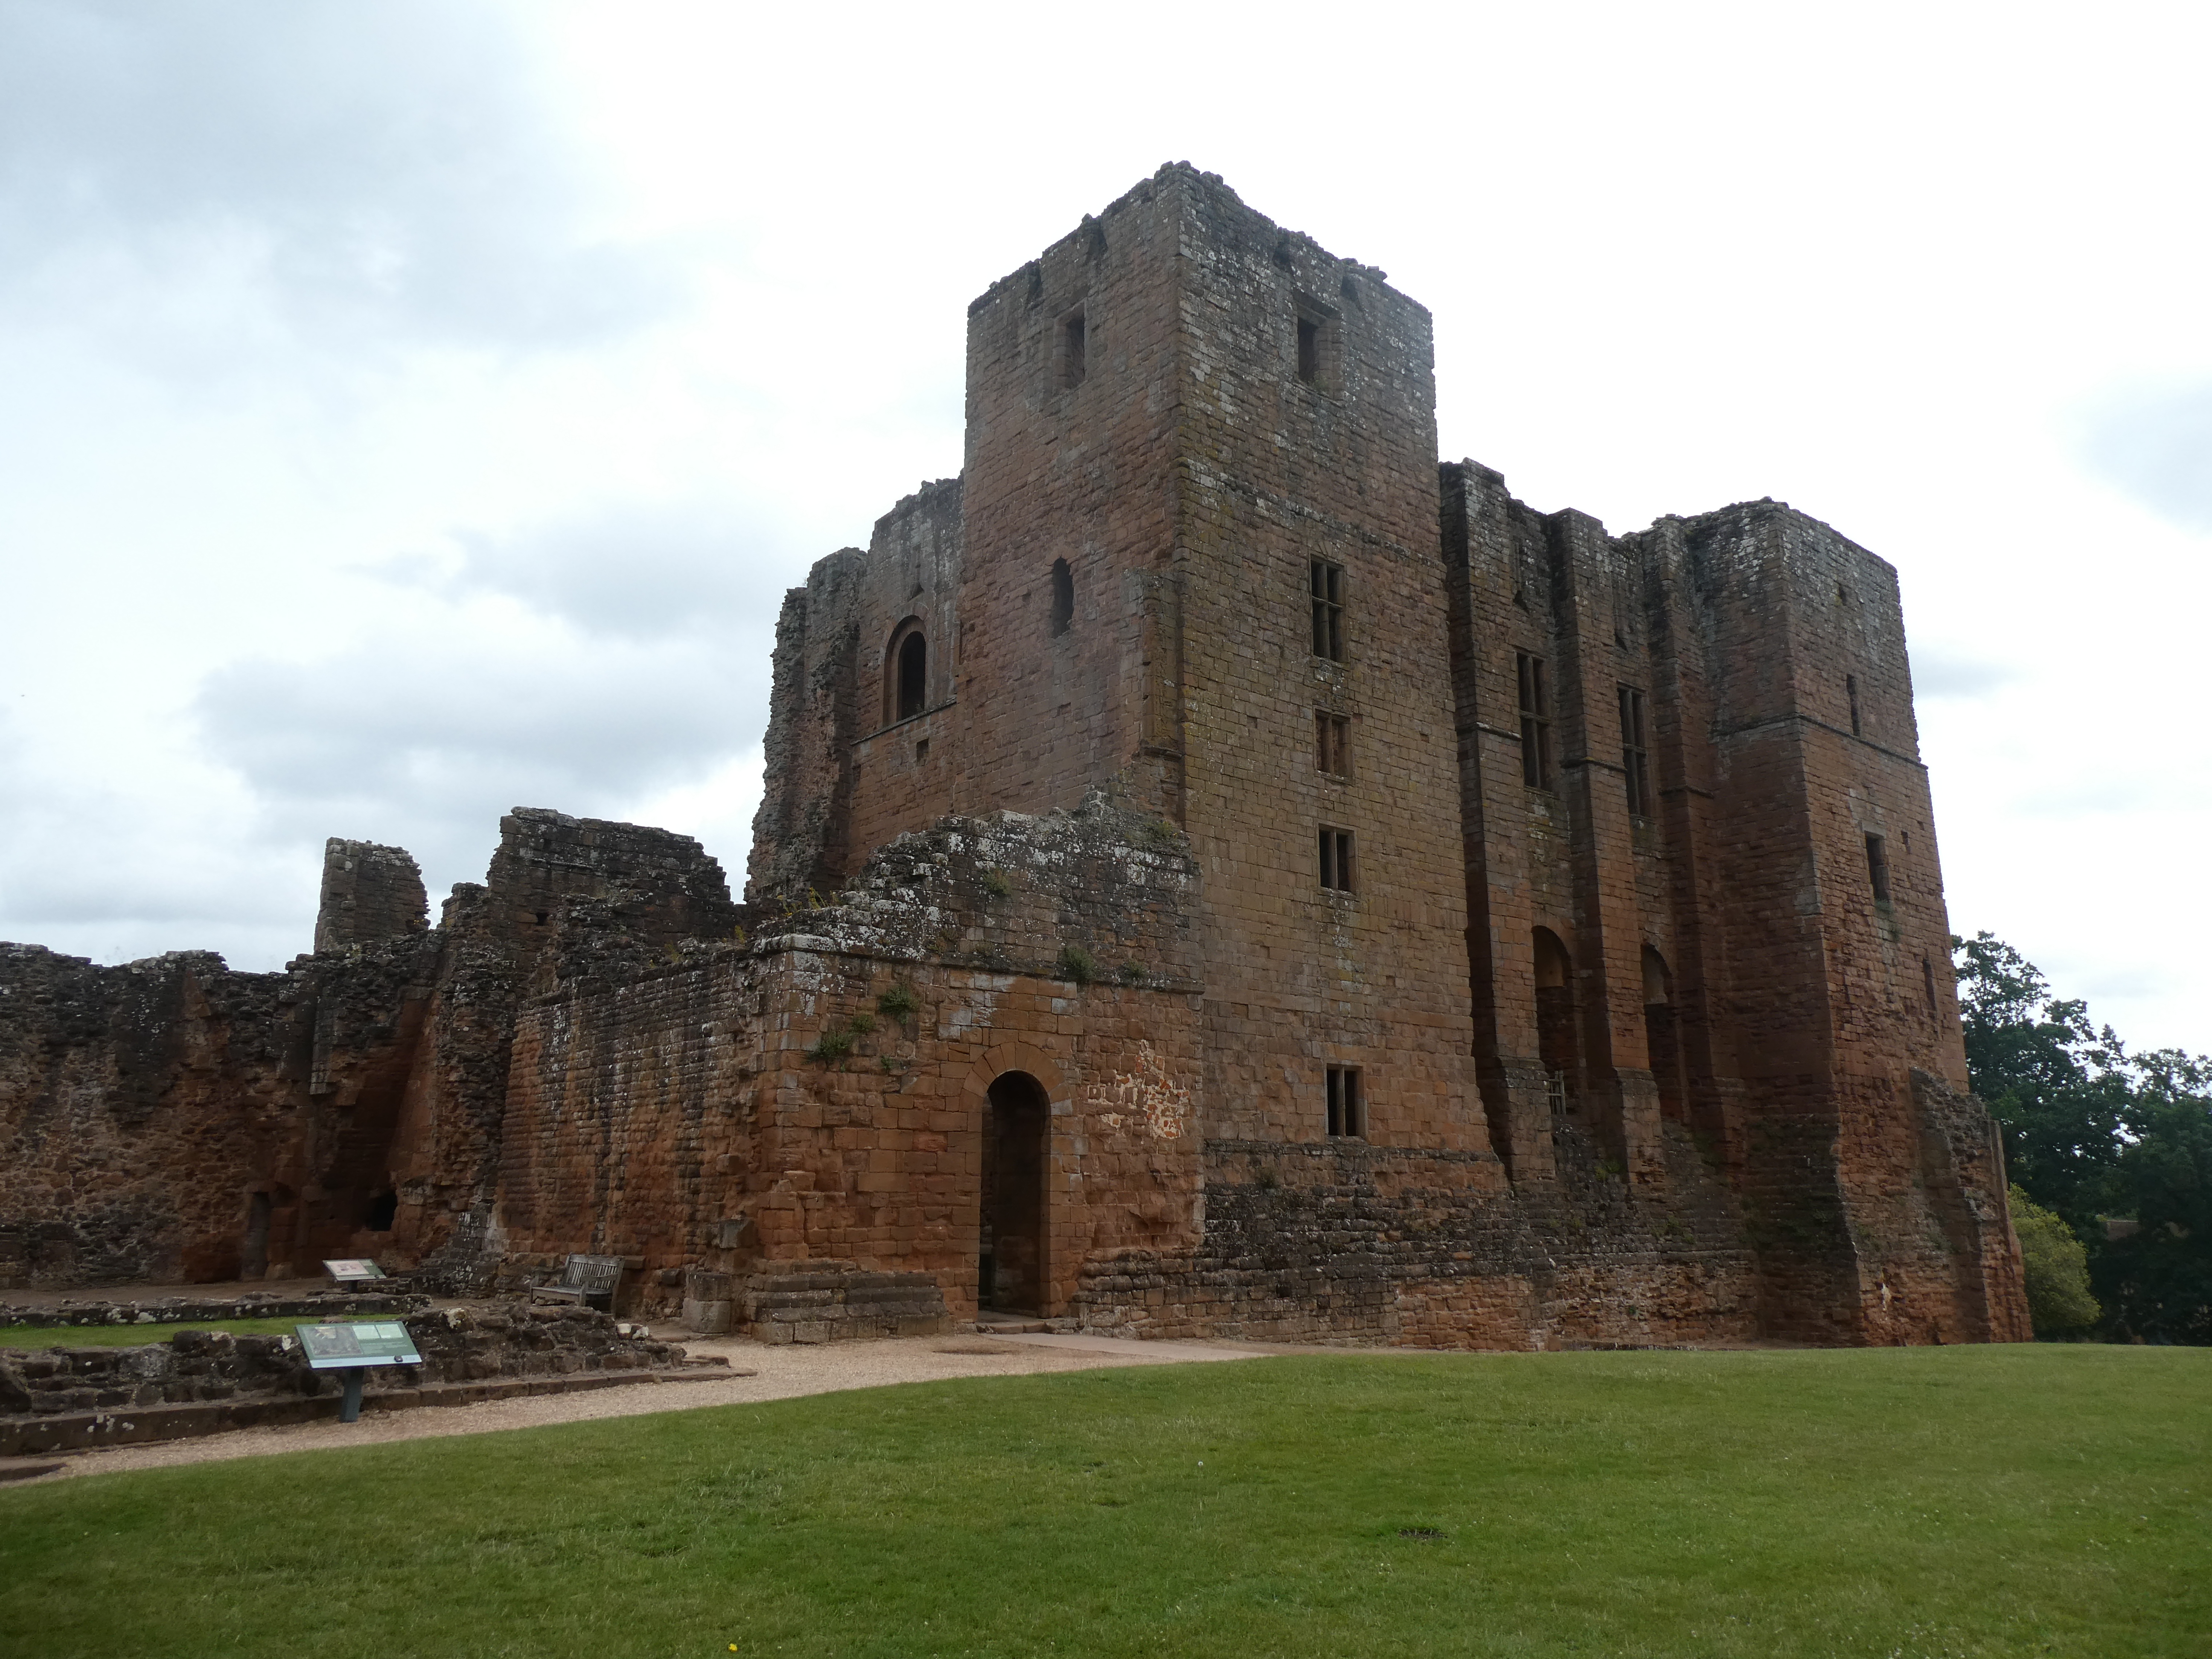
 Last weekend, we were visiting the Midlands.  One of the places we visited was Kenilworth Castle.  I had been before, almost 40 years ago and not surprisingly I  didn't remember much apart from the very imposing keep.


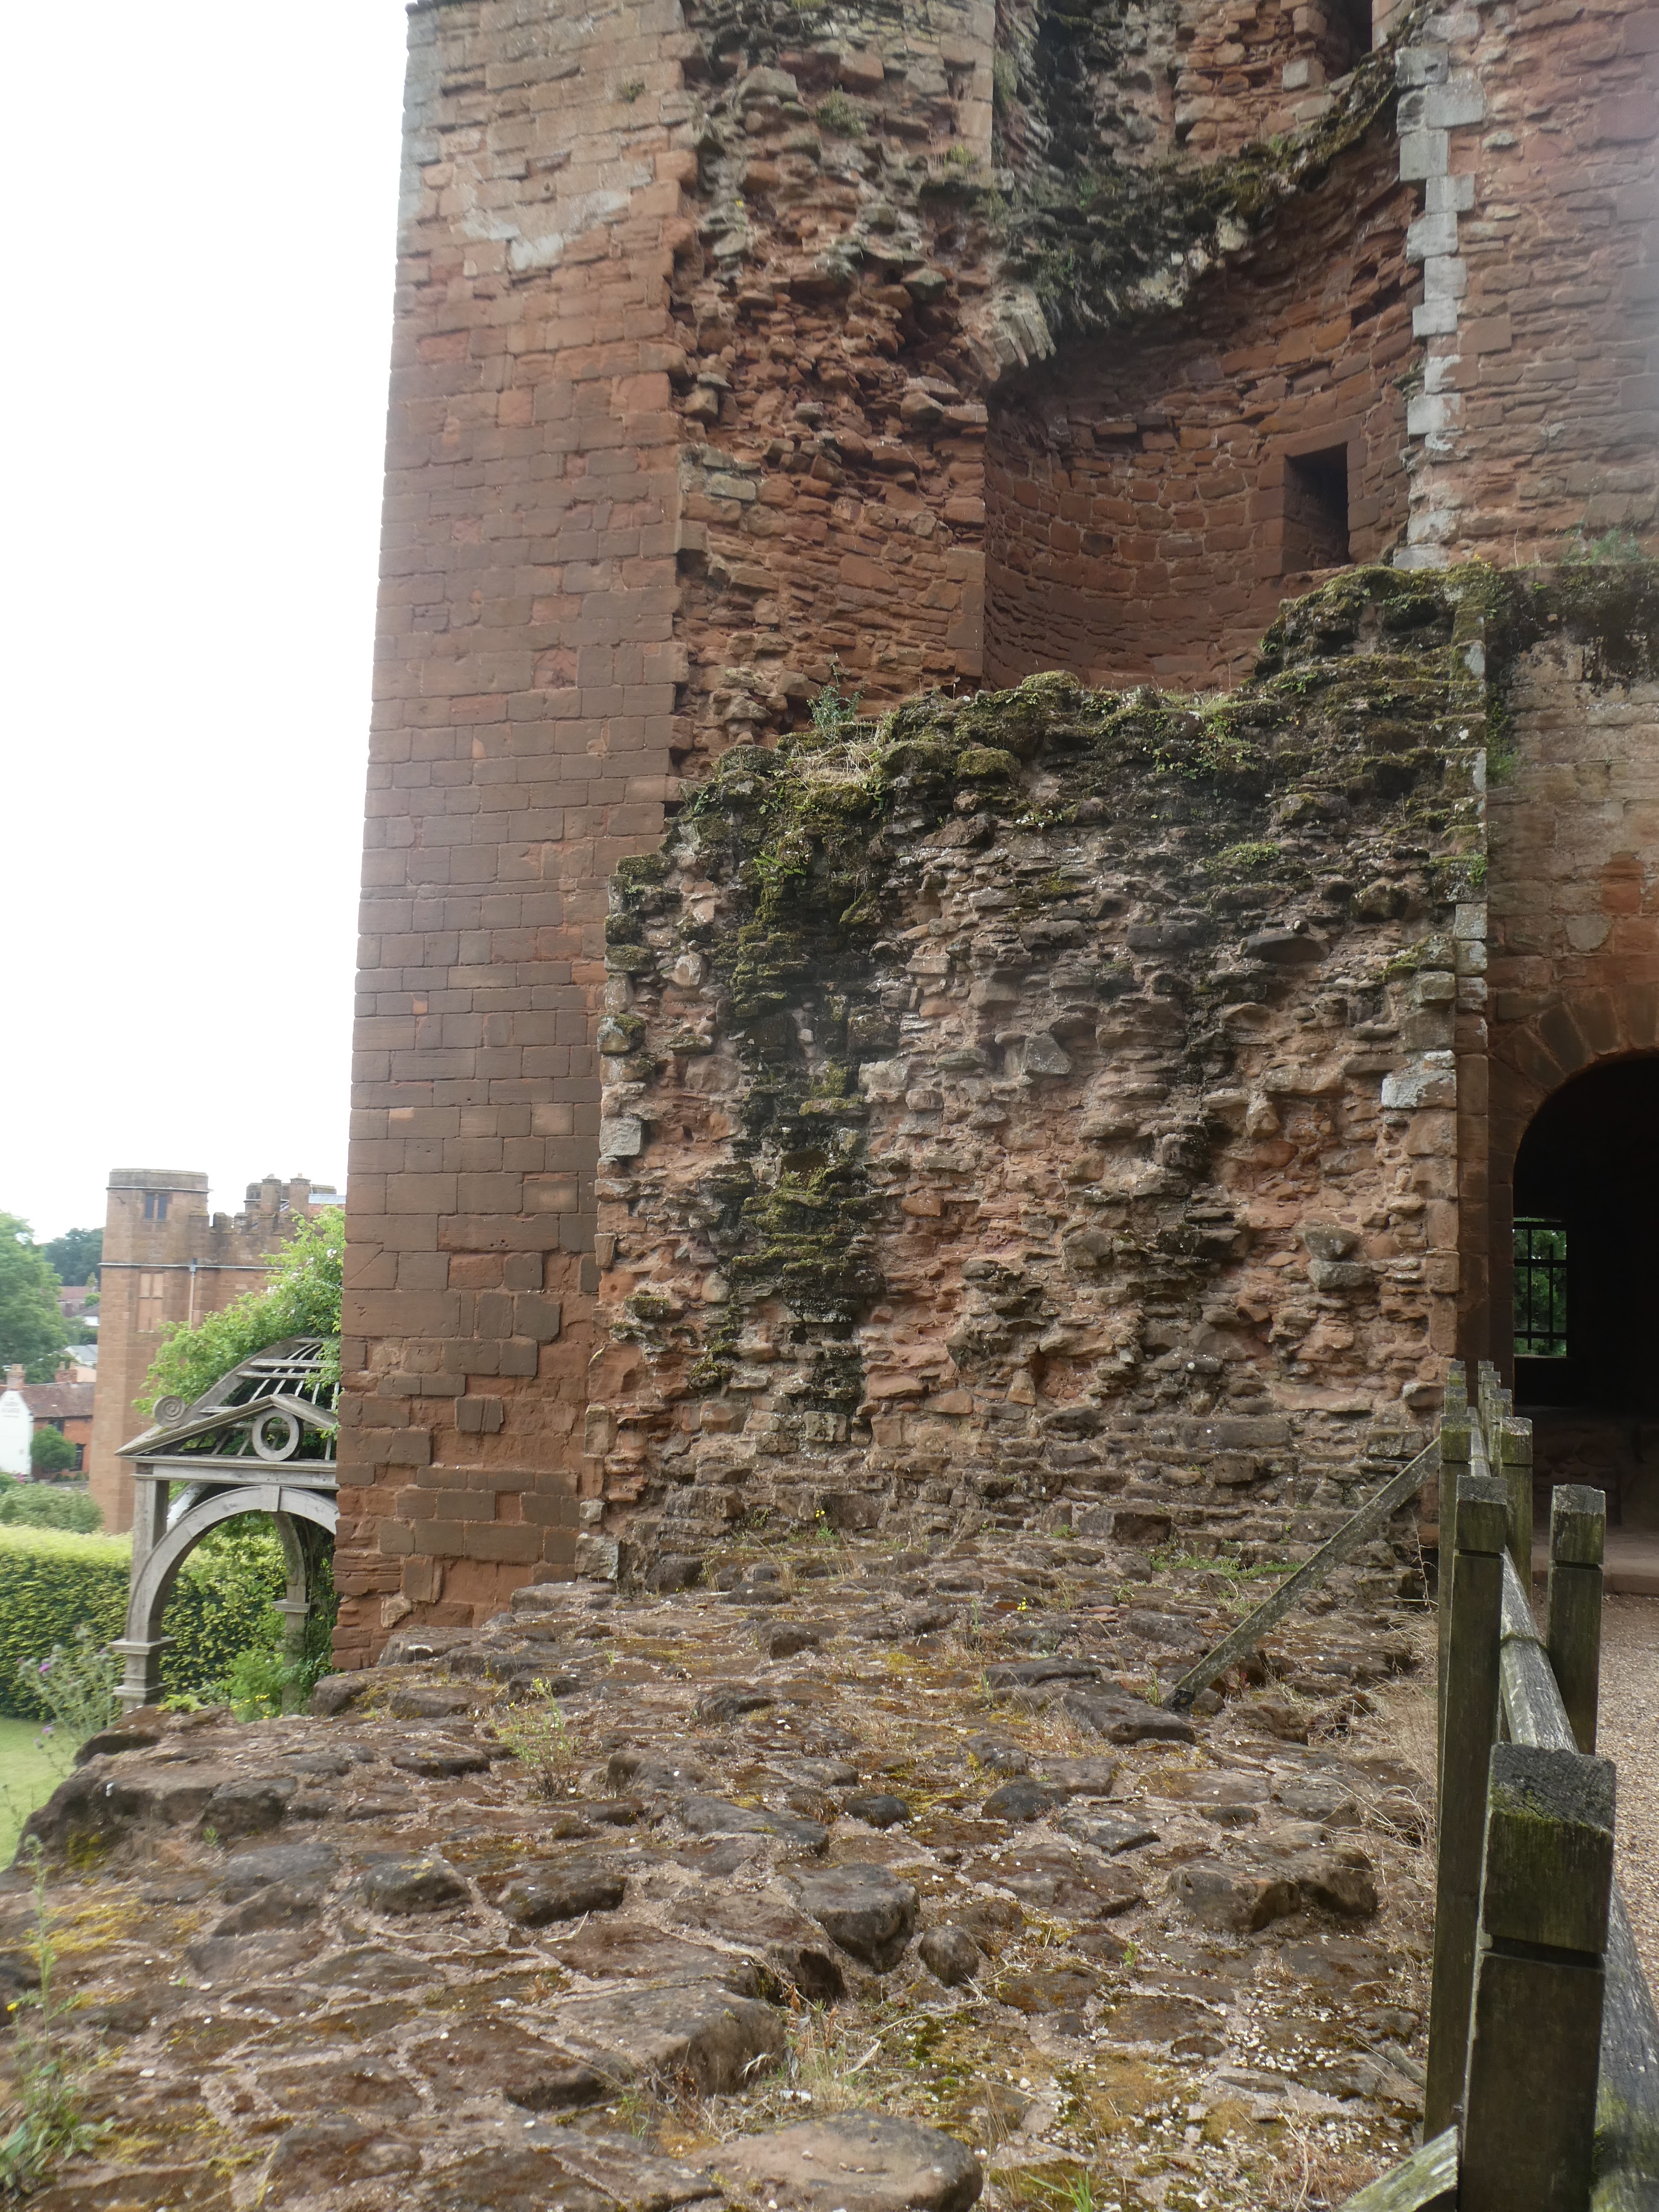
The walls of the keep are up to 14ft thick as can be seen on the North Wall which was demolished when the building was 'slighted' after the Civil War.


The castle was first established by the Royal Chamberlain, Geoffrey de Clinton in the early part of the 12th century.  It was considerably strengthened by King John, who built a stone curtain wall, an outwork to protect the main castle gate and raised the level of the keep.  He also raised the level of the causeway leading to the main gate which increased the extent of the water defences.  These were tested to the limit in 1266 when Simon de Montfort's son, also called Simon, was besieged by the Royal army after the rebel defeat at Evesham.  For six months the garrison held out.  The Royal stone throwers did not have the range to fire over the water defences and a larger machines had to be sent from London.  Stones from a trebuchet have been found within the castle grounds and are on display in the Stables exhibition.


The water defences meant that undermining the walls was impossible and an assault using barges was repulsed.   In the end disease and starvation forced the garrison to surrender. 

Further building was carried on by John of Gaunt.  He created a great hall with additional private apartments and the castle was often visited by the Lancastrian kings in the 15th century.  Below is a photograph of a model of the castle at the time of Elizabeth I when additional buildings had been added by Robert Dudley.  He also created a garden using French and Italian designs.  In 2005-6 an archaeological survey established the layout of the 16th century design and the garden has been recreated, complete with fountain and avairy.


Tuesday, 11 July 2023

Back to the AWI

For our game last week Steve organised an AWI game based on this post (https://paintingshed.blogspot.com/2023/04/the-battle-of-fonteytown-1777.html) from the Painting Shed blog.


Looking up the battlefield from the Crown right wing

The photograph shows the battlefield before the Crown forces deploy.  On their right and centre the Crown have two brigades (each of 4 units) of British troops; on their left a third brigade which are all Hessians, consisting of 5 units: 3 battalions of line infantry, one unit of jaeger and one light gun.  Their task is to drive off the rebel forces and allow the road to be used by supply wagons.

Opposing them are two rebel/revolutionary brigades, each of five units.  They have formed quite a strong defensive line, but have few reserves.   A roll of the dice allocated me command of the Crown forces and Bob took command of the opposition.

My intention was to get forward as quickly as possible, ie advance in column and then deploy into line once I was in musketry range.  This plan was in the wastepaper basket by the end of the first move as my best unit, the British grenadiers were targeted by the opposition artillery and having failed a morale test routed back to the baseline.

The grenadiers rout

Other British units made slow and stately progress, suffering the odd casualty on the way.  On the left flank the Hessians also had problems.  After a reasonable start, they seemed to be unable to coordinate their advance, allowing the defenders to concentrate their fire on first one unit and then another.  The brigade commander was soon scurrying around the battlefield rallying his men. 

It all started so well

Then this happened

On the flanks the light infantry were trying to push back the enemy riflemen from the woods.  The British light infantry were making heavy weather of the operation; their fire seemed to be having little effect and when they advanced they began to suffer casualties.  A bayonet charge managed to force the enemy to fall back but it was all too late.  One line unit had been advancing and also covering the artillery which was moving forward into effective range.  However, the line infantry had taken quite a few casualties from the riflemen and when targeted by the enemy artillery their nerve broke and they routed.  This left the British artillery exposed to a volley from a unit of Continental infantry and as men fell the remainder left their guns and ran for cover.  They were rallied but the British artillery was fated to play little active part in the action.

For all their problems, the Hessians were the first to break through the enemy lines.  The jaegers charged their opponents, who instead of falling back, stood their ground.  In an unequal melee, where the jaegers had bayonets and they did not, the riflemen inflicted severe casualties before they routed.

Success for the jaegers

Once the riflemen had been driven off, the jaegers could move onto the flank of the line infantry holding the defences.  Their harassing fire, combined with volleys from the weary Hessian line troops eventually forced one of the defending units to rout.  

Success at last


The opportunity was there for the Hessian brigade to move forward, but they were just too weak.  The jaegers were at half strength, the artillery had expended all of its ammunition and one of the musketeer regiments had routed from the field.  The two remaining Hessian infantry units were on the brink of following them, each having only one strength point remaining.

For their part the British had neared the defences, but had not yet tested them and we had run out of time.  The rebels/revolutionaries were adjudged the winners, but later, Steve played a few more moves and the British actually managed to break through the defences and open up the road.  


Friday, 30 June 2023

Almost Cropredy Bridge ; An ECW scenario set in Kelhamshire

 Traditionally, the Sunday of the Phalanx Show weekend Steve hosts a big game for the Gentlemen Pensioners.  This year he selected an ECW game set in Kelhamshire using our in-house version of the Pike and Shotte rules.  The table was 16 feet by 6 feet and he had assembled around 1500 figures divided into 8 commands, 4 per side.

A view from behind the Parliamentary right flank

  
The Royalist army in march column

The scenario starts with the Lord Mechett's Royalist army marching north in column.  Half of the vanguard and half of the rearguard (both composed of cavalry) are off table.   Sir Victor Meldrew's forces appear on the Royalist flank, but only half the brigades are immediately available, the remainder are still making their way over various bridges and fords.

The Parliamentary infantry advance in the centre

There was soon action on both flanks as the opposing cavalry commanders tried to gain ad advantage.  The situation on the Parliamentary right was the most fluid, with units charging and counter-charging and the balance tilting one way and the other.

The Parliamentary cavalry attack their opponents who are still in column


A couple of photos provided by John
(the Royalist cavalry commander on this flank)

On the opposite flank, the Royalist cavalry commander was having difficulty recalling his leading units, but the leading infantry brigade continued marching forward and then deployed to give support.  This secured the Royalist right, but did mean that the central infantry were outnumbered.

The Royalist cavalry begun to form up, with their
infantry deterring an early Parliamentary charge


The impasse on the Royalist right/Parliamentary
left from both sides

In the centre, the Parliamentary infantry were having a few problems..  One unit  had 'blundered', received no orders and just stood in position  blocking the exit from the bridge.  This meant that a co-ordinated advance by all four brigades was not possible..  

The dragoons on the Parliamentary left deploy into some woods

In what was to prove a significant move, the cavalry commander on the Parliamentary left ordered his dragoons to move into some woods.  This one unit drew the attention of two Royalist infantry units , plus a gun even though the dragoons firepower was relatively small.  

The piecemeal advance of the Parliamentary infantry

The left hand Parliamentary infantry general gathered his units in the lee of the low hill in the centre and then advanced all of them together to threaten the Royalist centre.  His colleague on his right had got his first brigade forward at last, but the second was still crossing the bridge.  Nevertheless, the right hand infantry commander moved forward to engage the enemy, trading volleys, hoping to pin his opposite number in position.  For his part, the Royalist commander used just enough of his units to hold his position and maintained a reserve against possible setbacks.

The two infantry brigades on the left of the Royalist centre

Having made little progress exchanging volleys, the Royalist infantry commander decided to charge the Parliamentary infantry on the hill.  One of his units was stopped in its tracks by a telling volley, but the other continued up the slope into contact.  


There was no quick victory, but gradually the Parliamentarians gained the upper hand and pushed their assailants down the slope.  To the left of the melee the Royalists were gaining the upper hand in the musketry exchanges and the leading Parliamentary infantry unit was beginning to waver. Further to the left another Parliamentary infantry unit was pushing forward, but the courier carrying Meldrew's order for it to charge must have been unhorsed, because nothing happened.  Perhaps sensing a little unease among their opponents, the Royalists did not stand on ceremony and charged themselves.  A rather feeble volley did little to stop them and they crashed into the Parliamentary ranks.

More fighting in the centre

 On the Royalist right the cavalry battle had begun in earnest.  The Royalist commander had broadened his attack by moving round a small wood and forced his opponent to move his reserves to meet this threat.


Unfortunately, we now ran out of time, as some of the participants had to start their journey home.  A good day.  Thanks to Alasdair, Andy, Bob, Chris, Dave, John and Will for taking the various commands. Also, Steve for devising, setting up and umpiring the game and also explaining some of the finer points of the rules to those who were not familiar with them. 


The essential logistics ( a fine lunch) were provided by Gwen and Lynne.  

Perhaps it was as well for the Parliamentary cause that we stopped when we did.  The first cracks were starting to appear in the Parliamentary infantry I was commanding.  One unit was routing and a couple of others were shaken.