A good number of years ago, almost 11, in fact, Alasdair set up a scenario for the Sudan called 'Last train to Handub'. Over the years it has become the most viewed post on the blog (link). Just prior to Christmas Steve set up his version of the scenario for Bob and myself to play. To set the scene, the village of Handub is the current rail head of the Suakin-Berber railway, a scheme to provide an alternative supply route for the Imperial troops in Sudan, avoiding the many cataracts on the Nile.
 |
| The battlefield, Handub in the centre and the railway heading eastwards back to Suakin |
 |
| The village of Handub, with the vital well. |
In Handub are three detachments of British infantry, from the Royal Kelhamshire, Borsetshire and Cromarty Highlanders, supported by a field gun and a gatling gun crewed by Royal Navy ratings. These are all under the command of Captain Hector Brandon. To the east of the village are two cavalry units under the command of Captain Winstanley Neville, found from the Rutlandshire Hussars and Princess Marie's Lancers. Major Albert Wren is in overall command. Over the last couple of days cavalry patrols have found evidence of enemy forces in the area, but there have been no sightings. Concerned that the village may be attacked in force, Wren has requested reinforcements and a troop train is expected in the next two days. For now, he has placed a detachment of infantry in three of the four buildings and deployed the Gatling gun to cover the western side of the village. The field gun is on the southern face, as this is where the main evidence for the presence of enemy forces was found.
 |
| The Royal Naval Gatling gun detachment, perhaps discussing the rum situation? |
 |
| Major Wren (on white horse) tours the village. In the background, Captain Brandon checks the ammunition supply |
 |
| The Imperial forces deployed at Handub |
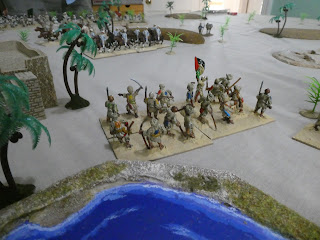
Just after dawn, a sentry on the south-western house of Handub sounded the alarm, a mass of Dervish warriors were approaching. The Dervish were an infantry force commanded by Abu Bakr, comprisinf a unit of riflemen, a mixed unit, two melee units and a field gun. His orders from Emir Khat were to attack with vigour and draw the defenders to the western edge of Handub. Emir Khat would attack with the rest of his force once the Imperial troops were fully engaged. For his part Abu Bakr had decided to place his riflemen in some broken ground where they could fire at the Royal Kelhamshires who held the building on the southwest corner of Handub. The field gun would deploy to the north and fire on the same building before the main attack would be launched by the melee infantry. Unfortunately, once the tribesmen spotted the Imperial troops they charged forward, carrying the riflemen with them. Forgetting their orders, the riflemen charged towards the house held by the Royal Kelhamshires and into a hail of fire. The Gatling joined in and the Dervish riflemen shrank from the fire. Their ardour cooled and all order lost they fell back into the broken ground where Abu Bakr did his best to rally them.
 |
| Abu Bakr's men surge forward |
In the village, the rapidly approaching mass of Dervishes had convinced Captain Brandon that he needed to move the Imperial artillery to support the Gatling crew and also the Borsetshires. He galloped over to Major Wren and put his case. "It is obvious that the enemy have moved round us during the night" he said. "It is vital that they don't break into the village, we need more firepower on the western edge". Wren had had many years of experience in India before his posting to the Sudan and was wary of 'putting all his eggs in one basket'. "You can move the artillery, but the Borsetshires remain where they are". Brandon galloped off to the artillery and ordered them to move to the west, then, looking over his shoulder, he saw a welcome plume of smoke, the train bringing reinforcements was almost there.
 |
| The train bringing the infantry reinforcements approaches Handub |
The arrival of the train was not welcomed by Emir Khat, he had hoped to eliminate the village garrison before any help arrived. New orders were sent to Abu Fahr, who commanded the second infantry force. He had originally been ordered to attack the north eastern corner of the village, held by the Borsetshires, now he was to attack the train. Emir Khat then noticed that some of the enemy cavalry were moving, Princess Marie's Lancers were making their way round the southern side of Handub to attack Abu Bakr in flank. Turning to Khalifa Abaid, who commanded the cavalry, he ordered his to attack the lancers.
On the western face of Handub, the Dervish attack struck home. Ignoring losses from the Gatling, one unit of Dervish overran the gun, butchering the crew. There blood up, they continued eastwards straight into the field gun, which managed one hurried shot before it too was overrun. Even worse, the ammunition mules had been with the gun and they were captured and taken away.
 |
| The Gatling is overrun |
Captain Neville had been ordered by Wren to swing round Handub to the south to attack the Dervich in flank. Leaving the Hussars to guard the northern side of Handub, Neville set off, but quickly struck some soft sand which slowed his progress. The same seemed to be happening to the Dervish cavalry, which was moving much slower than was usually the case. This applied particularly to Emair Khat's own regiment which seemed reluctant to attack.
As the train neared Handub, the driver could see masses of Dervish troops surging through the village towards him. Applying the brake, he brought the train to a halt just outside the village and then saw more Dervish charging towards him from the north. These were the troops of Abu Fahr. The train had a field gun at the front of the engine and a Gatling at the rear behind the trucks carrying the Galway Irish. The field gun could fire at the Dervish in Handub, but the gatling would need to be re-deployed to fire at Abu Fahr's men. As the Dervish charged towards the train, the Borsetshires fired into their flank, but undaunted the Dervish continued their advance. The young officer commanding the Hussars ordered a charge and the two forces crashed together. At first, the Dervish held their own, but gradually the pressure increased and finally they routed. On their part, the Hussars were too battered to pursue and they began to reform.
 |
| Abu Fahr's first attack is repulsed |
The Hussars had not yet finished their day's fighting. As they reformed, they were charged by another unit of Dervish infantry. They held the initial charge, but as they fought for their lives, they were hit in the rear by Dervish cavalry. Khalifa Abaid had ordered on of his units to attack the Hussars. They had galloped across the tracks in front of the train. They artillery on the train had attempted to fire as they passed, but there was some malfunction and the fate of the Hussars was sealed. Caught at such a disadvantage the Imperial cavalry were almost wiped out, only a few managed to reach the cover afforded by the wagons on the train.
 |
| The end of the Rutland Hussars |
Neville was faring better with the Lancers. Having evaded the Dervish cavalry and found solid ground he swept down on Abu Bakr's reserve infantry. The Lancers dealt swiftly with the infantry, though at some cost and carried on to overrun the Dervish artillery, which had yet to find a place to deploy. Reining in to rally, Neville was dismayed to see Dervish cavalry charging towards him. In a close fought melee, it was the fresher Dervish cavalry which prevailed and the Lancers were forced back. The Dervish cavalry followed up and the Lancers were scattered, disappearing into the desert.
 |
| The Lancers dispose of a unit of Dervish |
In the village, Abu Bakr's men were now tackling the houses holding the Imperial infantry. The unit which had overrun the Gatling and artillery was now storming the house held by the Cromarty Highlanders. Other units were attacking the Royal Kelhamshires and the Borsetshires. These units fought stubbornly, denying the Dervish any entry. The Highlanders were less fortunate. Their commander was severely wounded by a spear causing a temporary loss of cohesion. Seizing their chance the Dervish forced their way into the building and the Highlanders tumbled out into the desert.
 |
| The Royal Kelhamshires under attack |
On the southern side of Handub, Emir Khat had seen the Highlanders spilling out of the village. This was a golden opportunity to wipe out an enemy unit. Turning to his men he ordered them to charge; not a man moved. Stunned by their inaction, Emir Khat took time to regain enough composure to order a charge a second time. This time his men obeyed, but the Highlanders had reformed. Deteermined to regain their pride the Highlanders had charged the Dervish who had evicted them. Even the impact of Emir Khat's cavalry didn't deter them from forcing their infantry opponents to rout. One enemy disposed of, the Highlanders tuned and doled out the same medicine to the cavalry. Firing into the retreating cavalry, they then resumed their occupation of Handub.
 |
| Emir Khat's cavalry are driven off |
In the village, the stout defence by the Royal Kelhamshires and the Borsetshires had inflicted heavy casualties on their Dervish opponents. When these units saw their comrades routing down the tracks towards the west they decided that perhaps it would be best to pull back too. Abu Bakr's force had done all it could.
Abu Fahr meanwhile was still fighting at the train. The Galway Irish had surprisingly de-trained and formed up to face the onrushing Dervishes. A close range volley had slowed but not stopped them and a fierce melee now took place. At times it seemed the Irish were doomed, but eventually it was the Dervish troops which gave way and fled back over the dunes. The Gatling crew at the rear of the train had been attacked, but the accurate fire they had laid down dampened the Dervish's enthusiasm to attack enough to enable them to withstand the initial impact. However, the unequal struggle could not last and soon the crew were wiped out, but the Dervish infantry needed time to reform. At the front of the train an attack on the field gun never happened. Each time the Dervishes advanced, accurate fire from the Borsetshires stopped them. Like his fellow commander, Abu Fahr decided he had done all he could and recalled his battered units.
 |
| The Irish stand firm |
As the Dervish forces fell back into the desert, Wren looked round Handub. He had held the village and casualties had been relatively light; but he was concerned about his ammunition supply and lack of cavalry for reconnaissance. He ordered the Irish to garrison the north west corner of Handub and sent the wounded back on the train, together with his request for more ammunition and cavalry.
As for Emir Khat, he praised the efforts of Abu Bakr and Abu Fahr, whose men had fought well. He was less pleased with Khalifa Abaid and the cavalry.
Many thanks to Steve for setting up the scenario and to Bob for being such a congenial opponent.


