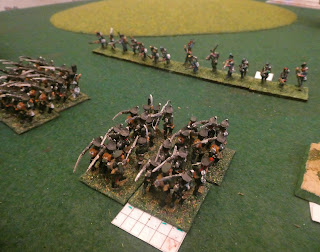
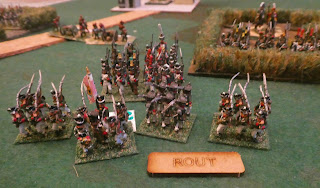
This week's scenario comes from the "Vitoria" supplement for General d'Armee published by Reisswitz Press. It is the first of the 6 in the book and is a fairly straightforward affair involving infantry only, except for a battery of artillery for each side. The British and Allies need to demoralise two of the three French brigades to win, the French win by avoiding this condition. Speed is of the essence as the scenario lasts only 10 turns.
 |
| An overhead view of the battlefield |
The French baseline is at the bottom of the photograph. They have three brigades of infantry (a total of 11 battalions) plus one battery of field artillery. One of the brigades is held in reserve on the baseline; the other two each must deploy at least two of their four battalions 24" forward (approximately the front edge of the two fields). The rationale for this is that Reille, the c in c initially decided to attack what he thought was an isolated brigade of enemy troops. As more British and Portuguese troops arrived and deployed it became obvious he was outnumbered and he therefore switched to the defensive. His reserve brigade will only be released if one of the other two brigades has a sauve qui peut or retire result.
The British start with four brigades deployed up to 8" in from their table edge; a fifth brigade will arrive at the beginning of turn 5's movement phase.
The action began almost immediately in our game and as I was commanding an army I had little time for photographs or making detailed notes of events; but I will give a quick resume of events. Napoleonic gamers will recognise straight away that there are no British or Portuguese troops in the photographs. I do not have any, so I used Austrian, Prussian and Russian units instead.
 |
| The highlight for the Allies in the first game, the attack on the French left goes in. |
For the first game I commanded the Allies and Steve the French with Bob umpiring. I decided to use a veteran brigade with an attached horse artillery battery to outflank the French on their left, with a second brigade, without attached artillery, would attempt the same on the French right. The two remaining brigades, plus the reserve brigade, would try and pin the French frontally. A simple enough plan, but the dice intervened and the two flanking brigades were both hesitant and therefore did not move.
 |
| The Allies ready to push back my skirmisher screen |
 |
| The Allied guns exposed |
This severely disorganised the attack on my right and bought valuable time. A similar thing happened in the centre, where a successful French charge caused morale problems for one of the Allied brigades. Once again time ran out for the Allies and the French were victorious.
A post match review brought up one glaring error on my part, I had neglected to give all the 'British' battalions the superior volley rating. This undoubtedly made things more difficult for them and went some way to explain their poor showing in the volley exchanges and the ease with which the French were able to avoid the Allied victory conditions.
How did the rules play this time?
Firstly, things moved a good bit quicker for this second game. We were better acquainted with the rules of course and had less recourse to checking things in the rulebook. The look of the game was improved by increasing the size of the units from 3 to 4 bases. This meant that attack columns could be easily seen to be different to columns of route. There are some reservations around the amount of 'friction' caused by the hesitant status for brigades, but this may be a hangover from our familiarity with the Shako rules where all brigades can move each turn. Looking at accounts of Napoleonic battles not all sectors of the battlefield are active at the same time, apart from mutual bickering between the opposing skirmish lines and artillery bombardments. There are some areas of the rules which could be clearer, but the Too Fat Lardies website does have a Forum where the questions can be asked. There is also a FAQ available for download and news on a proposed 2nd ed of GdA.
This particular scenario did not have any cavalry involved, trial run 3 will address that.

Enjoyed, thanks. For me the size of this game is a sweet spot and you getting two game in reinforces that. I think GdA is a set that one needs to get familiar with for good play. I quite like the ‘hesitant’ brigade type chaos and note that in the Valour & Fortitude free rules on the Perry Miniatures website, they use a similar (but gentler) mechanic, that I have found really helps solo play.
ReplyDeleteHello Norm, thanks for your comment, I will look at the Valour & Fortitude rules. The main 'beef' is with the Destiny mechanism which is like the Blunder mechanism in Pike and Shotte, but far more severe. Perhaps it is a question of toning it down a bit.
ReplyDeleteDavid
Good report and description of the limitations of this set of rules. I have played them three times now, all fairly large games. I went from concerns about them upon reading to being more comfortable upon game one but not comfortable with the aide de camp system and other aspects of command and control. I have now concluded that, for me, the core aspects of movement and combat are fine, but the rules are ruined by the 'gamey' aspects creating problems for commanders from entirely random events.
ReplyDeleteUnlike Norm, I would not recommend Valour & Fortitude. While the concept of rules on a few pages is a noble aim, they have left out too much that is core to Napoleonics. Within a few months they were already up to version 1.5 with additions and errata. There is a really good summary and review on the blog 'The Dining Table Napoleon' from October last year.
Regards, James
Hello James and thank you for your comments. We quite like the variety of orders which can be issued via adc's; in Shako you were limited to attack and defend. Admittedly the uncertainty regarding the number of adc's available can result in extreme situations, not helped by the rather severe results of the 'destiny' mechanism. It is surprising how many double sixes can crop up! Perhaps we could look at establishing a minimum number of adc's available with the possibilty of more. Something to look at? I will have a look at the review you mention too.
ReplyDeleteRegards
David