Tuesday, 18 January 2022

Hobkirk's Hill, April 25th 1781; A Rebels and Patriots Scenario

 The scenario is set in the period after the battle of Guildford Courthouse and the rebel (or revolutionary?) commander Nathanael Greene has marched into the Carolinas towards the Crown supply base at Camden.  Greene camped at Hobkirk's Hill a little north of Camden.  Lord Rawdon, the commander of the Crown forces decided to attack rather than sit behind his defences, and gathering his small army embarked on a flank march through the wooded terrain.  He hoped to launch a surprise flank attack which would roll up the rebel line.

Rawdon's army was composed mainly of provincial units which have remained loyal to the king, stiffened with a single regular battalion (the 63rd), some light infantry and a section of Royal Artillery.  There is also a single unit of light dragoons (Coffin's).  Greene's force had four units of Continental infantry, two from Maryland and 2 from Virginia, plus a militia unit and two units of riflemen.  There was also a section of artillery and Washington's Light Dragoons.

Rawdon's force about to commence the attack

In our first run through the game the Crown forces suffered from a spate of low die rolls.  The rules require a score of 6 (in some cases 5) or more on two d6 to move, despite this low bar, the Crown advance was disjointed.  One unit would advance and then three or four would fail to move.  The photograph below shows the result.


The rather disjointed Crown advance
 
Sticking to his original plan, Rawdon pushed his skirmishers forward on the flanks (as quickly as his dice would let him).  On the Crown left, the skirmishers moved towards a wood occupied by a unit of rebel riflemen, intending to drive them off.  Things did not go as planned as the rebel marksmen out shot their Crown opponents and rather too quickly, the Crown skirmishers were at half strength.  A second unit of rebel skirmishers was harassing the advancing provincial units and the stuttering pace of the attack meant that the provisional units took significant casualties before they were able to engage the continental infantry.  Greene had been surprised by the Crown force appearing on his flank and was grateful that their slow advance gave him time to redeploy to meet it.  He ordered the Maryland units to swing to the left and sent Washington's Dragoons down from the ridge to threaten the flank of the Crown advance. 


The Maryland units wheel towards the Crown advance

The skirmishers deployed on the Crown right had been ordered to fire into the flank of the Maryland regiments and   'soften them up' for the main attack.  Seeing the approaching enemy cavalry, the skirmishers fired and hurried  backwards trying to evade.  They were not quick enough and were caught by the dragoons.  The melee was inevitably won by the cavalry, who followed the retreating skirmishers and drove them from the field.                                   

Washington's Dragoons make short work of the Crown skirmishers

Rawdon had sent a unit to support the skirmishers.  Their volley did inflict some casualties on the dragoons, who had reformed, facing the flank of the advancing Crown units.  The dragoons charged their aggressors and totally defeated them, routing them from the field.  Rawdon's attack was not going well.

And a provincial unit

The only ray of hope for the Crown forces was that  the dragoons were now reduced to half strength and they fell back behind the ridge, their job done.  Through all the mayhem, the 63rd Foot had been advancing on Hobkirk's Hill.  After an exchange of volleys with the 1st Maryland they charged, only to be roundly defeated in the melee.  As they fell back in disorder the 63rd were hit by volleys from both Maryland units and the artillery, their morale cracked and they also fled the field.

By now, the Virginia regiments from the rebel right flank had marched over to support the Maryland regiments and Greene felt confident enough to counter attack.  The extra firepower ground down the remaining provincial units one by one and soon over half the Crown army had fled.  This left Rawdon little choice but to retreat with the remains of his force and hope he had sufficient troops to defend Camden.

After this rather one-sided affair, we reset the scenario and went for lunch.  On our return we swapped sides and tried again.   On this second attempt the Crown forces fared much better (things tend to even out).  The advance was much more organised  and the skirmishers on the flanks more than held their own.  Washington's Dragoons again moved to the left, but fared less well than before.  The fire from the Crown skirmishers was much more effective and the dragoons twice failed to charge their tormentors.  Reduced to half strength, the dragoons pulled back, failed to rally and fled the field, leaving the way open for the Crown skirmishers to push forward. 


A more organised Crown advance
As before Greene pulled his right flank units across to counter the Crown advance, but this time they were needed to help the Maryland units hold the hill, rather than support an attack.

The Rebel right moves to reinforce the left

With the 63rd to the fore, the Crown forces began to move onto the hill. All along the line the leading Crown units would fire a volley, the supporting line would pass through and fire a volley and then the process was repeated.  The pressure on the rebel units was intense.

The Crown forces move onto Hobkirk's Hill

One by one the rebel units had to fall back and as they did so, the Crown forces advanced maintaining the pressure.  Inevitably one unit failed to rally and routed.

One of the Continental units routs

At close of play the result was obvious, a victory for the Crown forces.

The end of the game - the Crown forces continue to push the Rebels back

Steve set up the scenario using the article in issue 78 of Wargames , Soldiers and Strategy. and adapted it for our in house version of the Rebels and Patriots rules written by Michael Leck and Dan Mersey  and published by Osprey.  One point from the above narrative, rolling low dice when attempting to rally
units is not recommended; it the reason so many Crown units fled the field in the first game.  Nevertheless, on the day both armies gained a victory, the players enjoyed the game so the scenario must be rated a success.

Sunday, 9 January 2022

Last train to Handub; a reprise. A Black Powder scenario

 A good number of years ago,  almost 11, in fact, Alasdair set up a scenario for the Sudan called 'Last train to Handub'.   Over the years it has become the most viewed post on the blog (link).  Just prior to Christmas Steve set up his version of the scenario for Bob and myself to play.  To set the scene, the village of Handub is the current rail head of the Suakin-Berber railway, a scheme to provide an alternative supply route for the Imperial troops in Sudan, avoiding the many cataracts on the Nile.

The battlefield, Handub in the centre and the railway heading eastwards back to Suakin


The village of Handub, with the vital well.

In Handub are three detachments of British infantry, from the Royal Kelhamshire, Borsetshire and Cromarty Highlanders, supported by a field gun and a gatling gun crewed by Royal Navy ratings.  These are all under the command of Captain Hector Brandon.  To the east of the village are two cavalry units under the command of Captain Winstanley Neville, found from the Rutlandshire Hussars and Princess Marie's Lancers.  Major Albert Wren is in overall command.  Over the last couple of days cavalry patrols have found evidence of enemy forces in the area, but there have been no sightings.  Concerned that the village may be attacked in force, Wren has requested reinforcements and a troop train is expected in the next two days.  For now, he has placed a detachment of infantry in three of the four buildings and deployed the Gatling gun to cover the western side of the village.  The field gun is on the southern face, as this is where the main evidence for the presence of enemy forces was found. 


The Royal Naval Gatling gun detachment, perhaps discussing the rum situation?

Major Wren (on white horse) tours the village.  In the background, Captain Brandon checks the ammunition supply  

The Imperial forces deployed at Handub

Just after dawn, a sentry on the south-western house of Handub sounded the alarm, a mass of Dervish warriors were approaching.  The Dervish were an infantry force commanded by Abu Bakr, comprisinf a unit of riflemen, a mixed unit, two melee units and a field gun.  His orders from Emir Khat were to attack with vigour and draw the defenders to the western edge of Handub.  Emir Khat would attack with the rest of his force once the Imperial troops were fully engaged.  For his part Abu Bakr had decided to place his riflemen in some broken ground where they could fire at the Royal Kelhamshires who held the building on the southwest corner of Handub.  The field gun would deploy to the north and fire on the same building before the main attack would be launched by the melee infantry. Unfortunately, once the tribesmen spotted the Imperial troops they charged forward, carrying the riflemen with them.  Forgetting their orders, the riflemen charged towards the house held by the Royal Kelhamshires and into a hail of fire.  The Gatling joined in and the Dervish riflemen shrank from the fire.  Their ardour cooled and all order lost they fell back into the broken ground where Abu Bakr did his best to rally them.

Abu Bakr's men surge forward

In the village, the rapidly approaching mass of Dervishes had convinced Captain Brandon that he needed to move the Imperial artillery to support the Gatling crew and also the Borsetshires.  He galloped over to Major Wren and put his case.  "It is obvious that the enemy have moved round us during the night" he said.  "It is vital that they don't break into the village, we need more firepower on the western edge".  Wren had had many years of experience in India before his posting to the Sudan and was wary of 'putting all his eggs in one basket'.  "You can move the artillery, but the Borsetshires remain where they are".  Brandon galloped off to the artillery and ordered them to move to the west, then, looking over his shoulder, he saw a welcome plume of smoke, the train bringing reinforcements was almost there.

The train bringing the infantry reinforcements approaches Handub

The arrival of the train was not welcomed by Emir Khat, he had hoped to eliminate the village garrison before any help arrived.  New orders were sent to Abu Fahr, who commanded the second infantry force.  He had originally been ordered to attack the north eastern corner of the village, held by the Borsetshires, now he was to attack the train.  Emir Khat then noticed that some of the enemy cavalry were moving, Princess Marie's Lancers were making their way round the southern side of Handub to attack Abu Bakr in flank.  Turning to Khalifa Abaid, who commanded the cavalry, he ordered his to attack the lancers.

On the western face of Handub, the Dervish attack struck home.  Ignoring losses from the Gatling, one unit of Dervish overran the gun, butchering the crew.  There blood up, they continued eastwards  straight into the field gun, which managed one hurried shot before it too was overrun.  Even worse, the ammunition mules had been with the gun and they were captured and taken away.


The Gatling is overrun

Captain Neville had been ordered by Wren to swing round Handub to the south to attack the Dervich in flank.  Leaving the Hussars to guard the northern side of Handub, Neville set off, but quickly struck some soft sand which slowed his progress.  The same seemed to be happening to the Dervish cavalry, which was moving much slower than was usually the case.  This applied particularly to Emair Khat's own regiment which seemed reluctant to attack.

As the train neared Handub, the driver could see masses of Dervish troops surging through the village towards him.  Applying the brake, he brought the train to a halt just outside the village and then saw more Dervish charging towards him from the north.  These were the troops of Abu Fahr.  The train had a field gun at the front of the engine and a Gatling at the rear behind the trucks carrying the Galway Irish.  The field gun could fire at the Dervish in Handub, but the gatling would need to be re-deployed to fire at Abu Fahr's men.  As the Dervish charged towards the train, the Borsetshires fired into their flank, but undaunted the Dervish continued their advance.  The young officer commanding the Hussars ordered a charge and the two forces crashed together.  At first, the Dervish held their own, but gradually the pressure increased and finally they routed.  On their part, the Hussars were too battered to pursue and they began to reform.

Abu Fahr's first attack is repulsed

The Hussars had not yet finished their day's fighting.  As they reformed, they were charged by another unit of Dervish infantry.  They held the initial charge, but as they fought for their lives, they were hit in the rear by Dervish cavalry.  Khalifa Abaid had ordered on of his units to attack the Hussars.  They had galloped across the tracks in front of the train.  They artillery on the train had attempted to fire as they passed, but there was some malfunction and the fate of the Hussars was sealed.  Caught at such a disadvantage the Imperial cavalry were almost wiped out, only a few managed to reach the cover afforded by the wagons on the train.

The end of the Rutland Hussars

Neville was faring better with the Lancers.  Having evaded the Dervish cavalry and found solid ground he swept down on Abu Bakr's reserve infantry.  The Lancers dealt swiftly with the infantry, though at some cost and carried on to overrun the Dervish artillery, which had yet to find a place to deploy.  Reining in to rally, Neville was dismayed to see Dervish cavalry charging towards him.  In a close fought melee, it was the fresher Dervish cavalry which prevailed and the Lancers were forced back.  The Dervish cavalry followed up and the Lancers were scattered, disappearing into the desert.

The Lancers dispose of a unit of Dervish

In the village, Abu Bakr's men were now tackling the houses holding the Imperial infantry.  The unit which had overrun the Gatling and artillery was now storming the house held by the Cromarty Highlanders.  Other units were attacking the Royal Kelhamshires and the Borsetshires.  These units fought stubbornly, denying the Dervish any entry.  The Highlanders were less fortunate.  Their commander was severely wounded by a spear causing a temporary loss of cohesion.  Seizing their chance the Dervish forced their way into the building and the Highlanders tumbled out  into the desert.

The Royal Kelhamshires under attack

On the southern side of Handub, Emir Khat had seen the Highlanders spilling out of the village.  This was a golden opportunity to wipe out an enemy unit.  Turning to his men he ordered them to charge; not a man moved. Stunned by their inaction, Emir Khat took time to regain enough composure to order a charge a second time.  This time his men obeyed, but the Highlanders had reformed.  Deteermined to regain their pride the Highlanders had charged the Dervish who had evicted them.  Even the impact of Emir Khat's cavalry didn't deter them from forcing their infantry opponents to rout.  One enemy disposed of, the Highlanders tuned and doled out the same medicine to the cavalry.  Firing into the retreating cavalry, they then resumed their occupation of Handub.

Emir Khat's cavalry are driven off

In the village, the stout defence by the Royal Kelhamshires and the Borsetshires had inflicted heavy casualties on their Dervish opponents.  When these units saw their comrades routing down the tracks towards the west they decided that perhaps it would be best to pull back too.  Abu Bakr's force had done all it could.

Abu Fahr meanwhile was still fighting at the train.  The Galway Irish had surprisingly de-trained and formed up to face the onrushing Dervishes.  A close range volley had slowed but not stopped them and a fierce melee now took place.  At times it seemed the Irish were doomed, but eventually it was the Dervish troops which gave way and fled back over the dunes.  The Gatling crew at the rear of the train had been attacked, but the accurate fire they had laid down dampened the Dervish's enthusiasm to attack enough to enable them to withstand the initial impact.  However, the unequal struggle could not last and soon the crew were wiped out, but the Dervish infantry needed time to reform.  At the front of the train an attack on the field gun never happened.  Each time the Dervishes advanced, accurate fire from the Borsetshires stopped them.  Like his fellow commander, Abu Fahr decided he had done all he could and recalled his battered units.

The Irish stand firm

As the Dervish forces fell back into the desert, Wren looked round Handub.  He had held the village and casualties had been relatively light; but he was concerned about his ammunition supply and lack of cavalry for reconnaissance.  He ordered the Irish to garrison the north west corner of Handub and sent the wounded back on the train, together with his request for more ammunition and cavalry.

As for Emir Khat, he praised the efforts of Abu Bakr and Abu Fahr, whose men had fought well.  He was less pleased with Khalifa Abaid and the cavalry.

Many thanks to Steve for setting up the scenario and to Bob for being such a congenial opponent.

Saturday, 1 January 2022

2021 and 2022

 A Happy New Year to all visitors to this blog and a special thank you to those who leave comments about the games we play and shows we visit.  Last year should have been a bumper year for getting figures painted, what with lockdowns no shows (almost) and gaming only really getting going in the summer.  However, events conspired to prevent that happening, although modest progress was made, 224 figures painted (cavalry count as 1 figure).  Even better, the number of figures entering the wargames amateur 'cubby hole' was only 87, the lowest in five years, so the 'stash' has been reduced.   

So, what are my targets for this year?  Well, top of the painting 'to do' list must be the last batch of Lissa ships.  The Austrian steam frigates arrived last February and I really must get them finished.  After that, well there are still more Ottoman, Polish and Muscovite troops to paint and a batch of Spanish ships for Black Seas.  If I manage to get all those finished it will be a miracle.

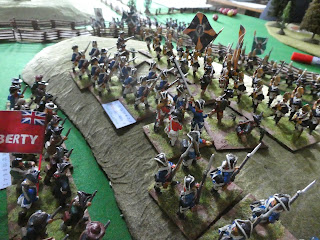
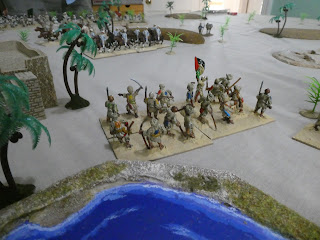
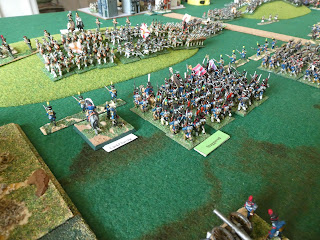
On the show front, I think everything is mostly 'on hold'; Vapnartak is still scheduled to take place in February, but beyond that, who knows?  Bearing in mind the age demographic of wargamers in general, a degree of caution needs to be exercised when contemplating attending large scale indoor events.  Hopefully, the regular face to face games with Steve and Bob will be allowed to continue, as will the less frequent zoom games with David. To end, here a a few photos of this year's games

Battling for a hill - AWI

Mahdists defending the oasis

The struggles in the east

Napoleonic action


Saturday, 18 December 2021

An episode from the Great Northern War

This scenario was set somewhere in what is now western Russia close to the Baltic states.  A Swedish force is heading eastwards hoping to defeat the nearest Russian force and then advance on Narva.  The Russians are aware of the Swedish advance and have told their army commander to slow the Swedish advance, avoid a major action and wait for a second army to join him from the south.  This will give the Russians an overwhelming advantage and ensure the destruction of the invading army.  Unfortunately for the strategists at army headquarters, the commander of the northern Russian army, having seen the size of the Swedish force, has decided he has sufficient strength to beat the Swedes on his own (and of course not have to share the glory).  We used our own version of the Pike and Shotte rules, together with the factors from the Last Argument of Kings Black Powder supplement.  The figures are 40mm home casts from the Prince August moulds which were passed on to me by Alasdair a good number of years ago.

The battlefield

The constricted nature of the battlefield did not allow the Russian commander sufficient space to make full use of his superior numbers.  In the event, his superiority was not as great as he thought as a third brigade of Swedish infantry was on its way.  The total force available to the Russians were 15 battalions of infantry and 7 units of cavalry with two medium guns.  For the Swedes, they started with 8 battalions of infantry, (soon raised to 12), 6 units of cavalry, (all small, whereas the Russian ones were standard) and 2 light guns.  The Swedish leaders and army were generally of a better quality and the units hit harder in the melee, but were weaker in terms of musketry.

The battle began with the Swedes advancing their cavalry, with the intention of driving off the opposing horse and threatening the flank of the Russian infantry line.  They were helped by some rather feeble attempts to advance by the Russian cavalry (they failed nearly all their command rolls), though the infantry on the Russian left did manoeuvre into a position to fire in support of their cavalry if they were charged.  Disdaining the infantry support, the Russian right wing cavalry commander led forward his leading cavalry unit against the Swedes.  He was soundly beaten and as his men routed from the field, he was carried away with them.  Disaster was averted only by the infantry which fired a volley at the leading Swedish cavalry regiment, inflicted such damage that they fell back through their supports, disordering them.  This second unit was also swept by musketry fire and routed, allowing the victorious infantry to advance into the clearing and block any further Swedish cavalry attacks.

The left wing Swedish cavalry ready to charge

Seeing that the Russian infantry had advanced in support of their cavalry, the Swedish right wing cavalry commander decided to save the unit charging the Russian cavalry by ordering a spoiling attack against the infantry.  The cavalry involved were not impressed by this order, especially as the Russian infantry proceeded to fire a very effective volley which inflicted heavy casualties.  They were even less impressed when the cavalry they were protecting failed to drive off their opponents and were held in the melee.  The Russians then managed to get another regiment of horse up in support and this help swung the second round of melee in the Russians favour, pushing the Swedish cavalry back.

Contact on the Swedish right


The Swedish cavalry take heavy casualties as they charge home

The Russian cavalry push forward

It was at this point that the third brigade of Swedish infantry arrived and the Swedish commander decided to reinforce his left and directed them to advance down the clearing and drive back the Russian infantry which had inflicting casualties on the Swedish left wing cavalry.

Led by the Guard battalion the infantry move forward

Meanwhile, in the centre, the Swedish infantry brigades were advancing.  Ignoring the fire from the Russian artillery, they were halted by some very effective musketry by the Russian infantry.   Indeed, some of the Russian infantry became a little over-enthusiastic and advanced on the enemy.  This proved their undoing as a Swedish volley, followed by a charge sent the Russians back in rout.


The Russian infantry has advanced a little too far and is about to be charged by the Swedish infantry

On their right, the Russian infantry were making use of the wooded knoll to position themselves to give converging fire on any Swedish units advancing on the main line.


The main Swedish advance

On the Swedish left, the Guard had driven back the leading Russian infantry unit, but another had stepped forward to take it's place.  A couple of volleys from this fresh unit caused the Guards to afll back to rally, but fresh Swedish units were available to push forward.

The Swedish advance continues on the left

Elsewhere, Swedish fortunes had ebbed.  The right wing cavalry needed infantry support to advance, but the infantry centre was beginning to falter under the continuing effectiveness of the Russian musketry.  They found it difficult to advance quickly enough to close rapidly with the enemy and use their melee superiority.  

Although they had taken heavy punishment, the Russians had inflicted some loss on the Swedish force.  If nothing else the Swede's confidence would have been lowered by their failure to drive off the Russians.  So a Russian victory, they had slowed the Swedish advance and given time for the southern force to march to the area.  The level of losses may take some explaining, but the Russian commander had already identified a couple of brigadiers who would provide convenient scapegoats.


Final position in the centre


Sunday, 5 December 2021

RECON Wargames Show 2021

 On Saturday I crossed the Pennines  to the outskirts of Leeds for the RECON show put on by the Wakefield and District Wargamers.  Upstairs was the HOTT competition and the trade stands and games were in the main hall, as was the Bring and Buy. There didn't seem to be many of the public wandering around, but the poor weather and the renewed uncertainty about Covid won't have helped.  Many thanks to the club, who organised the show under some difficulties.

Next to us were Durham Wargames Group and they had their Dark Ages game, Ragnarok, which they had taken to Partizan.  A few photos of the game are in the post I did covering the Partizan show, but here are some more.  

An overview of the table

Very nicely painted figures

The Saxon opposition

Just next to us was a 6mm Sudan game.

The Table, featuring a printed cloth on which terrain pieces can be placed

The cloth was very effective, conveying the changes in terrain and avoiding having too many terrain pieces and also fitting well with the scale of figures.

Naval support for the Imperial troops

The firing line established

The Mahdists just waiting for their chance to attack

As I mentioned in my previous post, Steve was putting on his San Giovese game on behalf of the Lance and Longbow Society.

The view of the battlefield from behind the Imperial force

The monks complaining that their pleas for peace have been ignored

A local trying to get his sheep to a place of safety

The womenfolk of San Giovese continue as normal

We ran through the game twice, with the French winning one and the other being a draw.  One notable event in the second game was the Imperial civic militia repulsing a charge by the Swiss pikes.  However, it was only a temporary reprieve, the Swiss charged again and this time the militia had to give ground.

Many thanks to Steve for devising the game, Andy,Bob and Will  for helping with the game and also to John and Ben who took up our offer of 'having a go'.   Not forgetting Dave and Lynne for supplying the refreshing brews.